

LIVE Manager
Summary
What is TikTok Shop LIVE Manager and how does it enhance the live shopping experience for sellers and creators?
- LIVE Manager is a desktop-based tool that allows sellers and creators to plan, manage, and optimize live shopping streams with features like event scheduling, product management, real-time analytics, and interactive tools, reducing reliance on mobile devices.
How can sellers and creators effectively prepare and manage products, giveaways, and promotions within LIVE Manager?
- Sellers can add and organize multiple products (recommended 10+) to their LIVE, set up LIVE Giveaways by allocating items and defining participation rules, and create LIVE Flash Sales with exclusive inventory to boost engagement and sales during streams.
What are the key steps to schedule, promote, and start a LIVE event using LIVE Manager?
- Schedule events via the LIVE events tab with a minimum 30-minute duration, promote by creating teaser videos and sharing event links or QR codes, and start the event from desktop or mobile, syncing video, audio, and product displays for a seamless viewer experience.
How does LIVE Manager support real-time interaction and performance optimization during a live stream?
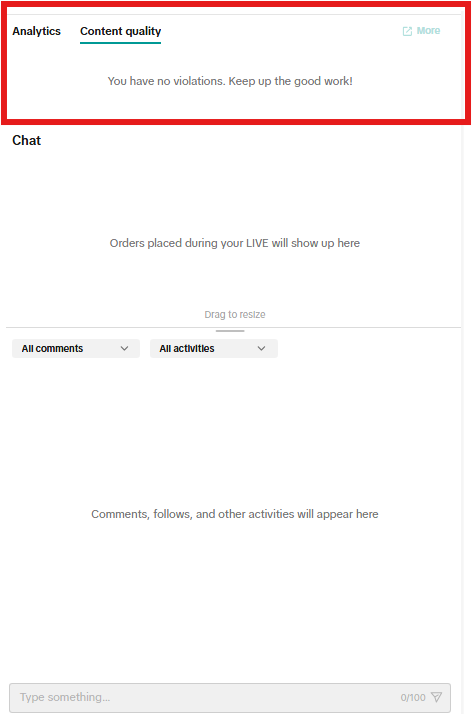
- The interface provides live comment management, pinning, activity feeds (orders, gifts, followers), and a Suggestions tab with actionable alerts to optimize performance, plus a Content Quality tab to monitor violations and an Analytics tab for tracking key metrics like GMV and viewer count.
What post-event tools does LIVE Manager offer for analyzing performance and managing past LIVE sessions?
- After the event, sellers can access detailed session analytics, review past giveaways and winners, replay or download session content, and use the LIVE Recap dashboard for in-depth performance insights to inform future live shopping strategies.
Overview
LIVE Manager gives you greater control over how you plan and manage your LIVE shopping streams. Within LIVE Manager, you can control all aspects of planning and managing LIVE sessions without depending solely on your mobile device. It's also a great way for moderators and assistants to plug in so that you can focus on hosting a great live event.Key features that you'll find here for live streaming include:
- Guidance on LIVE Shopping Best Practices, educational content and LIVE creator inspiration
- LIVE event scheduling to plan, promote and manage your live shopping sessions effectively
- More video and audio input capabilities, such as OBS Virtual Camera
- Activity & order management Feed to help you engage with your shoppers in real time as they send gifts and make purchases
- LIVE Diagnosis to help you optimize in real time with actionable recommendations for your LIVE
Accessing LIVE Manager
Navigate to TikTok Shop for Creators --> LIVE Manager and log in with your TikTok Shop account.Alternatively, log in from Tiktok.com by heading to Creator Tools and LIVE Shopping.
Your LIVE Home Page
Whether you're new to LIVE shopping or more experienced, you can access all that you need to know in order to plan and run your events from LIVE Manager's home page.- Checklist for success outlines key actions to take to improve your performance as a LIVE creator
- Schedule an event is one of those essential actions, and once you've created your event, enable Practice mode to get comfortable with your set up ahead of time. Once you've scheduled events, you'll see a list of your upcoming events here as well.
- Data from your Latest LIVE gives you a snapshot of how your most recent LIVE performed, including commission earned, items sold, total buyers, and first time buyers
- LIVE Tasks are opportunities to earn exciting rewards by going LIVE a certain amount of times
- LIVE shopping tutorials provide detailed education on product selection strategies, effective content structuring, sales pitches for LIVE, and how to reduce the risk of policy violation
- Learn from successful creators and get inspired by TikTok Shop creators like you who are creating exemplary LIVE content

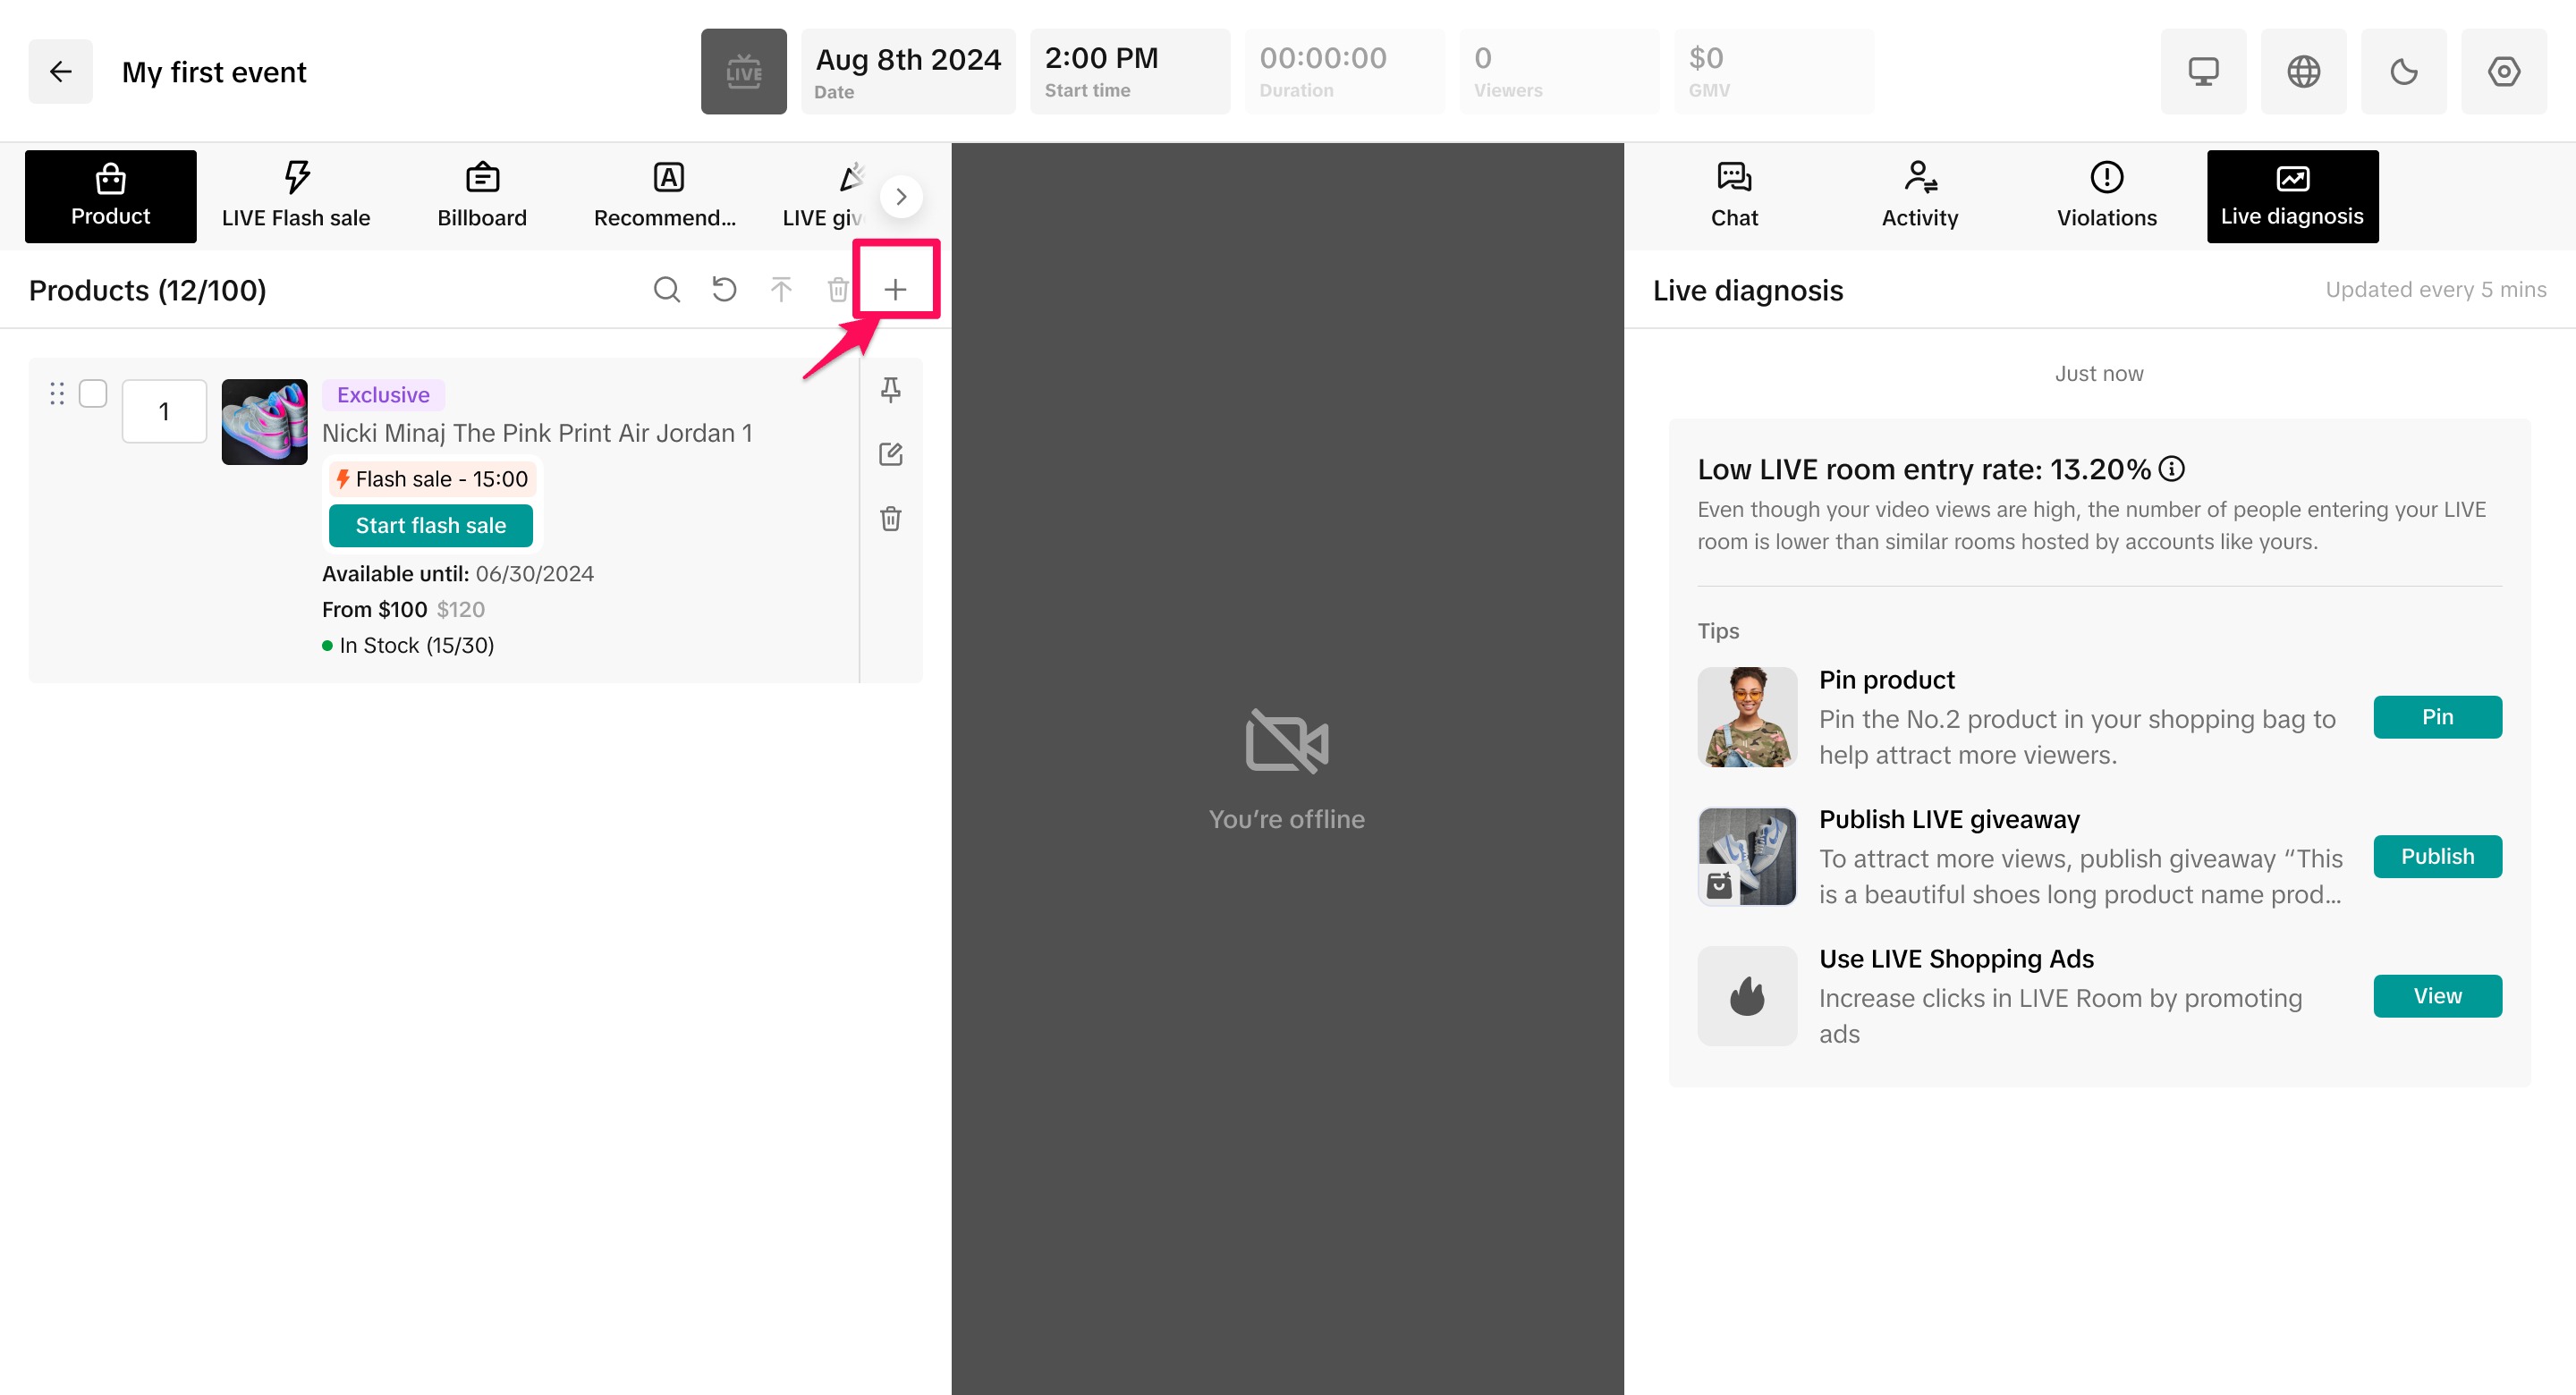
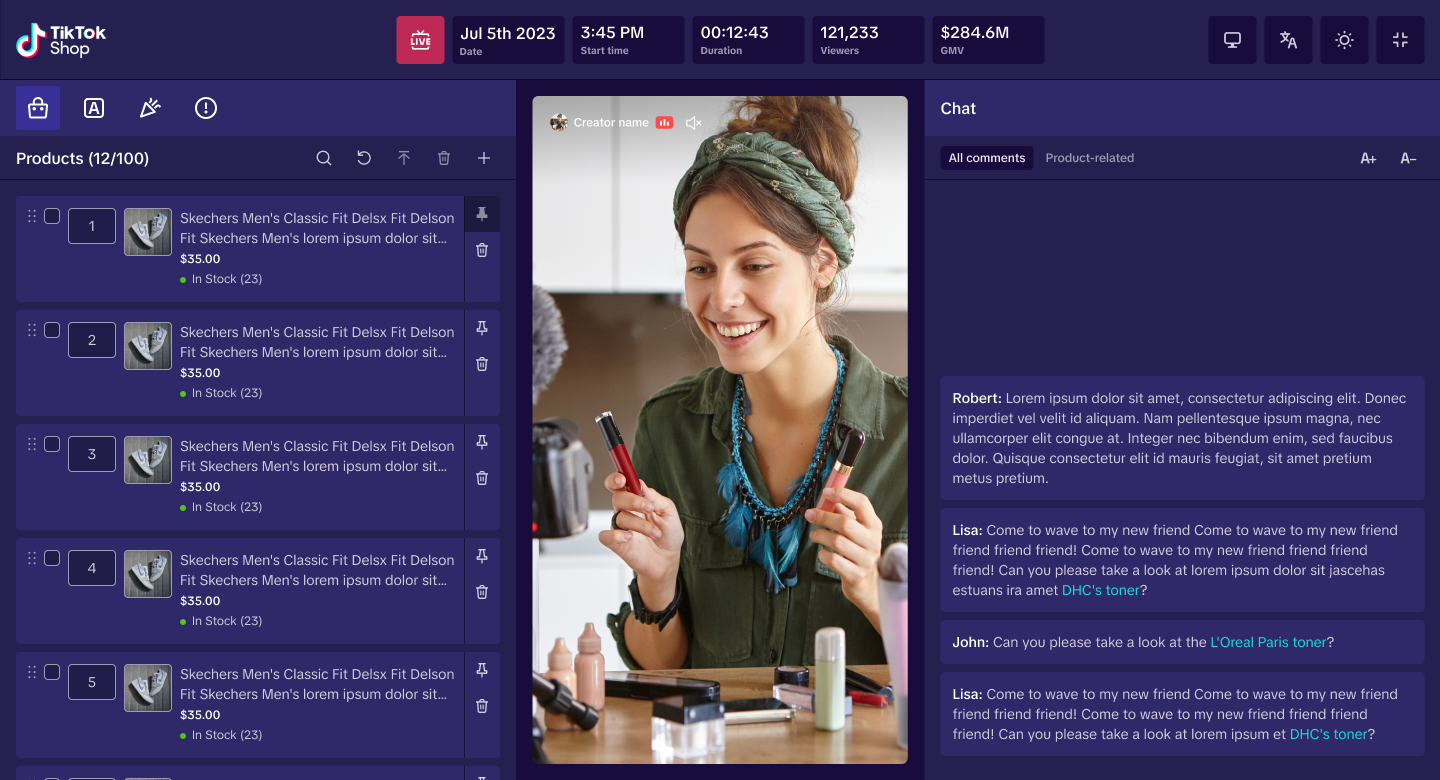
LIVE console components
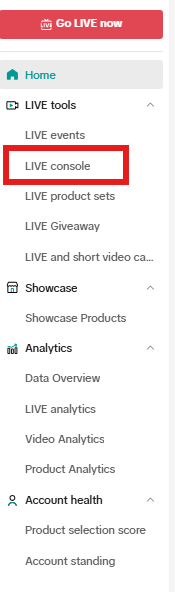
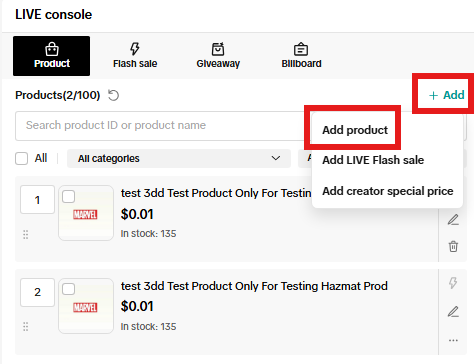
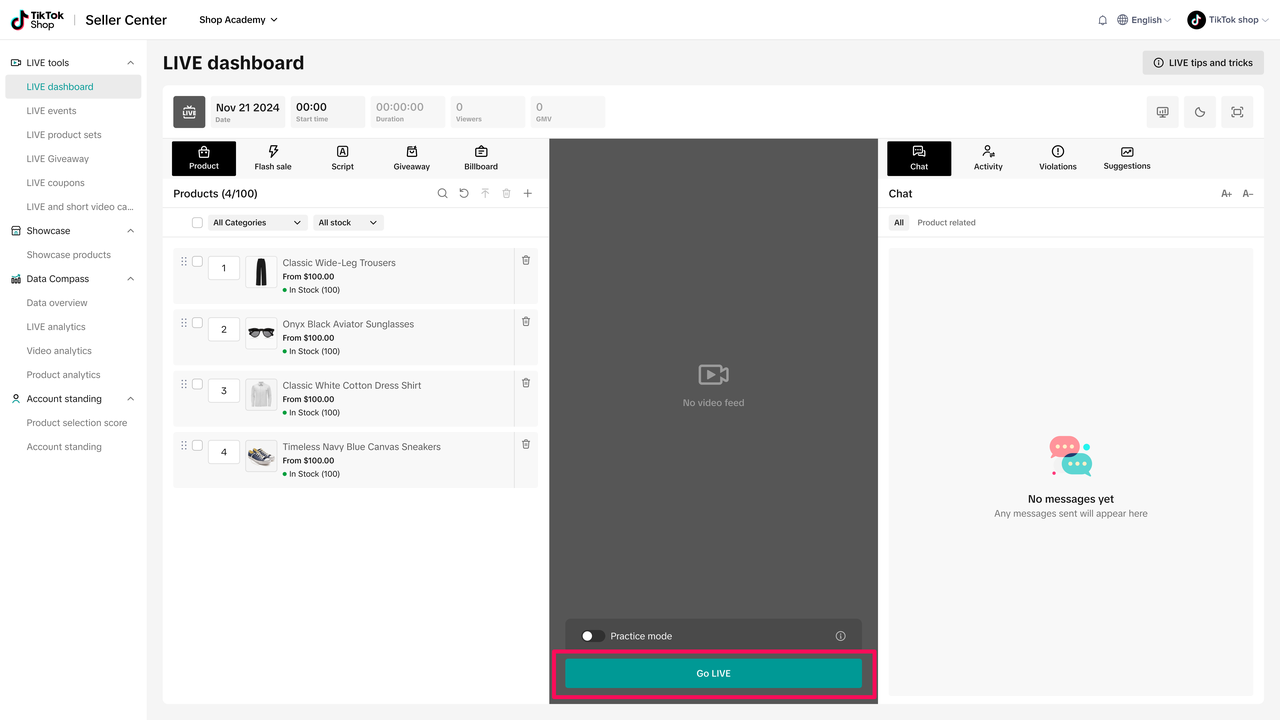
- On the left hand side is where you can add products, set up Flash Sale, Giveaway, and Billboard. Please note that in order for you to go LIVE, you must have at least 1 product added to your LIVE. (We recommend adding at least 10 products).
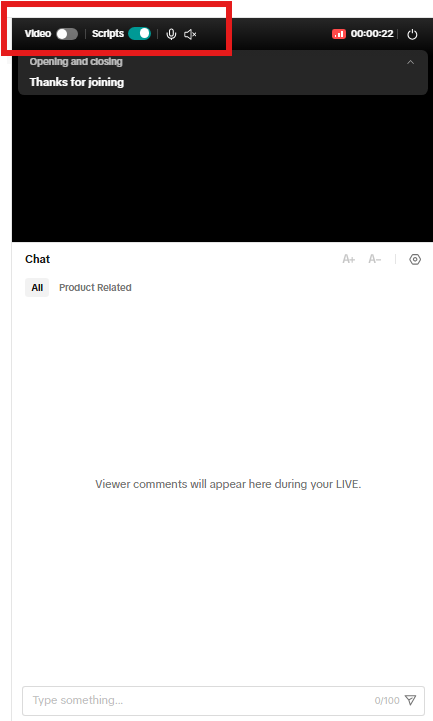
- In the middle is the video feed. This is what your viewers see as you go LIVE.
- On the right is where you can access analytics and interact with your viewers.
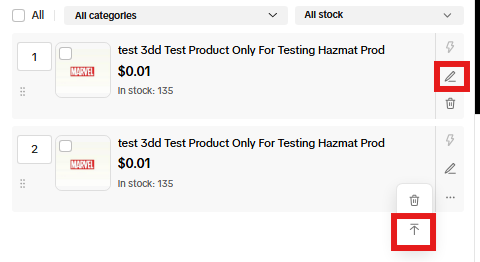
- Rearrange the order of the products by dragging them or by changing their order number
- Move products up to the top of the list
- Delete products from the list
Note: Sellers will need to set up a LIVE Giveaway promotion and allocate giveaway items to creators first before being able to create, edit and launch giveaways. For more on Seller LIVE giveaway set up, refer to this article for more.

- Select the products you want to add to the giveaway.
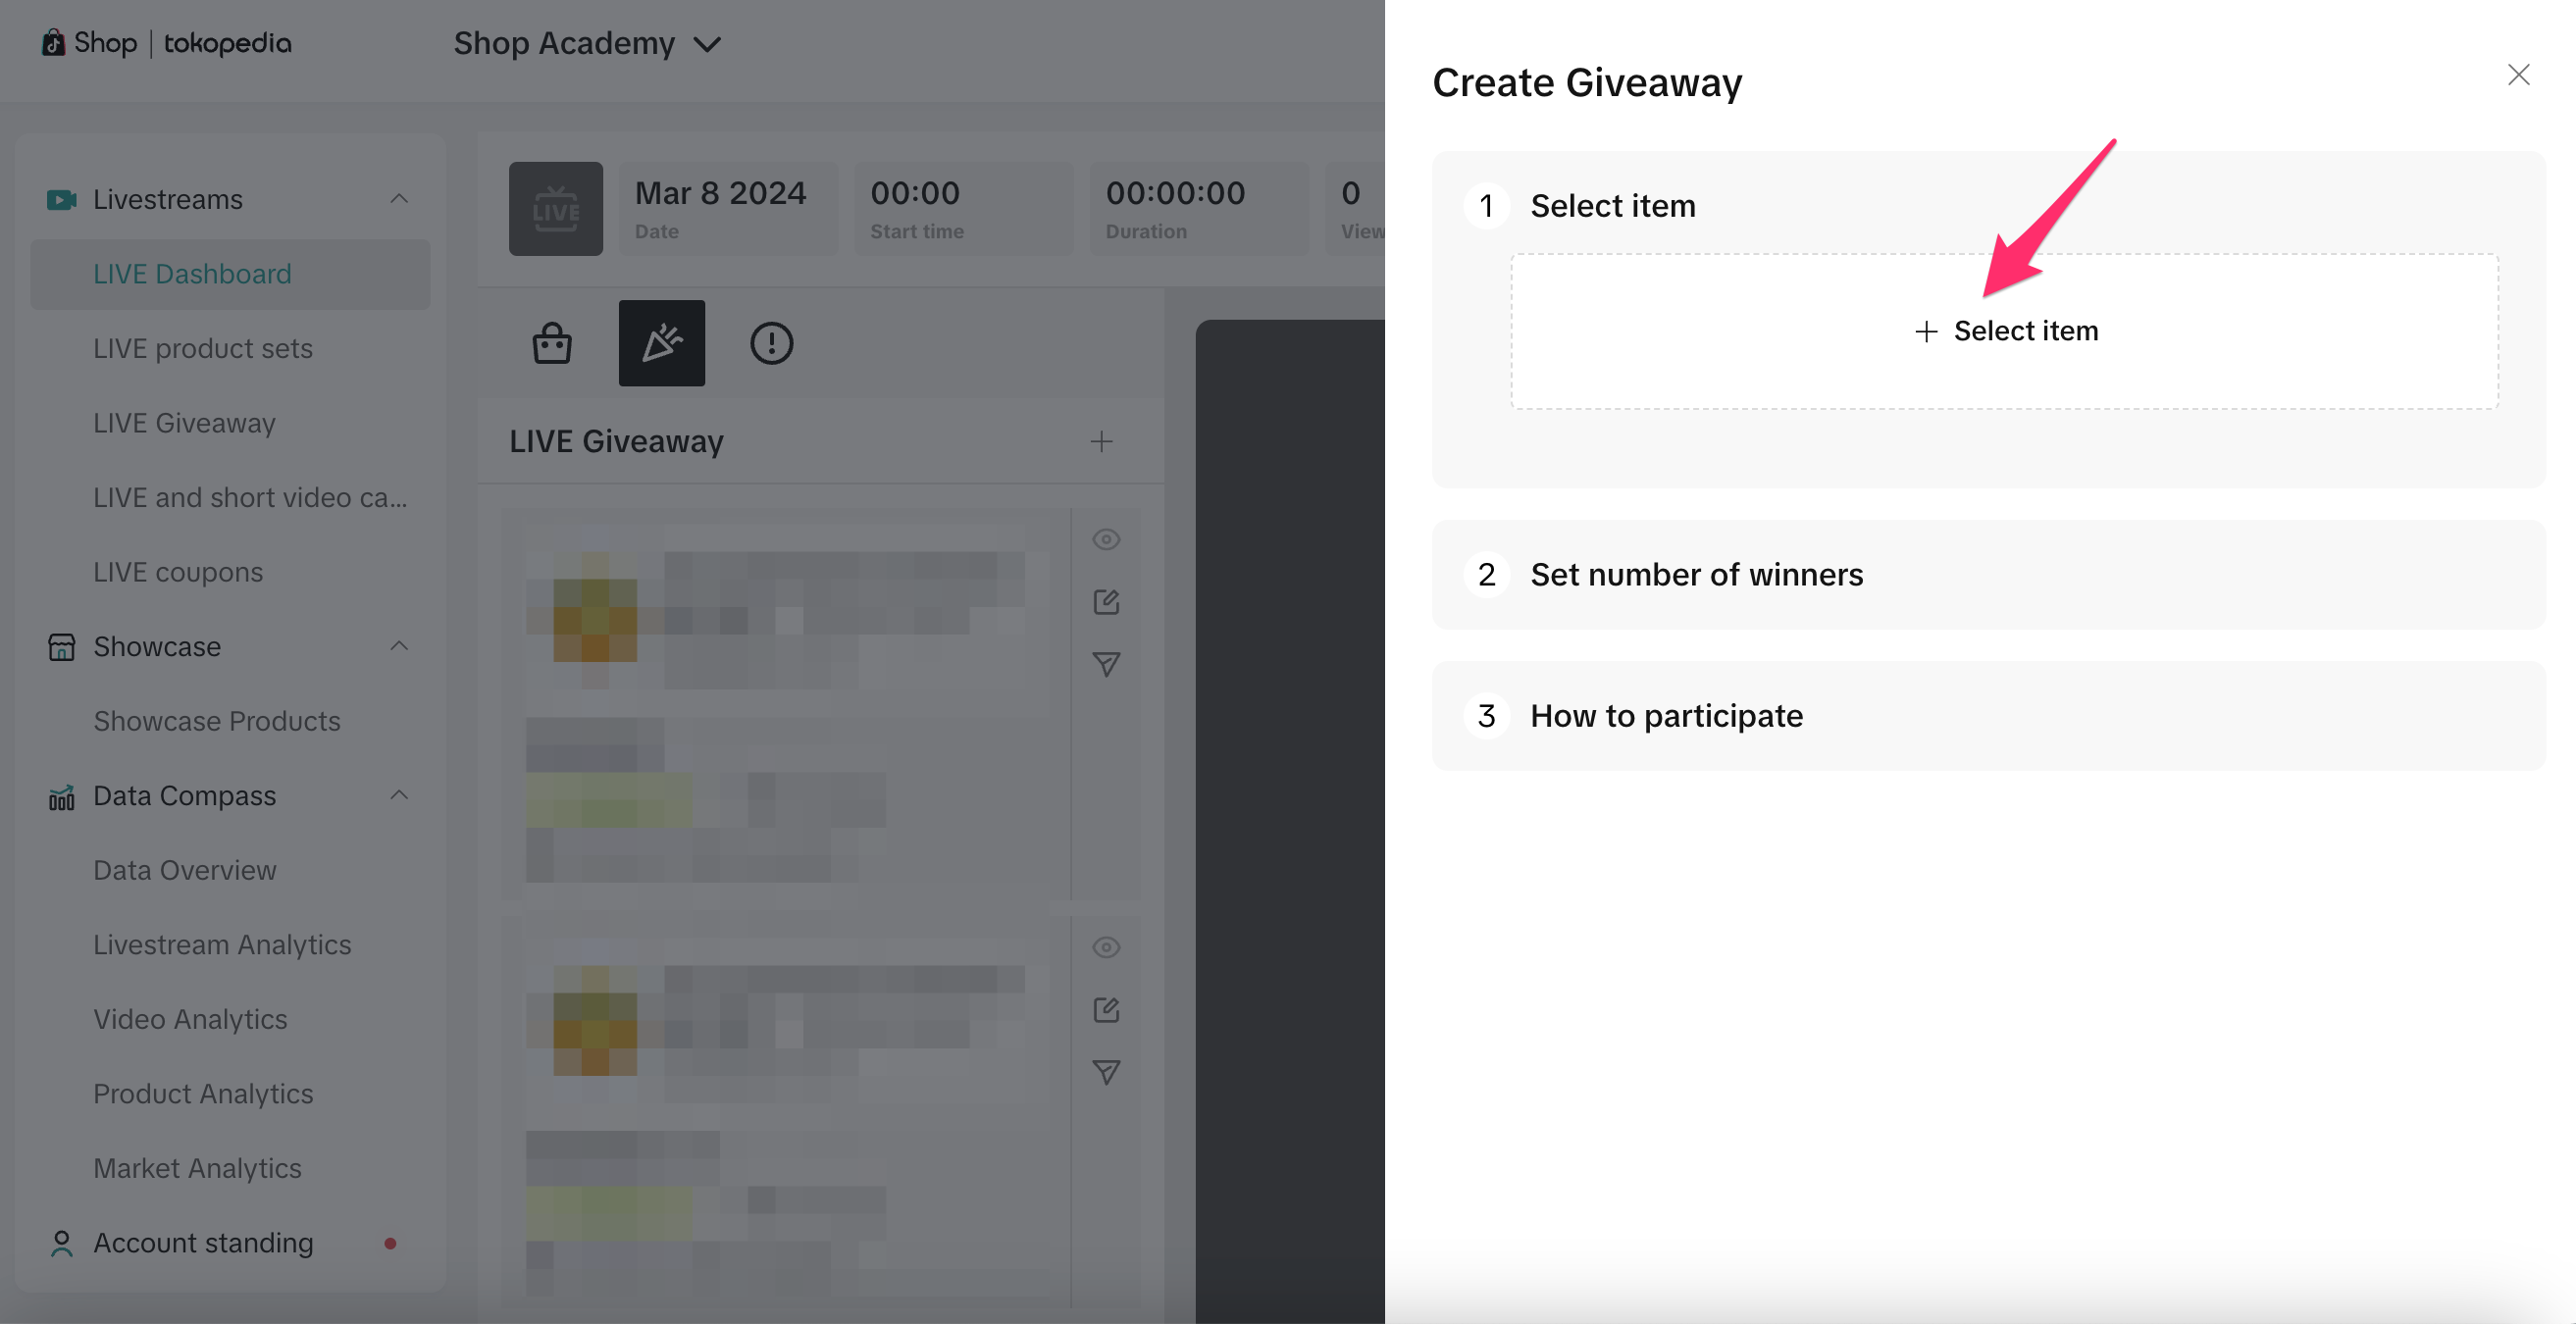

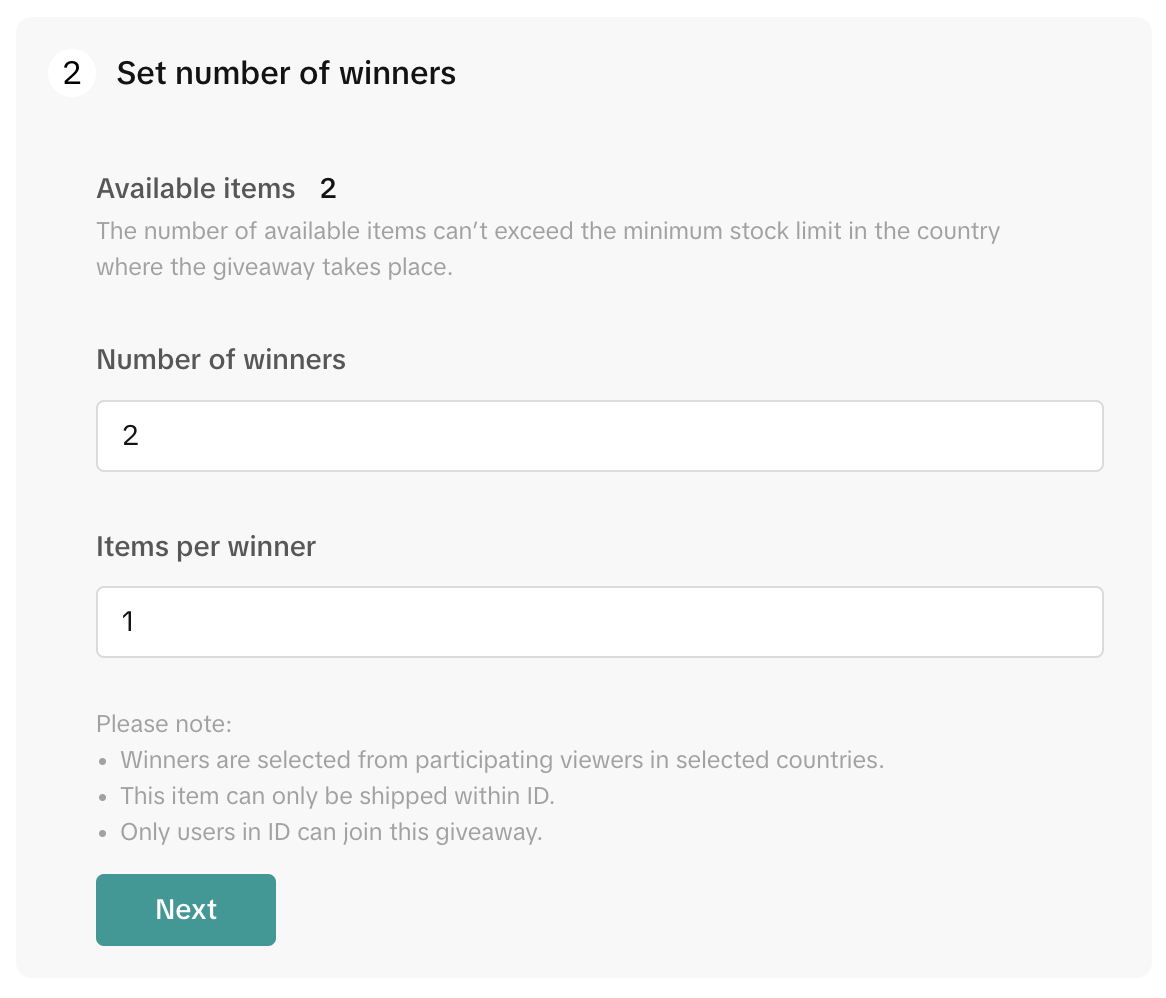
- Set the number of winners and items per winner. Keep in mind that the number of winners and items per winner cannot exceed the number of available items.
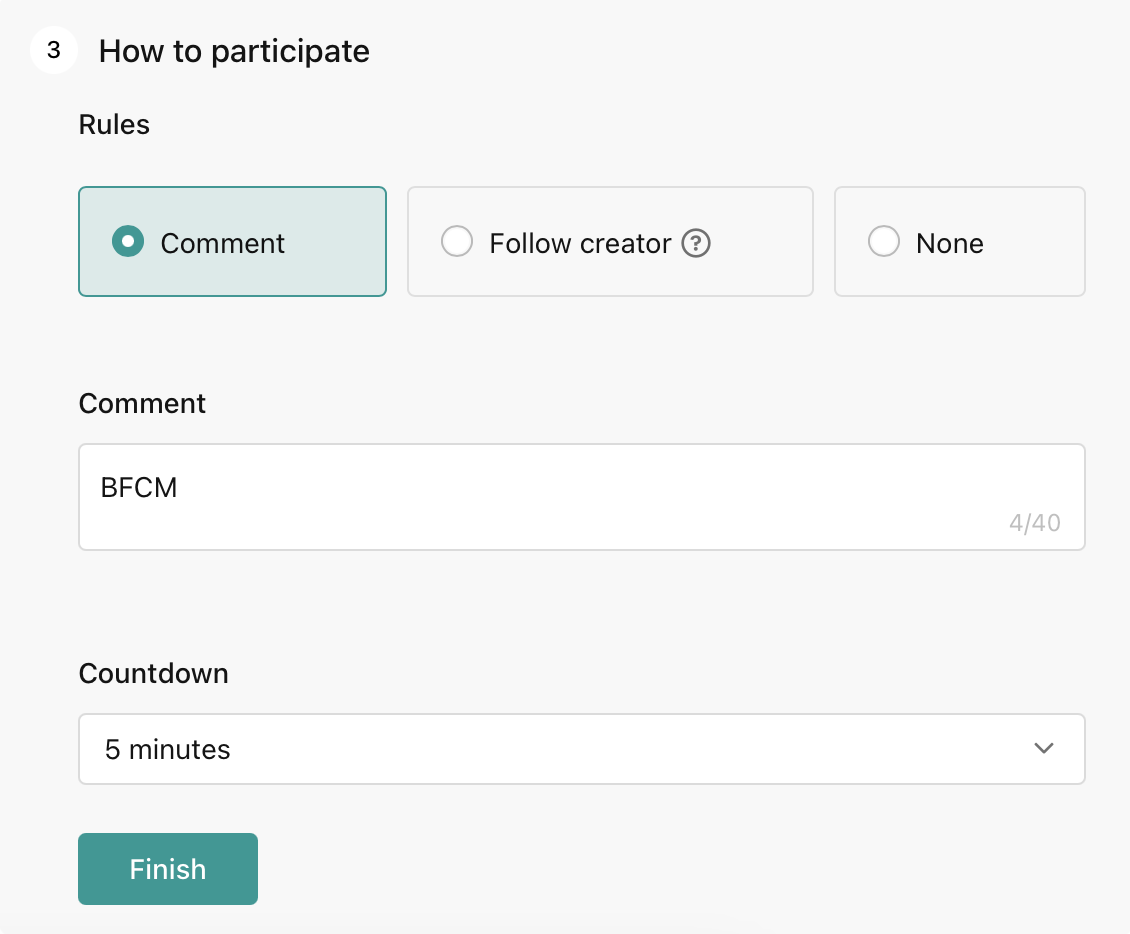
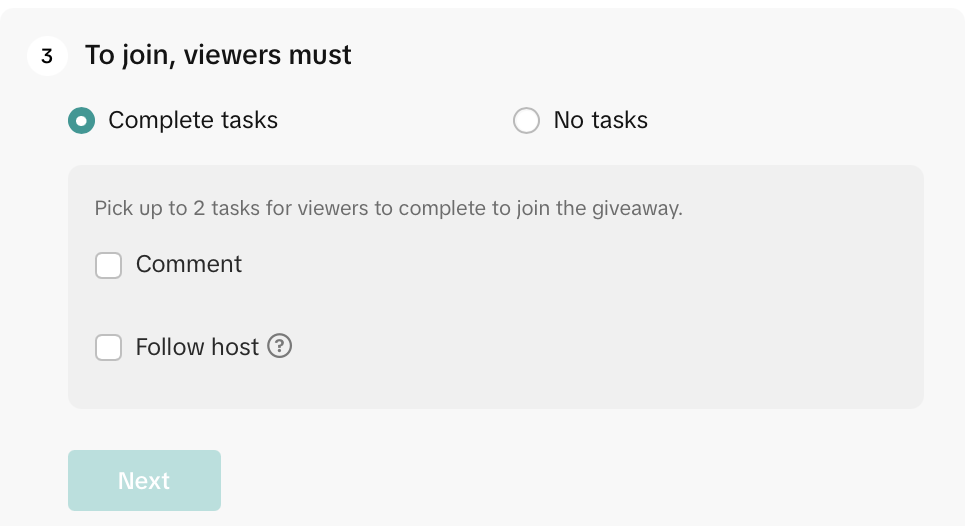
- Determine how viewers can participate in the giveaway:
- If you select Comment, then enter a comment that viewers must type into the LIVE chat in order to be considered for the giveaway.
- If you select Follow creator, then viewers can only participate in the giveaway after following you
- If you choose None, then no comment must be added, but you still have to select a Countdown, which is the period of time during which users can participate in the giveaway.
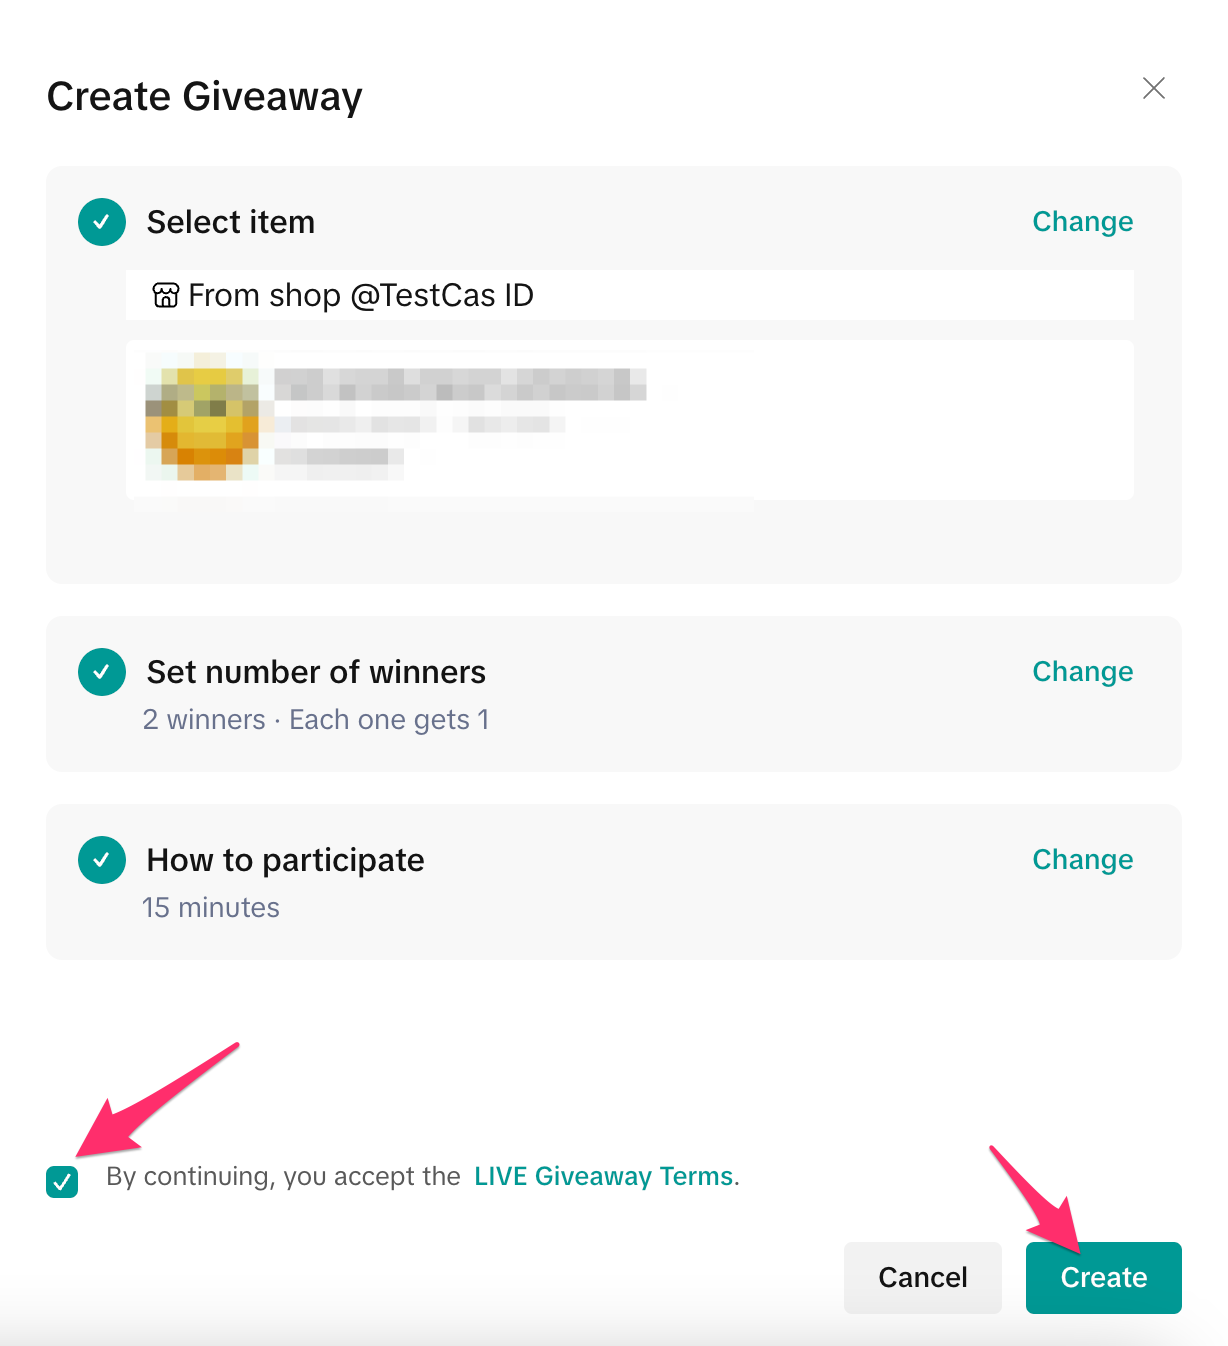
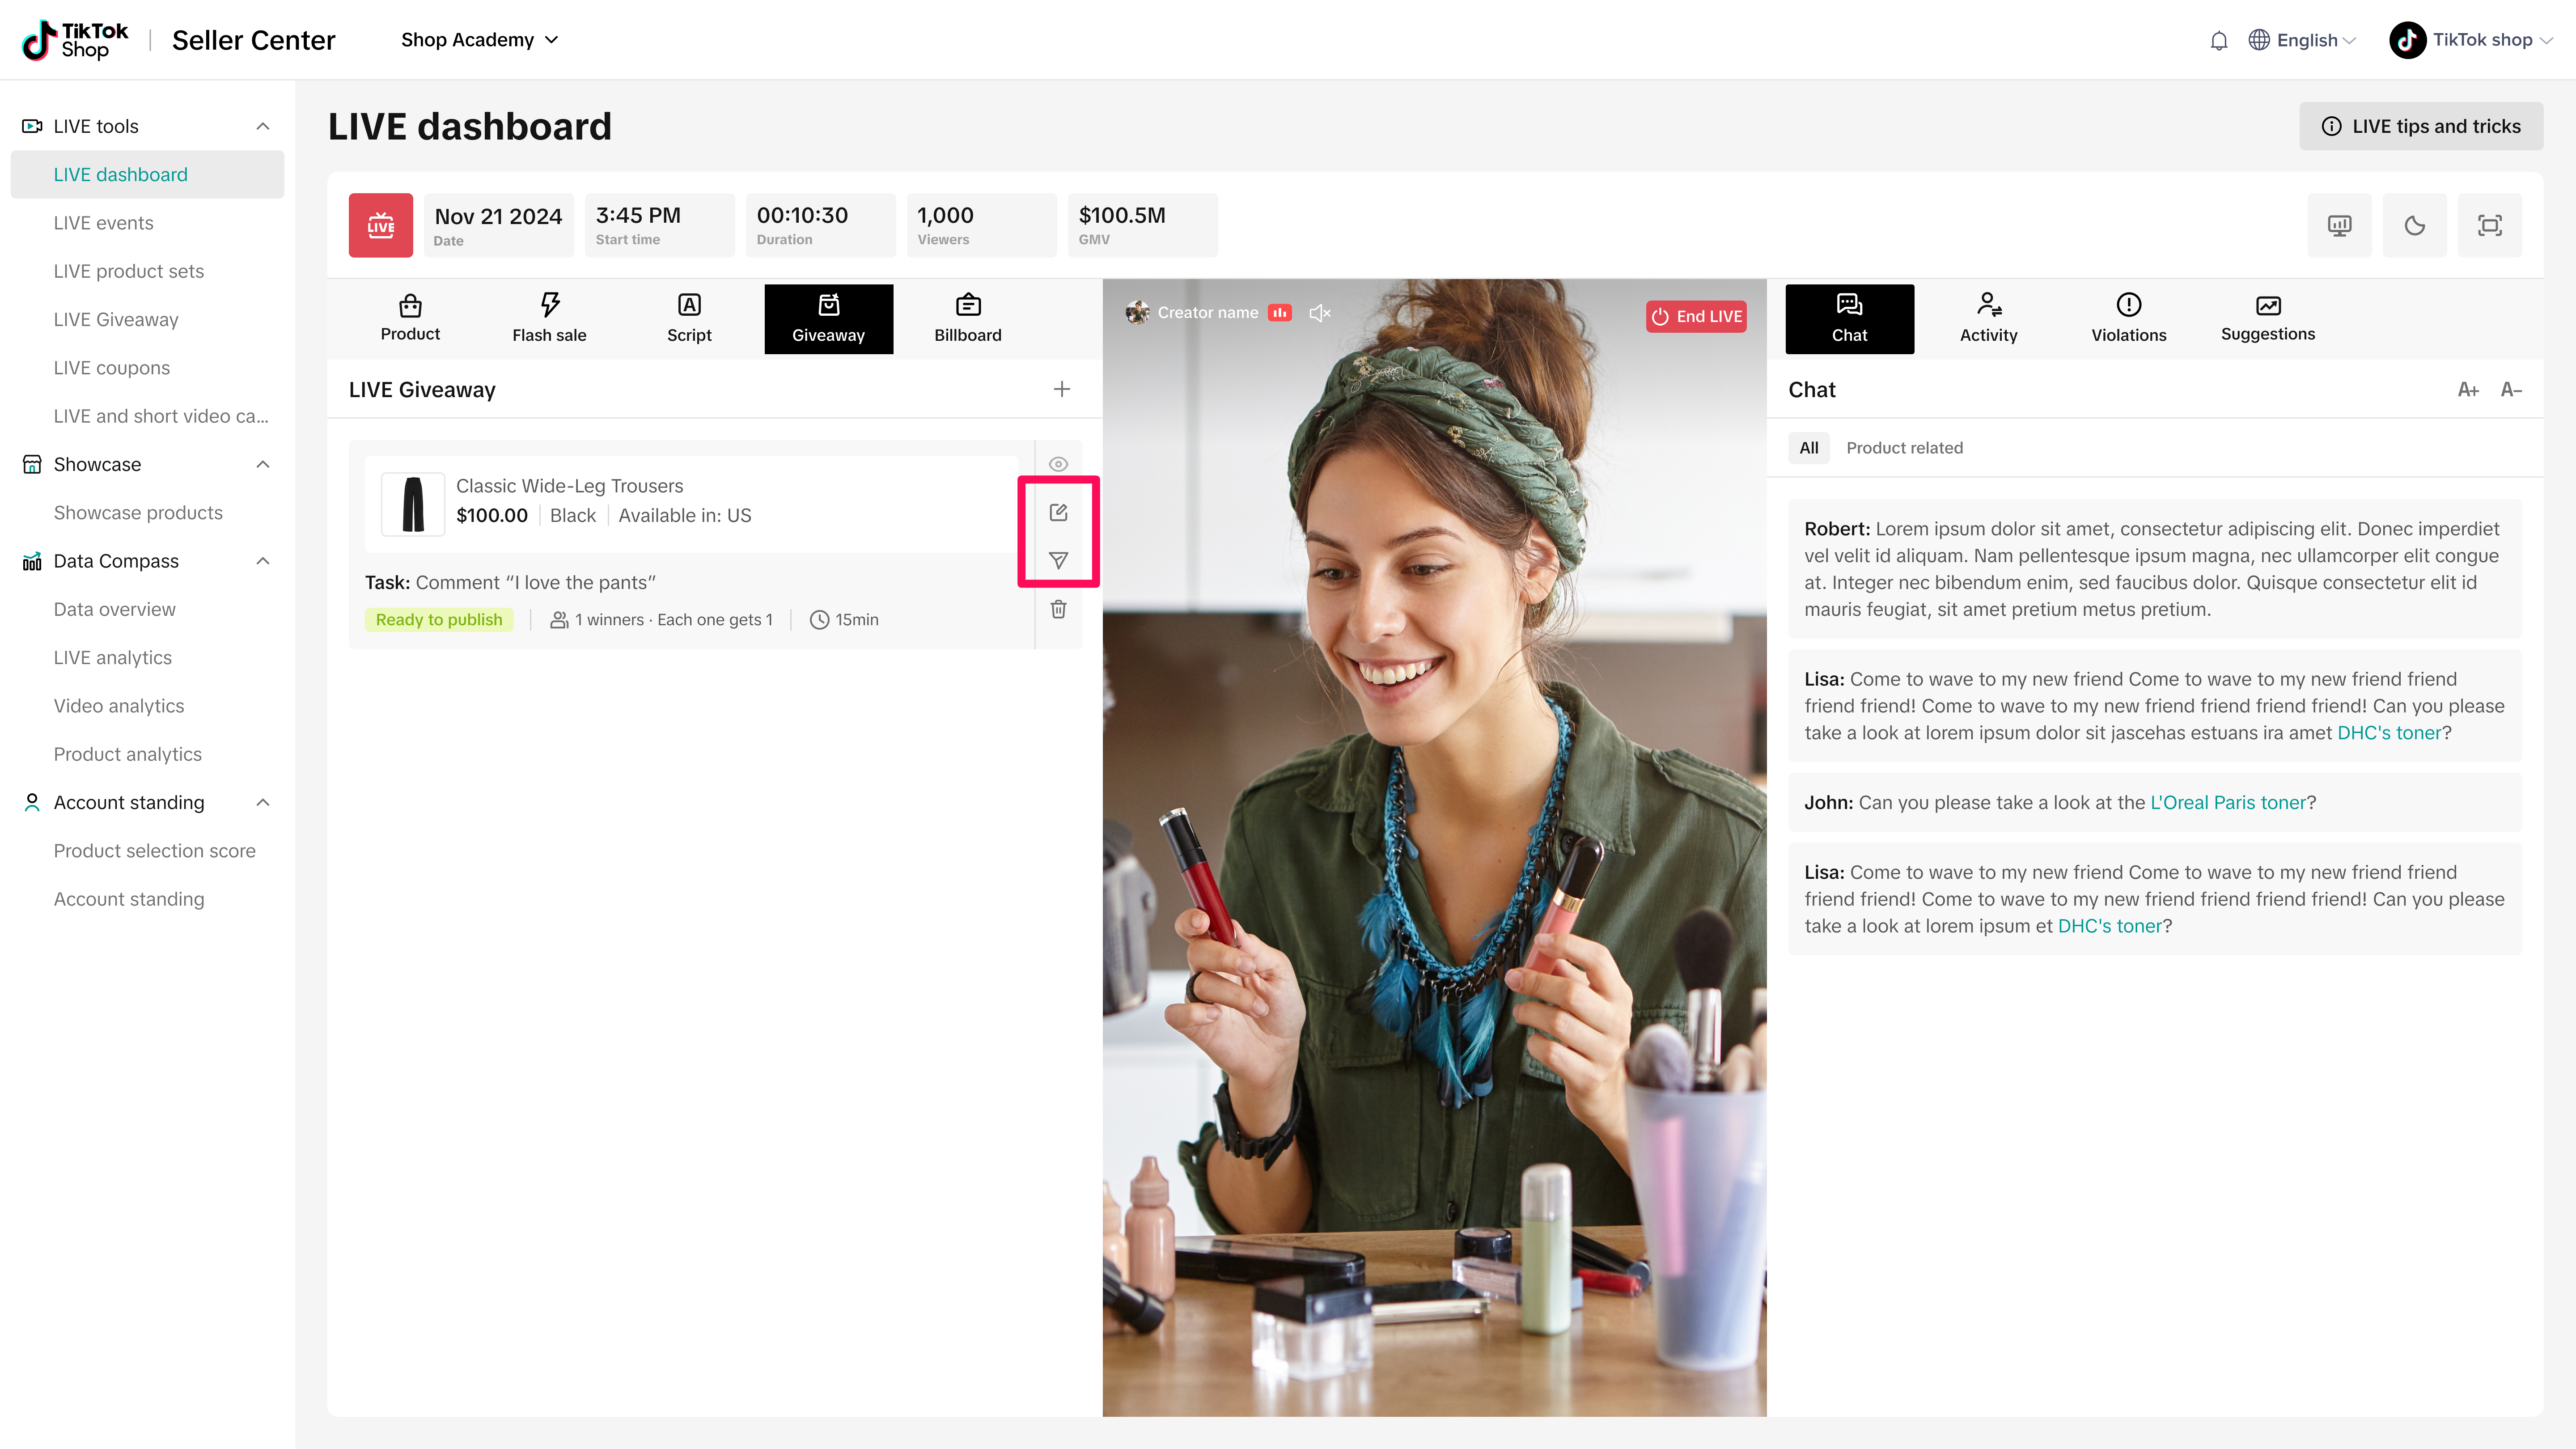
- Accept the terms and then click Create. You have now created the LIVE Giveaway, which will appear on the left panel. To edit or start the giveaway, use the buttons shown below:
Click here to learn more about LIVE Billboard.
Going LIVE from Desktop & OBS Virtual Camera (Open Broadcast Software)
You can initiate a stream from LIVE Manager for an immediate go-LIVE experience or begin a stream on desktop for a scheduled event. This allows you to select different camera and audio sources, including OBS Virtual Camera.Note: OBS is a 3rd party software - we cannot offer support for issues specific to the OBS application.
Initiating LIVE from Desktop
- Navigate to LIVE dashboard and click Go LIVE. If you're starting a scheduled event, navigate to the event in LIVE Events tab and click View console for the selected event.
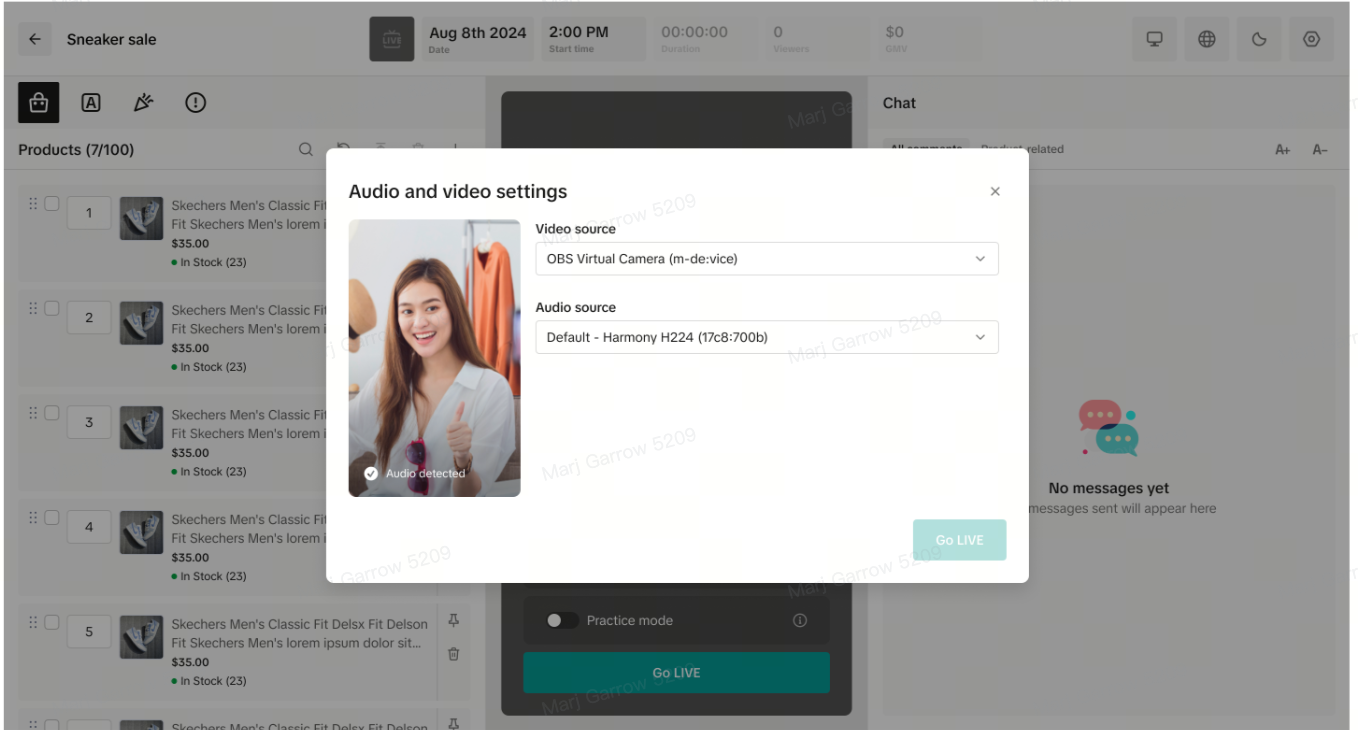
- Select the video source and audio sources from your computer for the stream. Click Go LIVE
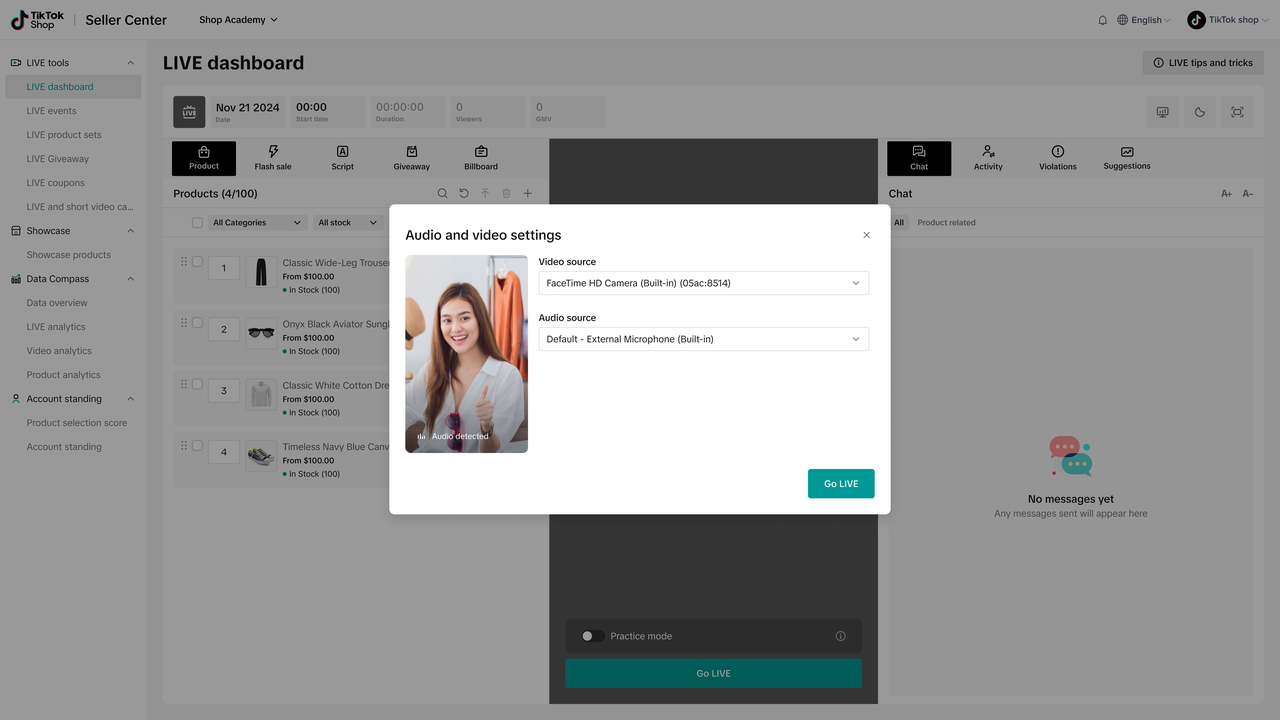
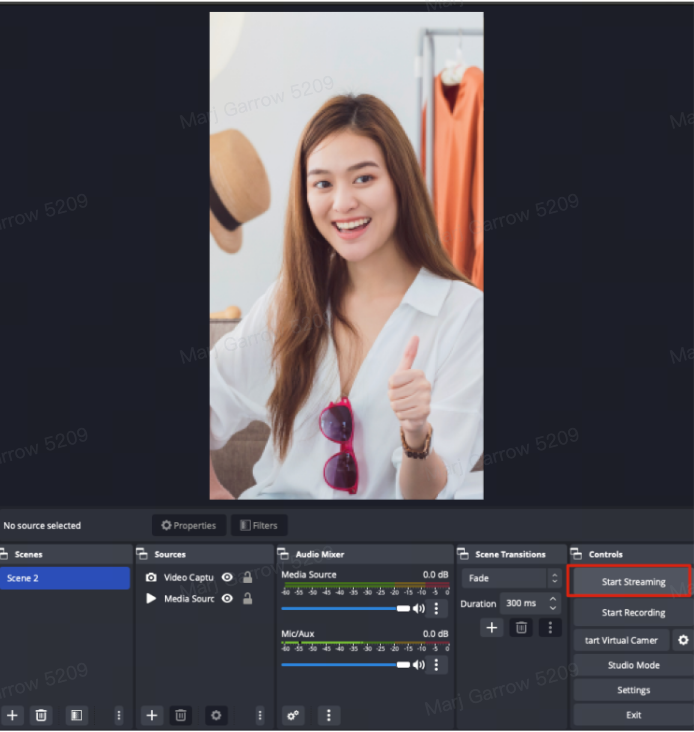
- If OBS is detected running in the background, OBS Virtual Camera will be the default option for the camera source. You can also manually select OBS Virtual Camera as the Video source in the Audio & Video settings. When the user clicks start, the stream will begin and pull the video feed from OBS
- Once LIVE, you can manage the stream via the Mobile app by selecting Manage LIVE. This allows you to manage and pin products and deploy promotions on your phone.
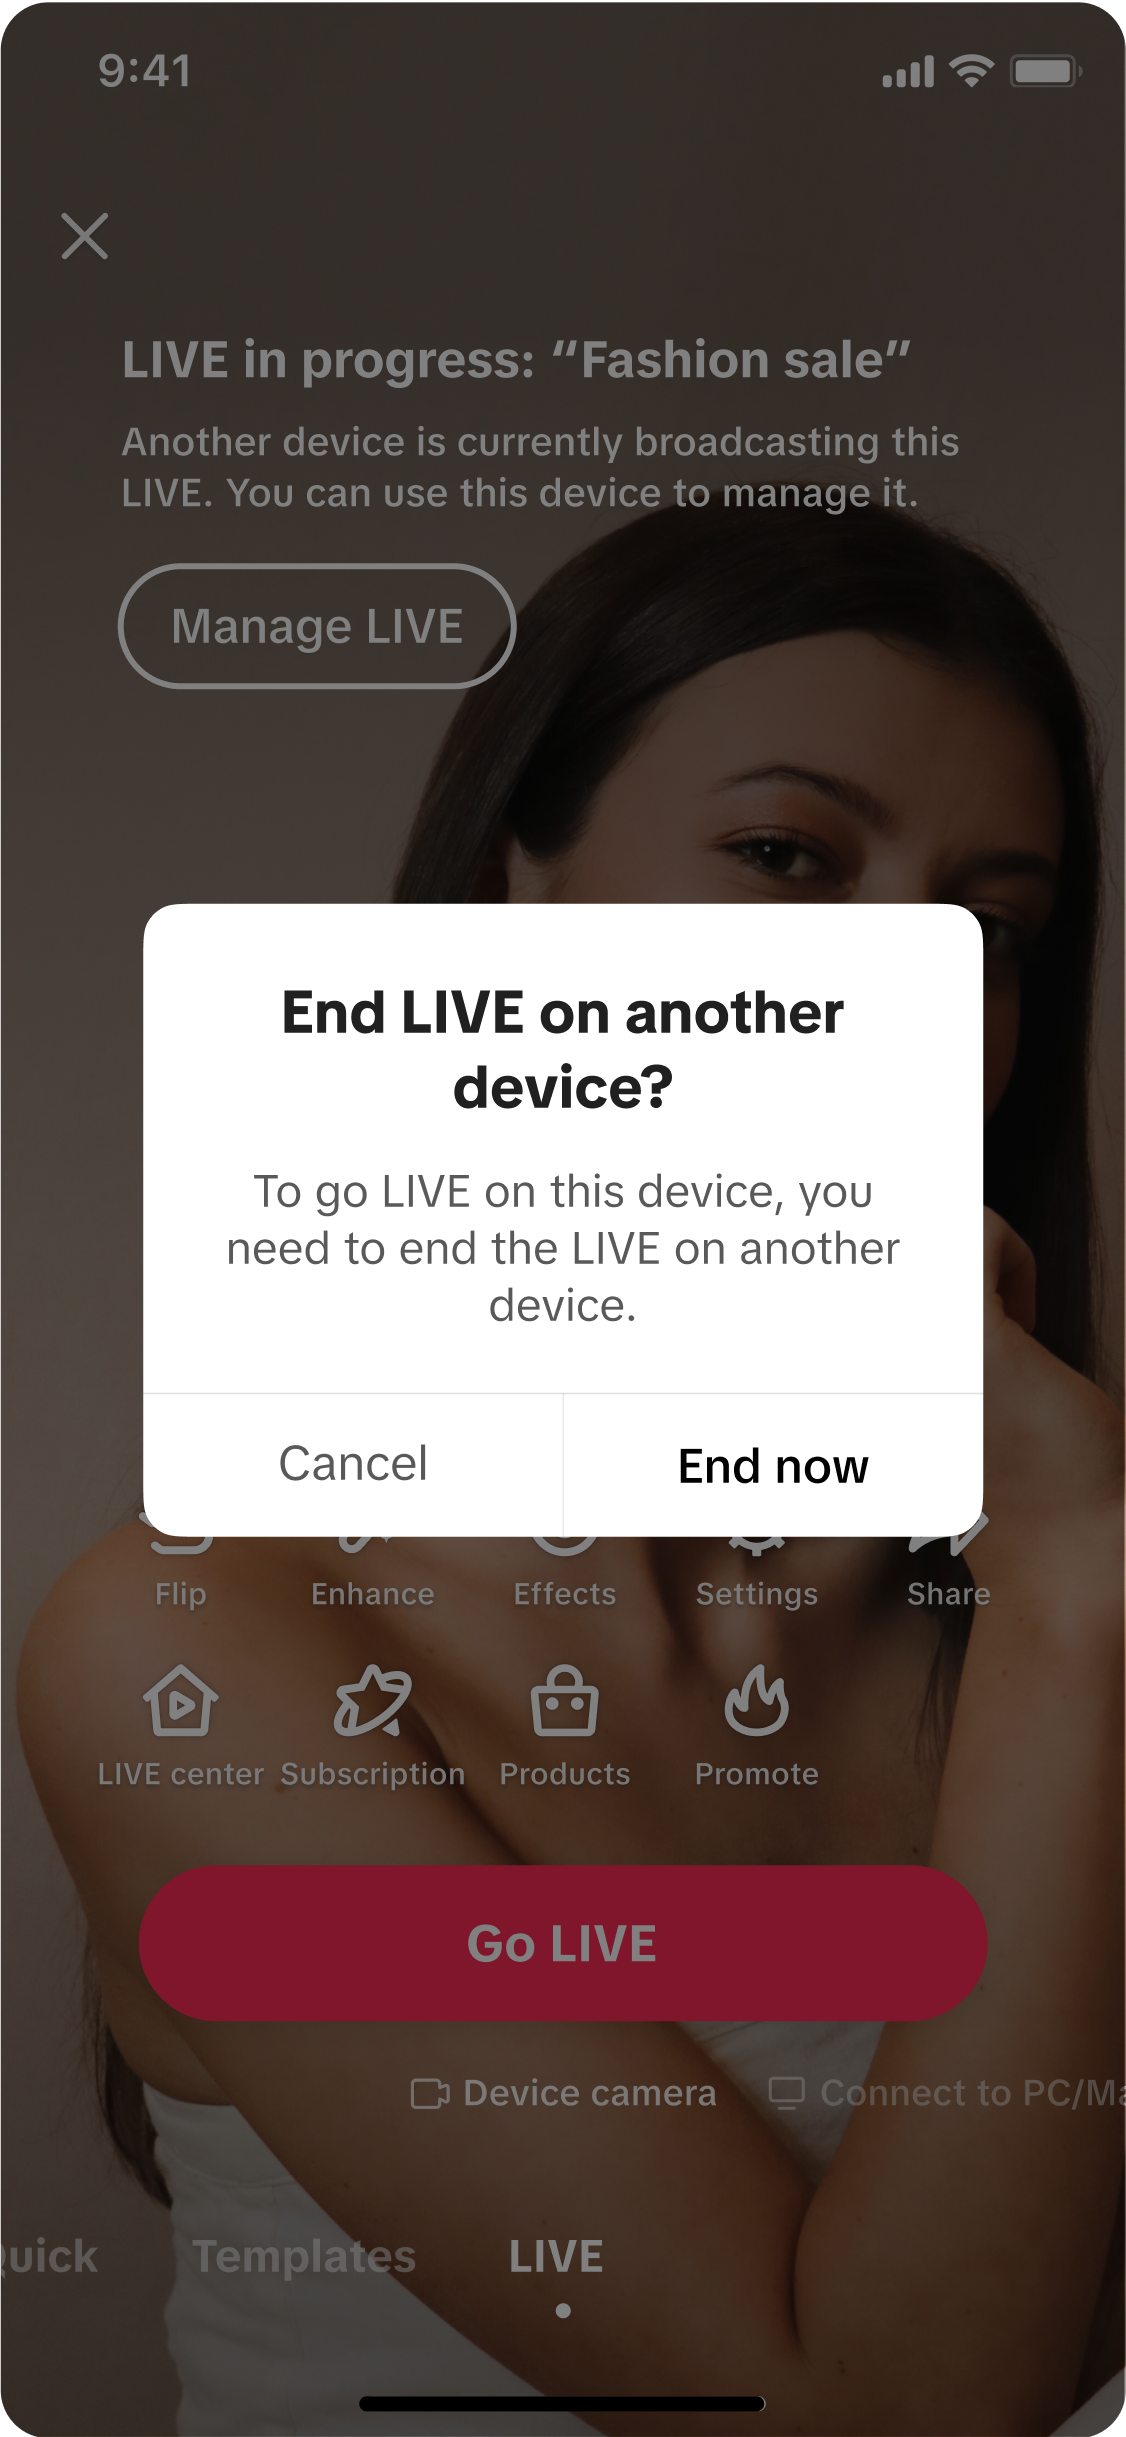
- If you select Go LIVE on your phone, you will be reminded that you are streaming on another device and that you need to end your LIVE on desktop to begin a stream via the TikTok App.

Desktop Practice Mode
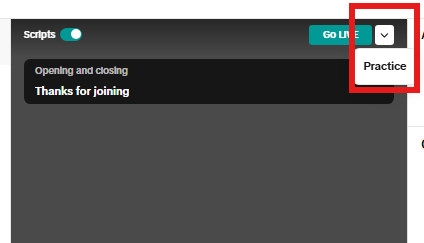
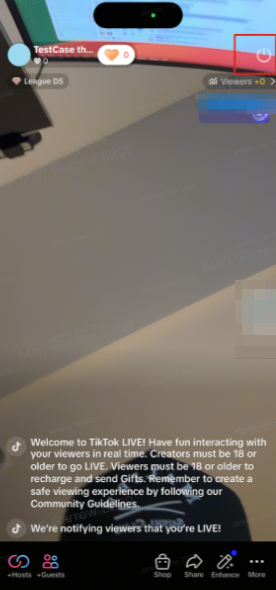
You can also enable Practice Mode to emulate your stream experience without viewers being able to see your stream. Practice Mode can be enabled from LIVE Manager or from a specific event ahead of its scheduled time, and you can engage Practice Mode to try out streaming with different video and audio source inputs, such as OBS.- In the center screen, click on the down arrow and select Practice. Select the video source and audio source.
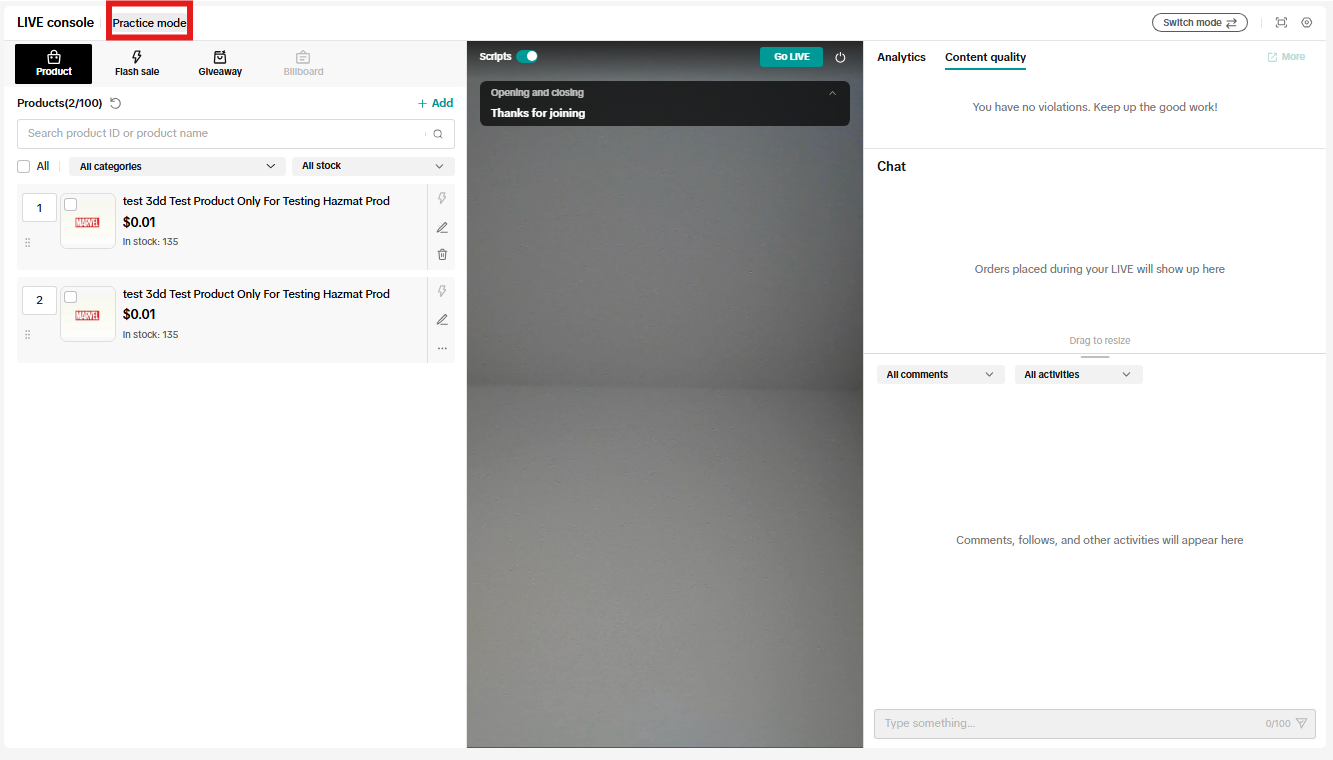
- Once Practice Mode has been enabled and you click Practice, a practice stream will begin that no viewers will be able to see or join. You'll see a label in the left column indicating that Practice Mode has been engaged.
- To end Practice Mode, click the power button in the top right corner of the center screen. Alternatively, click Go LIVE to begin an actual LIVE.
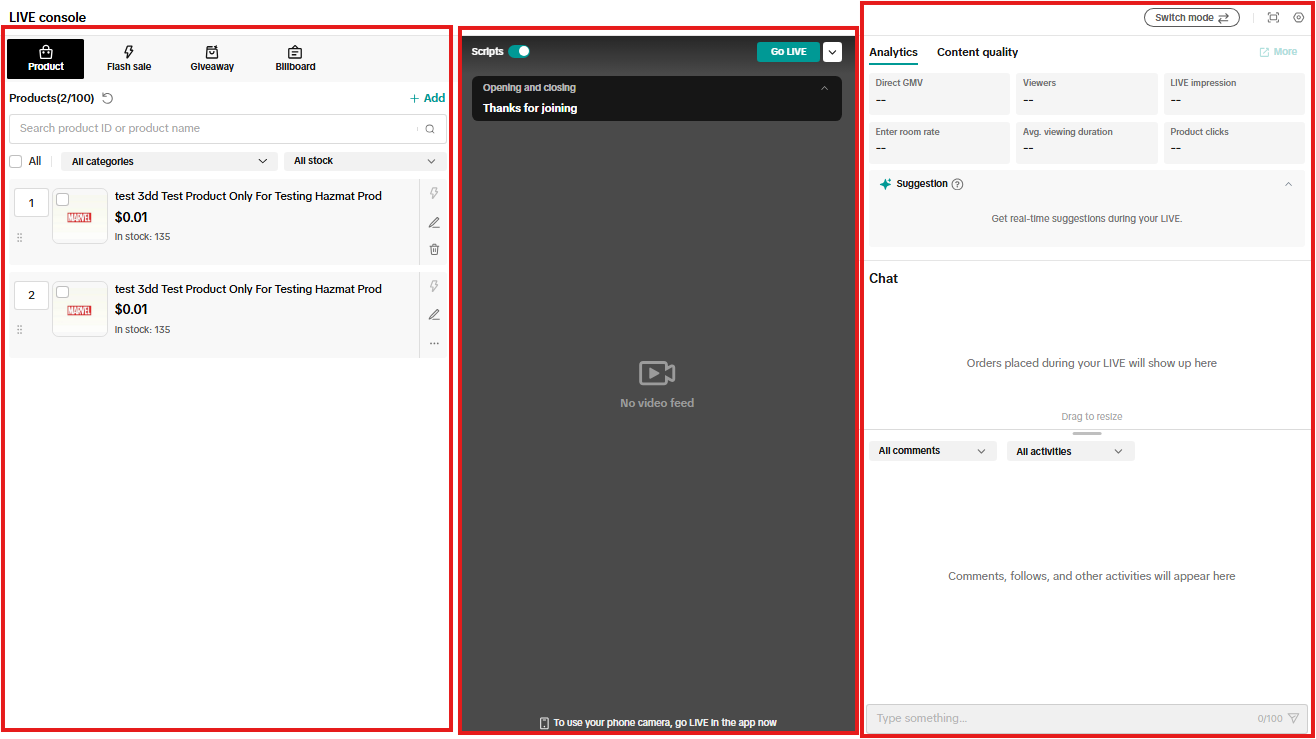
Operating your stream
Once you have set up your products and promotions, when you start your LIVE, the stream will sync with the center screen, showing you the livestream here as well.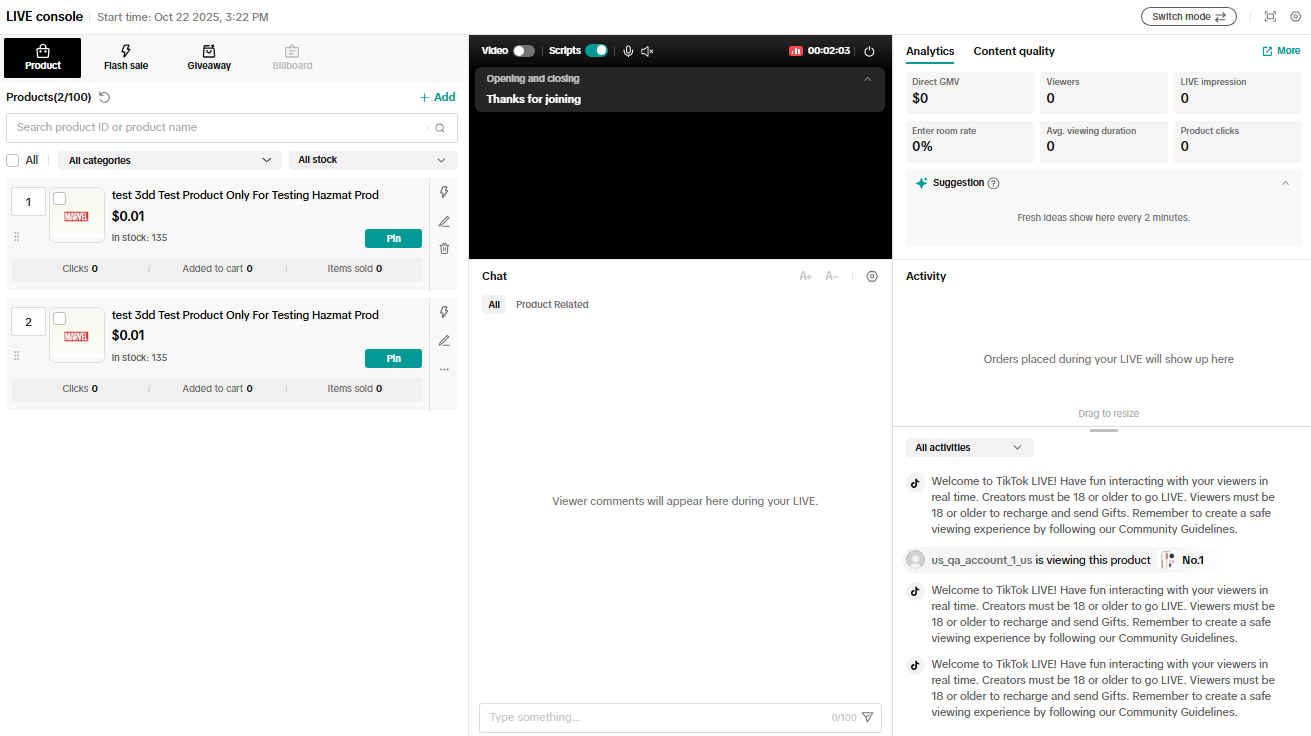
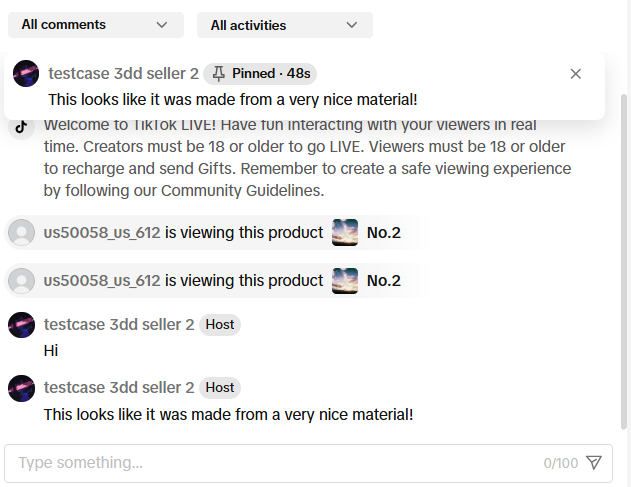
You can also pin a comment to bring better visibility to a specific viewer or moderator comment. Select pin comment to position the comment at the top of the comment feed. A pinned comment on desktop will also appear pinned on mobile.
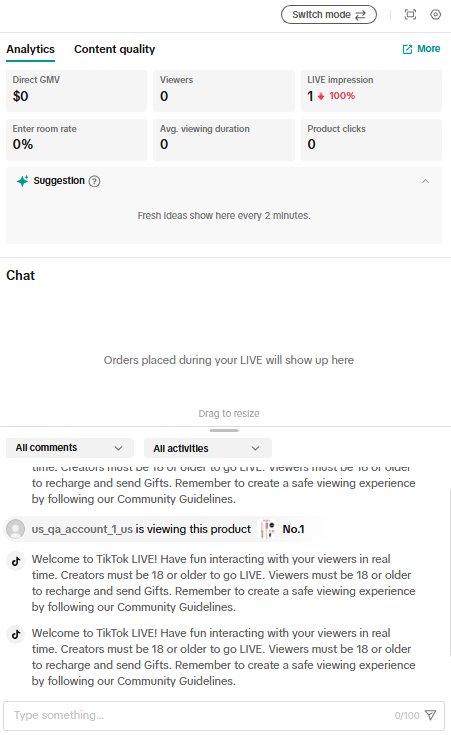
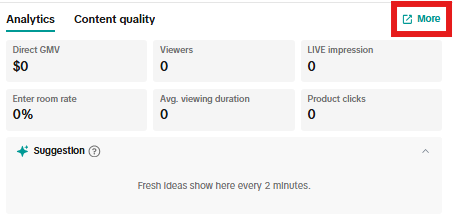
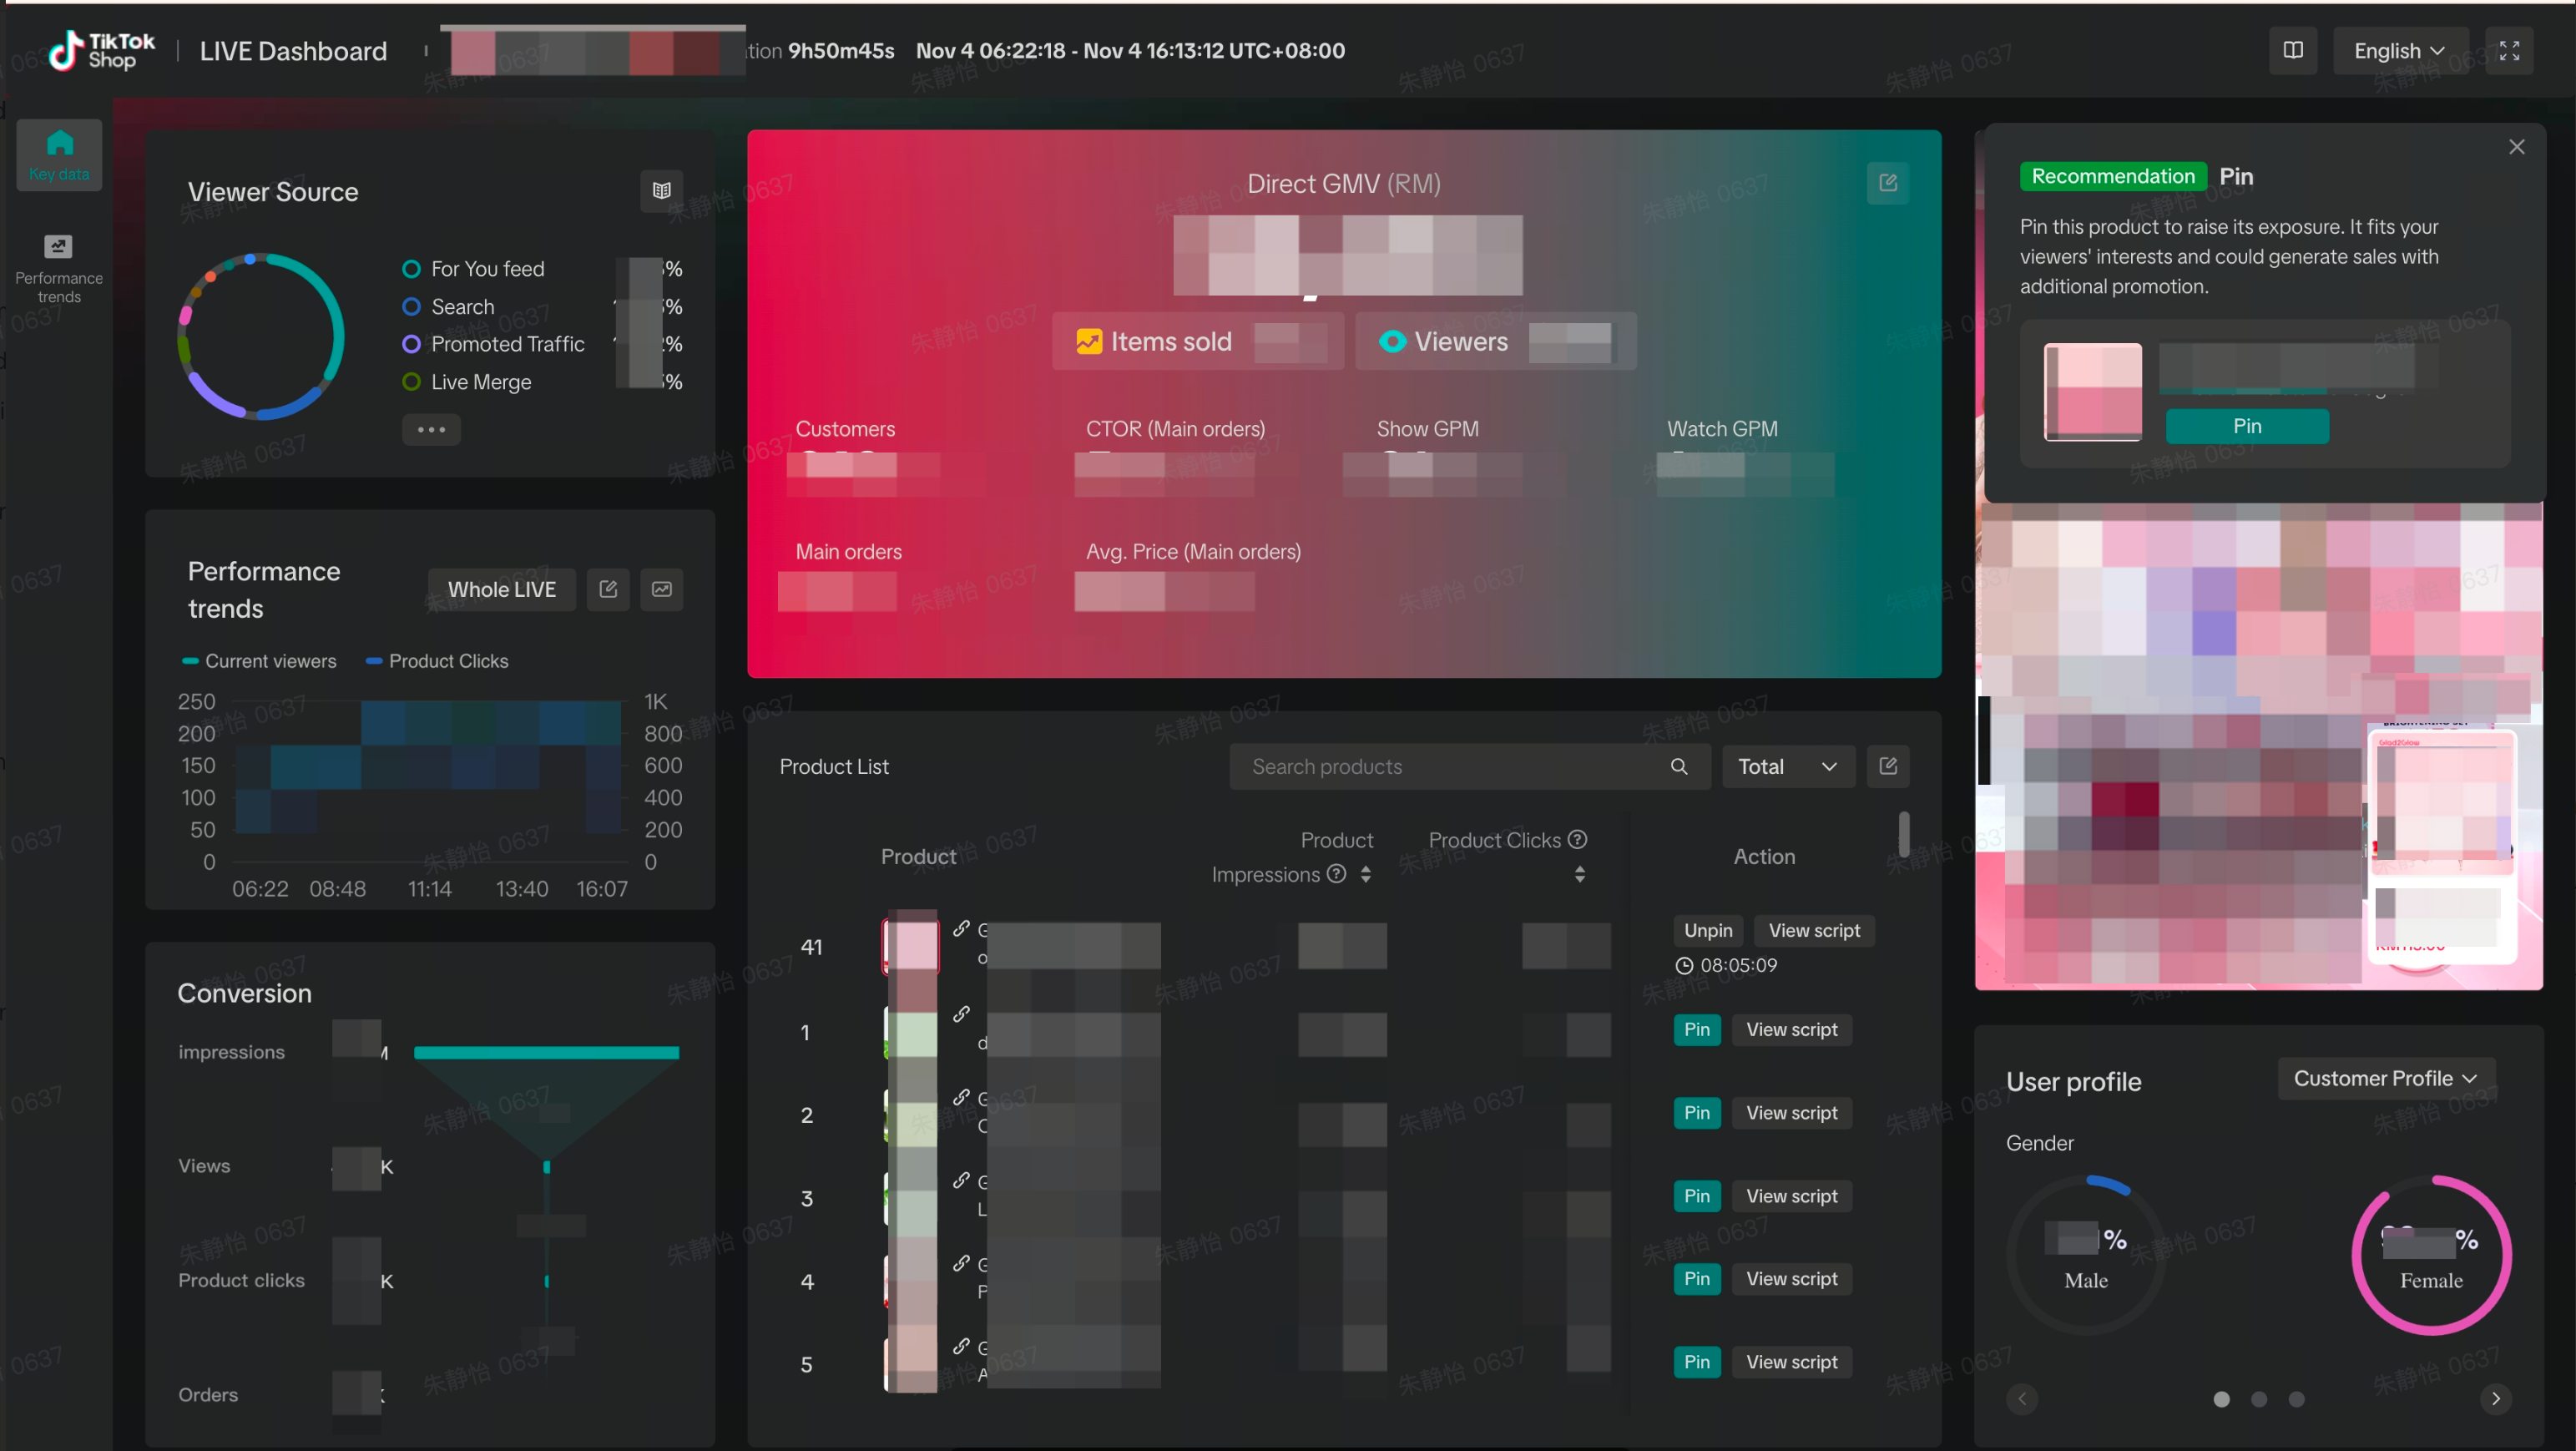
During your event, in the Analytics tab you'll find key metrics such as GMV, viewers, and enter room rate. Click on "More" to open up a new browser that will take you to LIVE Dashboard which shows you in real-time how your LIVE is performing. In the Suggestions tab, you'll receive suggestions on how you can optimize your session's performance in real-time. For example, if a drop in traffic is detected, you’ll receive an alert and actionable steps to take to improve your performance.

LIVE events
LIVE Manager gives you greater control over how you plan and manage your events. You can manage all aspects of planning and running a LIVE event without depending solely on your mobile device. It's also a great way for moderators and assistants to plug in so that you can focus on having fun engaging with your viewers and sharing great products.LIVE events created on desktop have a one-to-many relationship with your livestreams, so over the duration of your LIVE event, you can have multiple LIVEs within one event. This allows you to pause, take a break, and resume your session for the duration of your LIVE event.
Note: Unlike LIVE events created on mobile, which need to be scheduled at least 2 hours in advance, when creating a LIVE event through the desktop, you can schedule in advance or go LIVE immediately.
Scheduling your event
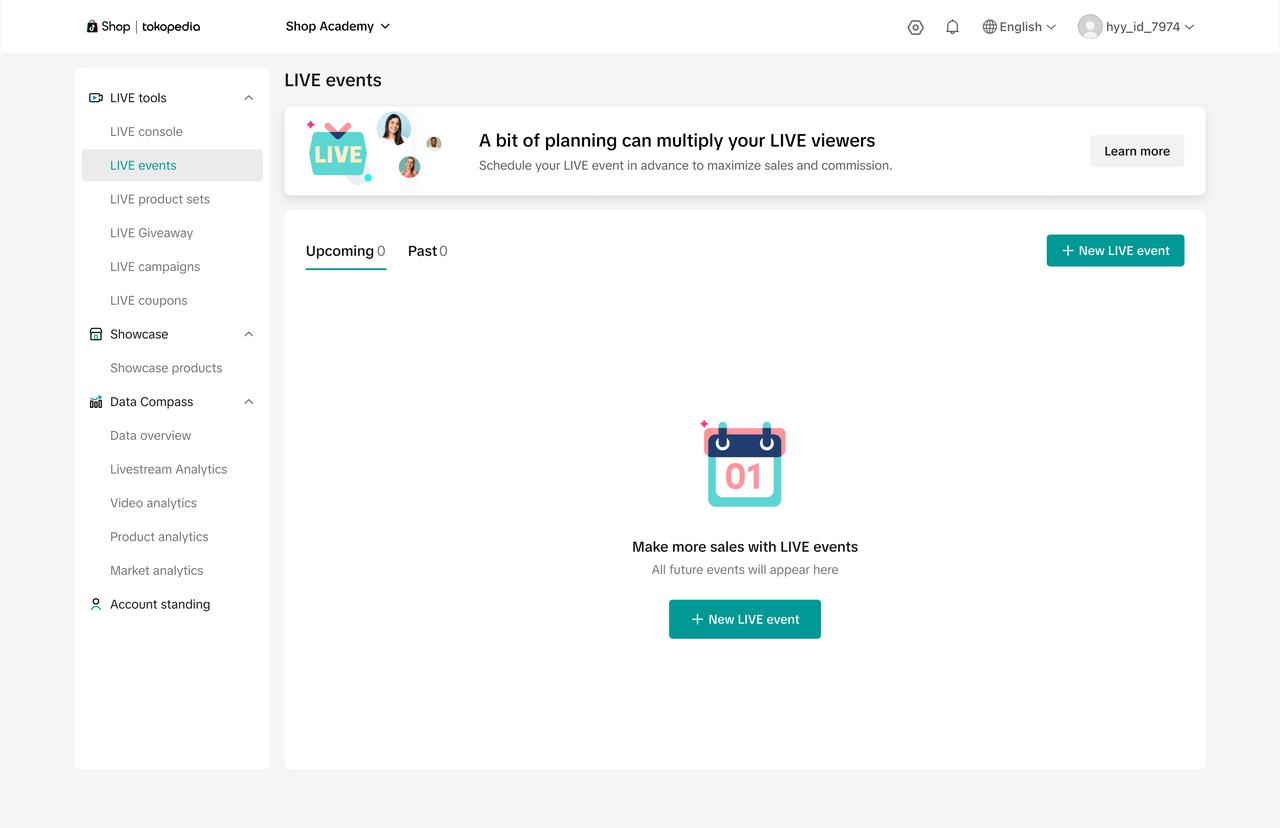
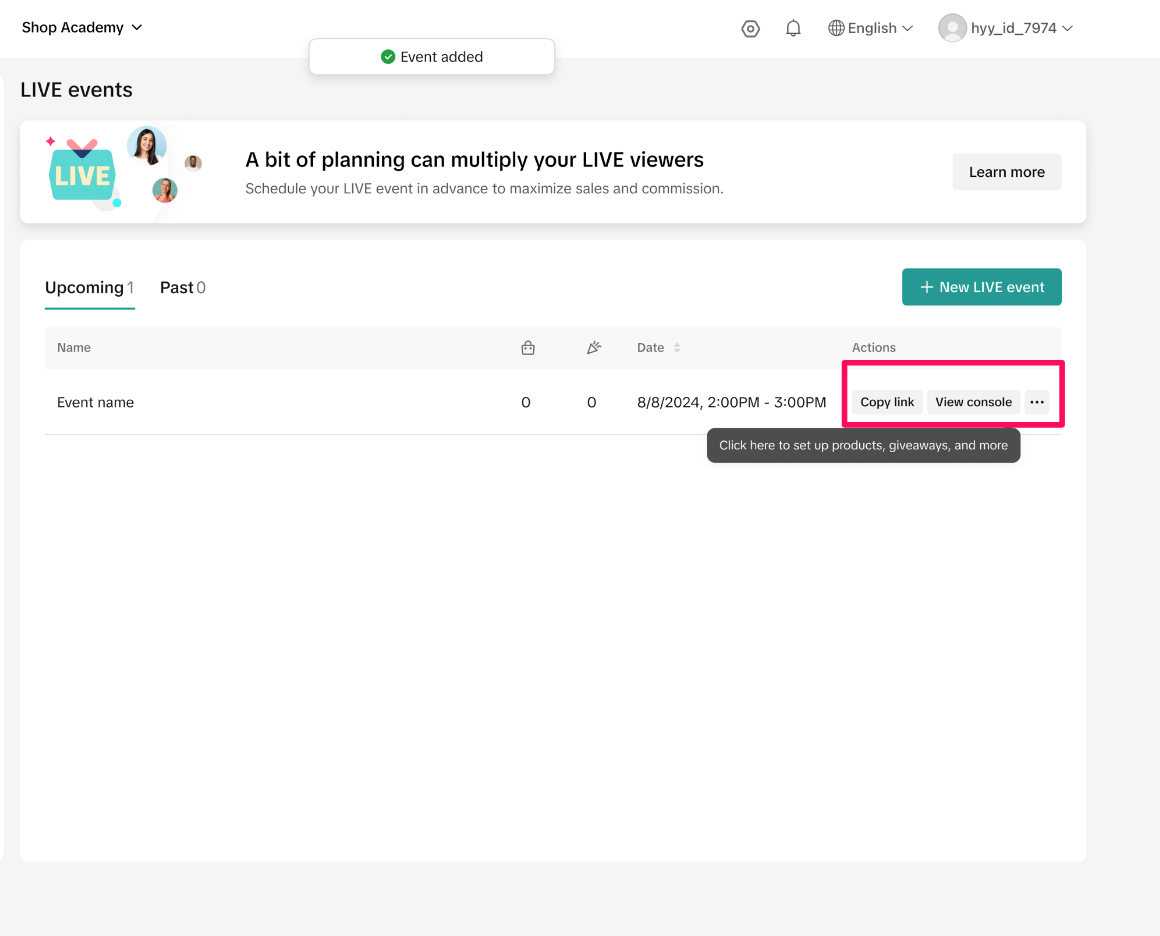
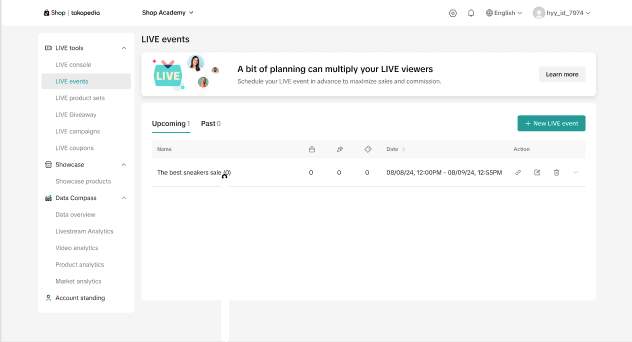
- On the home page, under LIVE tools, select LIVE events. Here, you can view upcoming and past events, as well as schedule future events.
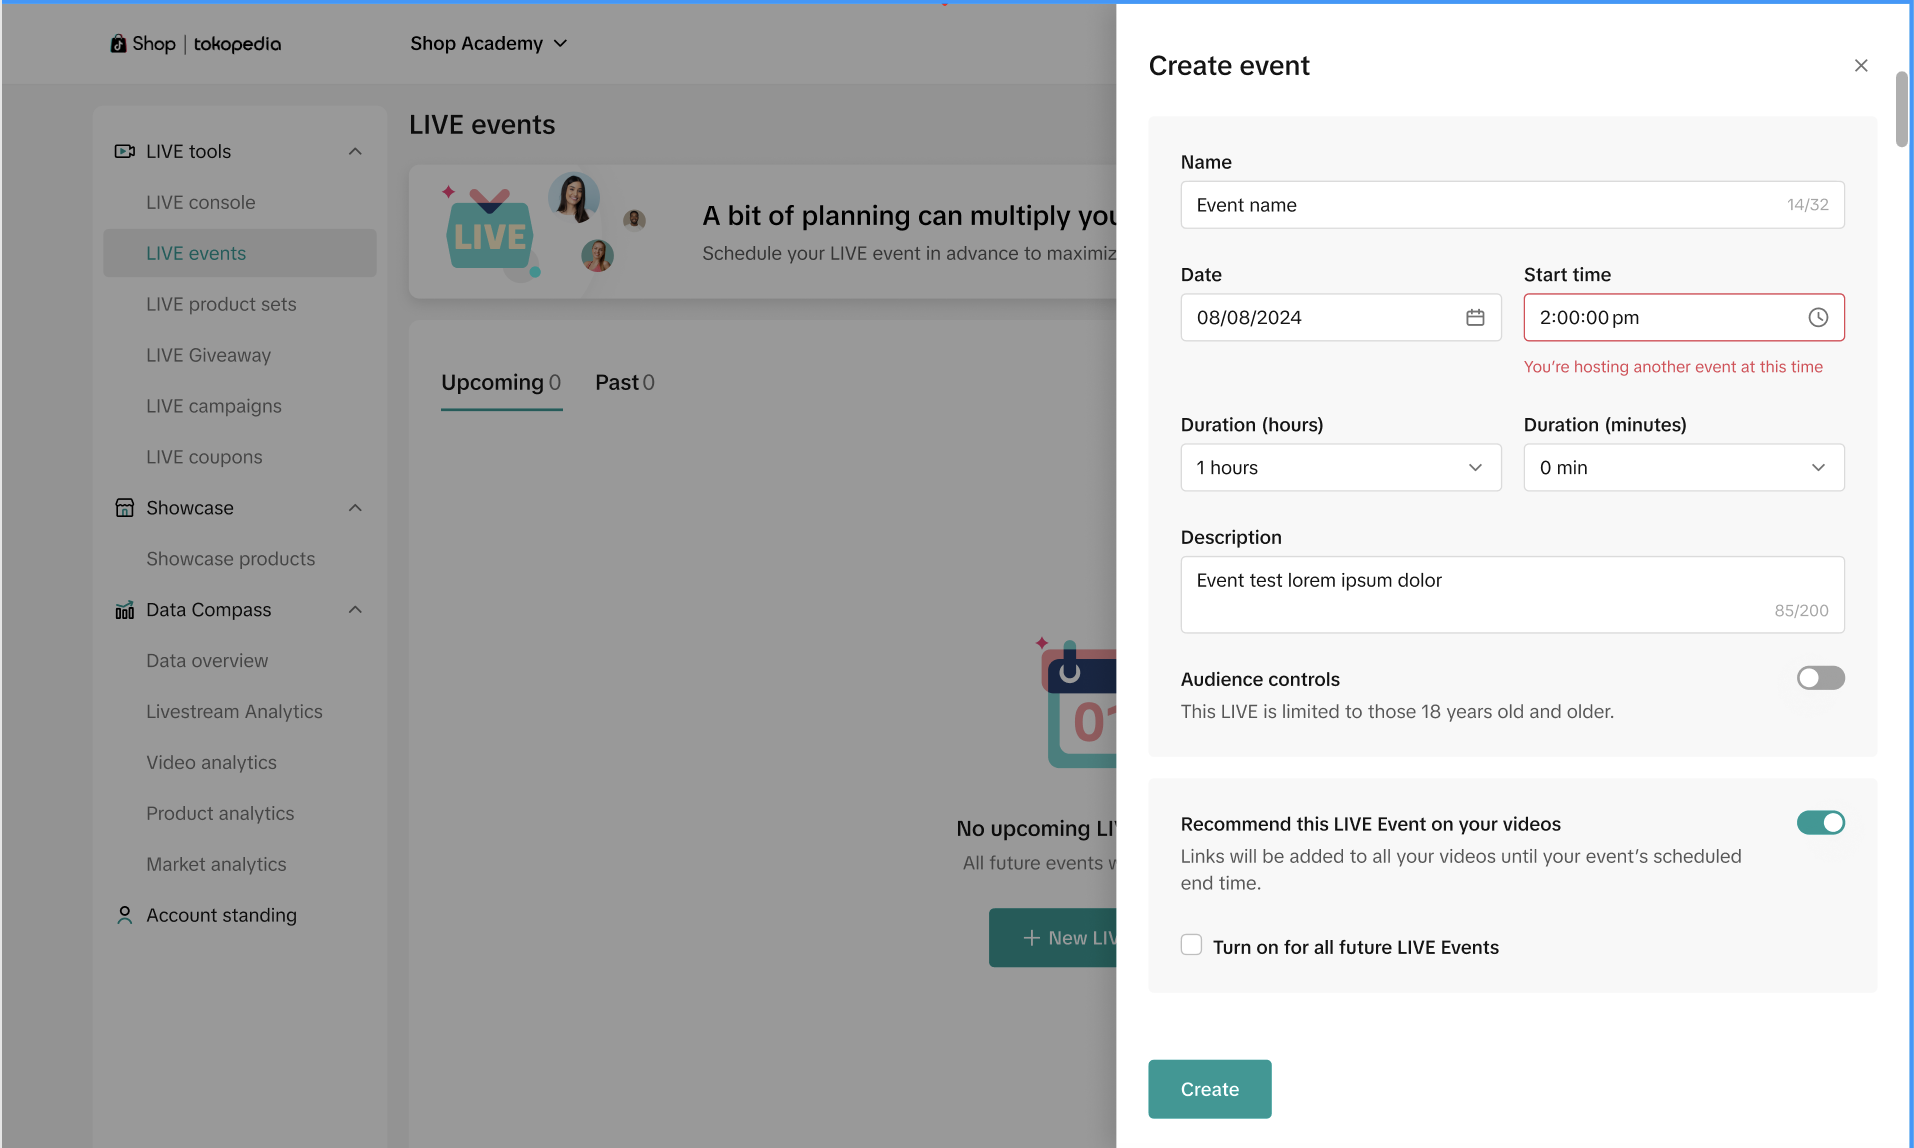
- Click New LIVE event and add in the details of your upcoming LIVE event.
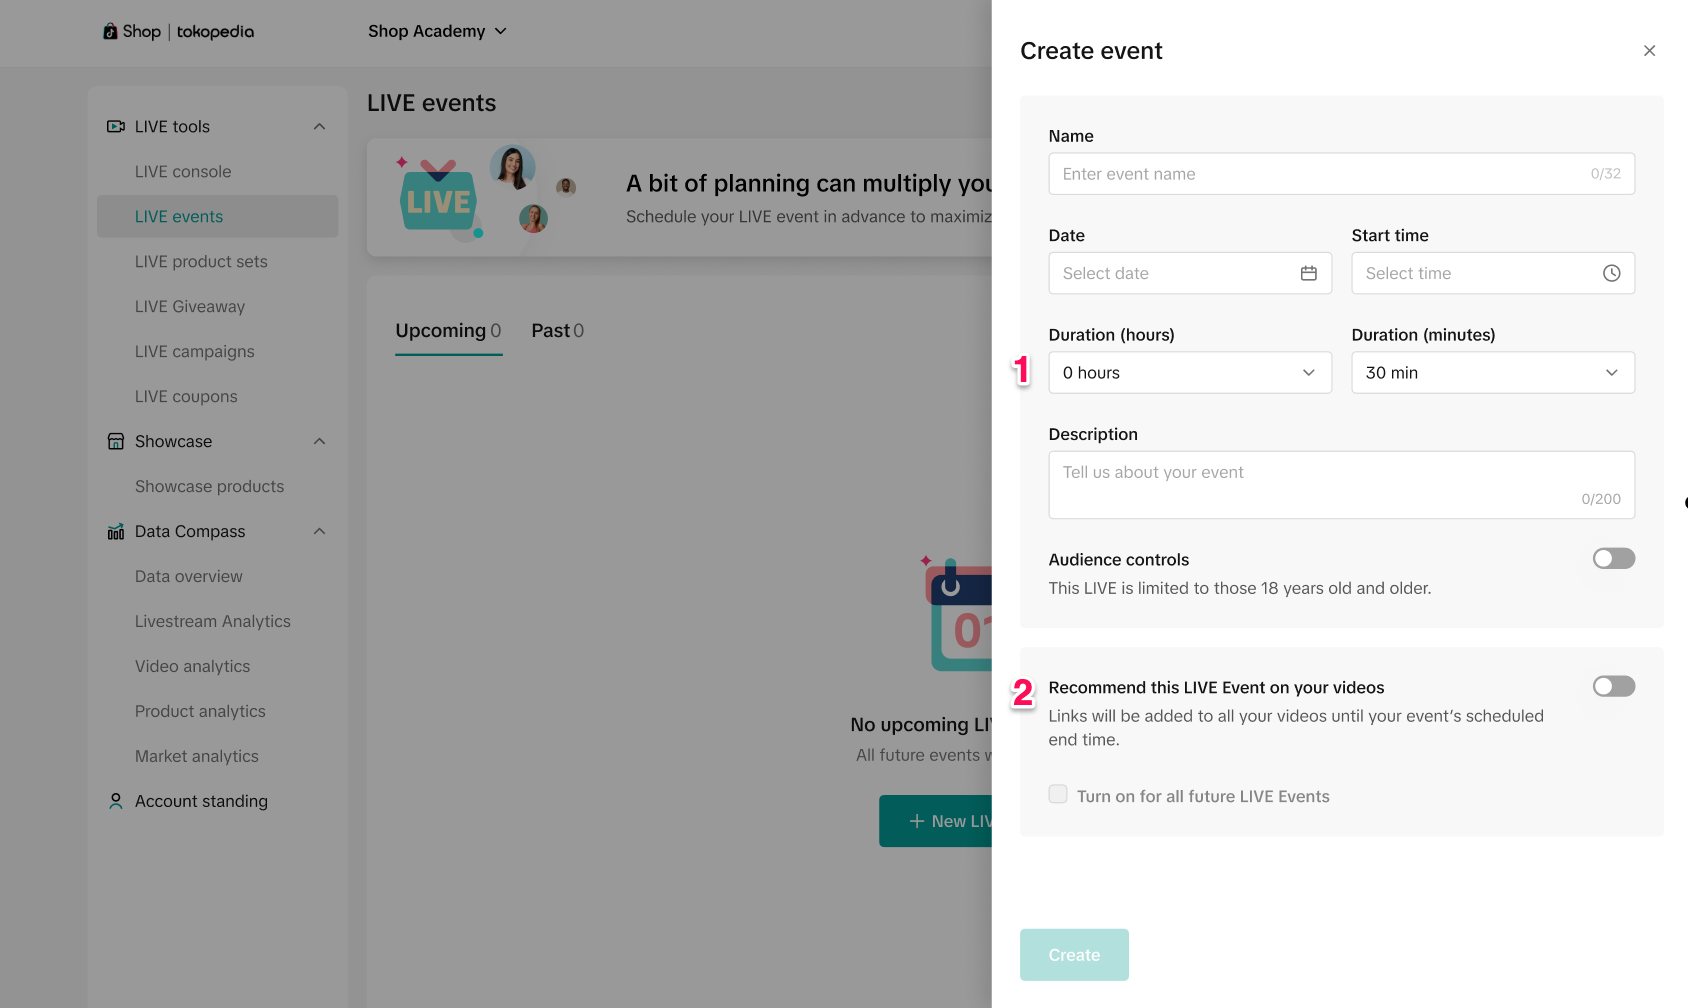
- Duration: Once you've selected your start time, specify the duration, which must be 30 minutes minimum and maximum 13 hours.
- Recommend this LIVE event on your videos: If you toggle this setting on, events links to your LIVE are added to all videos until the scheduled end time of your event.
Preparing products for your event
To prepare for your event, add products ahead of time.Tip: It's a good idea to add multiple products ahead of time that you plan on talking about - aim for more than one product and look for product recommendation labels to help you identify more products to promote
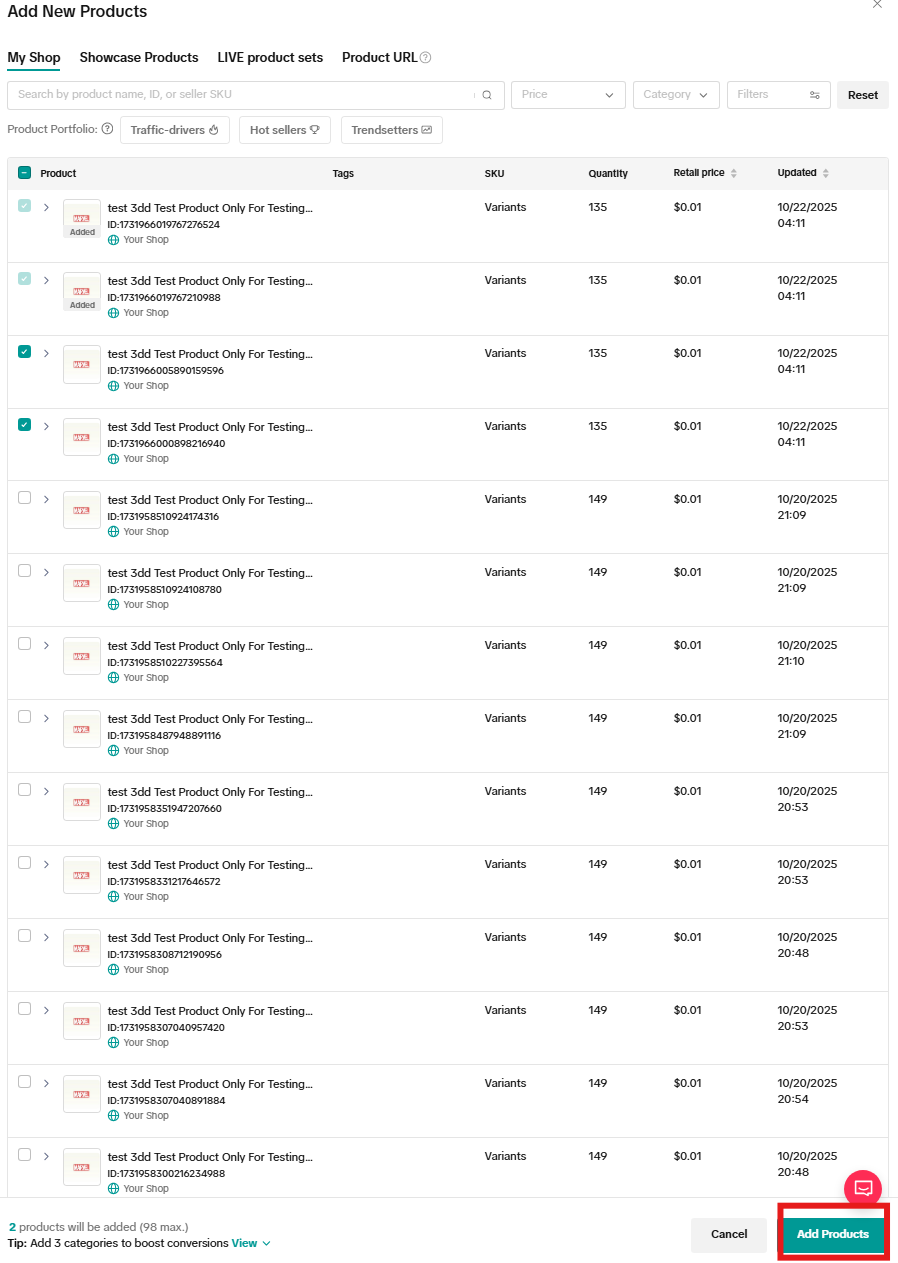
- Click into your event. You'll be redirected to the event's console, where you can select the products to include.
- You can add LIVE product sets, showcase products, product links from sellers, or products from collab invites for a maximum of 100 products total.

Adding LIVE Flash Sale Products
When a seller allocates you exclusive inventory, you can create even more excitement and urgency with LIVE Flash Sale, which can be set up in advance in LIVE dashboard.Step 1: Reach out and coordinate with the seller offering Exclusive Inventory to promote. Ask that they set up a Creator LIVE Flash Sale following these instructions.
Step 2: Once your seller has successfully allocated you inventory, within the LIVE console, navigate to the Product Listing slide and select the shopping bag icon. Click Add LIVE Flash Sale and follow the steps in this Feature Guide to set up, operate and duplicate Flash Sales easily.
Scheduling LIVE Giveaways
- LIVE Giveaways allow you to offer free products to your fans to help drive engagement during the livestream. Remember, sellers need to first allocate you giveaway items before you can use this feature
- To manage a specific LIVE event's giveaways, click your LIVE event. You'll be redirected to the event's Dashboard, where you can assign an existing giveaway or set up a new LIVE Giveaway for the event. On the left screen, navigate to the LIVE Giveway panel and press the plus button to add a giveaway to the event.

- Choose an existing giveaway to add to the session or select Create new giveway.
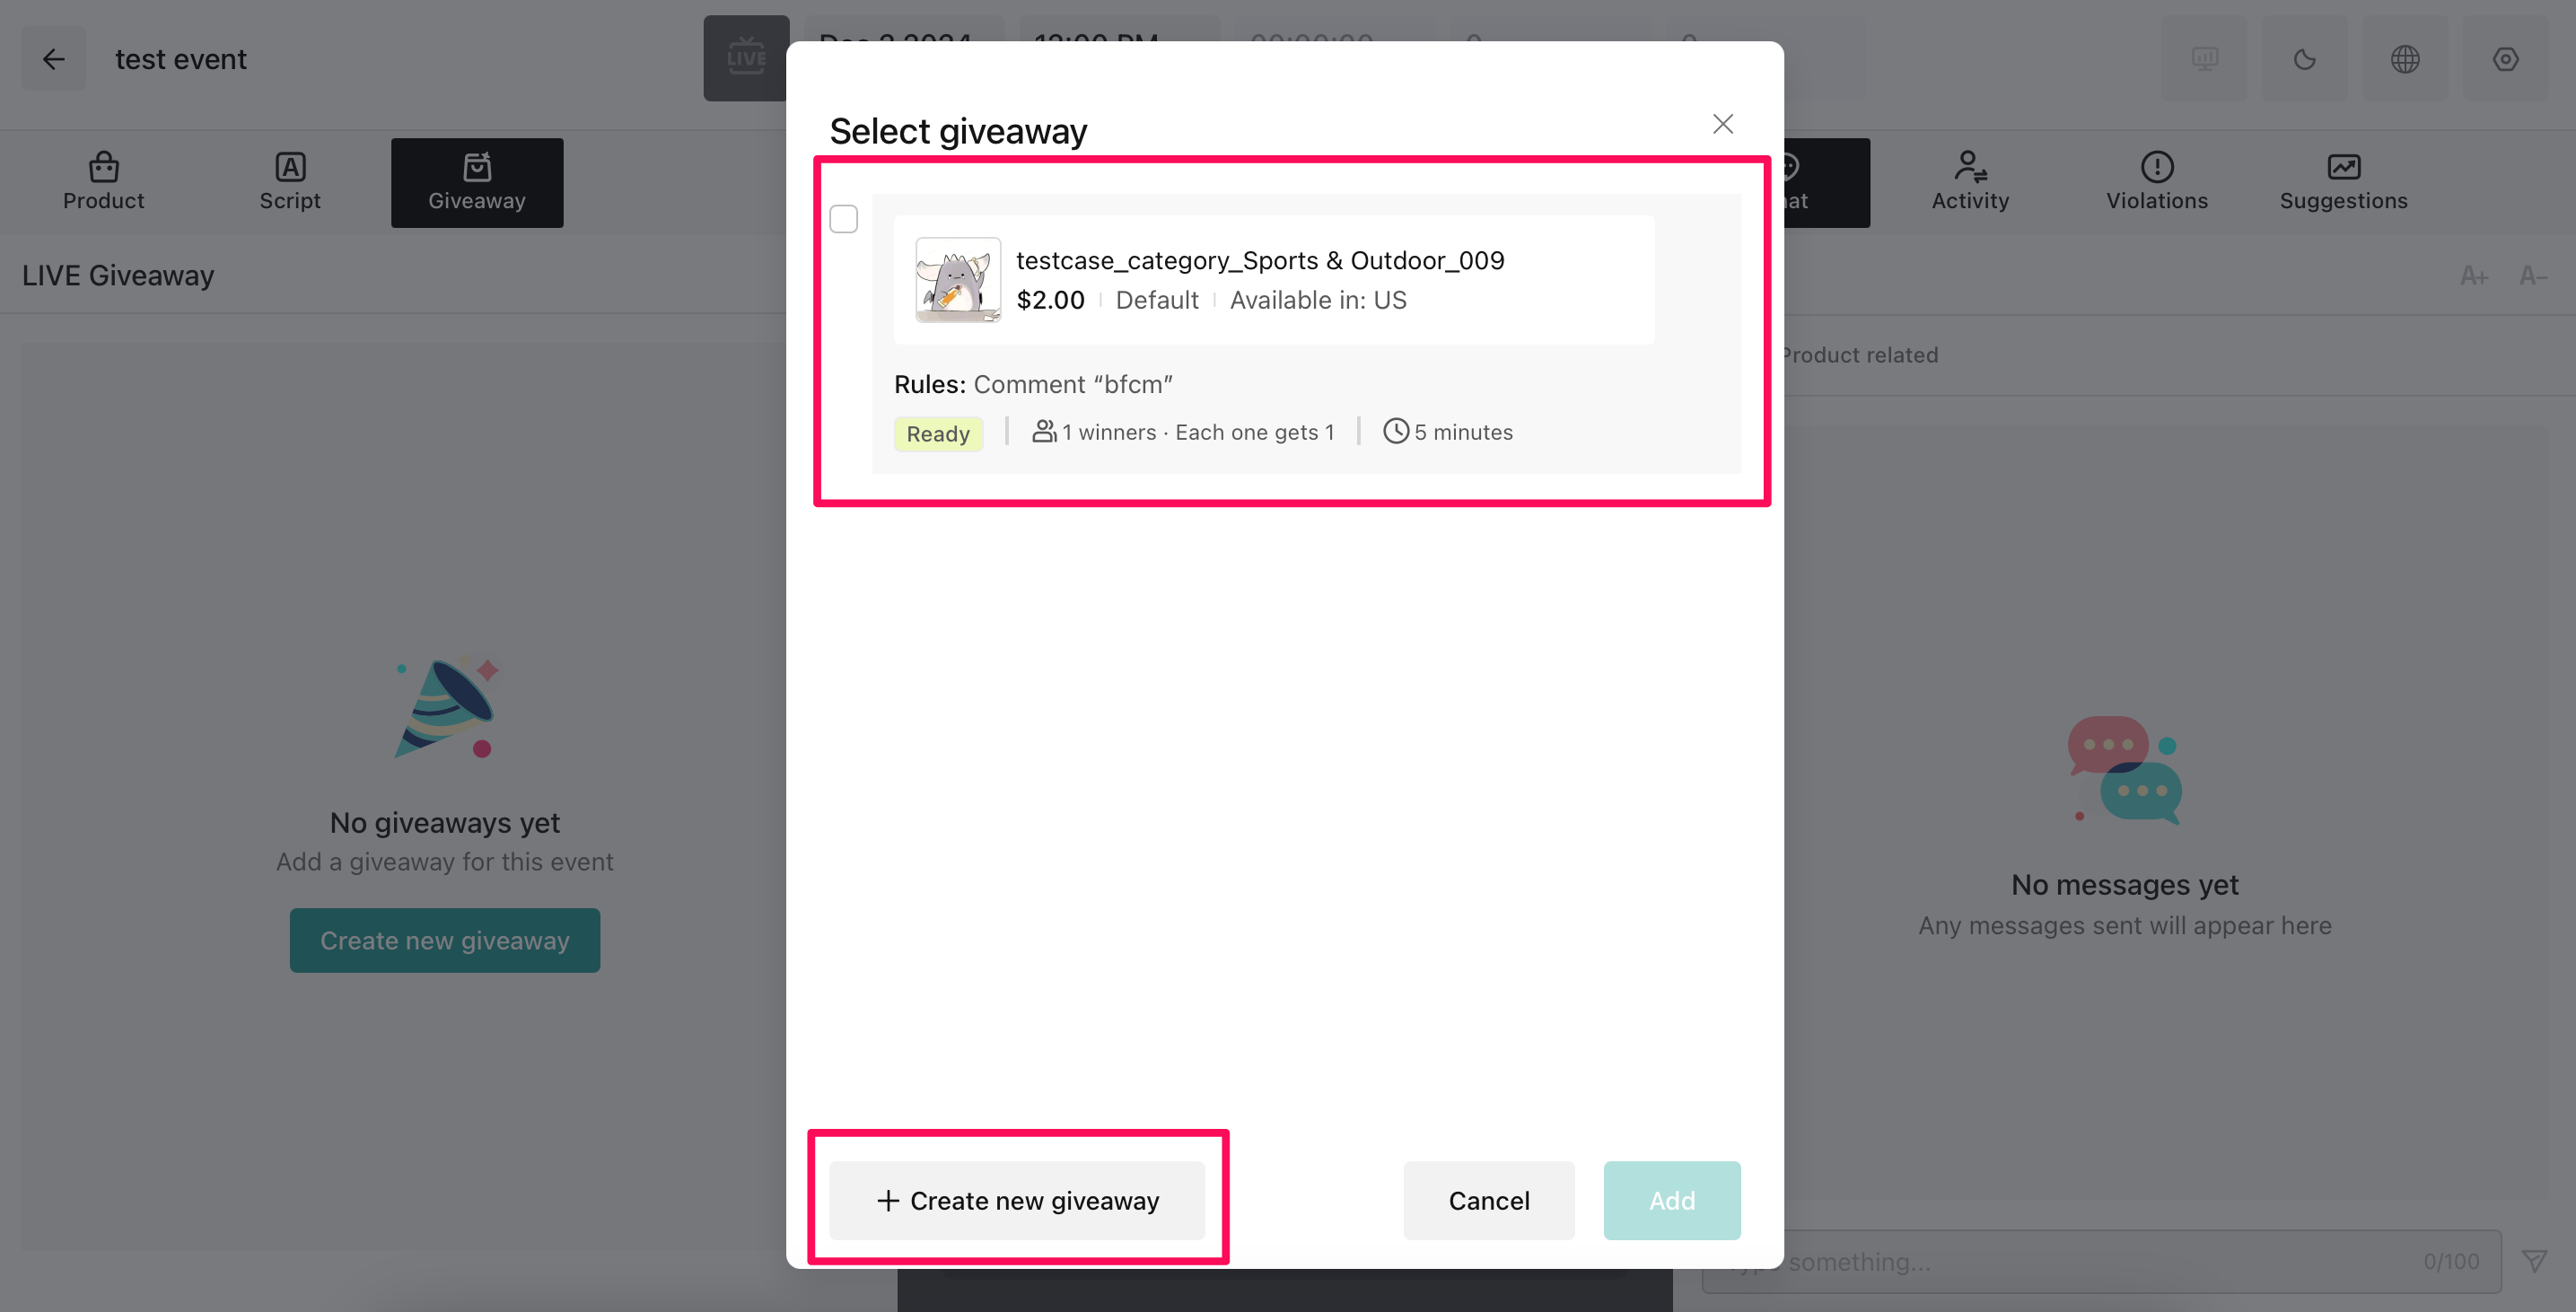
- If you are creating a new giveaway, select the products you want to add to the giveaway.
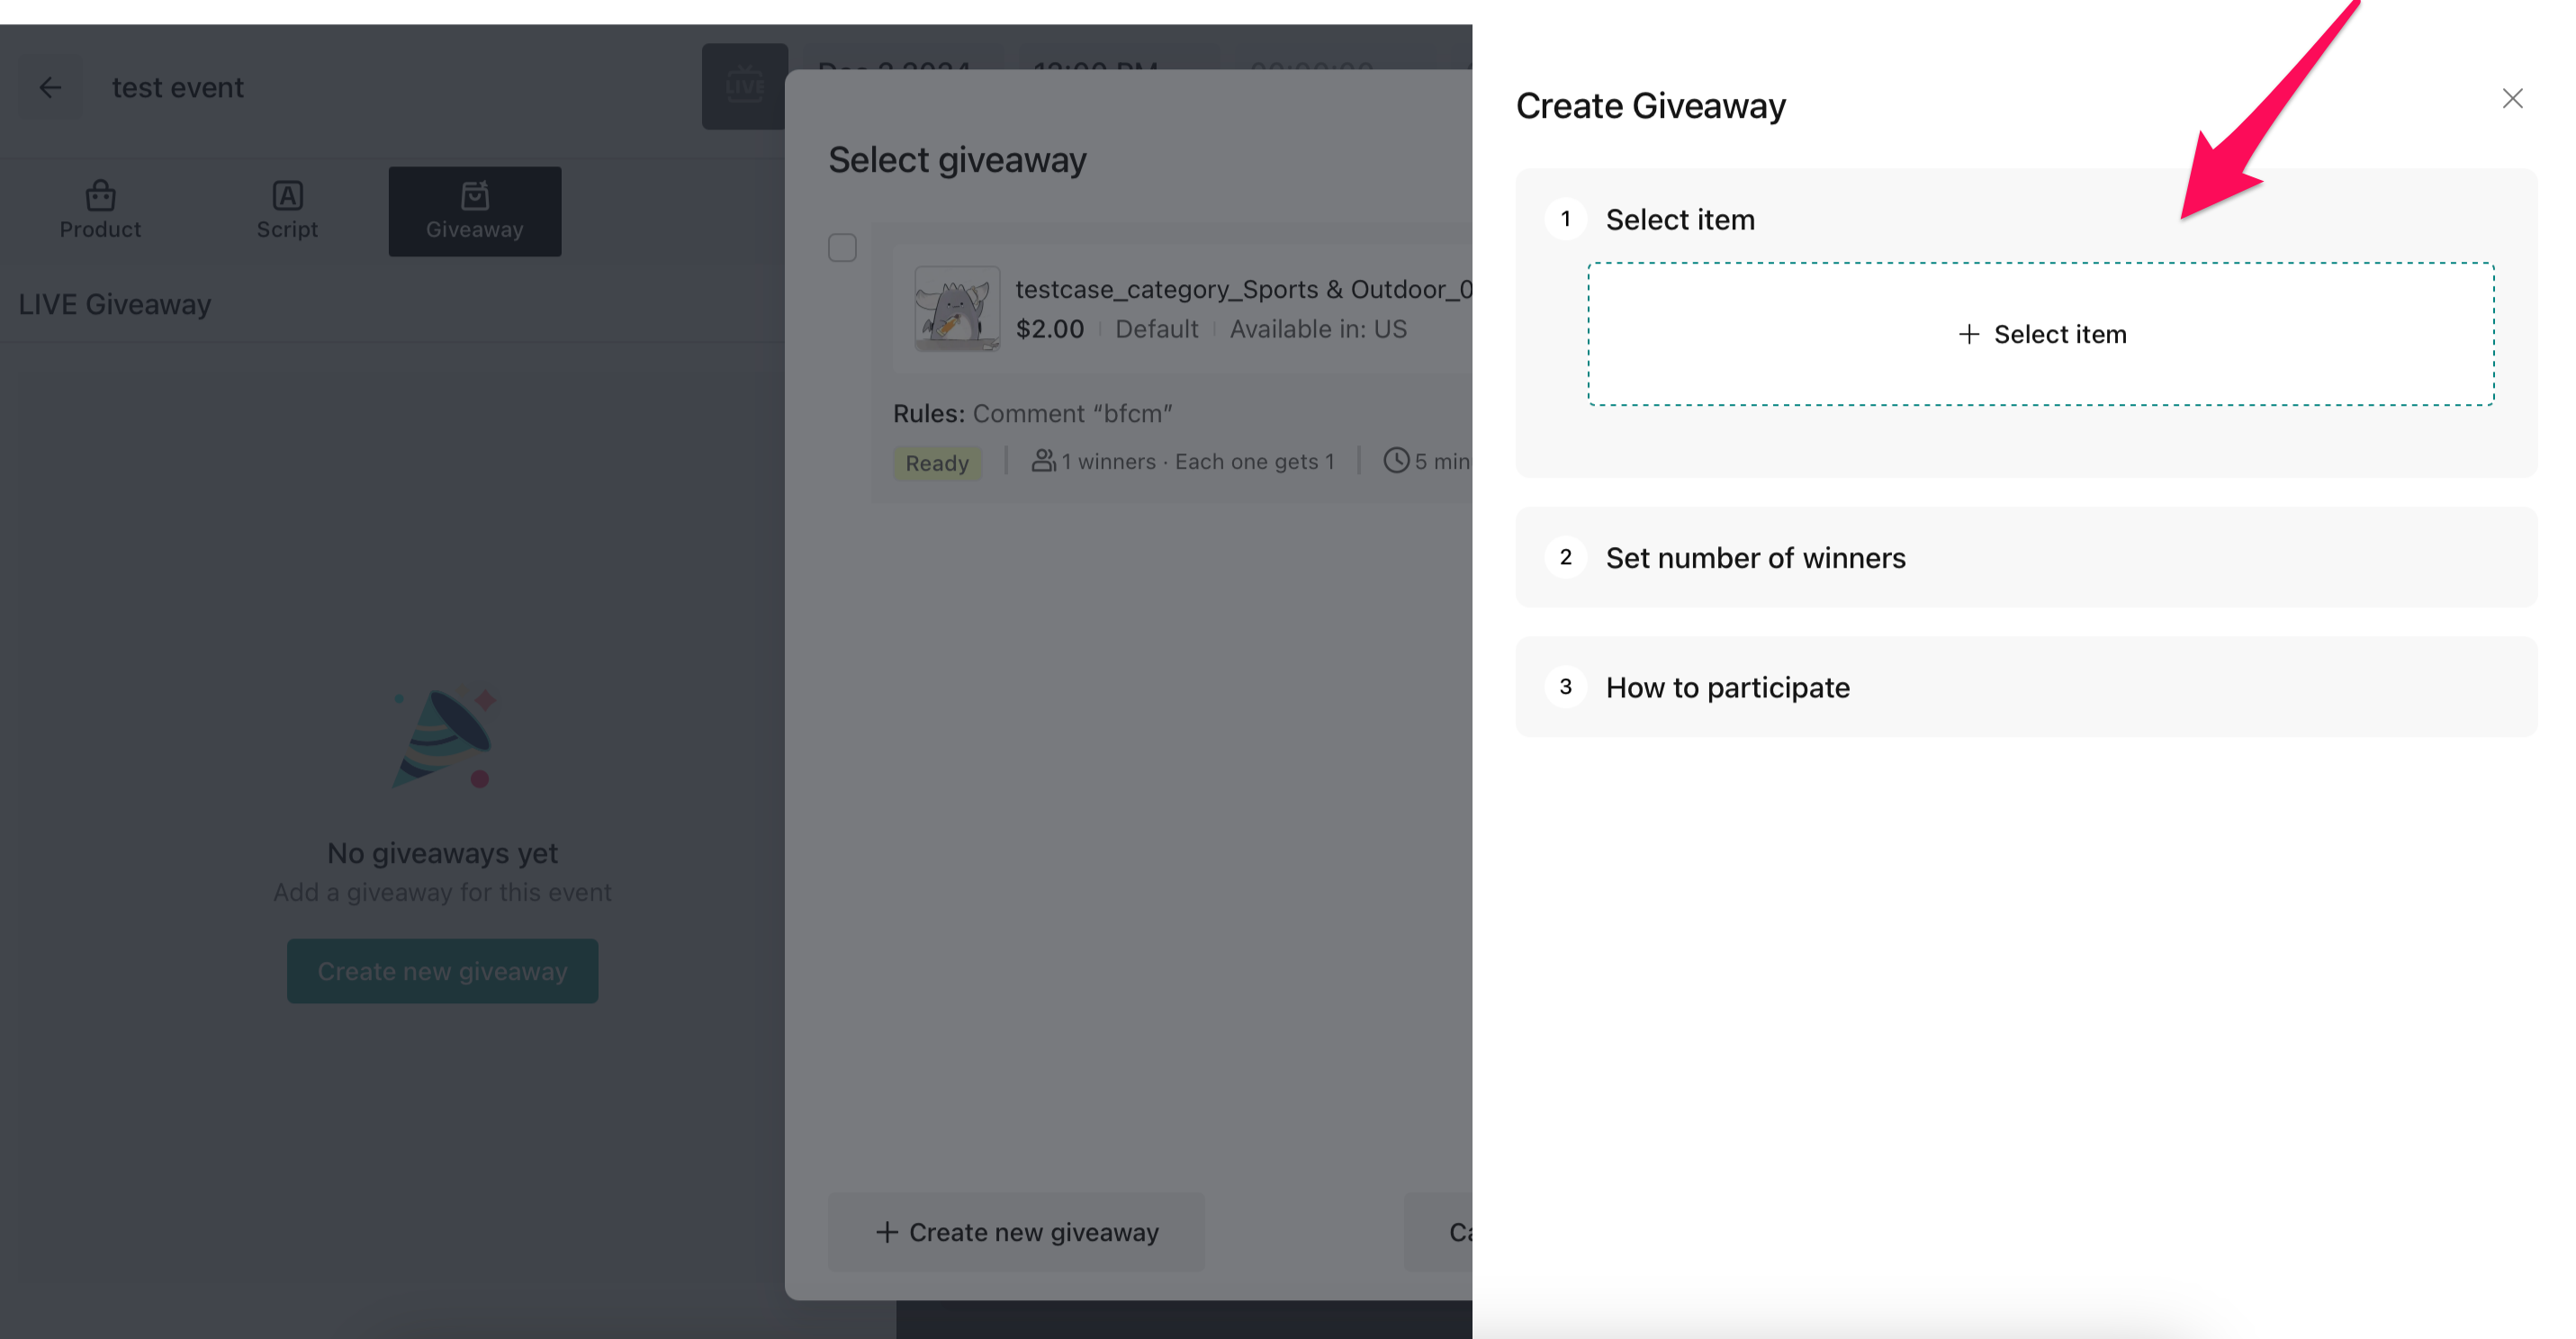
- Set the number of winners and items per winner. Keep in mind that the number of winners and items per winner cannot exceed the number of available items.

- Determine how viewers can participate in the giveaway:
- If you select Comment, then enter a comment that viewers must type into the LIVE chat in order to be considered for the giveaway.
- If you select Follow creator, then viewers can only participate in the giveaway after following you
- You can select both Follow creator and Comment to further customize your giveaway to drive engagement from your followers
- If you choose None, then no comment must be added, but you still have to select a Countdown, which is the period of time during which users can participate in the giveaway.
- Accept the terms and then click Create. You have now created the LIVE Giveaway, which will appear on the left panel. To edit or start the giveaway, use the buttons shown below:
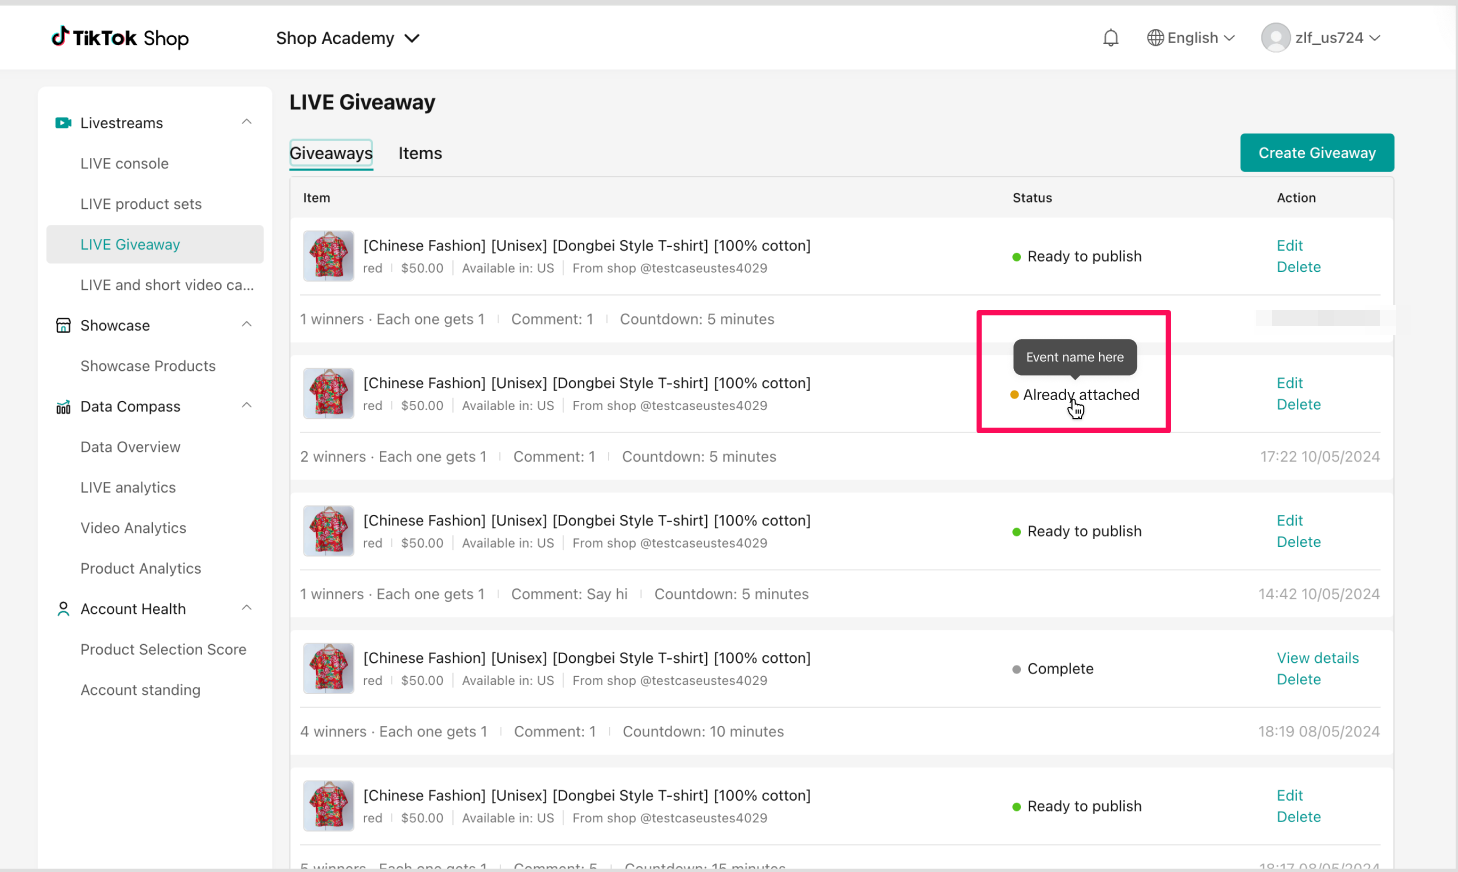
- If you try to set up a giveaway that's already included in another LIVE event, you'll be reminded that the giveaway is already included in an existing Giveaway and you won't be able to add that giveaway.
- To remove a giveaway from your event, simply select the garbage can icon next to the giveaway.
Promoting your event
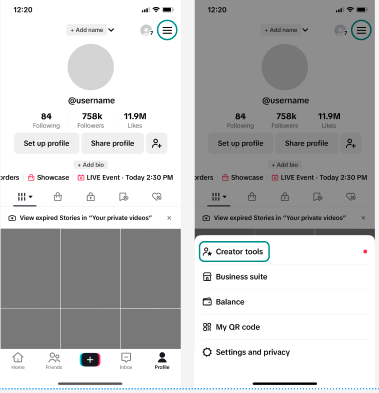
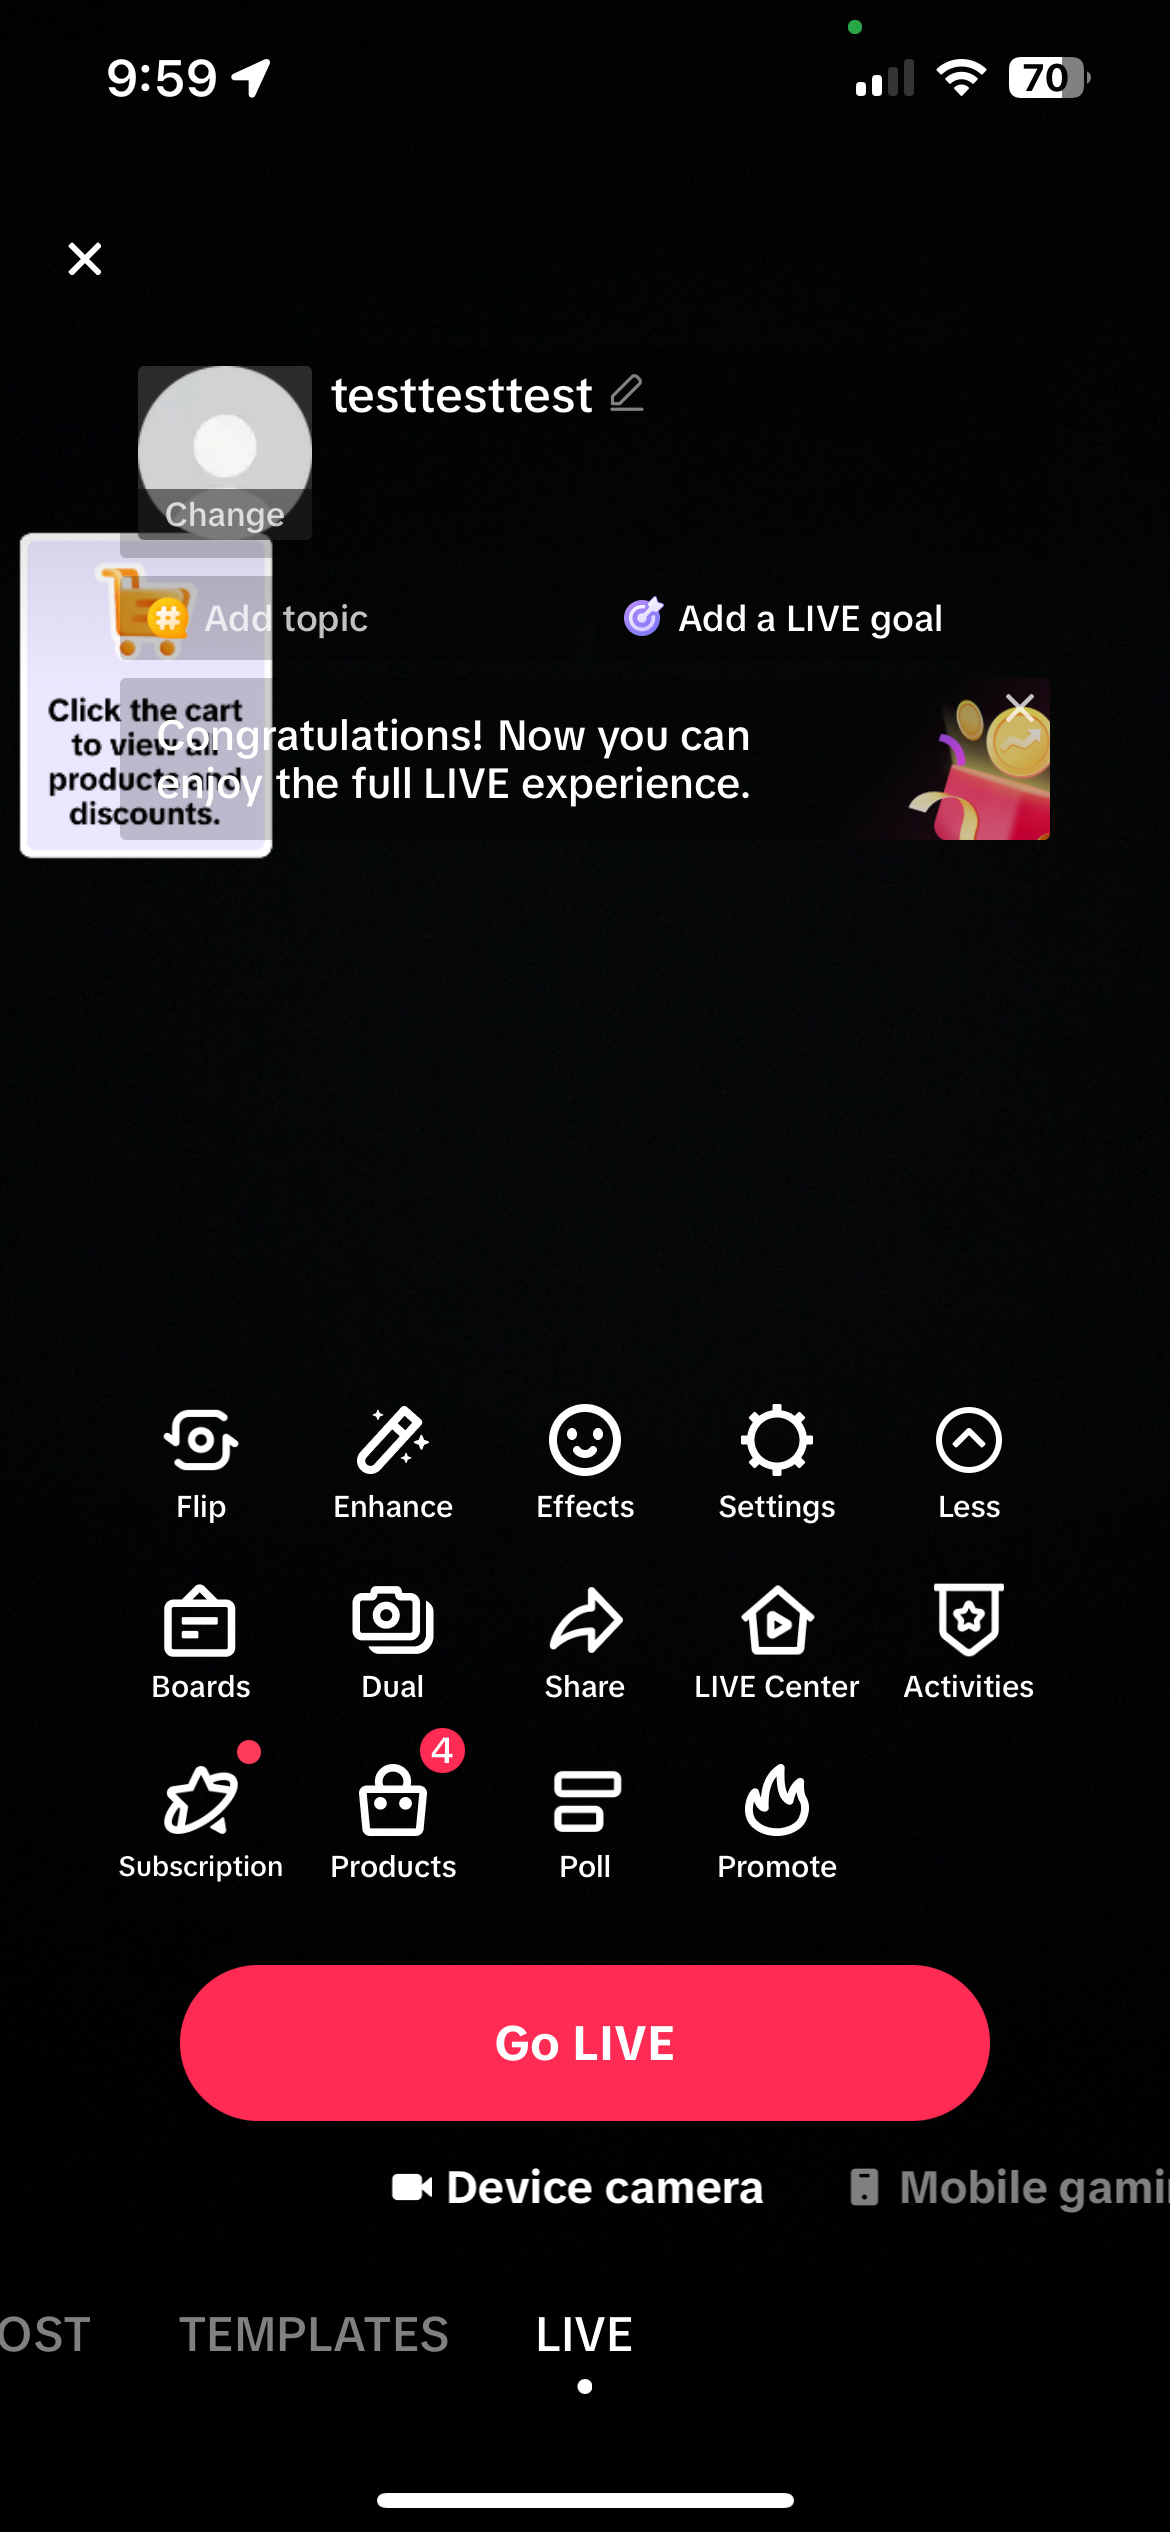
Now that you’ve set everything up, it’s time to promote your LIVE event. This is an essential preparatory step to take. By increasing awareness and attendance ahead of time, you're more likely to have a larger, more engaged audience during your event, which can lead to increased traffic and sales!- On TikTok, go to your profile and tap the menu icon → “Creator tools.” Scroll down to LIVE events and tap it - here, you’ll find the event you scheduled on desktop
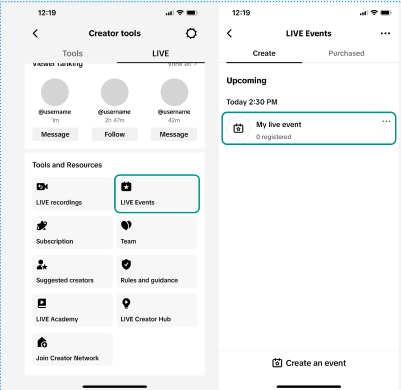
- On the event page, tap the + icon under Related videos. Create a short video that teases the products you’ll be featuring, LIVE giveaways and Flash Sales to look forward to, and other key selling points of your upcoming shopping session. Once recorded, this video will be shown on the For You Page, helping spread the word about your event.
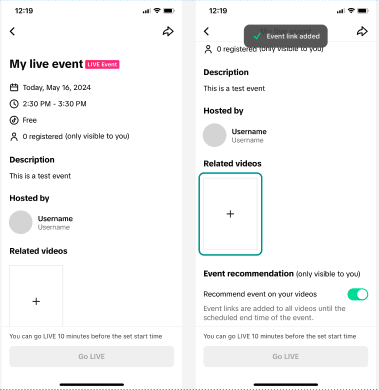
- Make sure to toggle on ‘Recommend event on your videos’ to add the event link to your past videos, inviting viewers to subscribe to your event
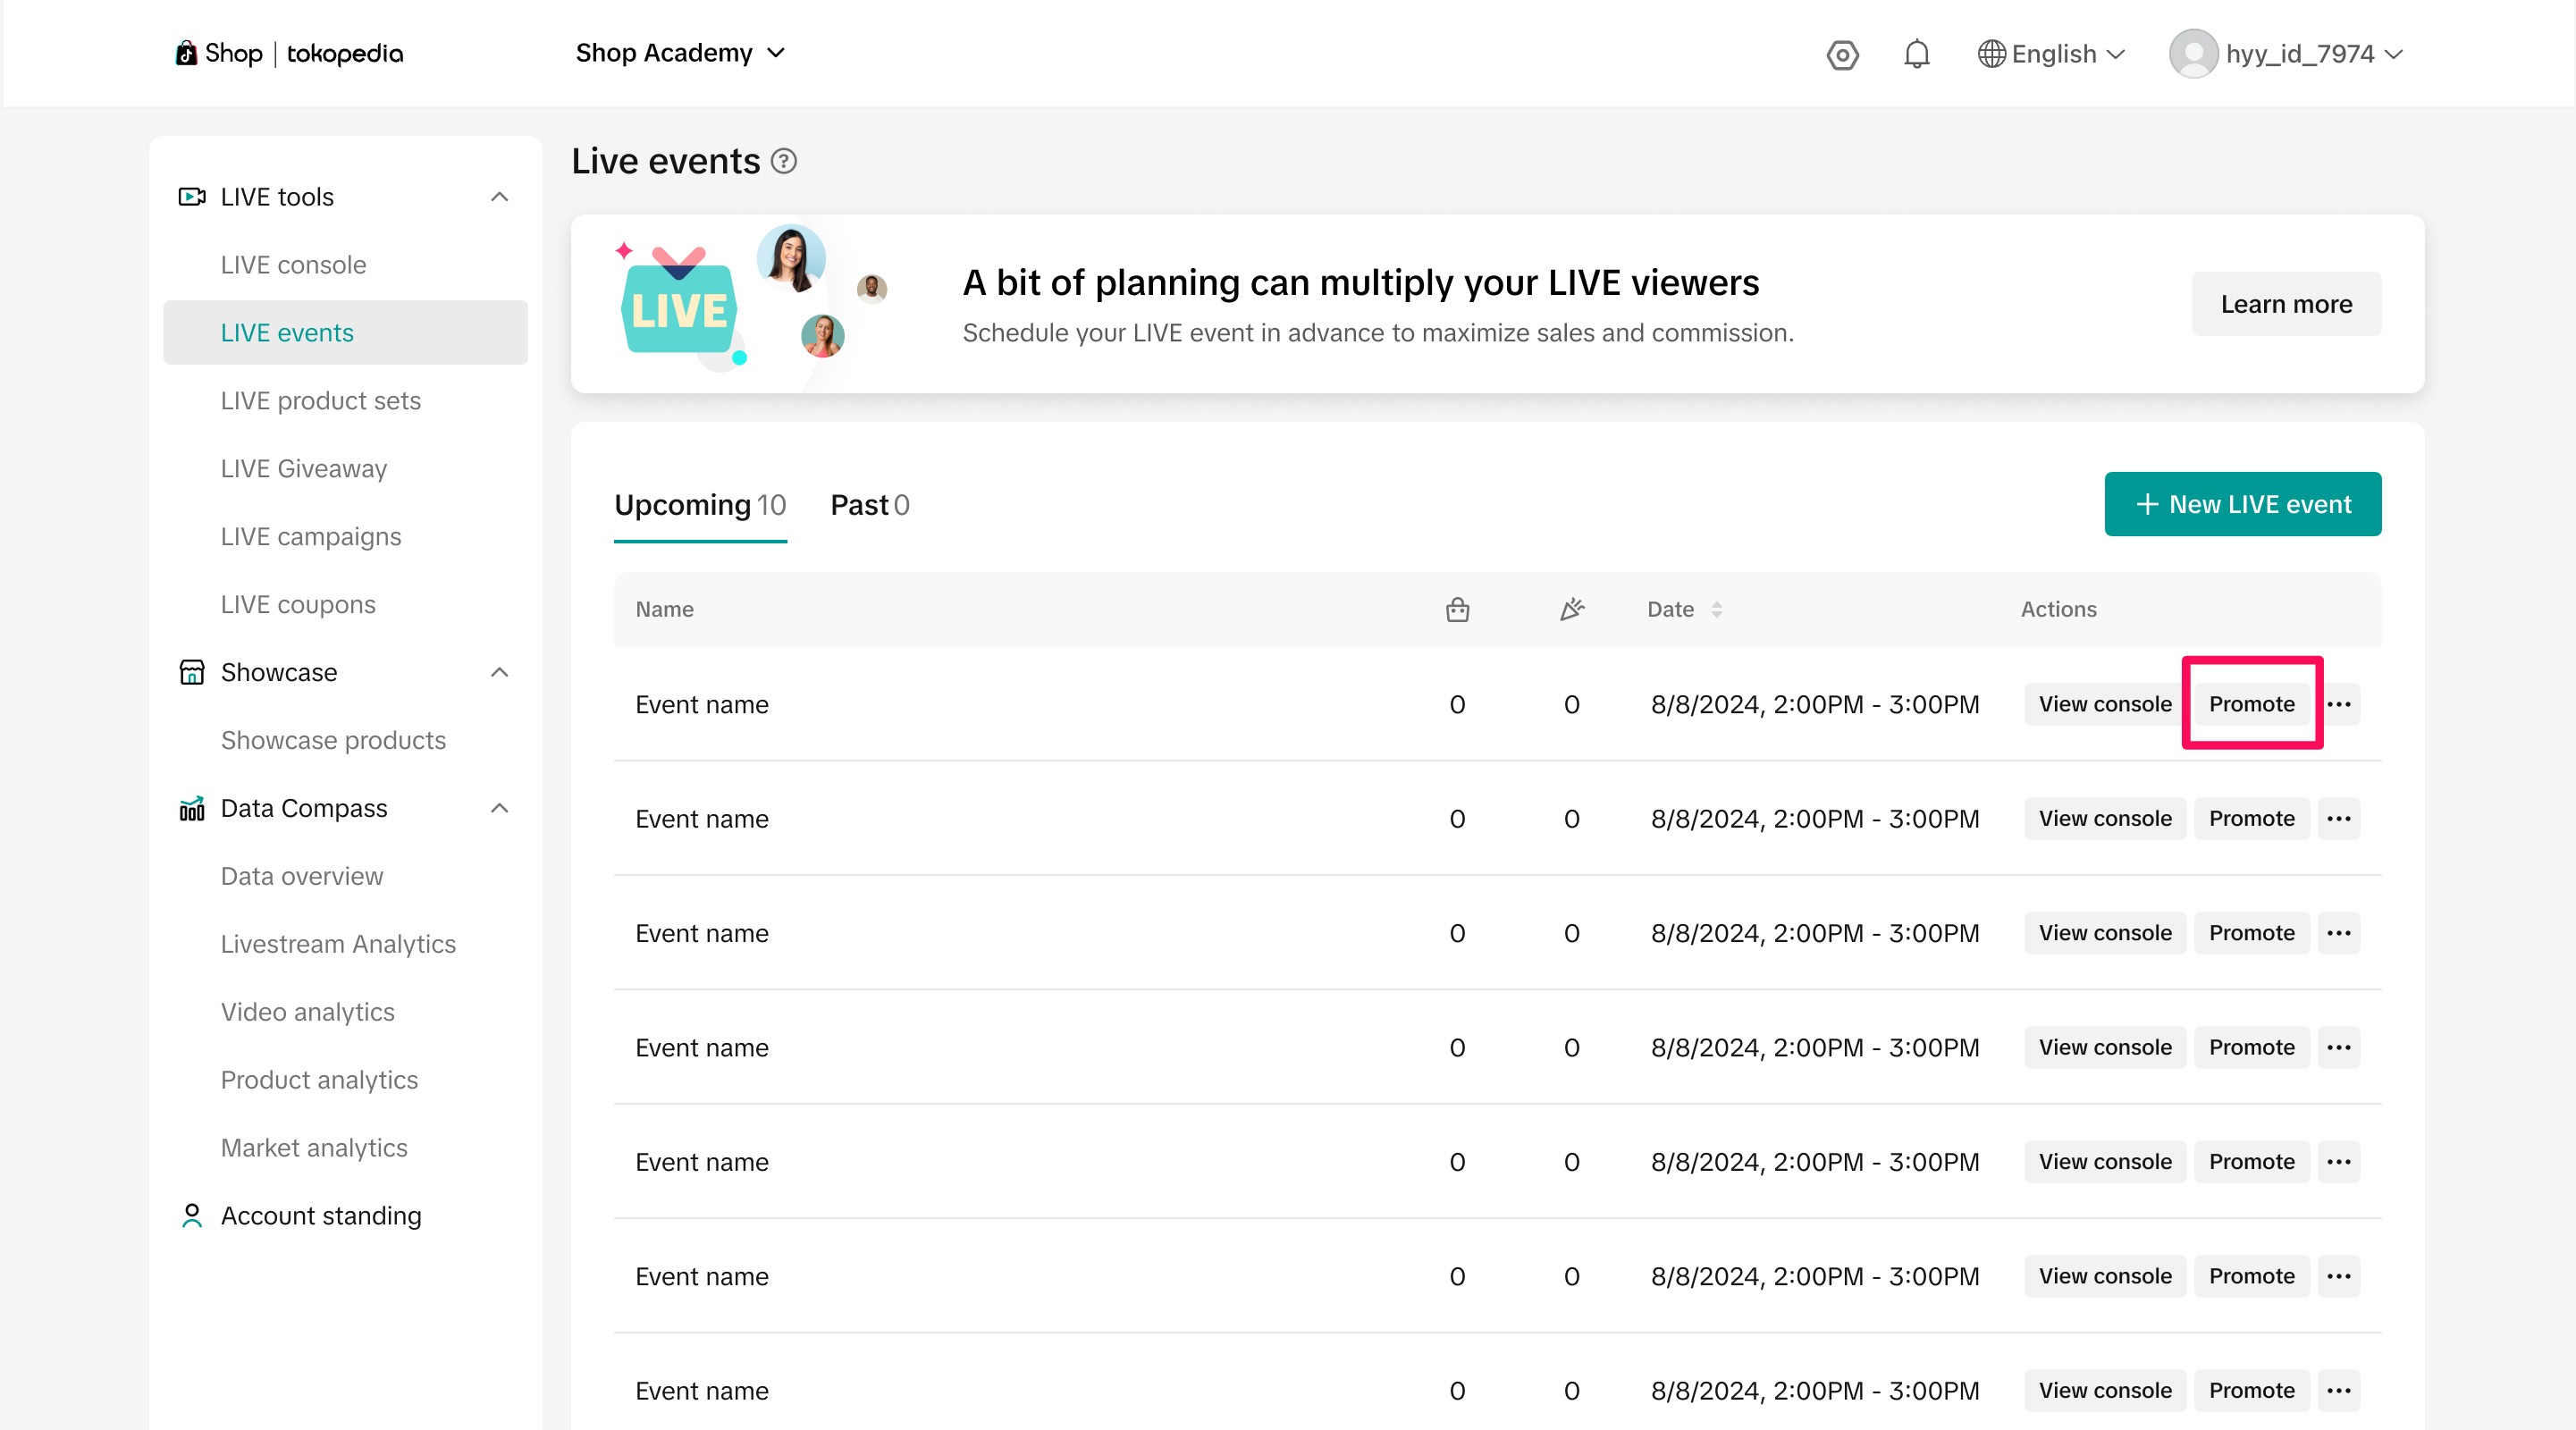
- Alternatively, within LIVE events on desktop, click Promote next to your scheduled event. From here, you can create a short promotional video that includes a link to the event, or copy the event URL to share and post on and off TikTok
- Scan the QR code from your phone to open the scheduled event on mobile. From there, create a short video and toggle on add event link to make sure that viewers see and RSVP to the event
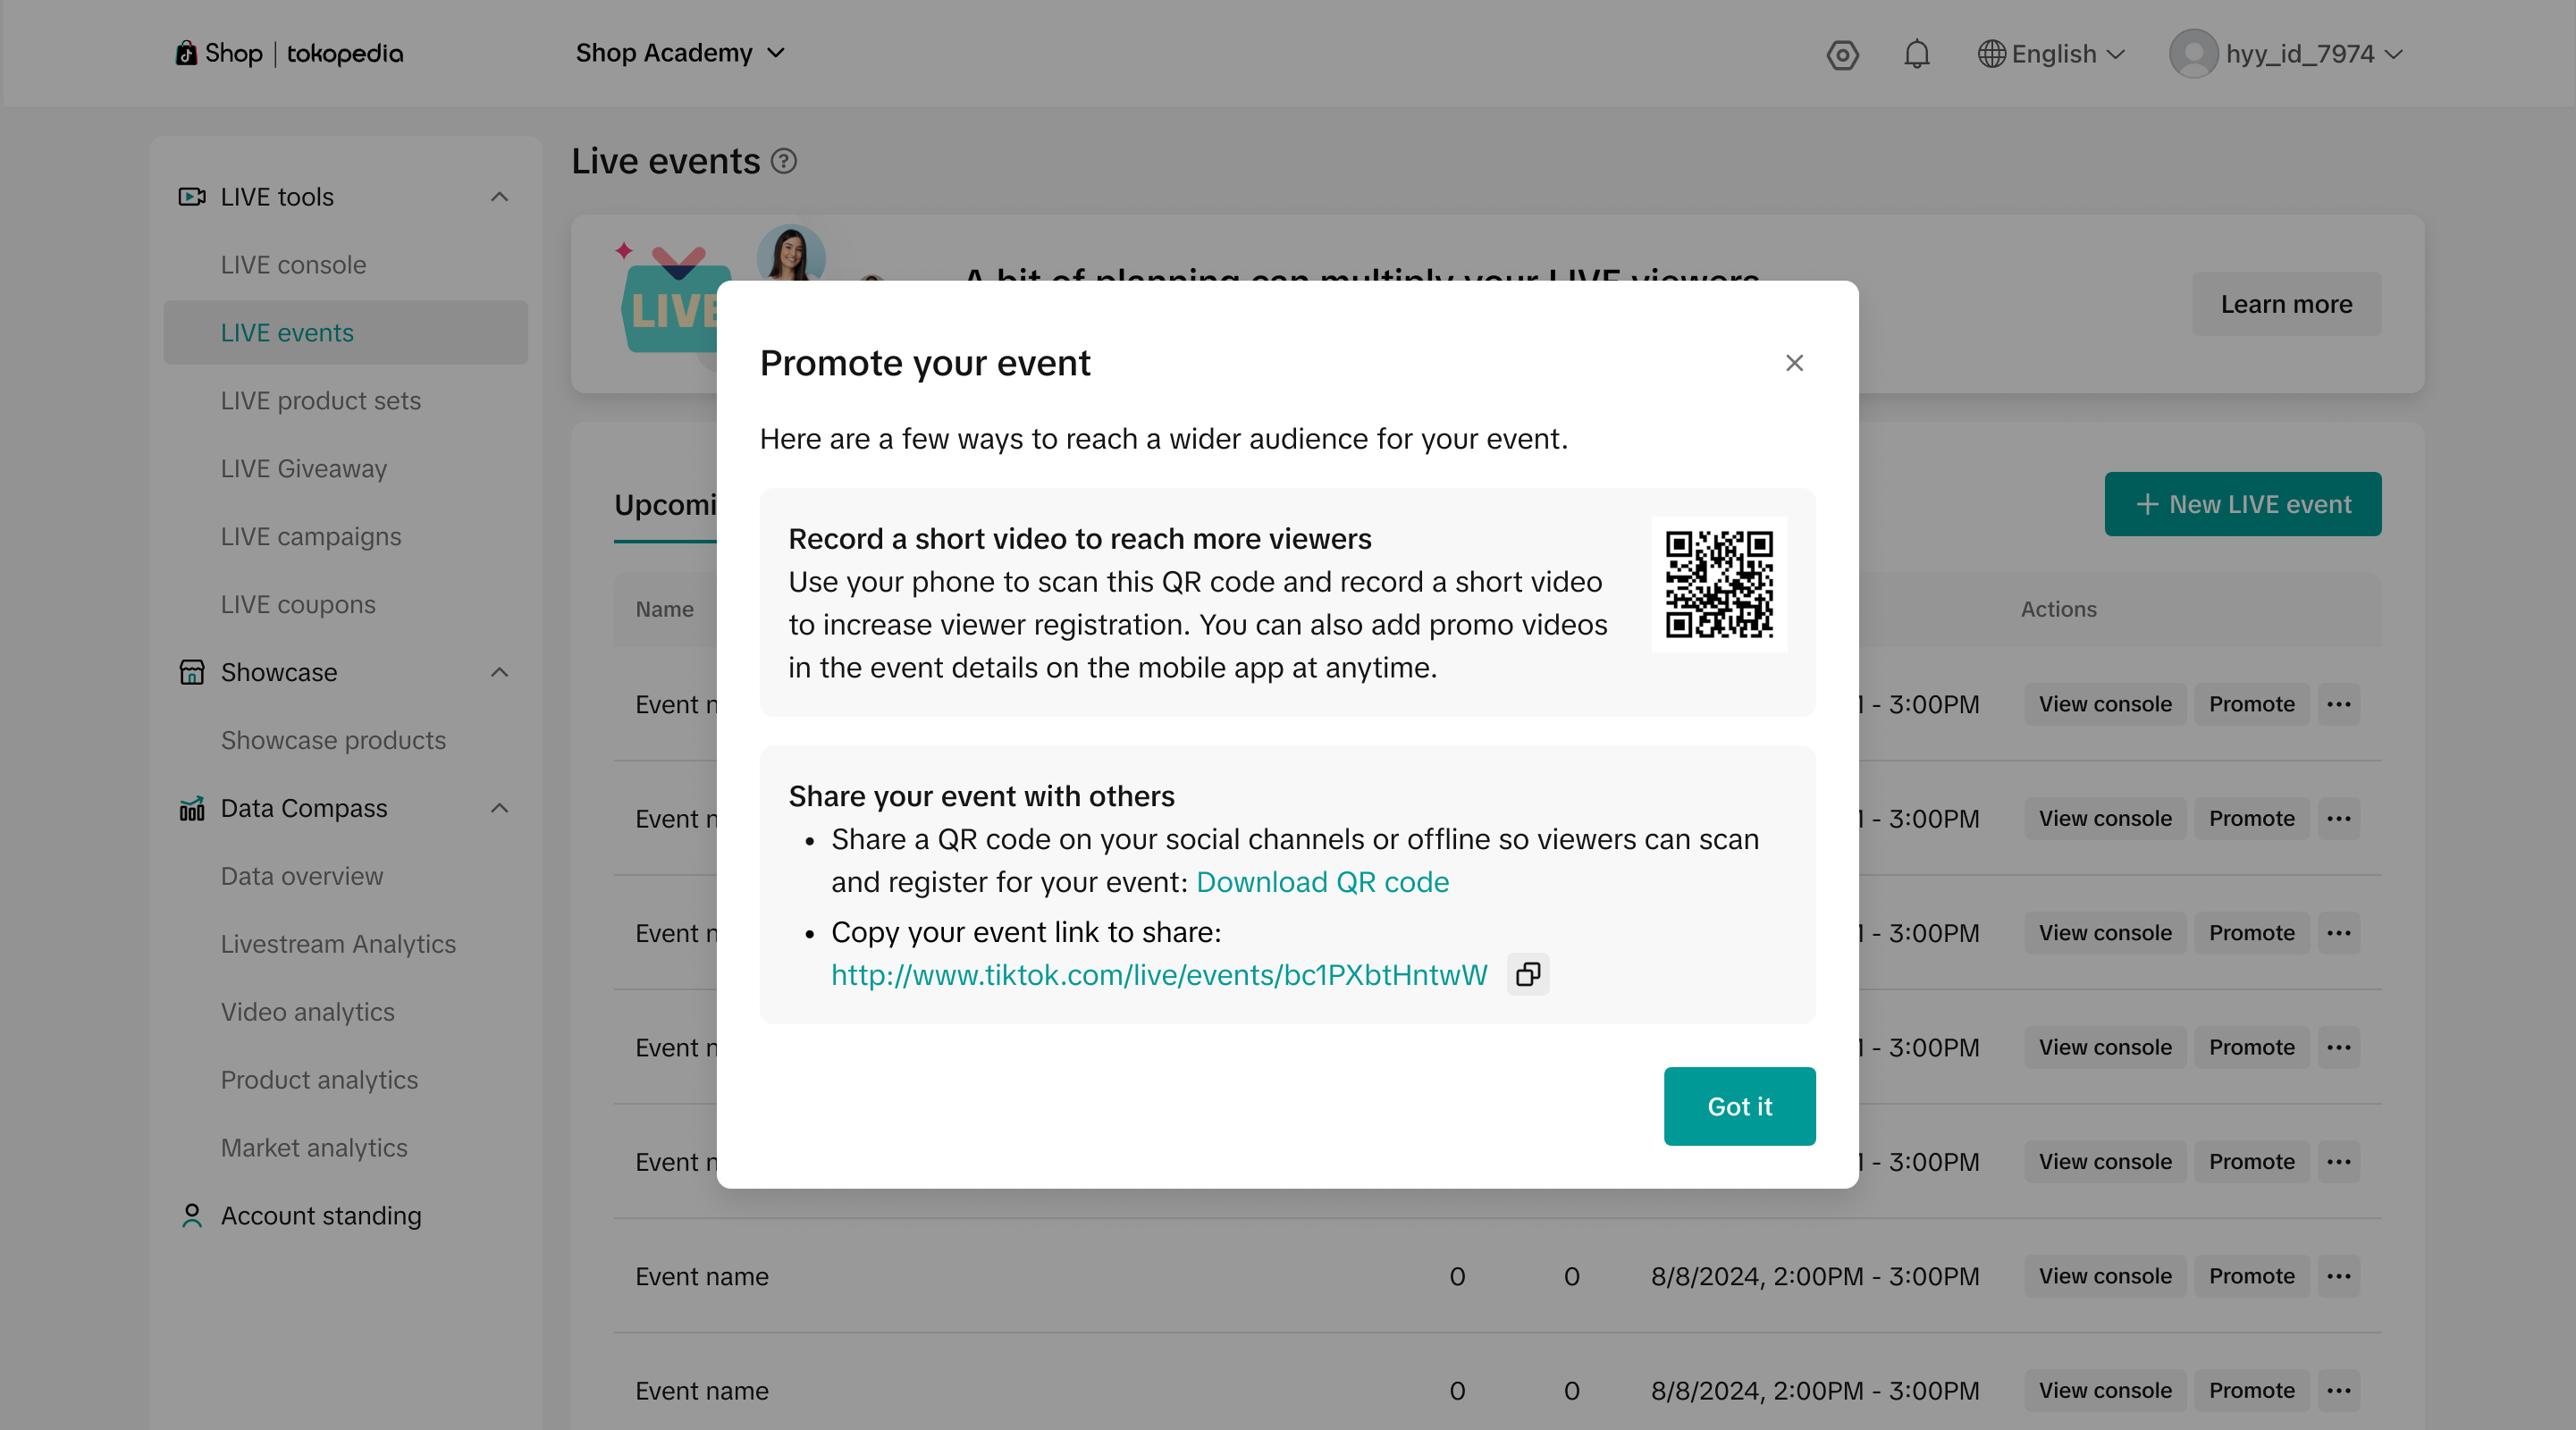
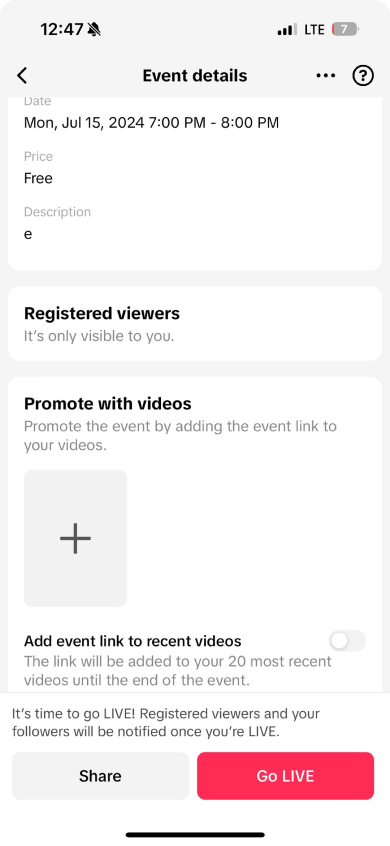
- You can also download the event QR code to repost on and off TikTok, or copy the Event URL for on and off-platform and offline sharing.
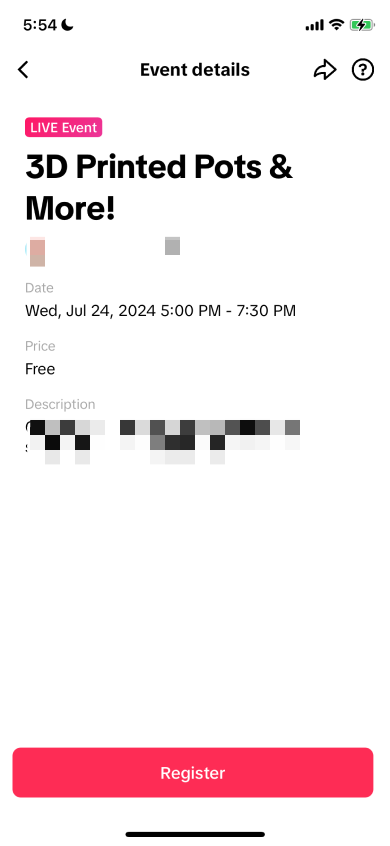
- When viewers scan the event QR code, they will be taken to the event registration page, where they can sign up to attend in advance.
Starting your event
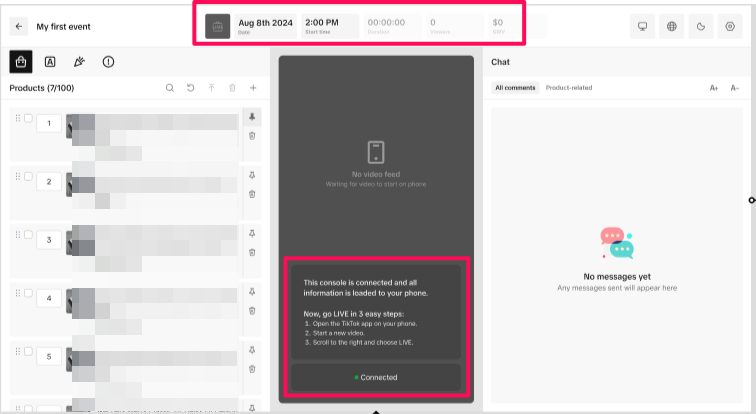
Ten minutes before the scheduled start of your event, the event dashboard will load all selected products and your phone as indicated by the center screen. Below, you can see 4 products on the desktop are synced with products on mobile. You'll also receive a notification on mobile reminding you that your upcoming event will be set up shortly.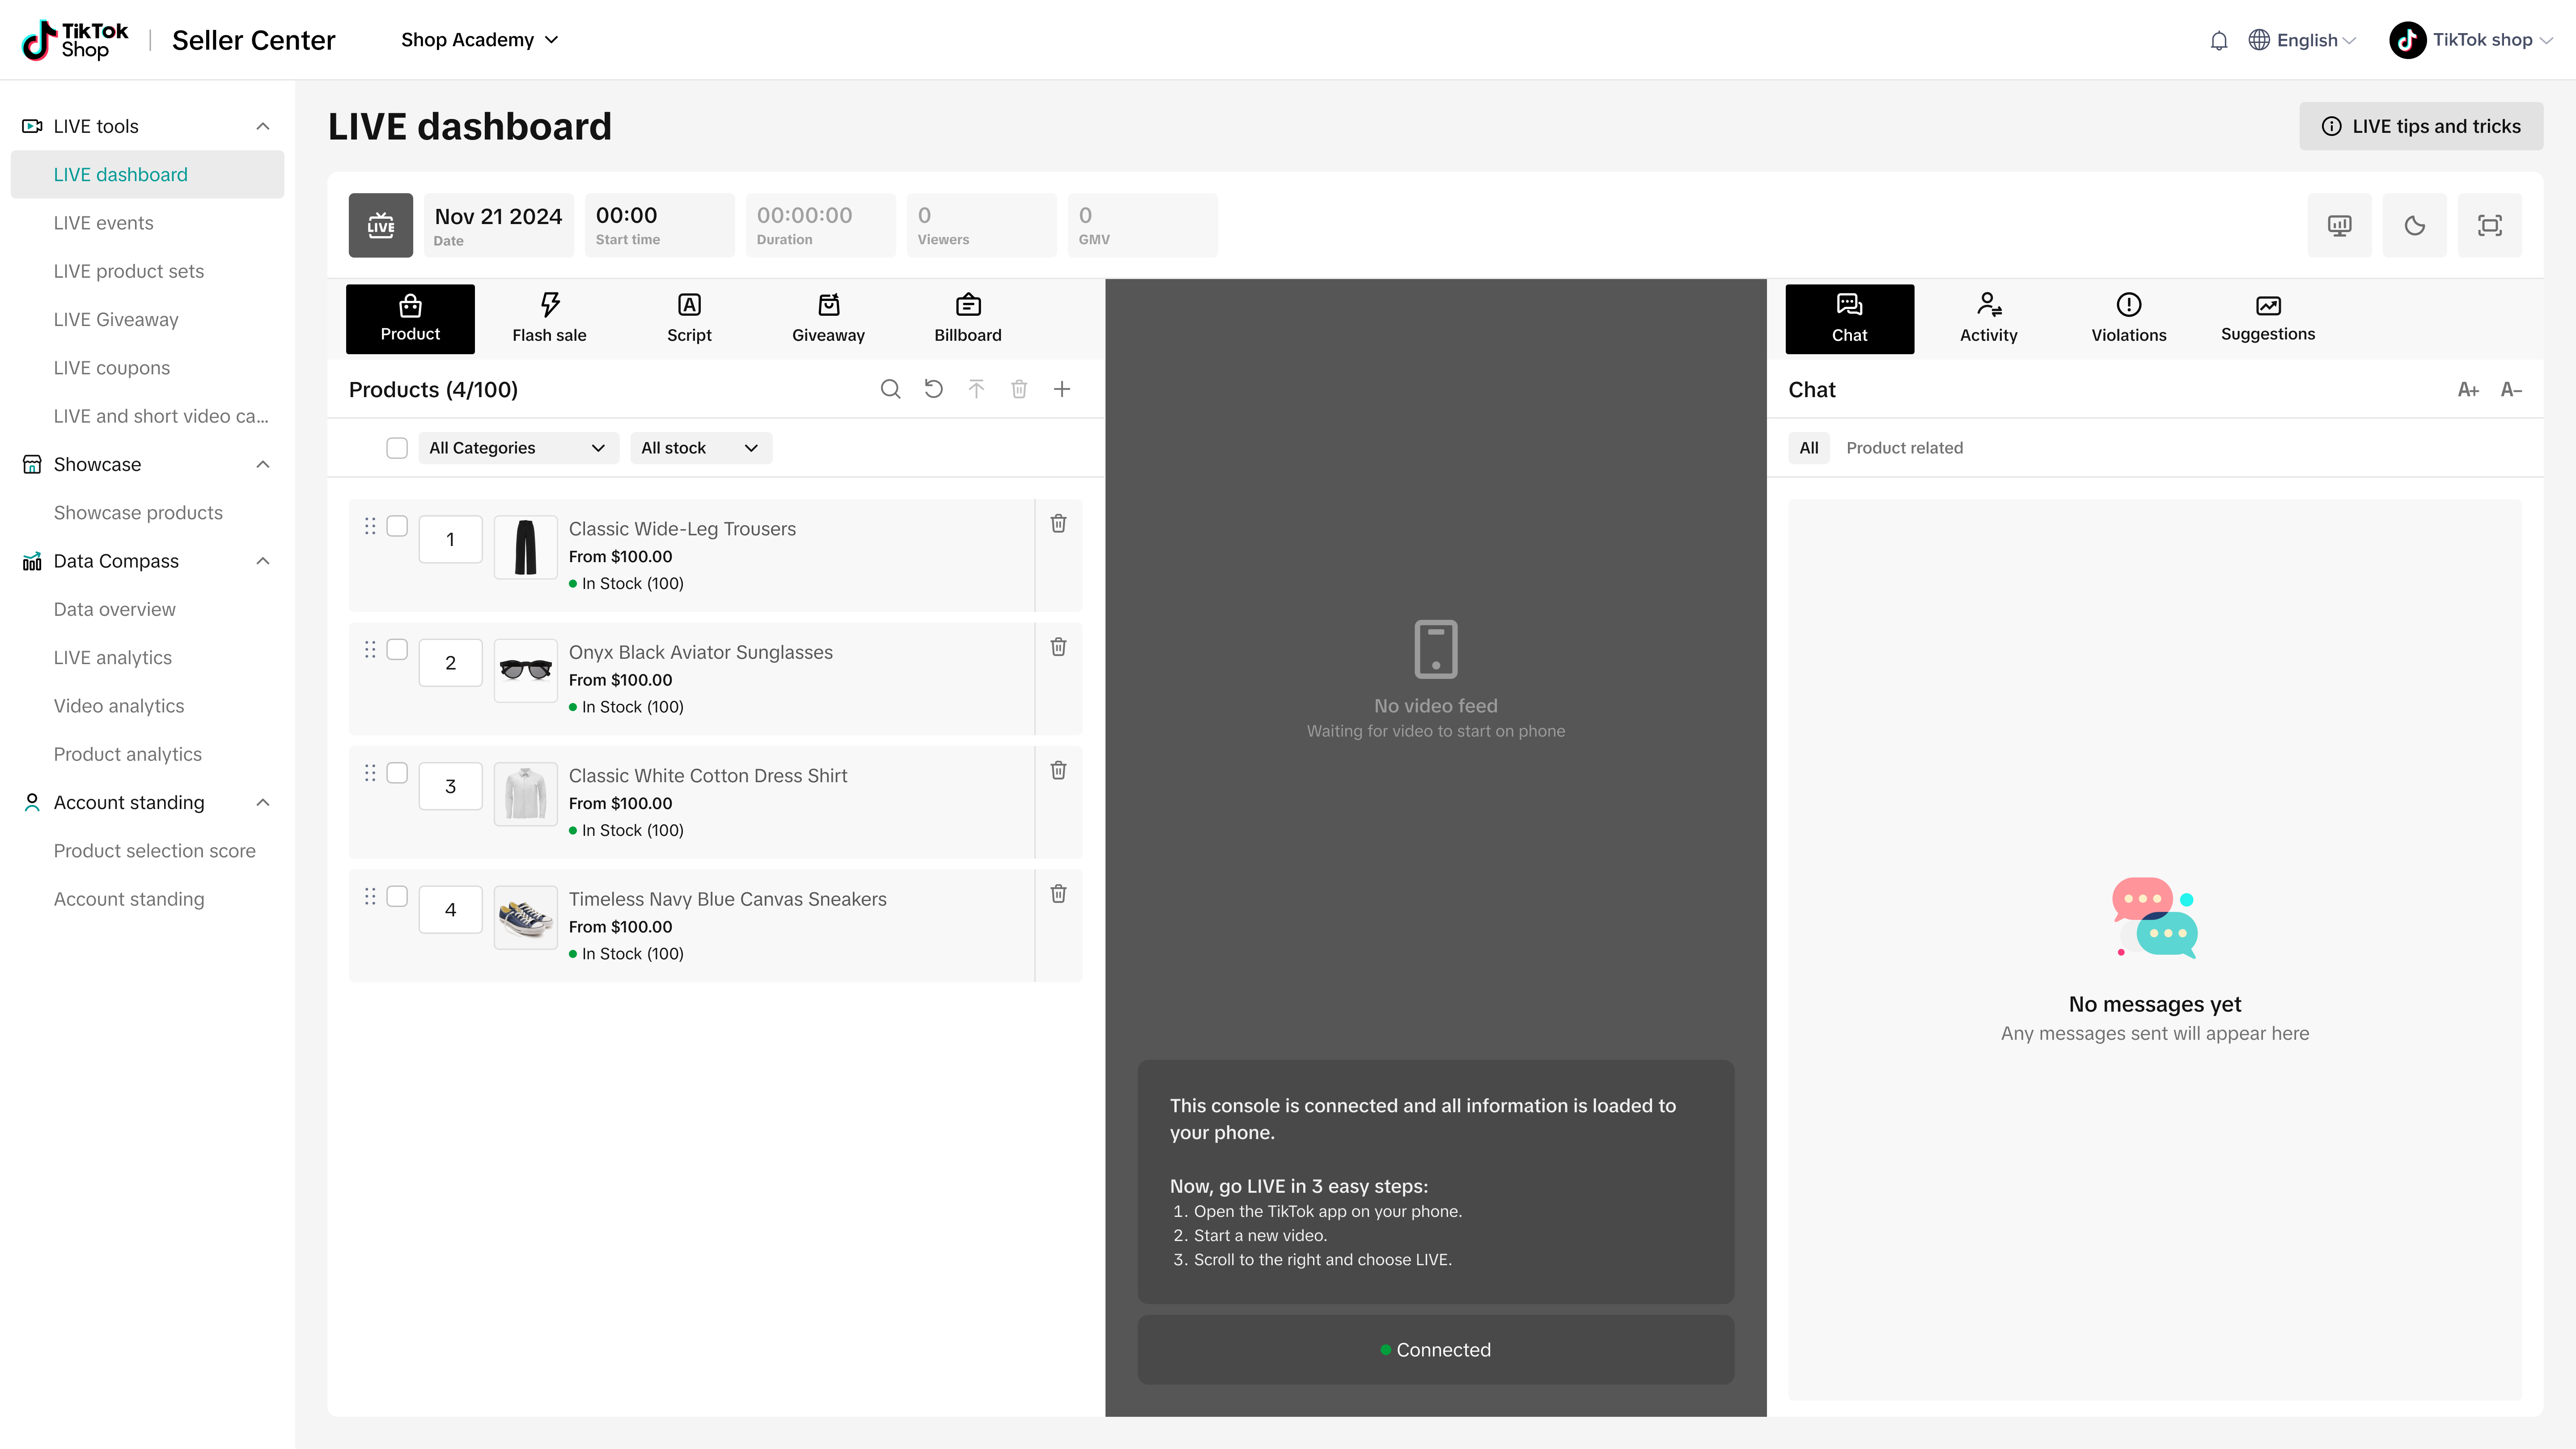
 Note: If you're already running a live from LIVE Manager and you click into your event within 10 minutes of it starting, the center screen will remind you to end your current LIVE in order to begin your LIVE event.
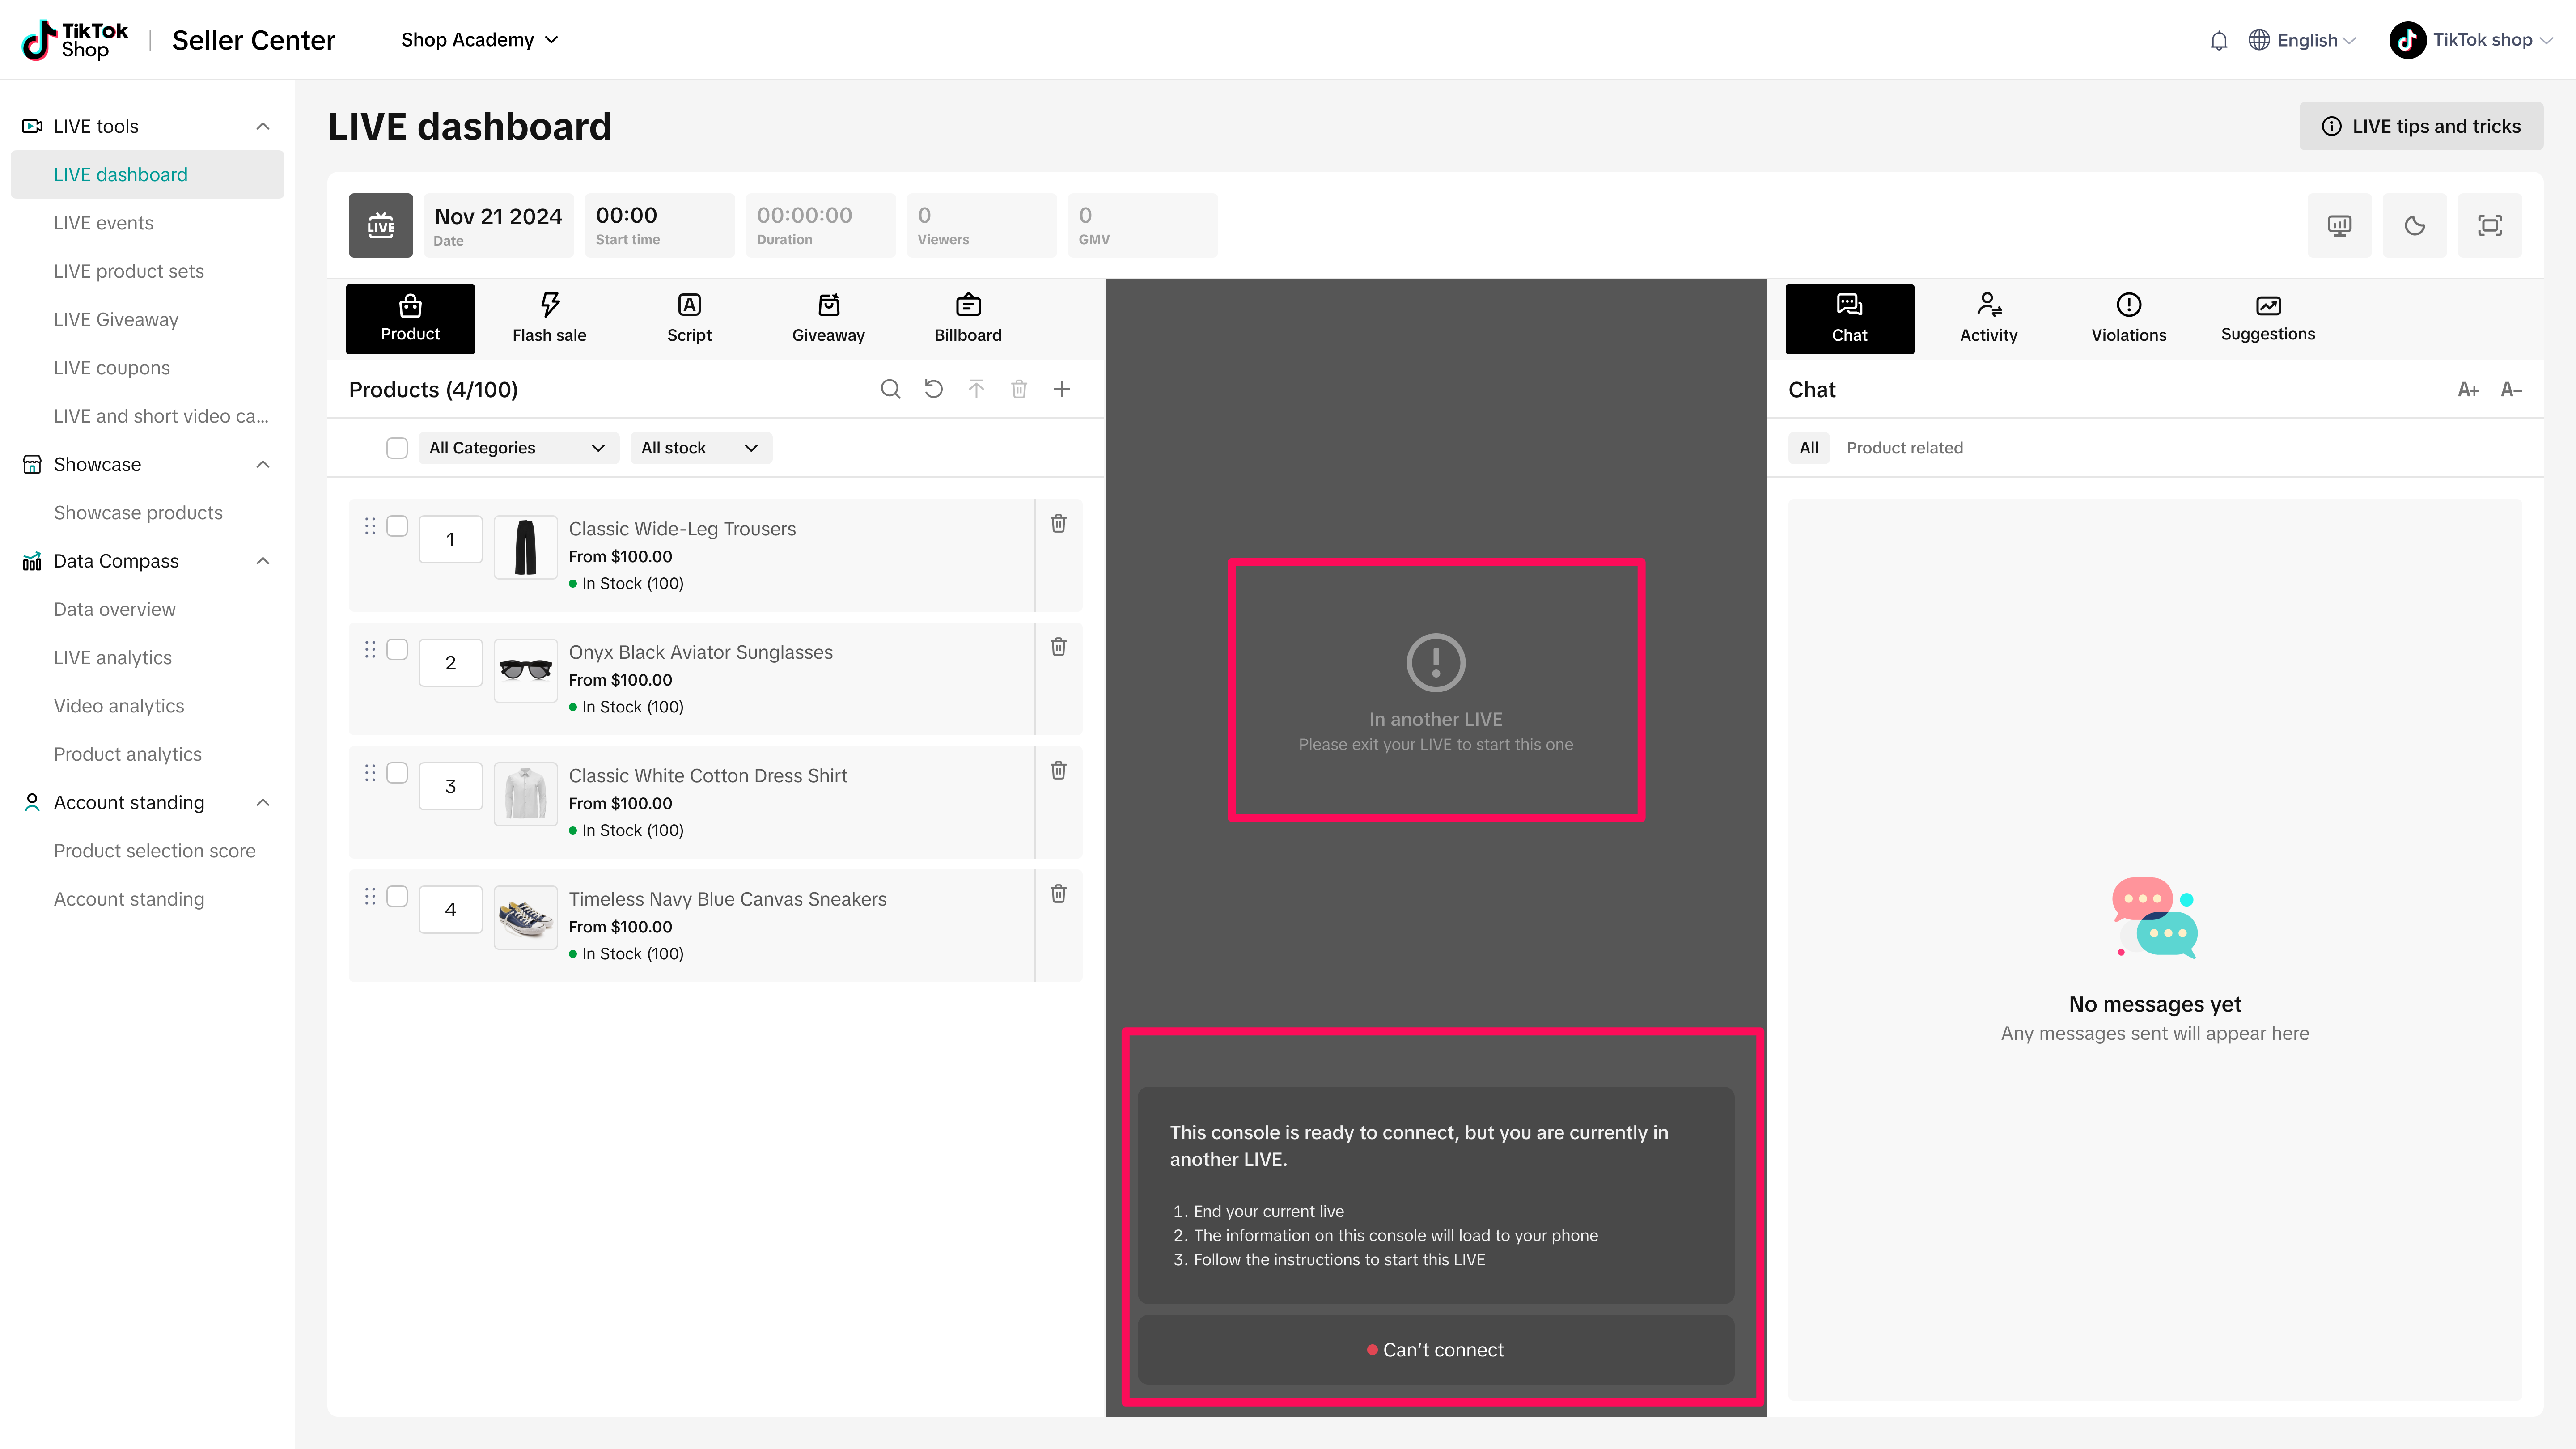
- Click into your event before you're scheduled to start and you'll see a countdown to when your LIVE event starts.
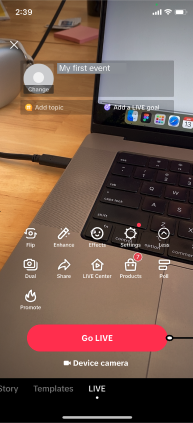
- On mobile, click Go LIVE to begin the session. Alternatively, select Go LIVE directly from desktop to begin streaming with the video and audio sources connected to LIVE Manager
- Your LIVE event will open into a new window, which will be a full screen for easier viewing. Your live stream will sync with the LIVE console, showing you the event's livestream on desktop as well.

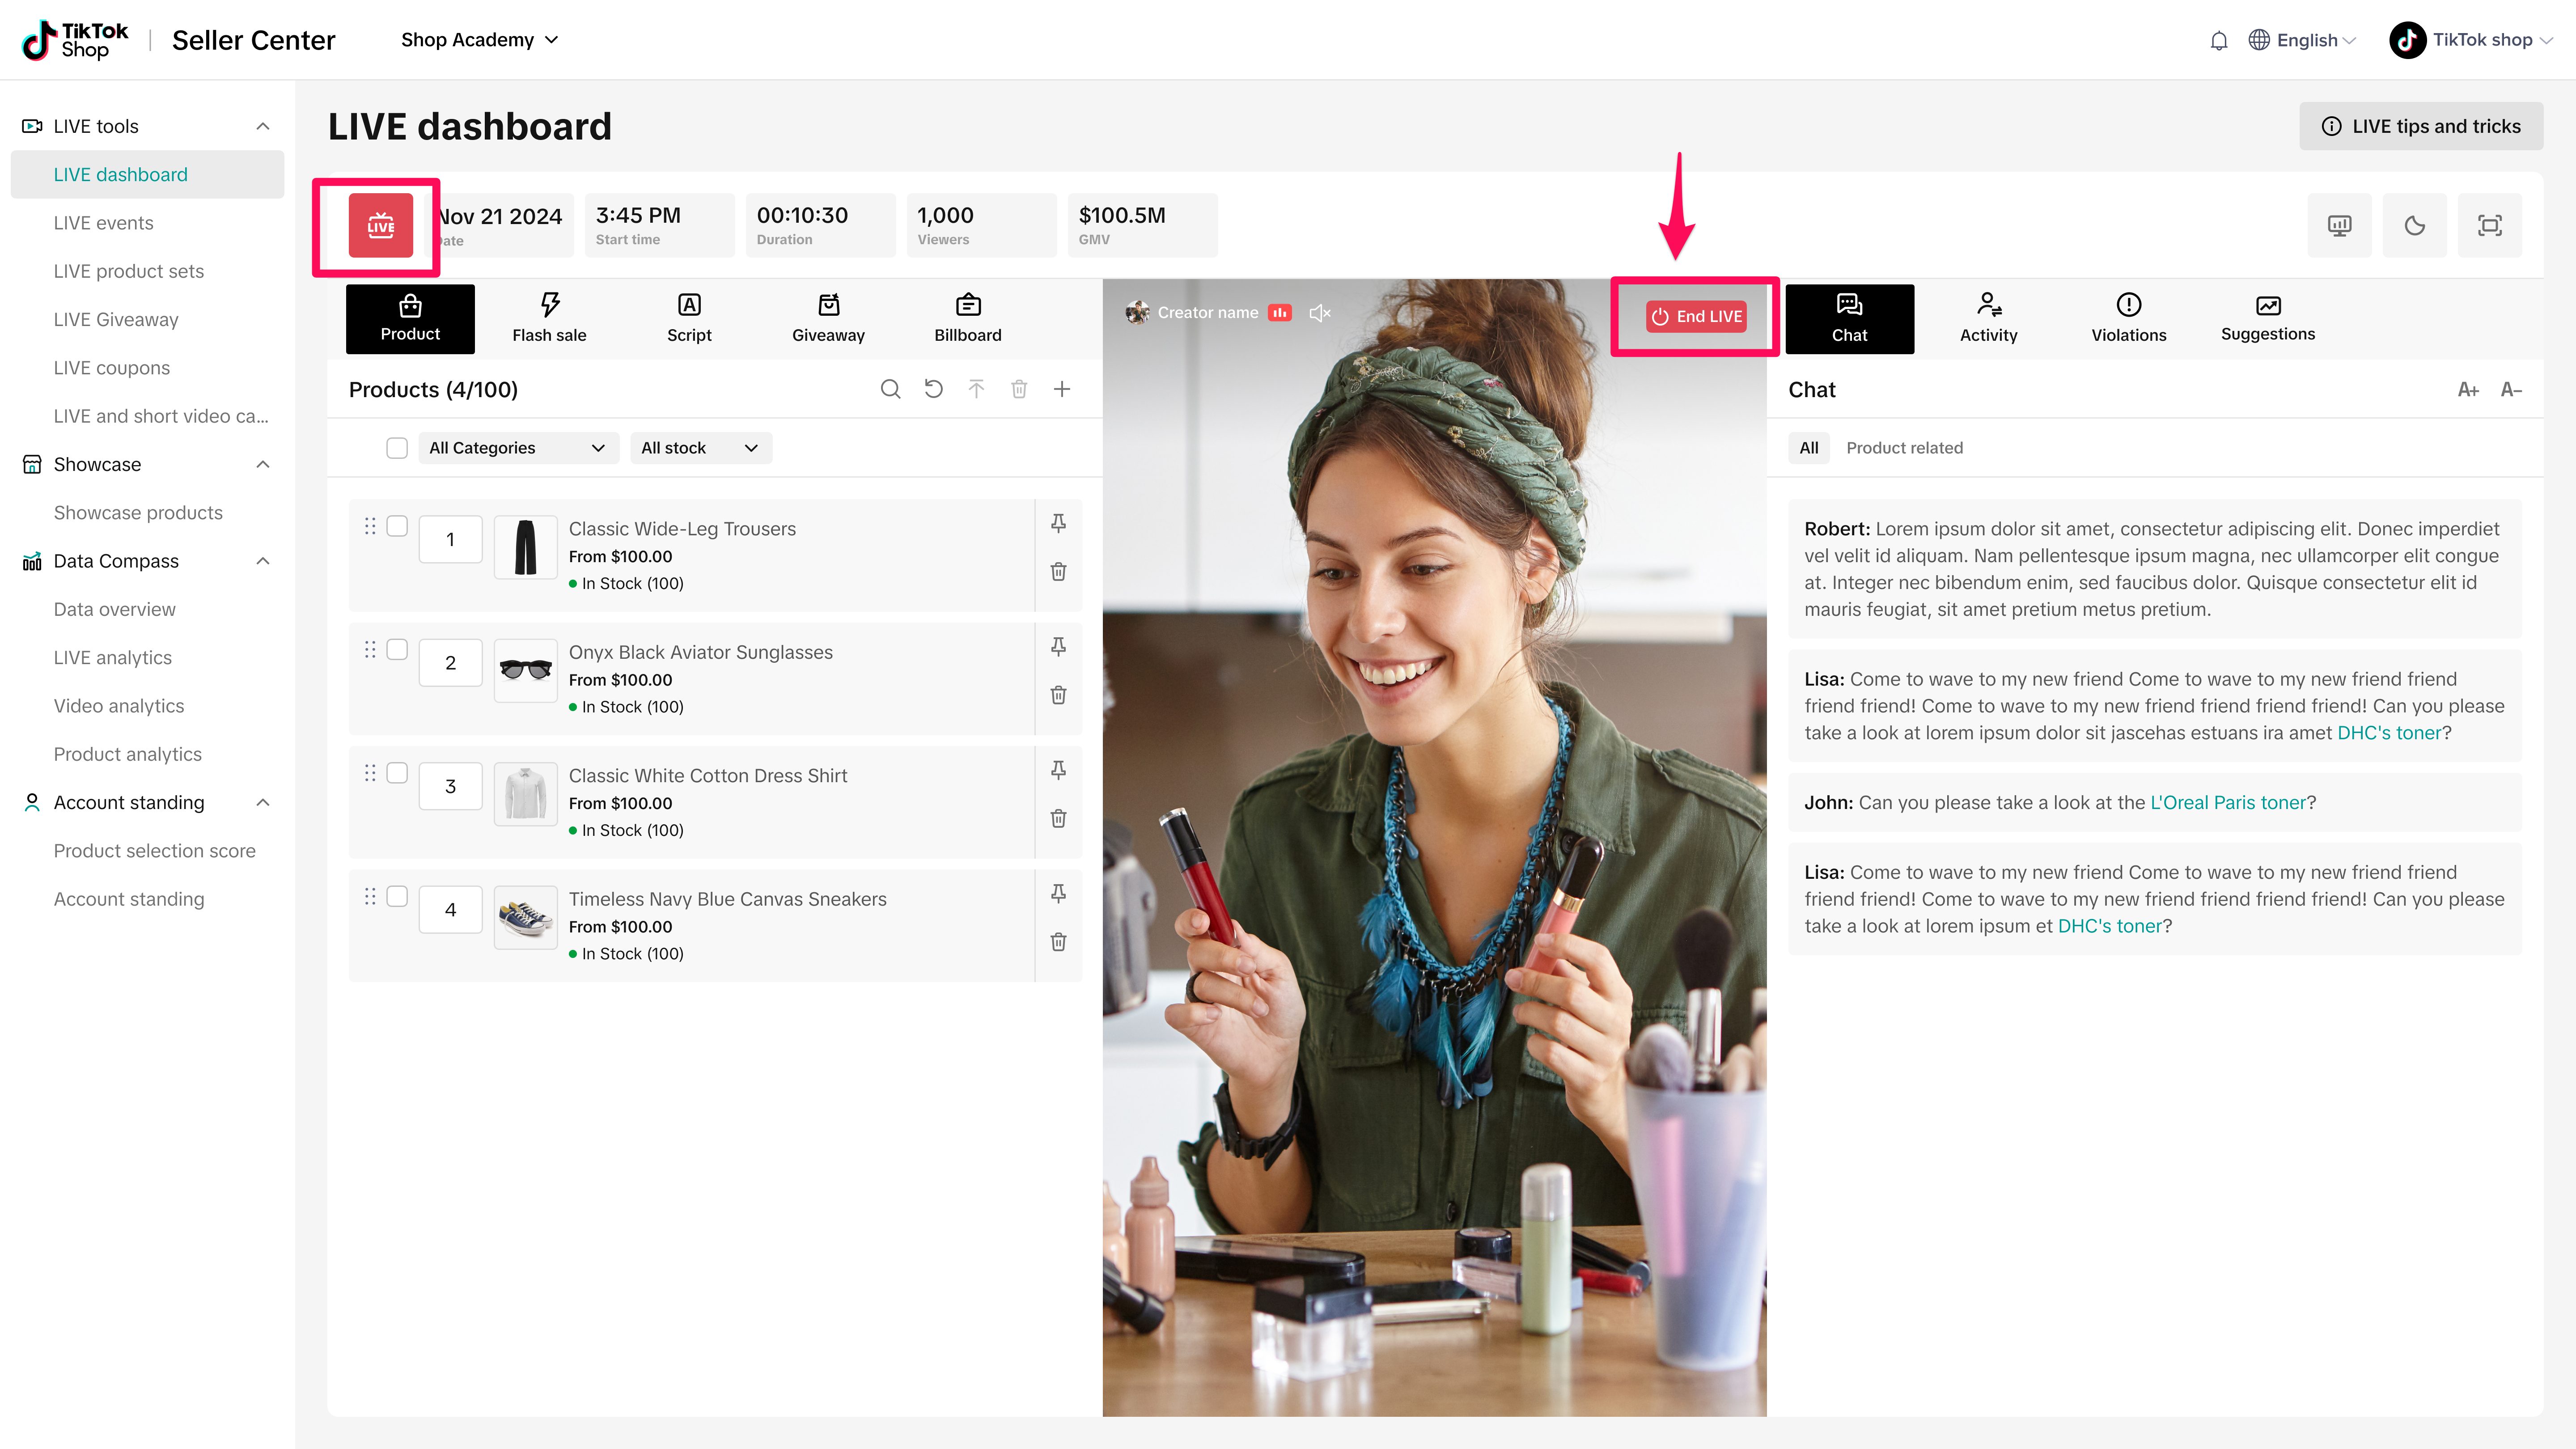
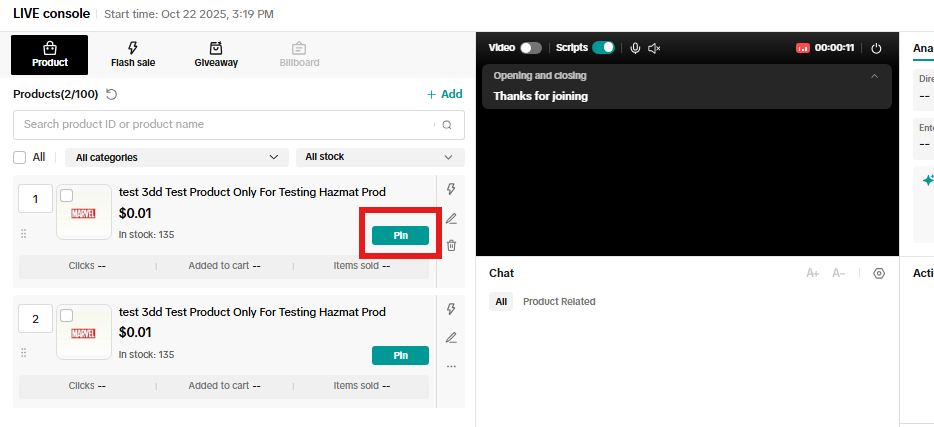
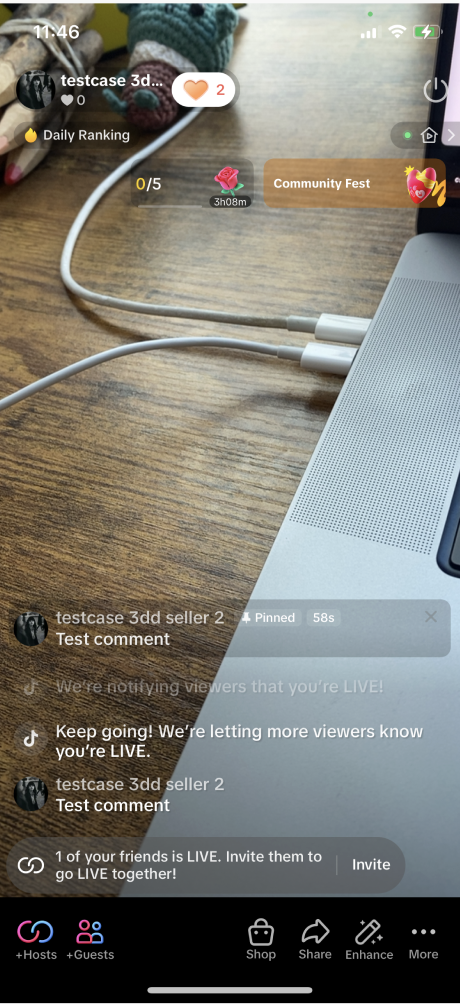
- Once you go LIVE, you will see the Pin button, which allows you to pin the product and make it visible to your viewers.

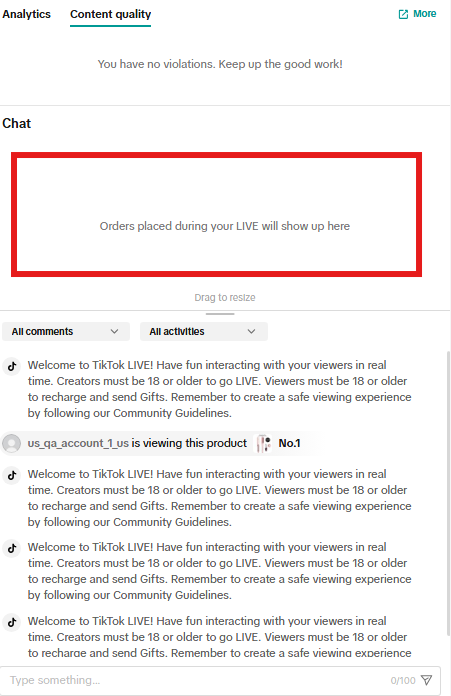
- On the right panel, you can keep track of general comments and product-related comments, as well as order activity and violation information. Note that you can also change the size of the font.

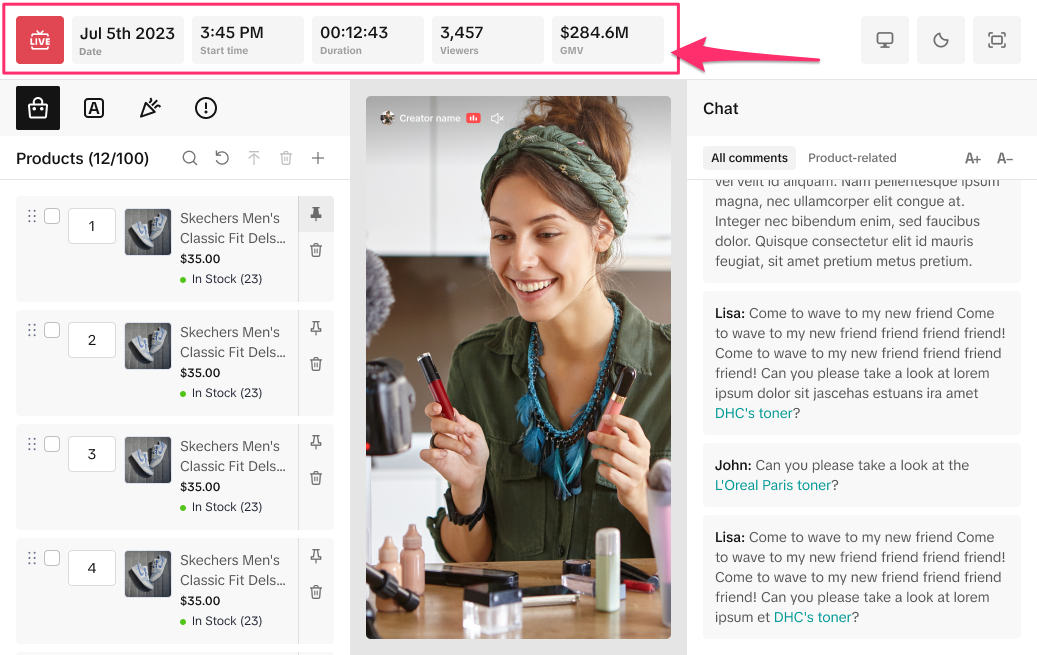
- On the top panel, you can track the date of the livestream, the start time, the duration, the number of viewers, and the GMV generated during the LIVE.
- At the top right of the panel, you can:
- Enter LIVE Board for more detailed real-time analytics
- Switch between light and dark mode.
- Enter full-screen mode, as shown below.

Ending your event
When it's time to finish your event, you can either end your stream on mobile or from desktop. Click End Live on the center screen or tap the power button on mobile.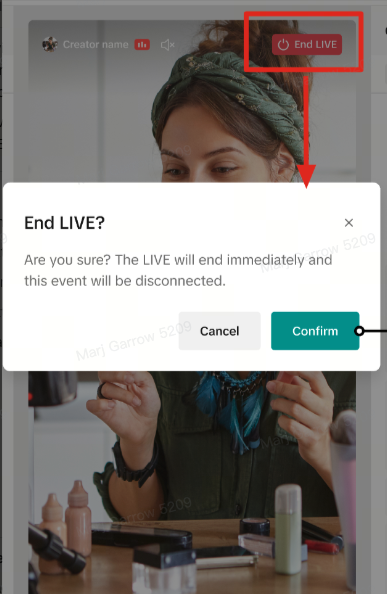
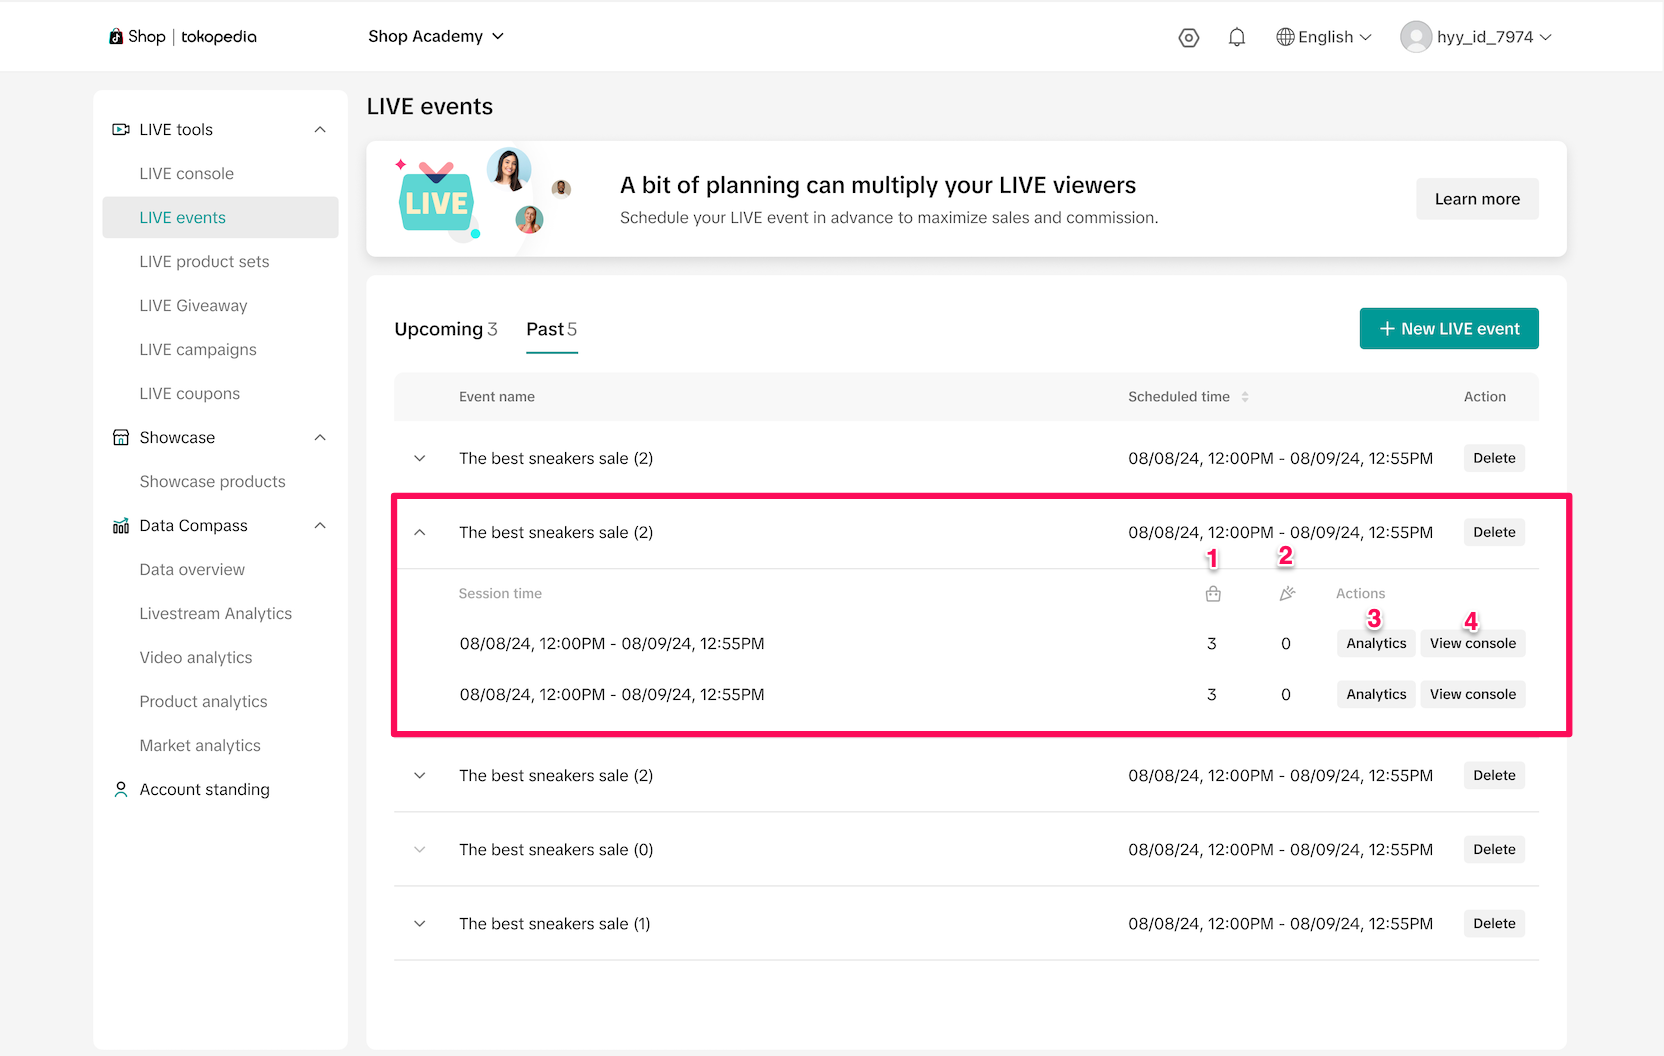
After your event
You can access Past events within the LIVE events tab for a list of all events. If your event had multiple sessions over the course of the event, each session will be broken out beneath the main event. You can view granular details for each session, including:- Number of products featured in the session
- Number of LIVE Giveaways featured in the session
- Analytics: Clicking Analytics will take you to the Livestream Analytics for that session to view detailed performance
- View console: Clicking View console will open up that session's specific console, where you can view past giveaways and winners, and replay or download the session and session comments. Note that you can't make any edits to a past session or its settings.
Analyze performance
After your LIVE is complete, navigate to Data Compass > Livestream Analytics. Click on Details of the livestream that you want to recap. In the detail page, click on View Dashboard to be directed to the LIVE Recap dashboard. For more detailed information, check out this dedicated feature guide.
FAQs
| Questions | Answers |
| No, you can create more LIVE Giveaways during the livestream as well. |
| No, the script is only meant to help you, but you don't need to stick to it. |
| Yes - you can access LIVE Manager from tablet devices via your tablet's browser at https://business.tiktokshop.com/us/creator |
| No - unlike LIVE Studio, stream keys are not necessary for using OBS Virtual Camera as the video input source |
| If you are using virtual camera software as your video source, we recommend the following settings: Output Settings: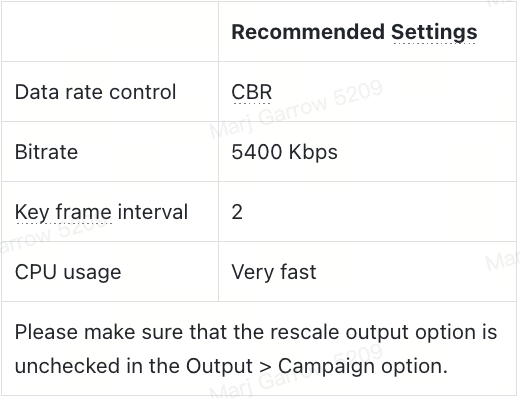 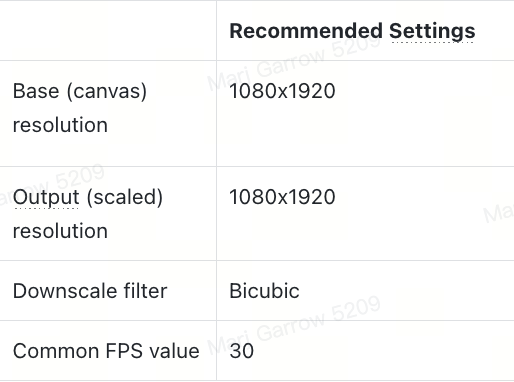
|