Overview
This guide covers how agencies can use Partner Campaigns to create campaigns between Sellers and Creators. With this tool, Sellers can register and submit products to an agency's campaign, and determine the commission they would like to offer to the agency. Then the agency chooses the commission they would like to set for the managed or unmanaged Creators they've selected for the campaign. Agencies share product links with the Creators so they can add the products to their showcases and promote them. The commission splitting is then completed online via the tool.
Partner Campaigns offers several benefits:
- For Agencies: A new revenue stream that allows agencies to collect commission from Sellers by setting up affiliate campaigns on their behalf.
- For Sellers: A way to outsource the creation of campaigns and selection of Creators to agencies. Sellers can apply to campaigns in the Partner Campaigns tab, described in more detail in the Seller experience section of this article.
- For Creators: More opportunities to earn affiliate commissions from product lists curated by the agencies. Participating Creators do not have to be managed by the agency.
Recent Updates as of February 2024:- Ability to edit Partner Campaign details
- Easier ways to create Product Lists and set up commission rates with creators
- Ability to add more products to an existing Product List
- Ability to duplicate Product Lists
- Ability to delete Product Lists
- Ability to search for specific Product Lists
- Ability to bookmark products and filter for bookmarked products
- More performance data, including sample shipping status and viewing content made with samples
Onboarding Requirements
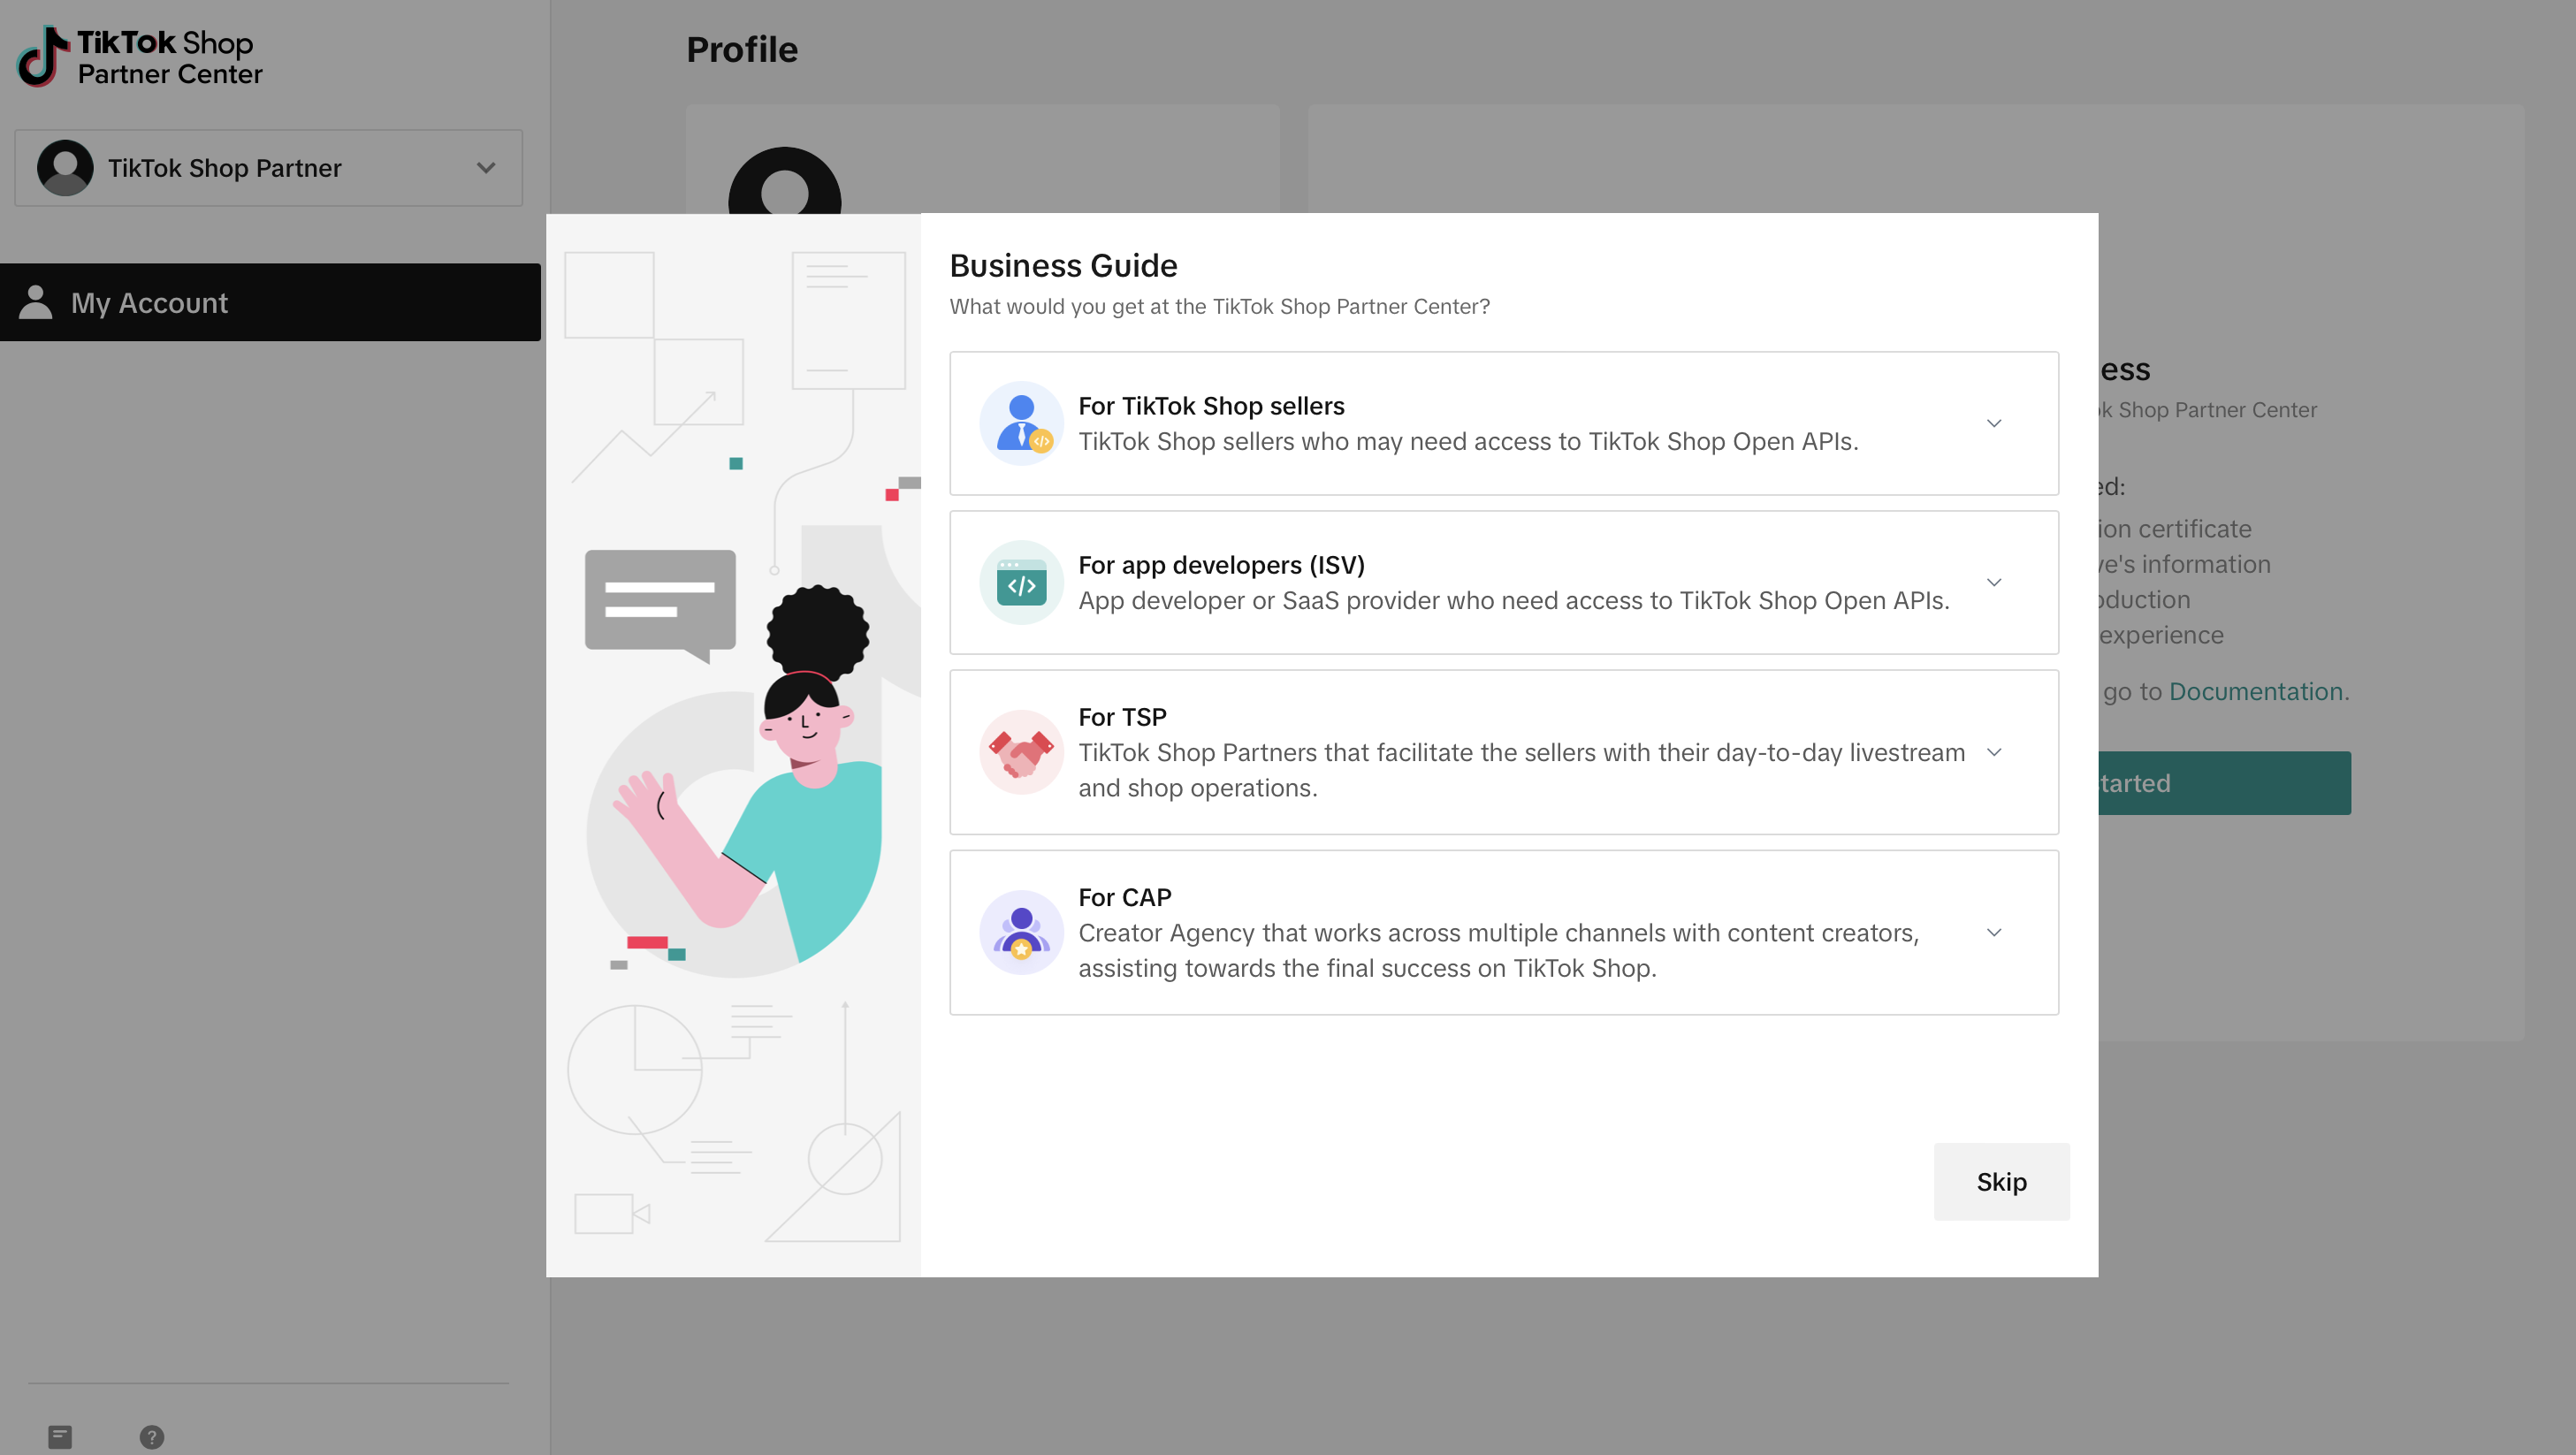
Step 1: If you already have a TikTok Shop Partner Center account, skip to step 2. If this is your first time signing up for TikTok Shop Partner Center, press
Skip in the Business Guide Page. Then, select
Content Management as your Business category.
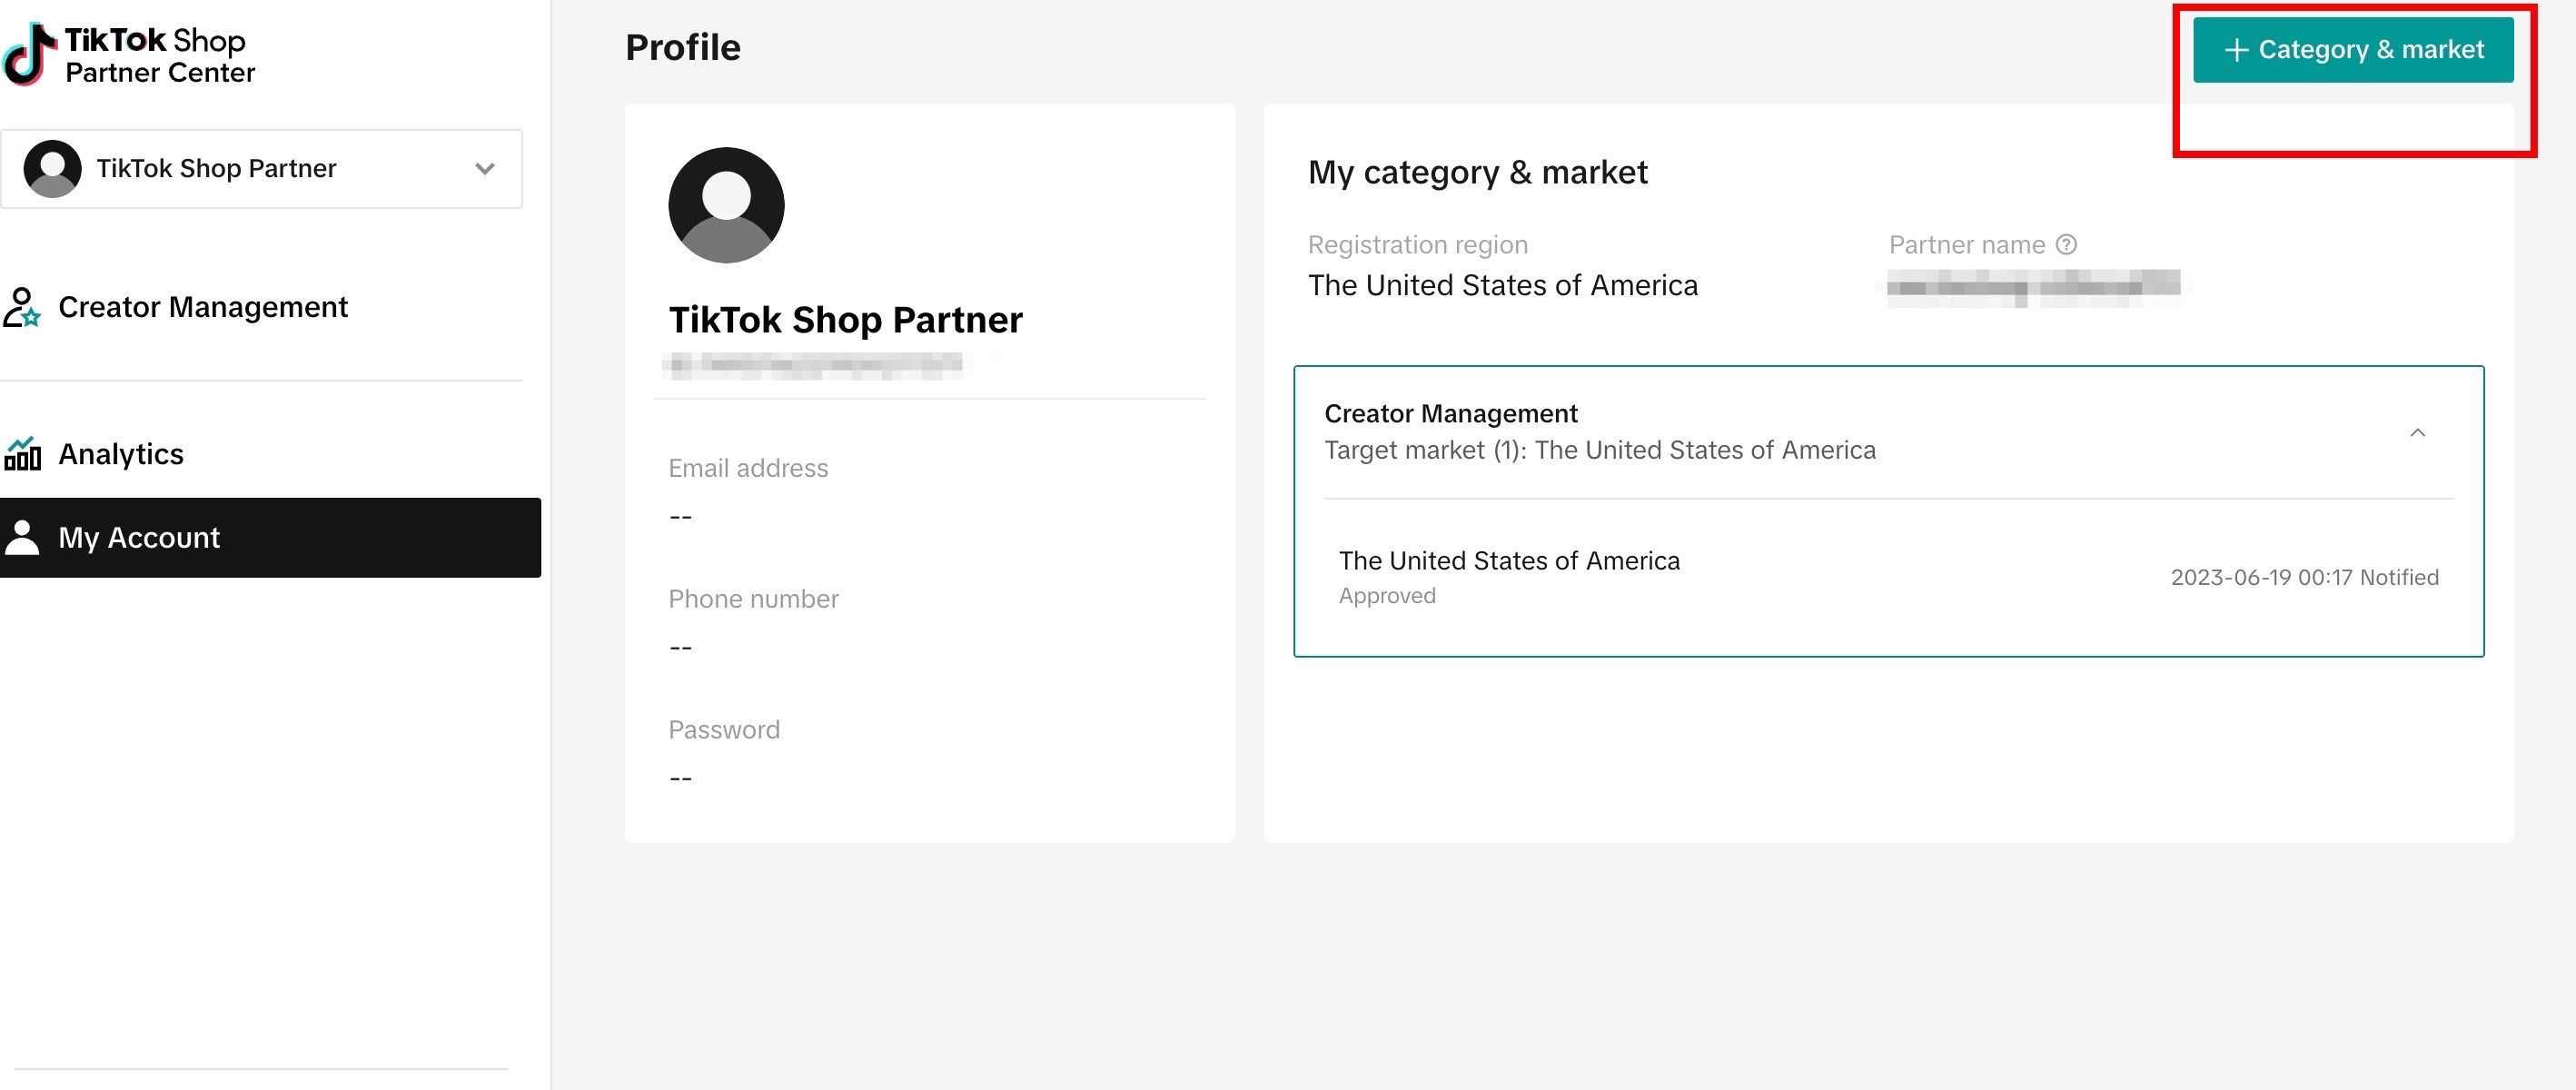
Step 2: If you already have a TikTok Shop Partner Center account, then navigate to
My account and press
+ Category & market.
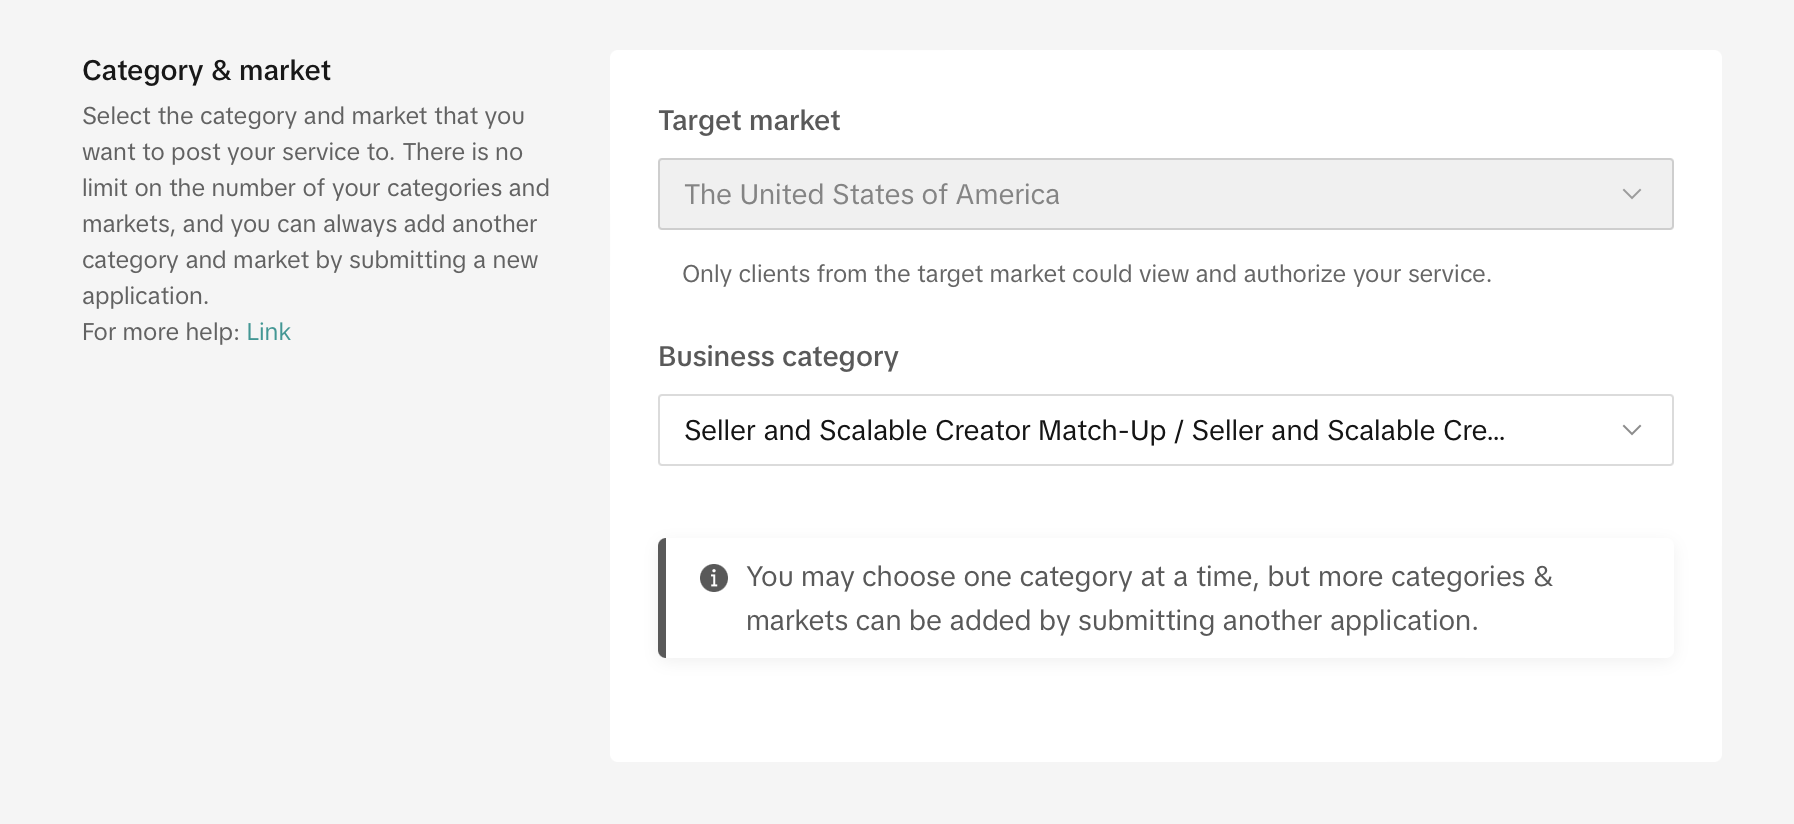
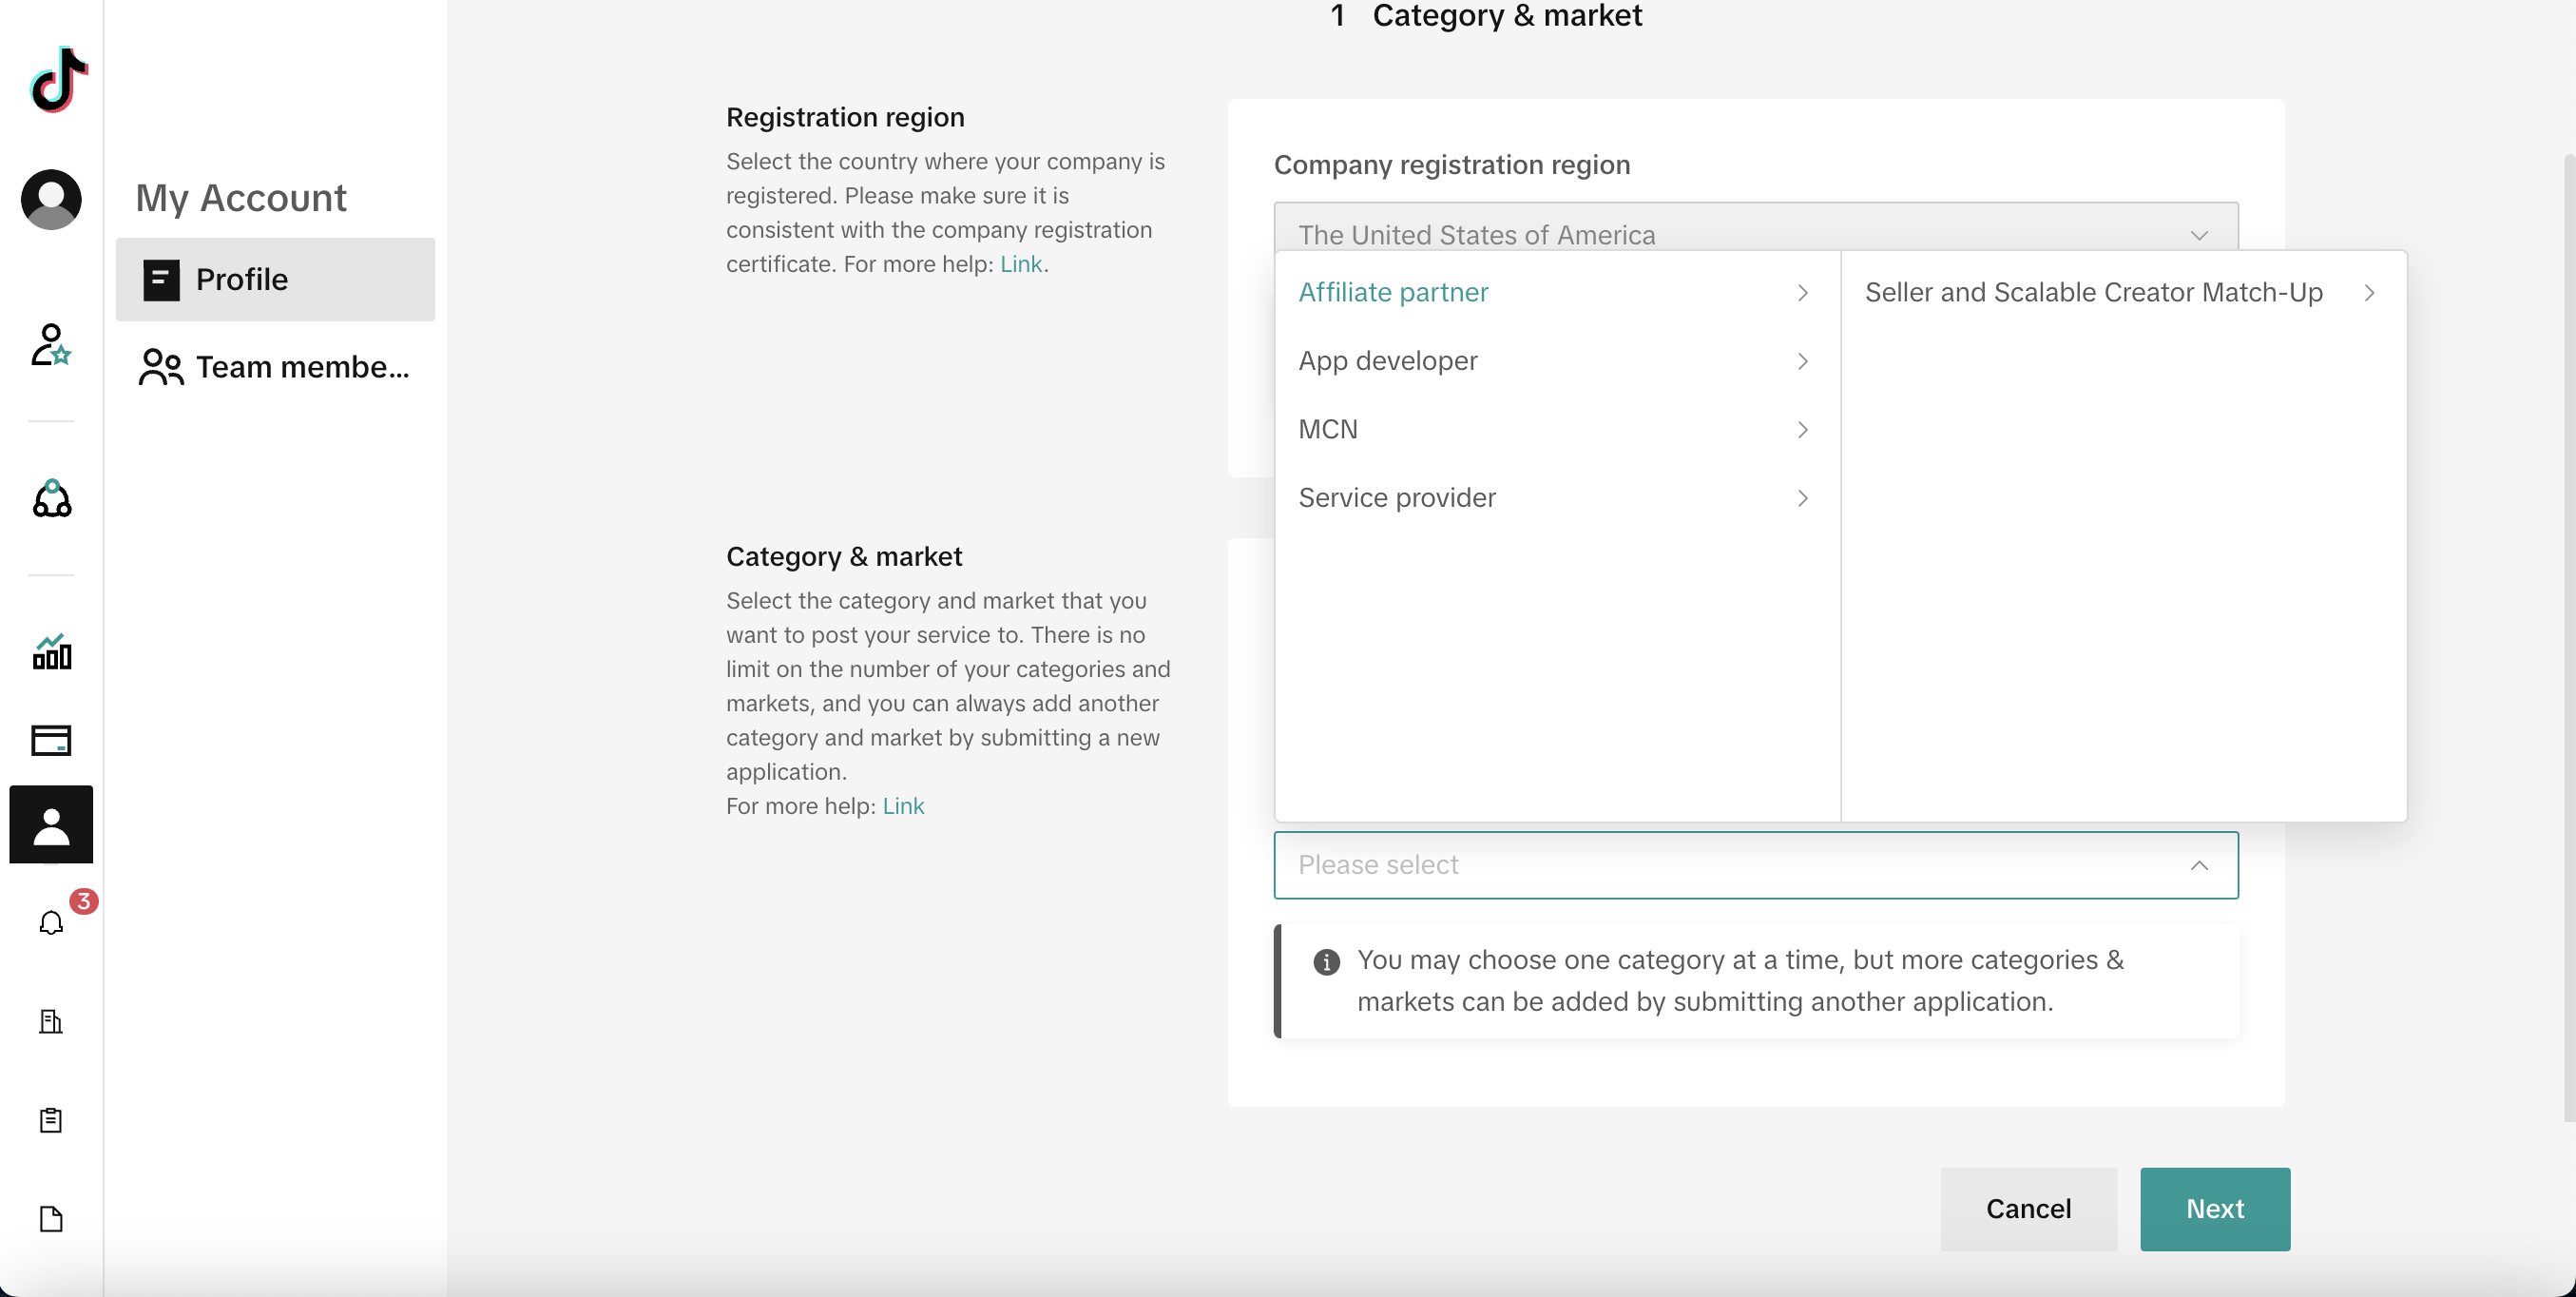
Step 3: Select
Business category and then select
Affiliate partner --> Seller and Scalable Creator Match-Up.
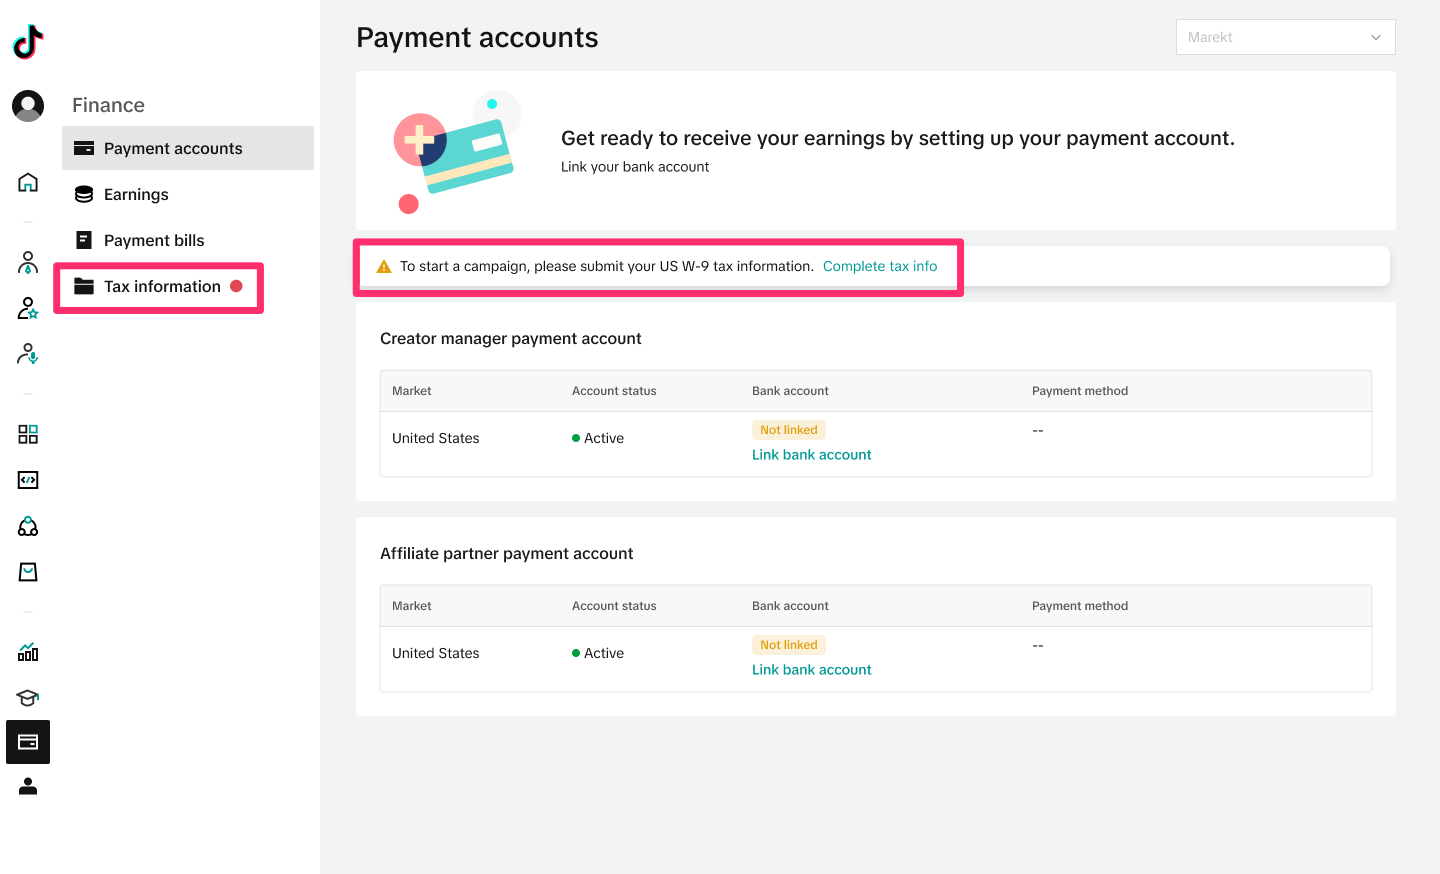
Step 4: In TTSPC, navigate to the
Finance section, and then to
Payment accounts, where you will be prompted to submit your US W-9 tax information. This can also be accessed via the
Tax information tab.
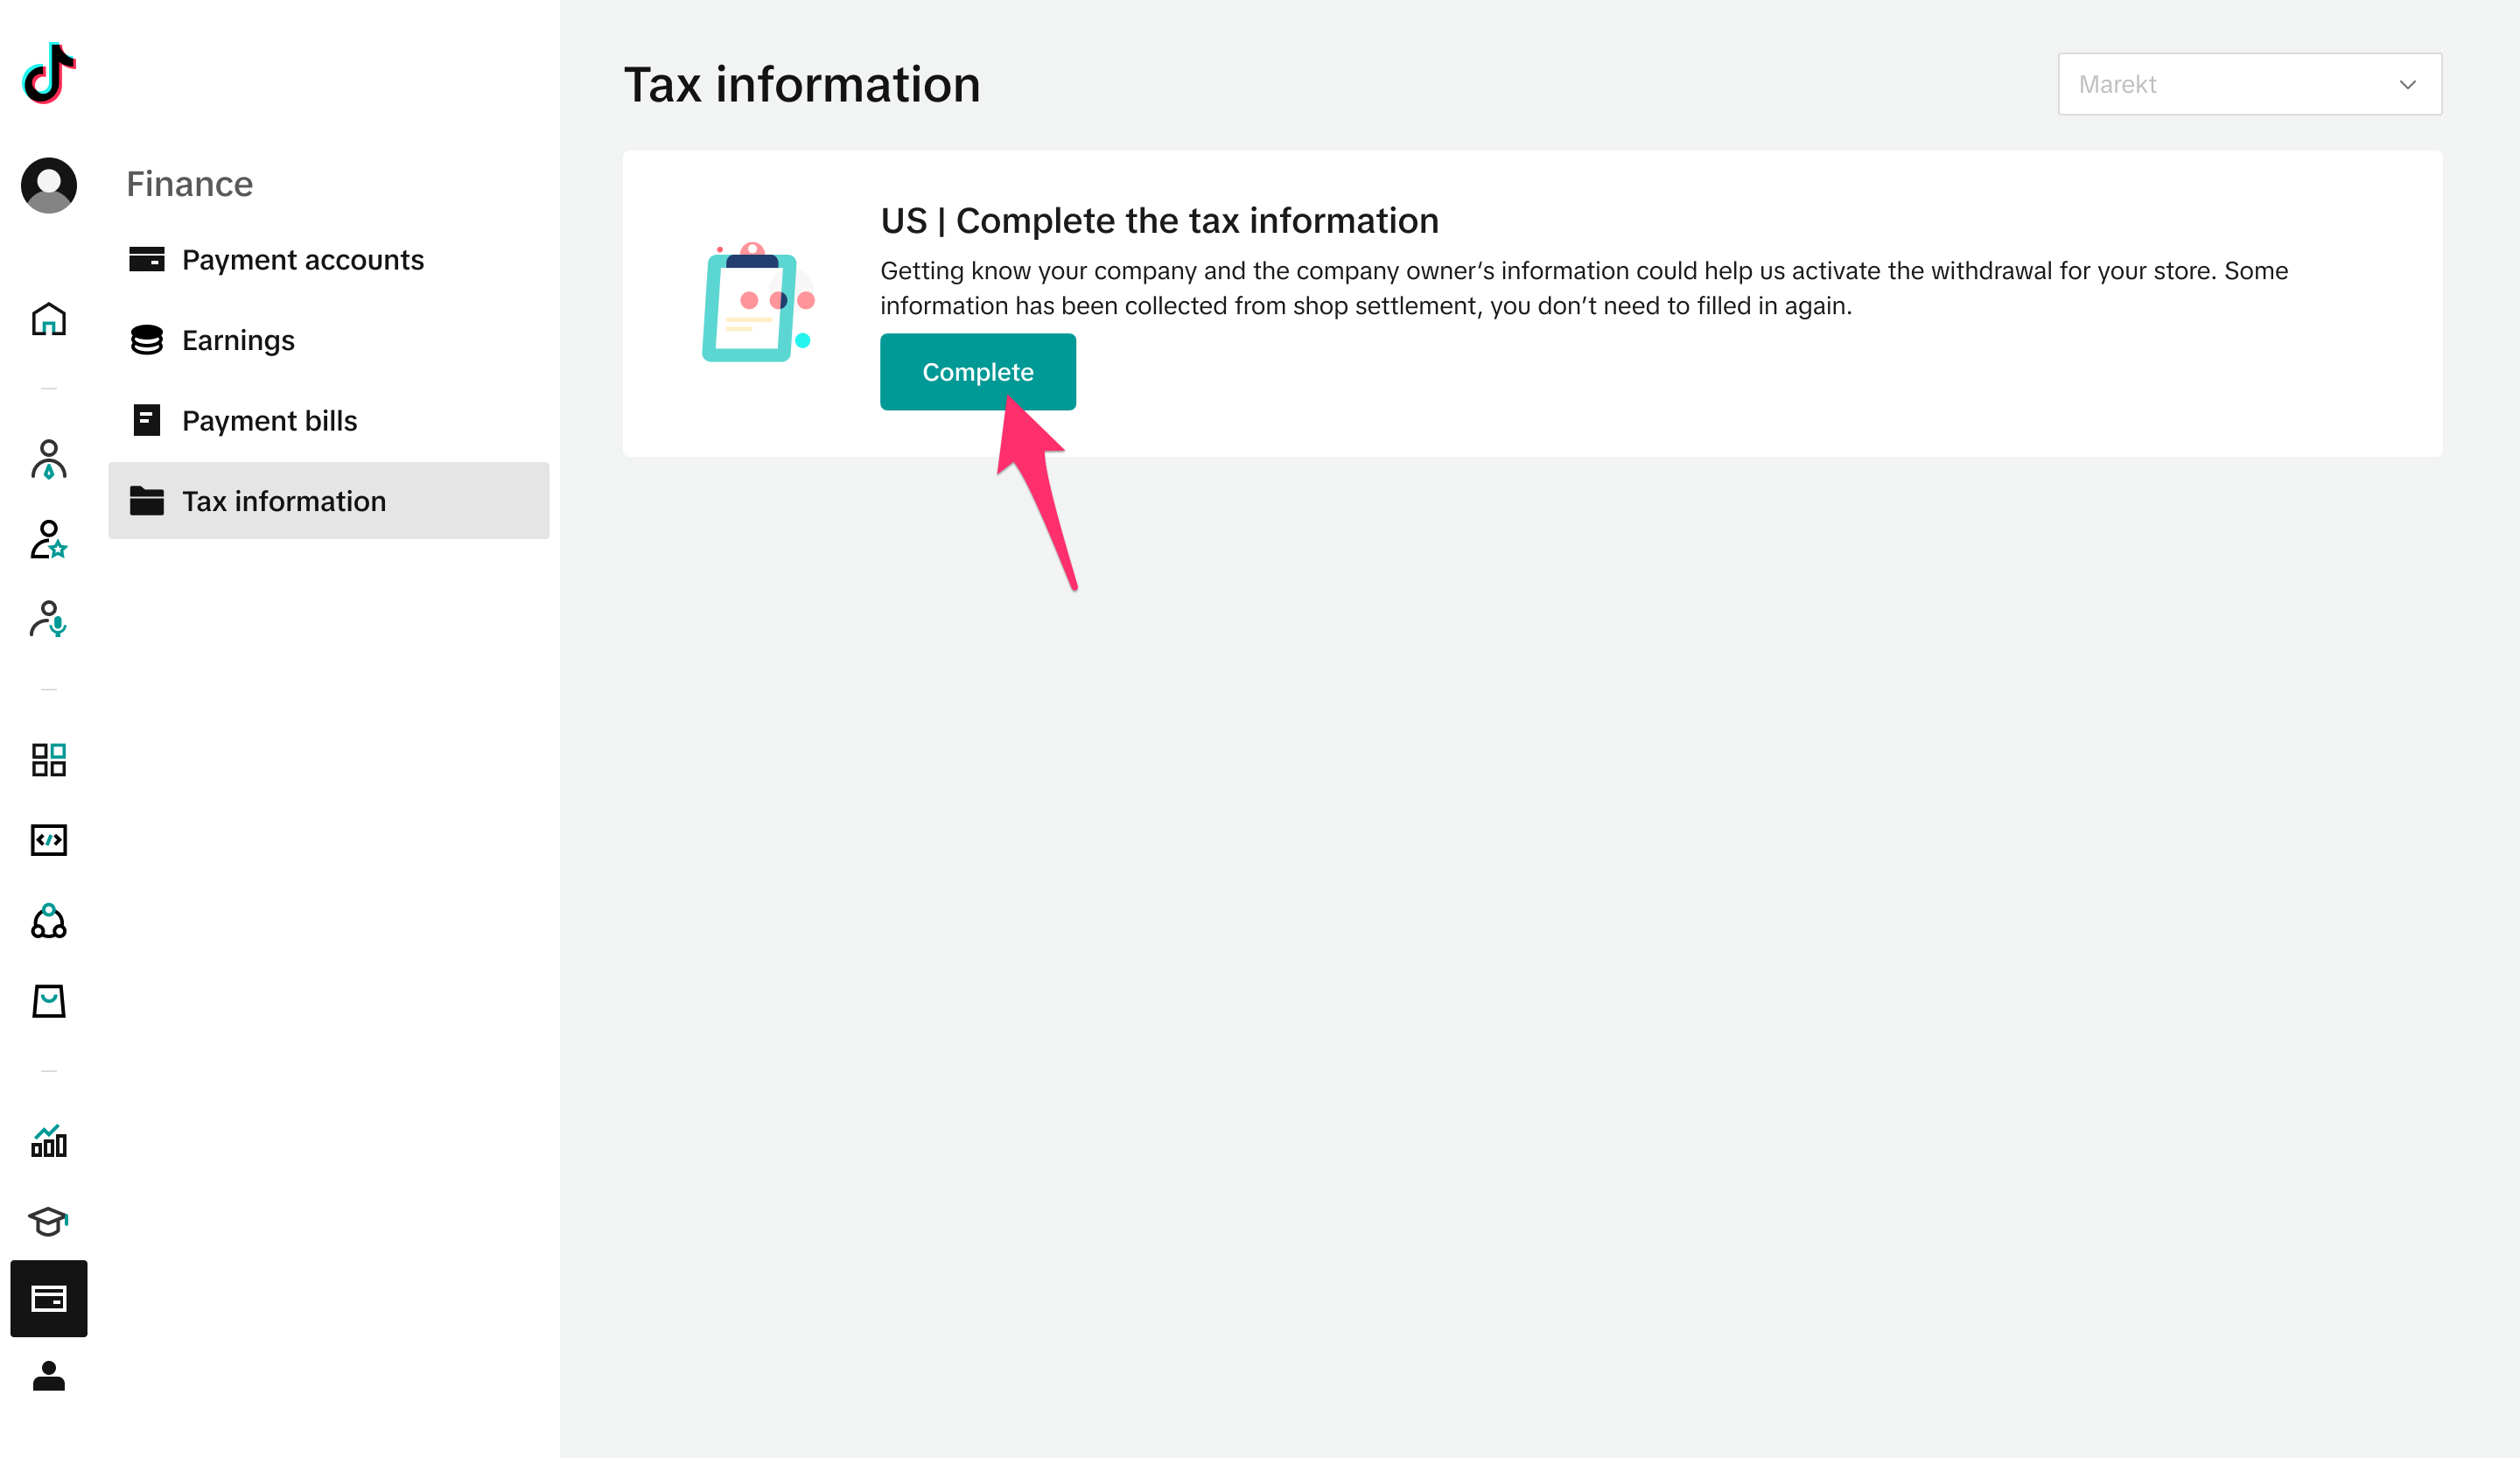
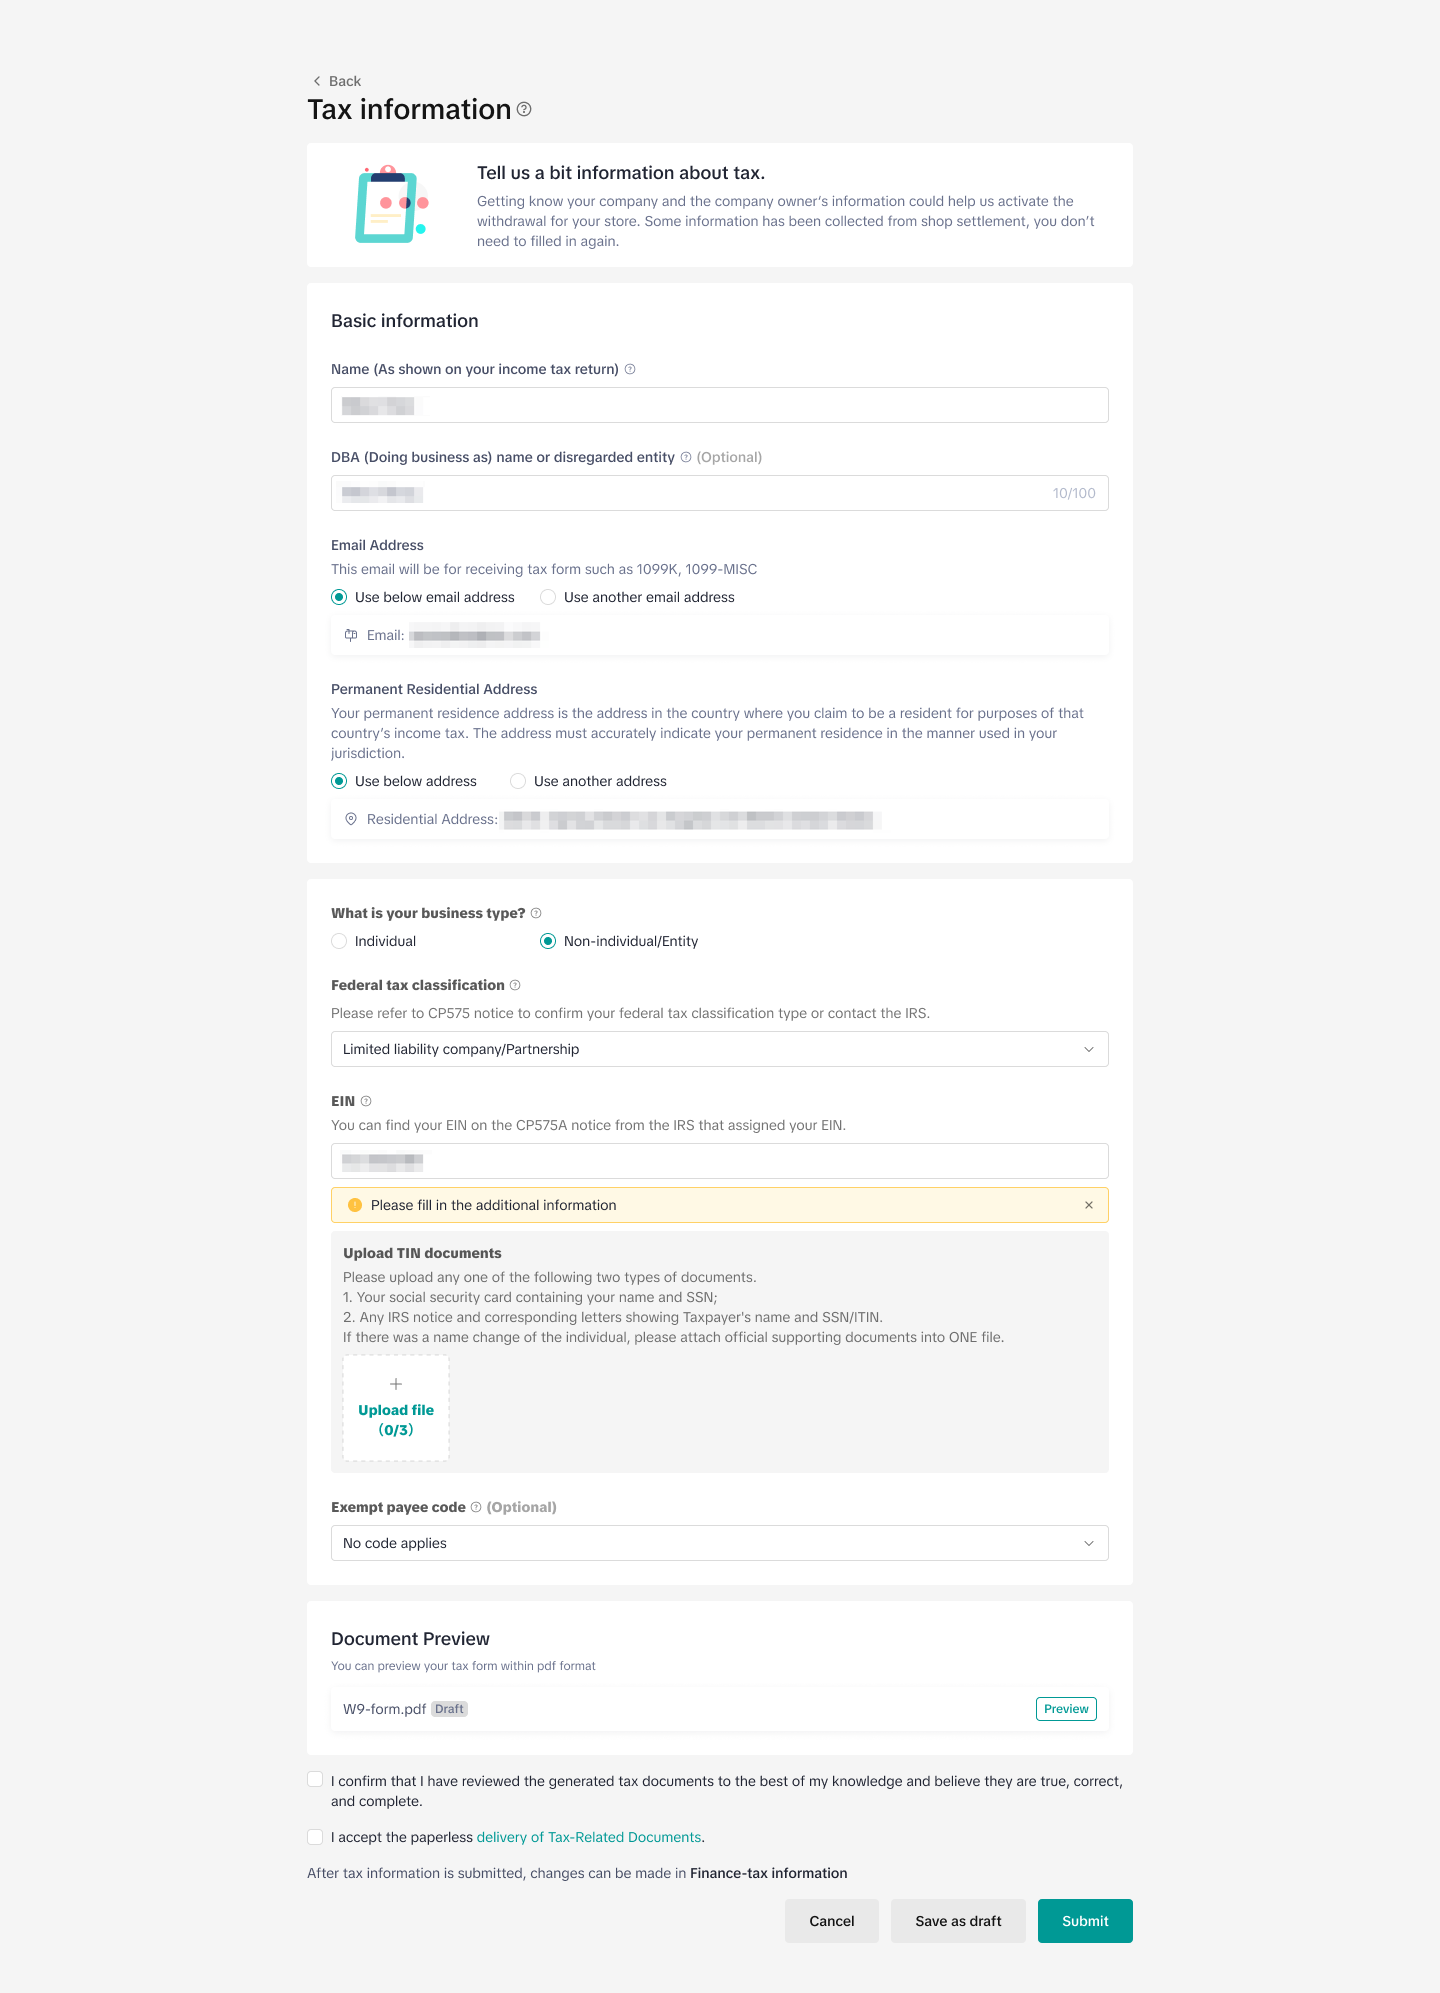
Step 5: Complete the W-9 information, providing all the necessary information, such as name, contact information, EIN, and supporting documentation. At the bottom of the page, you can preview the completed W-9.
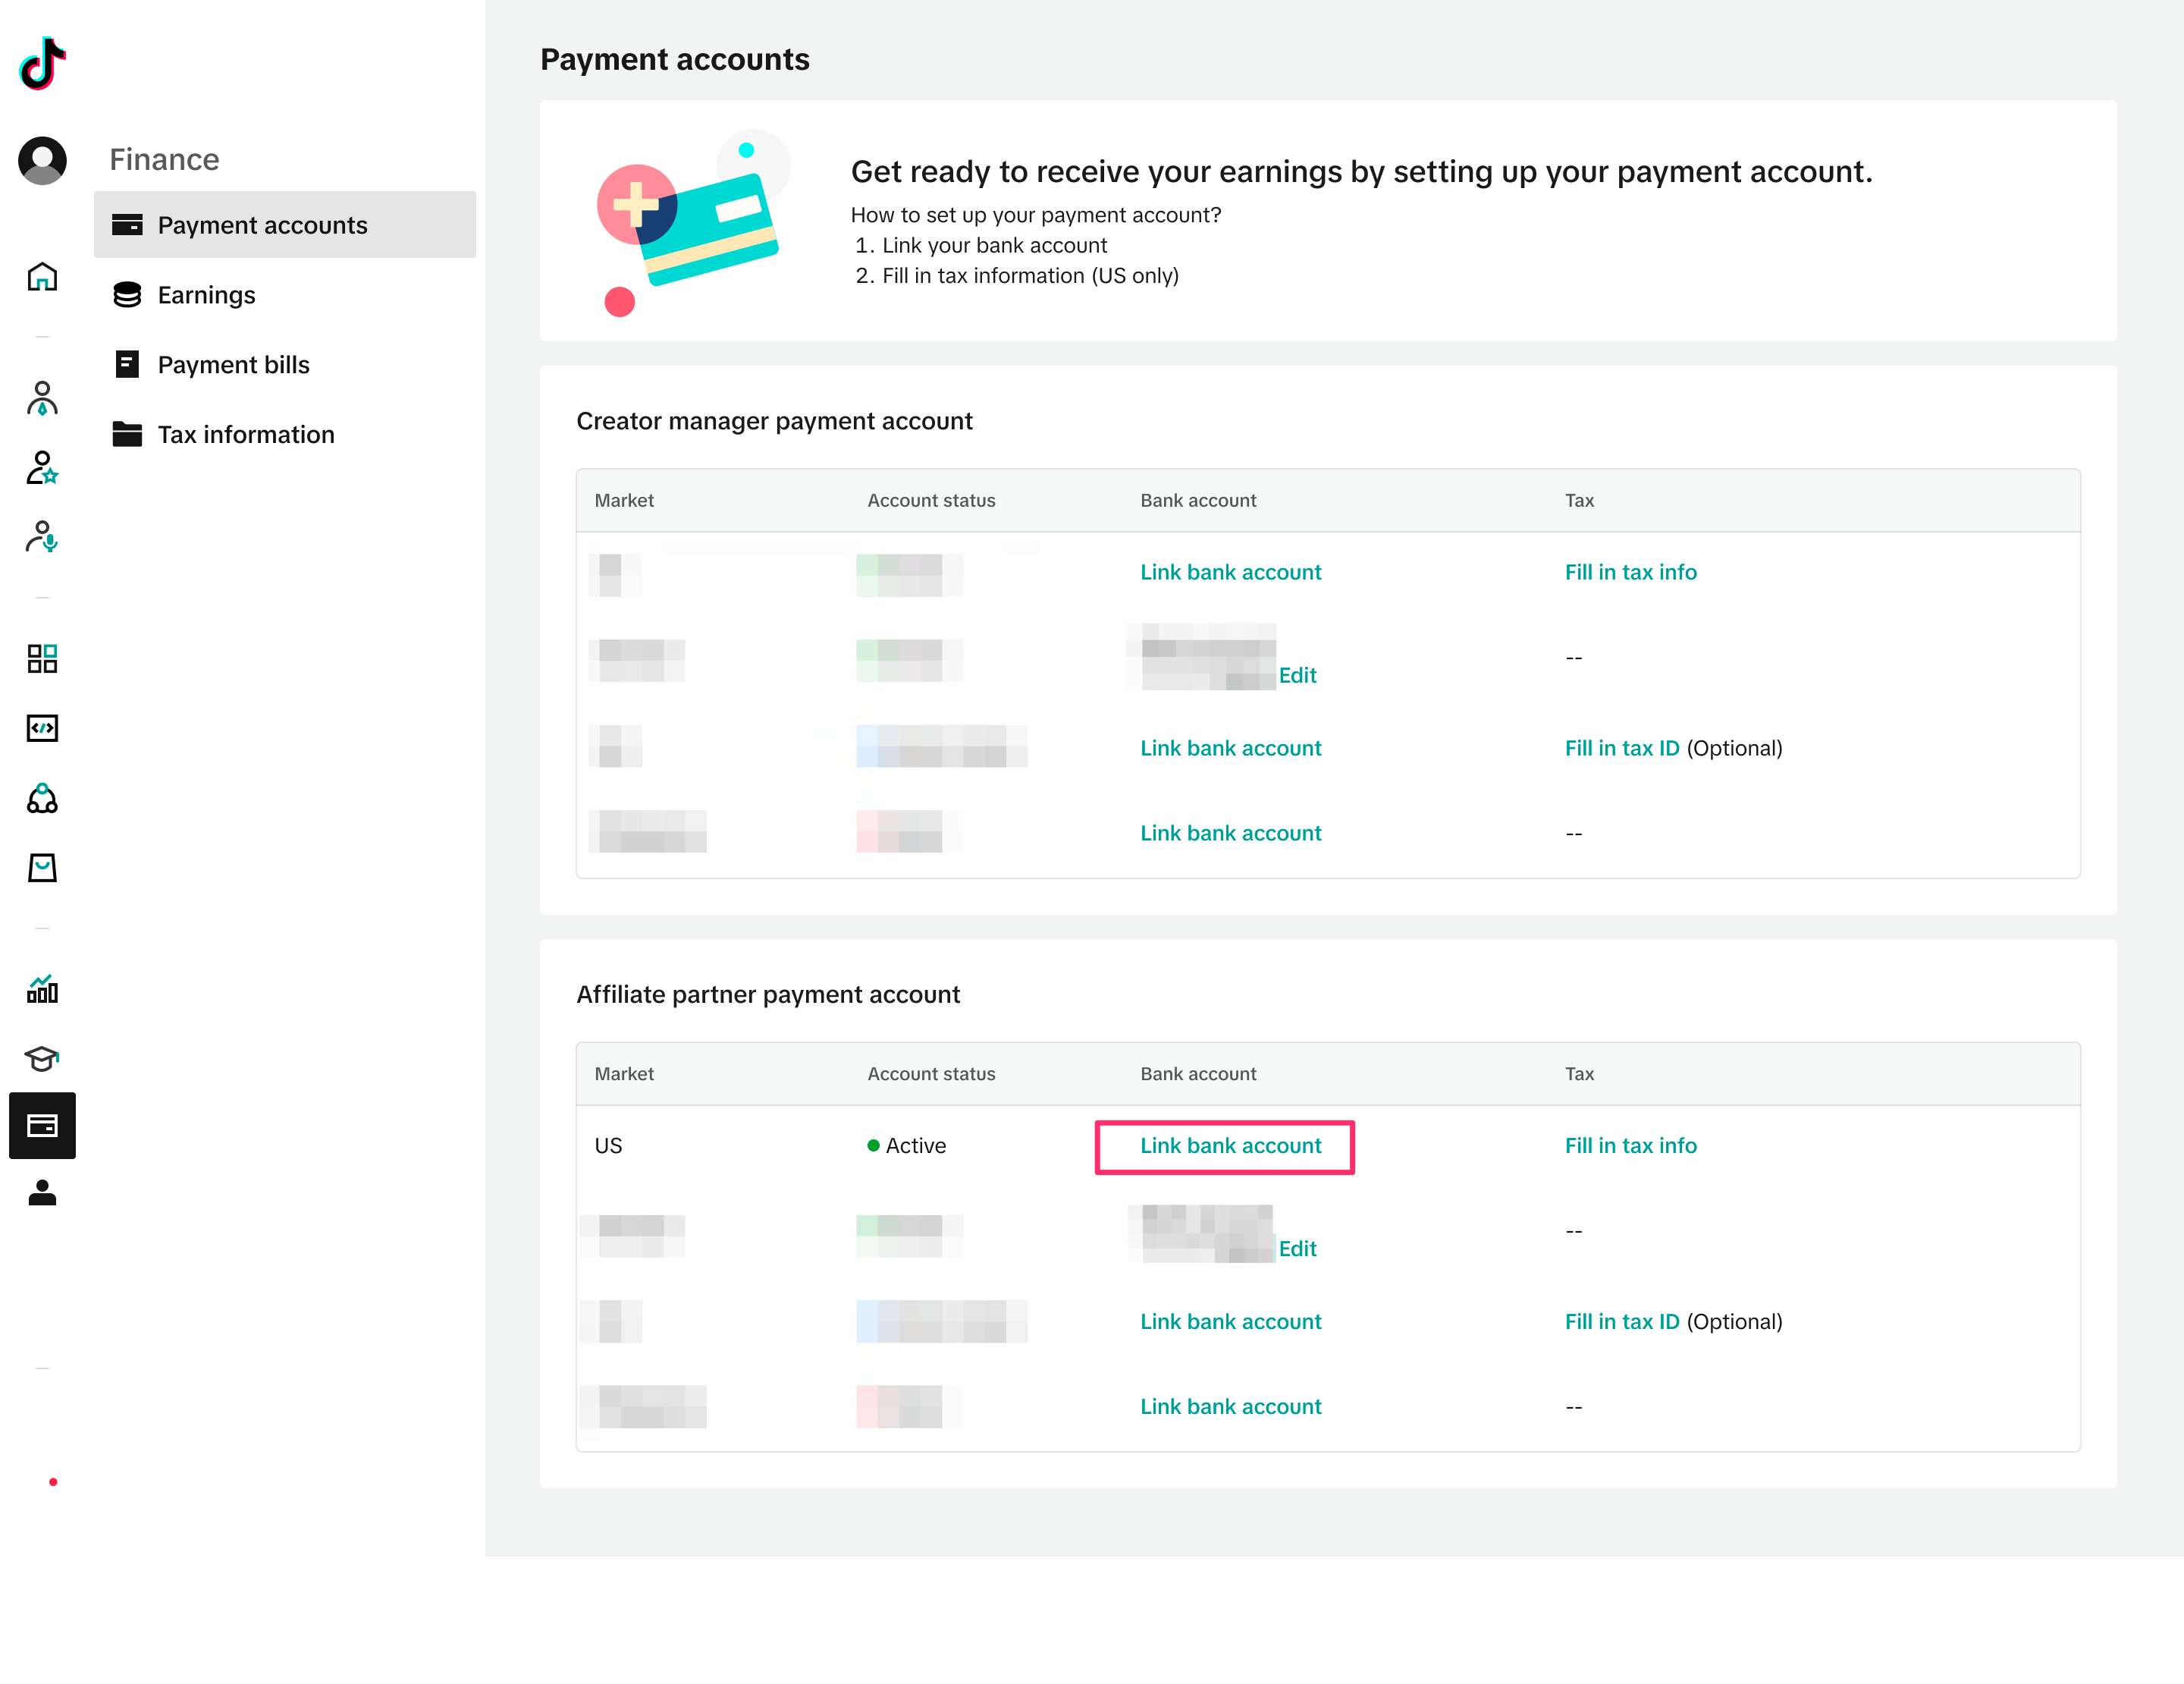
Step 6: Once your Tax information is completed, return to the
Payment accounts page and click on
Link bank account. If you are unable to link your account at this time and the account status is listed as "under review," please try again in 24 hours.
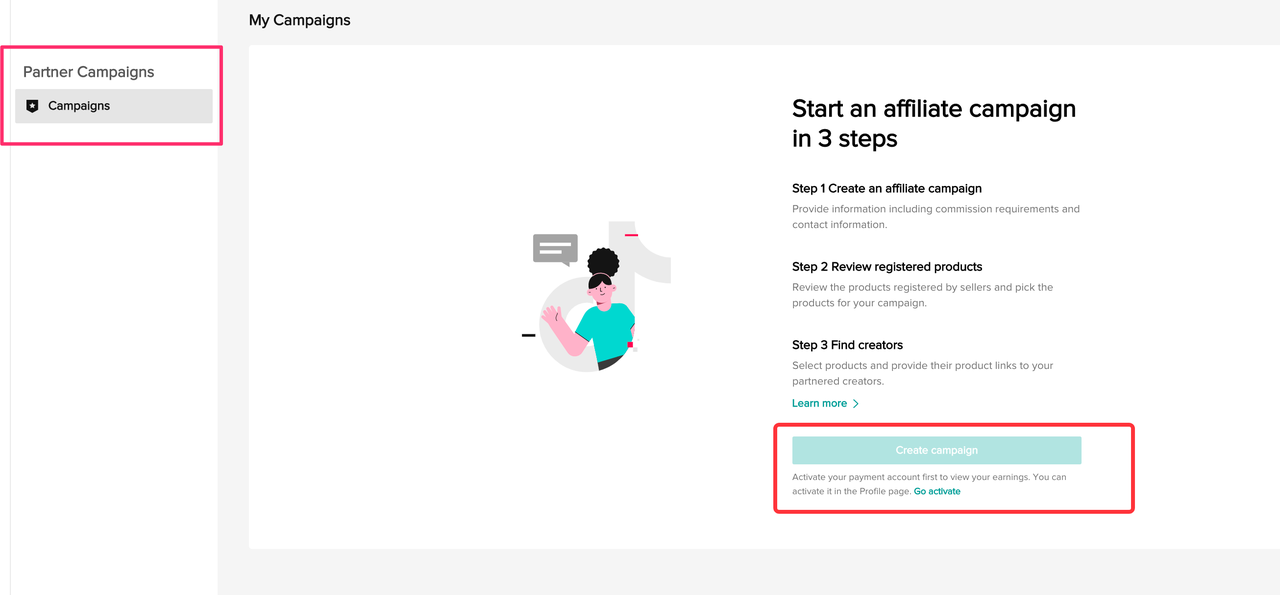
Setting up Campaigns
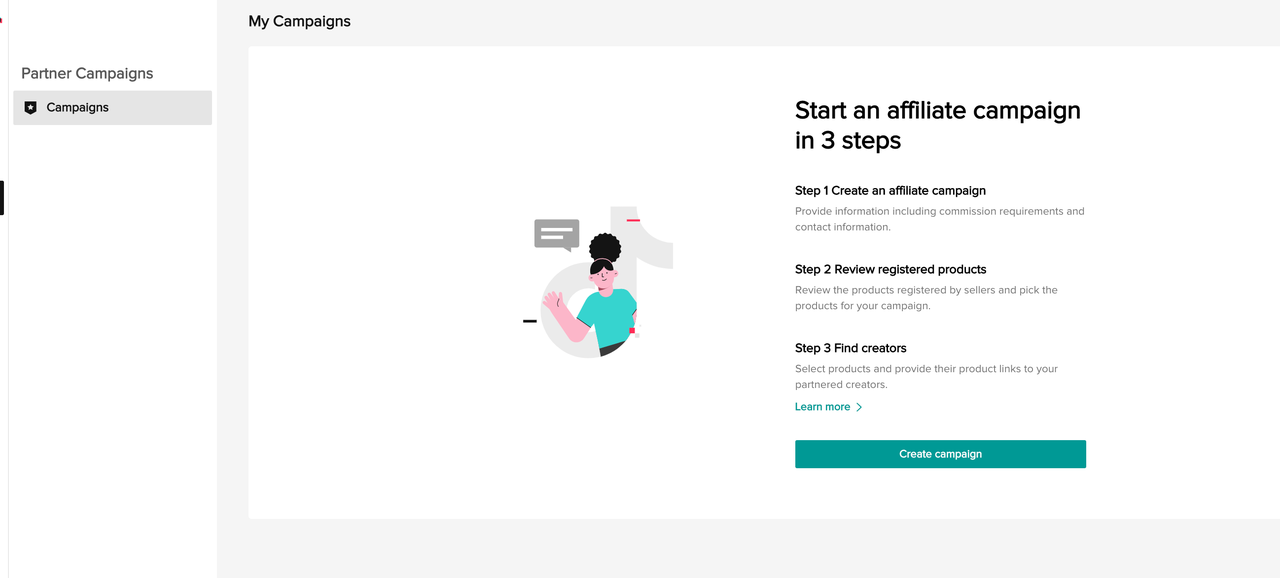
Step 1: Enter the
Partner Campaigns page in TTSPC. If you are unable to click on
Create Campaign, return to the top of this document and ensure that you have completed the steps in the Onboarding Requirements section. Otherwise, click Create Campaign to get started.
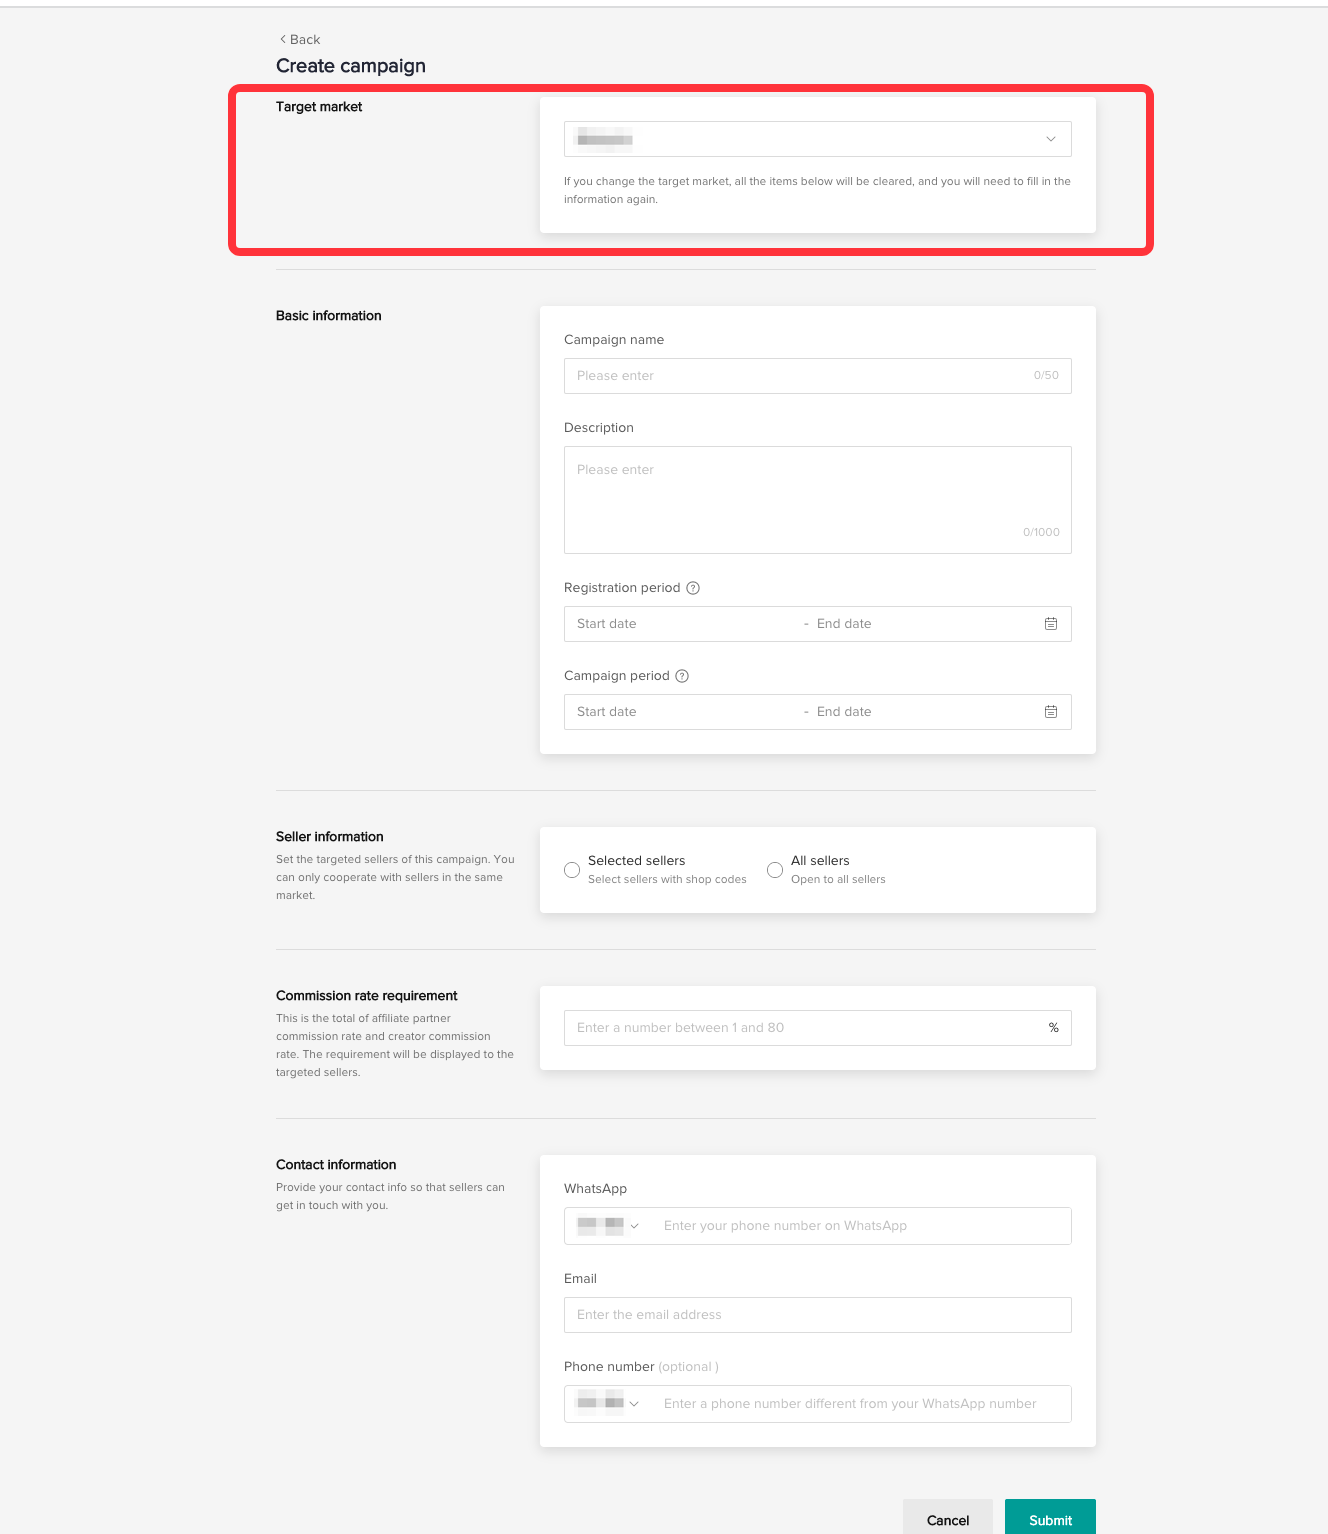
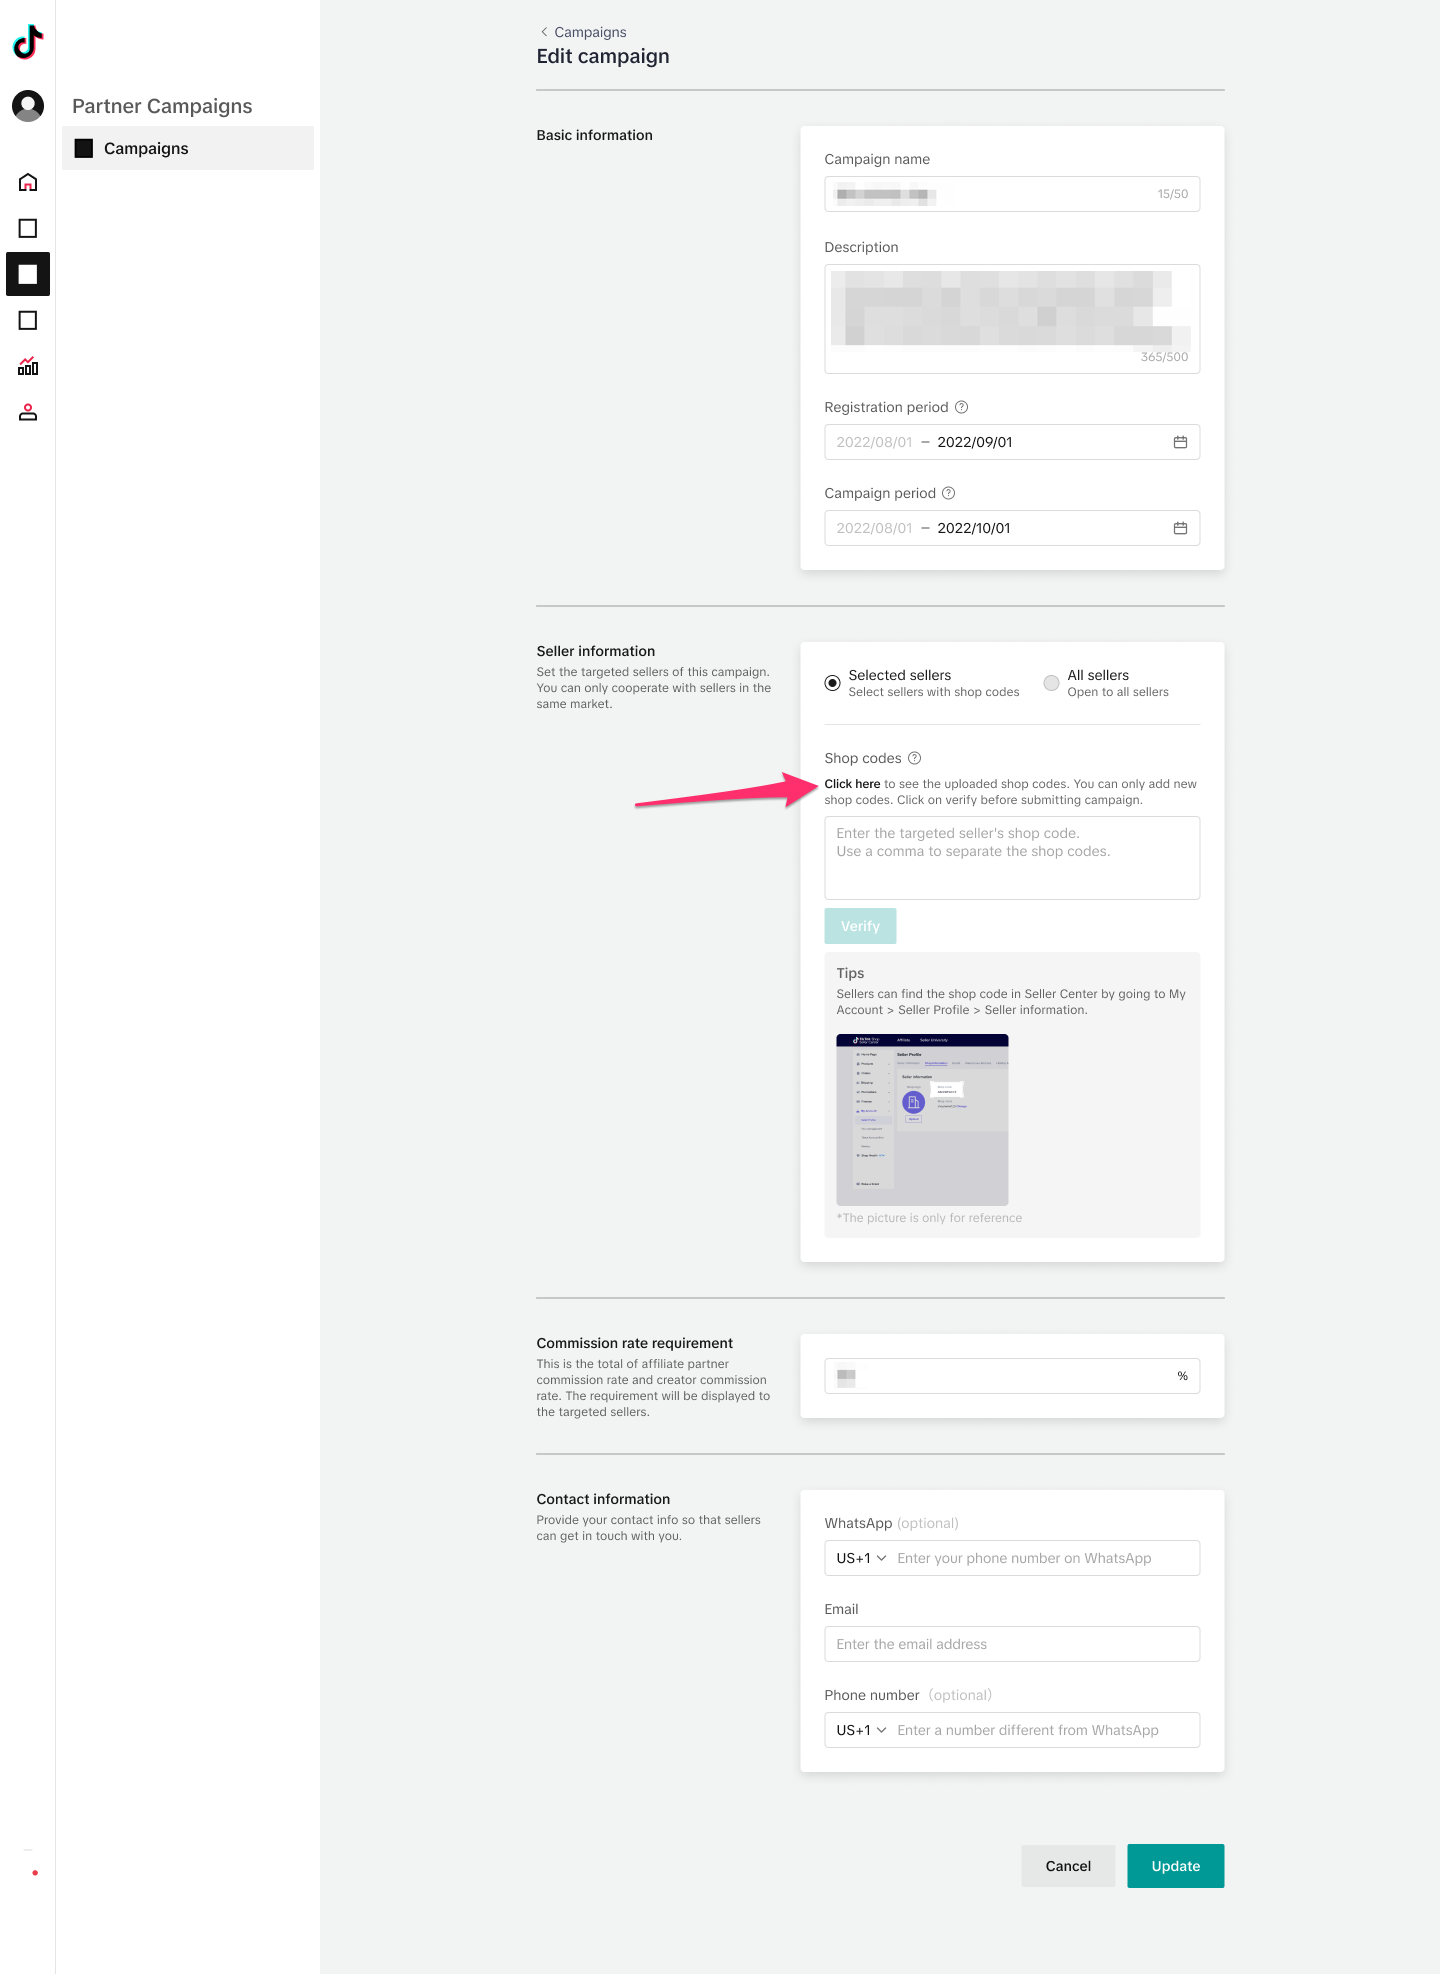
Step 2: Enter the relevant campaign information, such as the
Target market, Basic information, Seller information, the
Commission rate requirement, and your
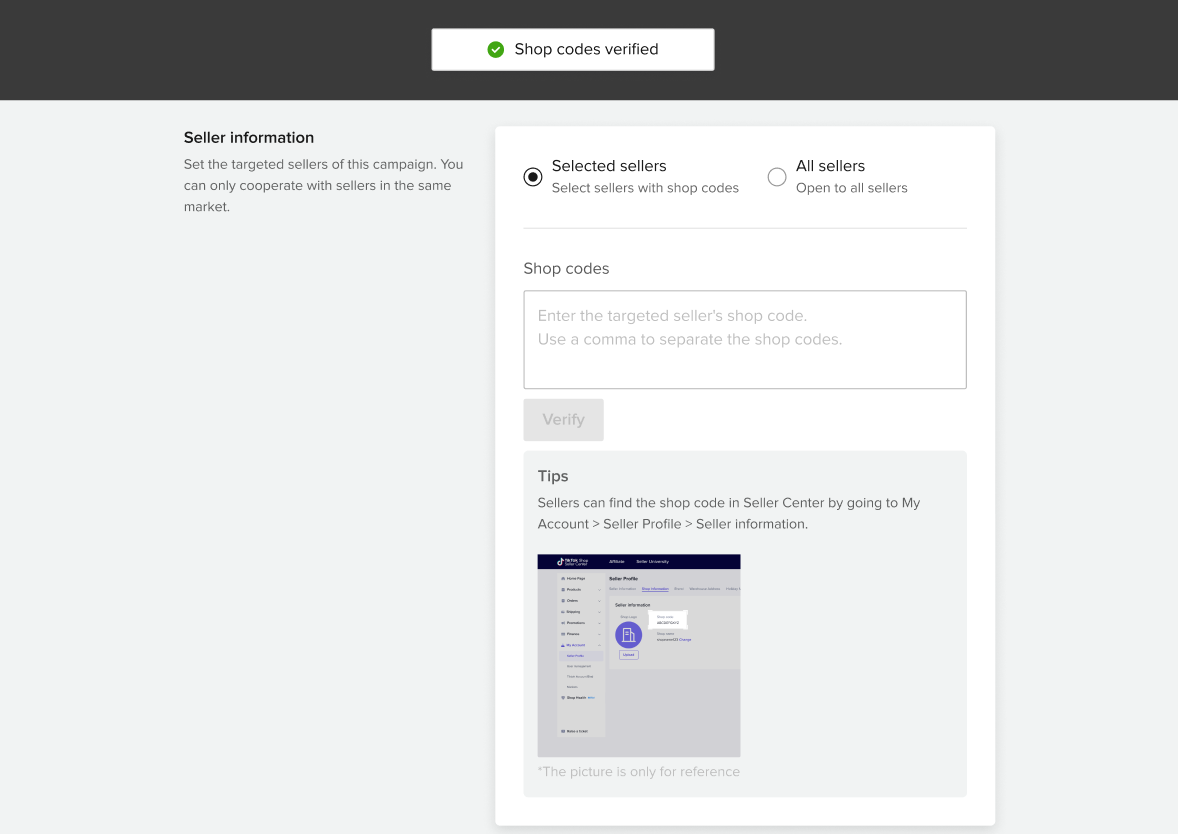
Contact information. In the Basic information section, describe in detail what this campaign is about and make it compelling for Sellers to want to participate. Then, set the registration period, which is the dates during which sellers can register products to the campaign, followed by the campaign period, which is the dates during which creators can promote the products. The start date for the registration period and the campaign period must always be the same. Note that under the Seller information section, you can choose to make the campaign open to all Sellers or only select Sellers by inputting their Shop Codes (you can add up to 100 Shop Codes). Sellers can find Shop Codes in the Seller Center by going to My Account-> Seller Profile-> Seller Information. After you have filled in all the relevant details, click
Submit.
Step 3: After clicking
Submit, you will be taken to the main
Campaigns page. All of your created campaigns will be listed here. To publish the campaign to Sellers, you
must turn on the
Publish Toggle. On this page, you can also create more campaigns by clicking
Create Campaign.
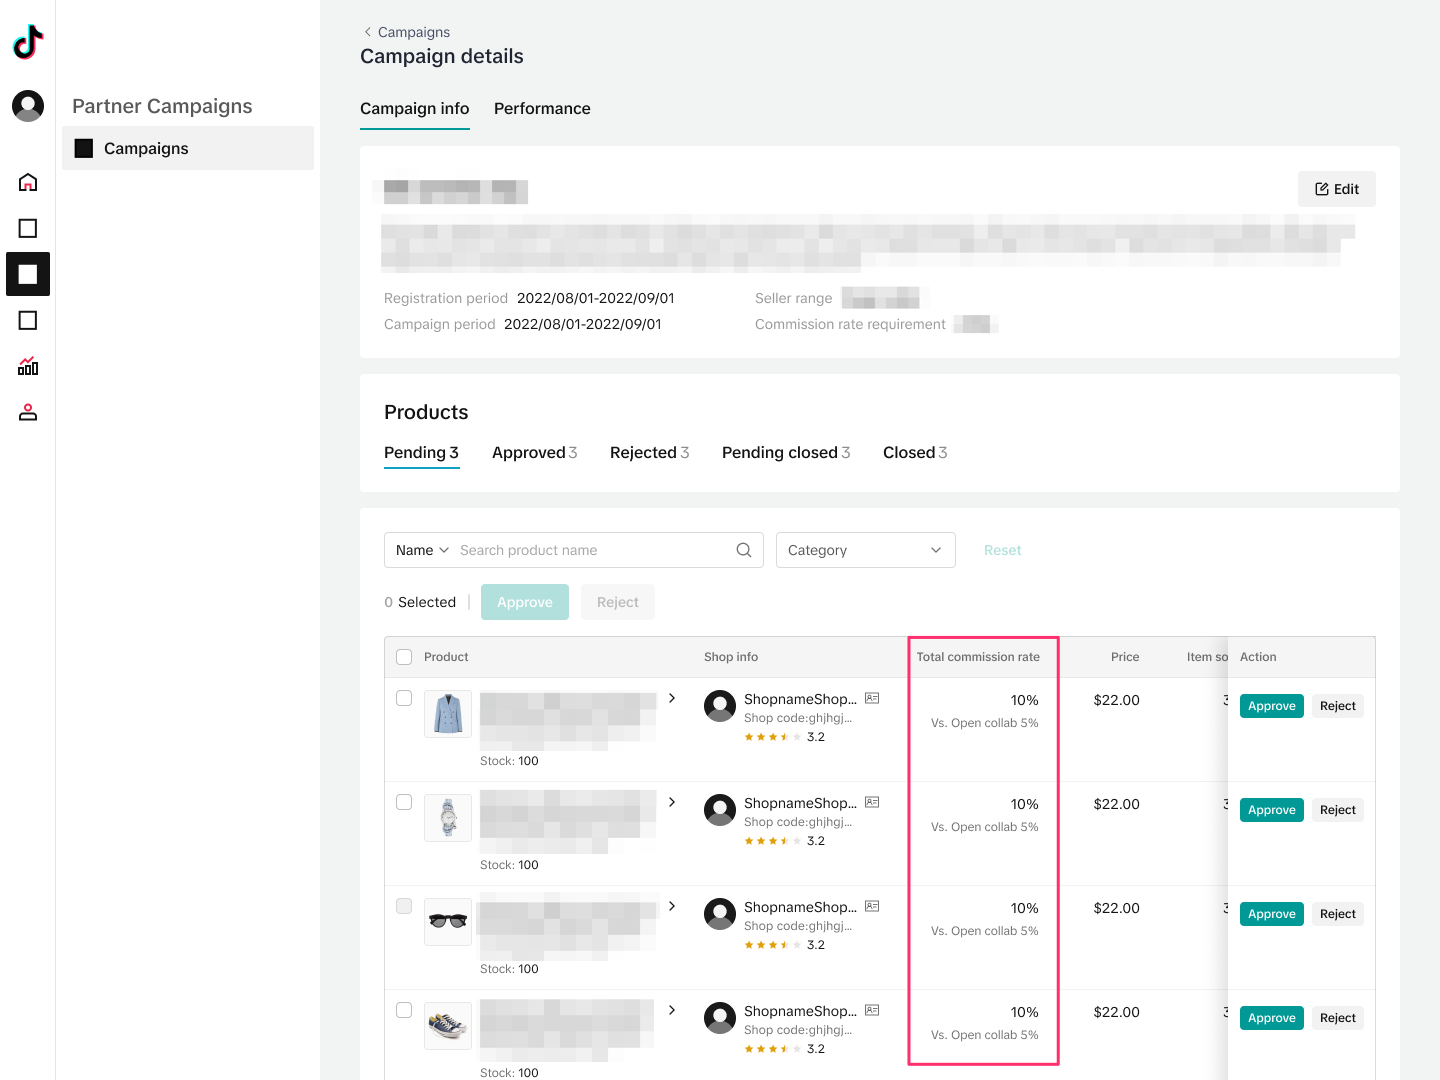
Approving/Rejecting Seller Products
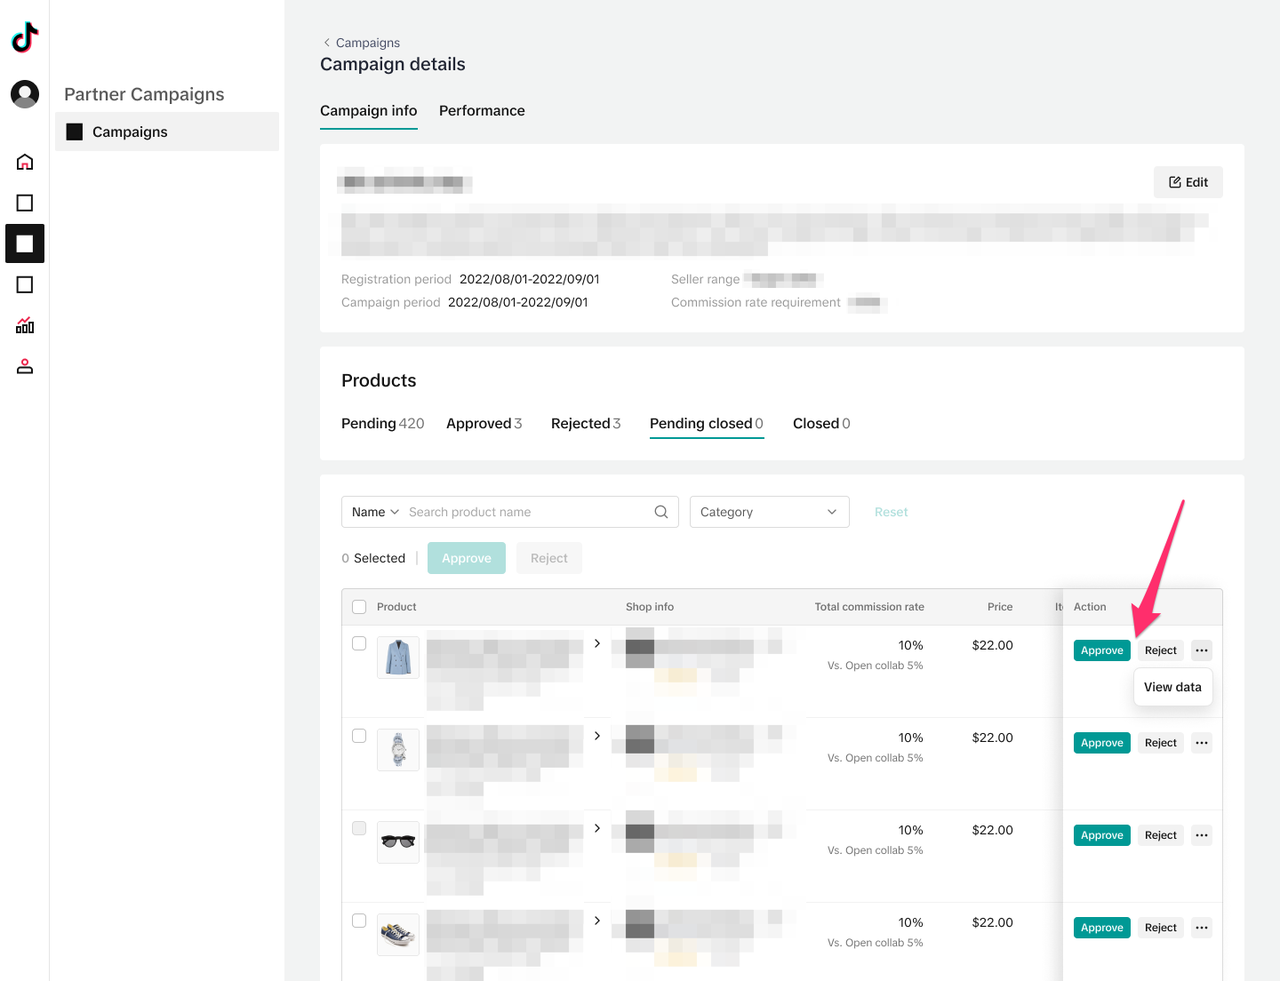
Step 1: After Sellers have registered products for your campaign, you can click into the
Campaign details page to see all the registered products, the Shop information, the price of the product, the number of items sold, and the commission rates that Sellers are offering for this campaign. Note that this is the total commission rate that will be paid to you and the Creators in the campaign. Below that, you can also see how this commission rate compares to the commission rate the seller is offering for this product via a collaboration.
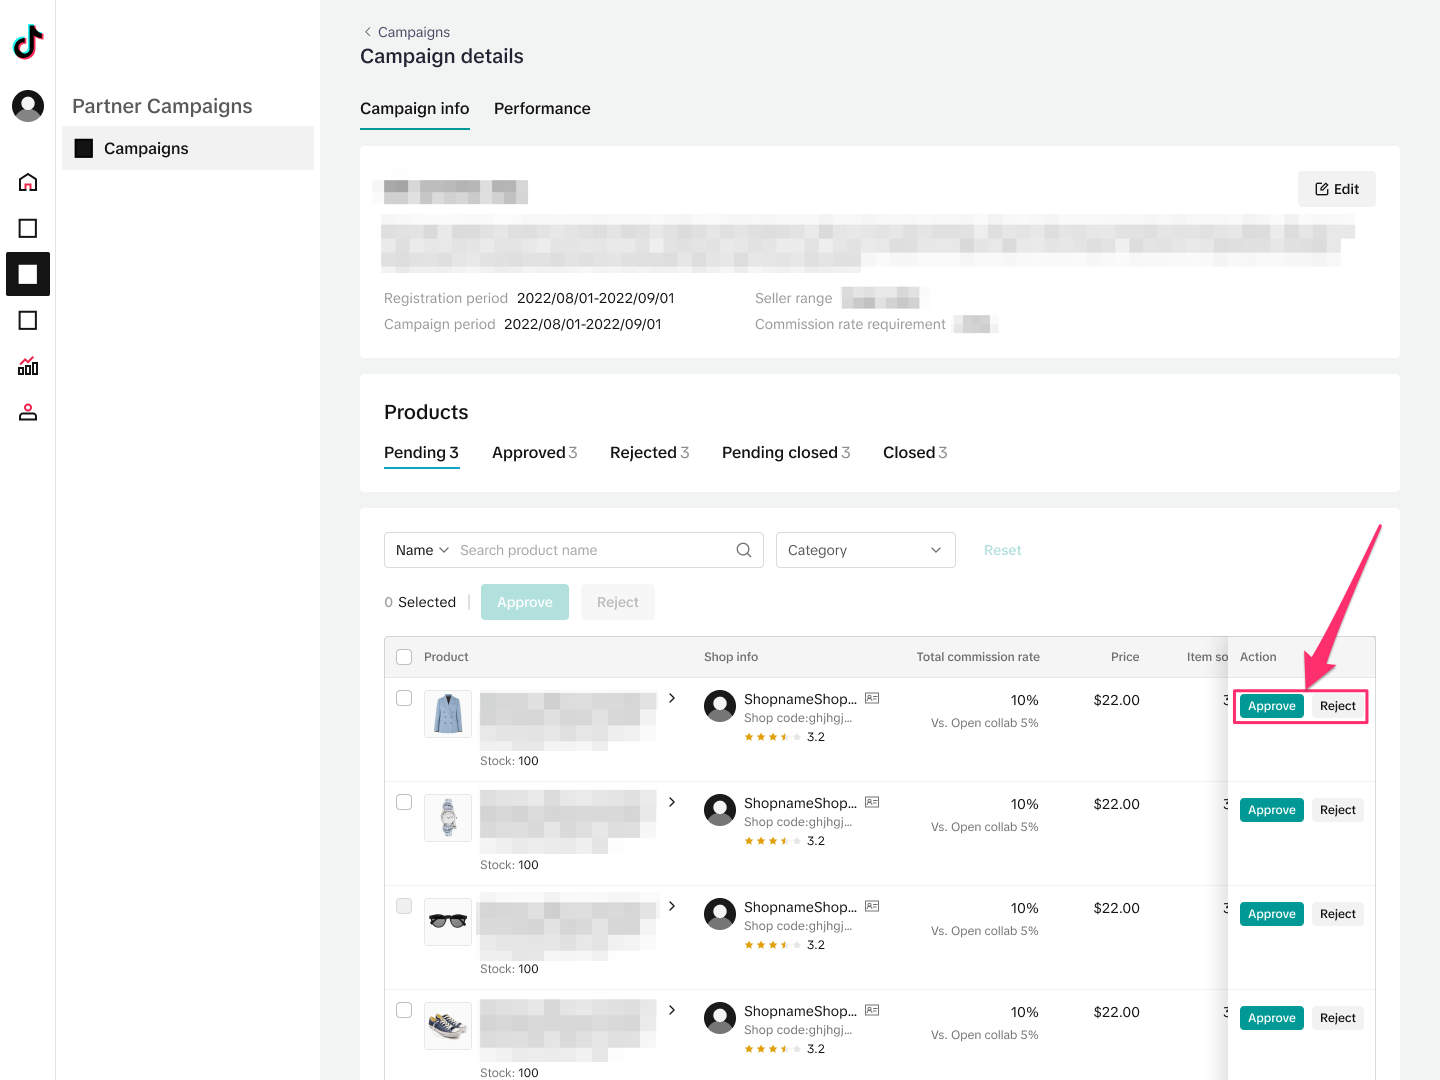
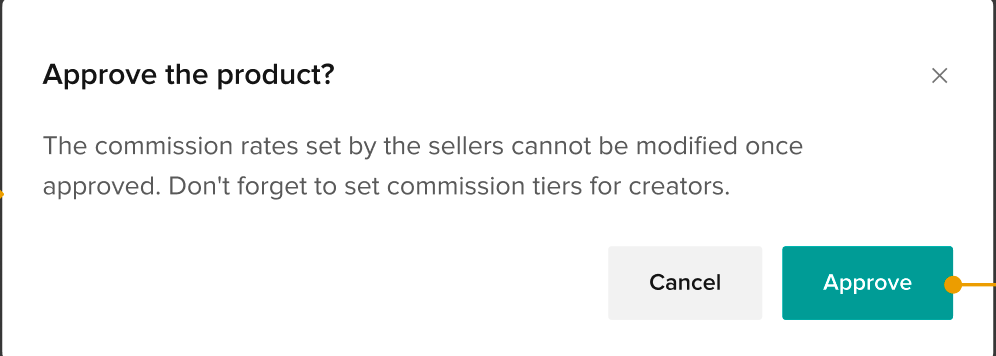
Step 2: On the
Pending tab, you must choose to
Approve or
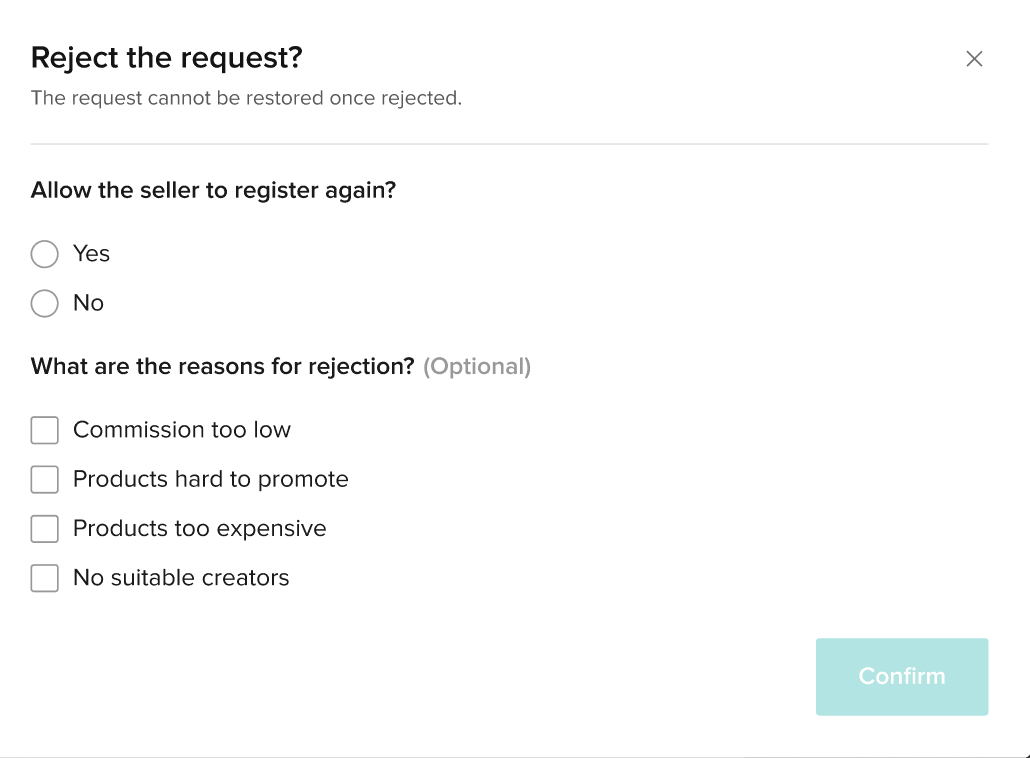
Reject a Seller's product registration. Note that after you approve the registration, you will not be able to modify the commission rates set by the Seller. If you reject the registration, you will be asked if you would like to allow the Seller to re-register, and you will be able to give the Seller a reason for the initial rejection.
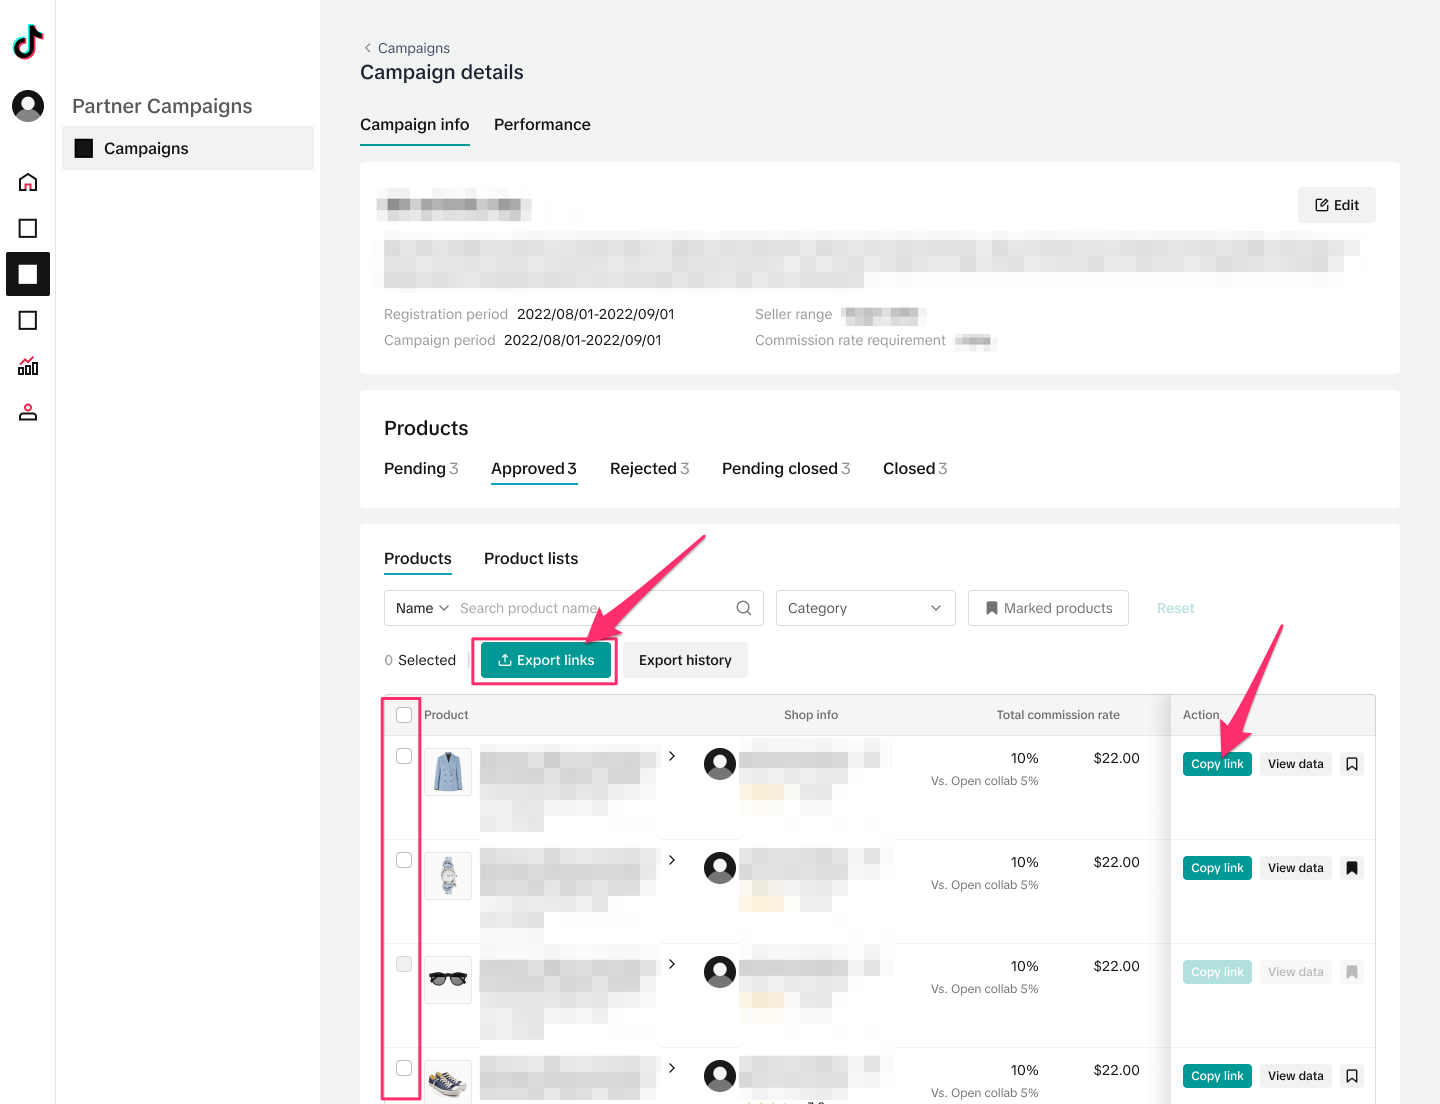
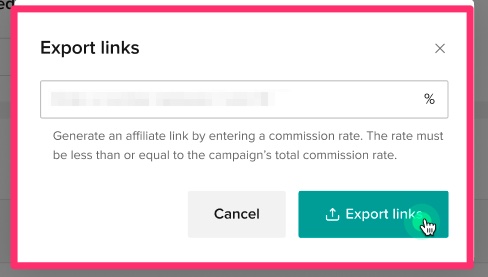
Step 3: You can navigate to the
Approved tab to see a list of approved products. Here, select products individually or in bulk, and then click on
Export links to generate links to share with the Creators, which will allow them to view the products in the campaign and add them to their showcase. In order to export the links, you must first set a
commission rate that you want to offer the Creators. It must be less than or equal to the campaign's total commission rate. For example, if the Seller is offering a campaign total commission rate of 30%, then the commission rate you offer to the participating Creators must be less than or equal to 30%. If you set the commission rate here as 15%, then that means Creators will receive 15% and you will receive the other 15% of the commission. On this page, you can also mark products using the
Bookmark button, and then you can filter for
Marked products, as well as filter by product name and category.
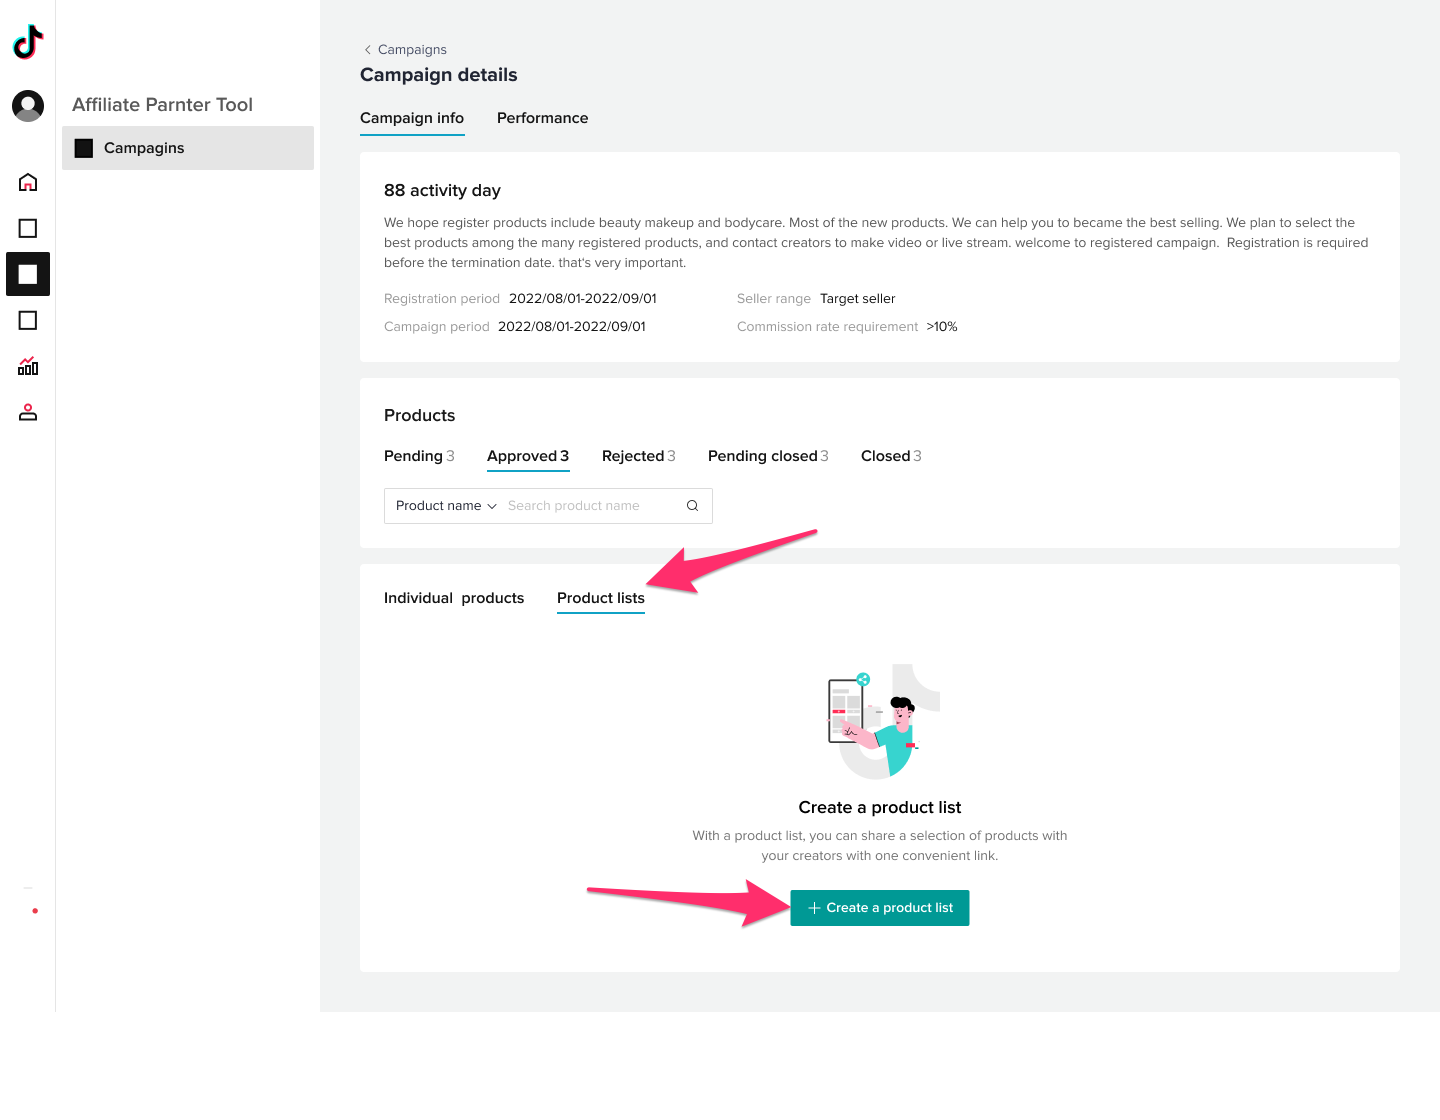
Step 4: Rather than sending individual product links, you can also create a list of products to send to Creators by clicking on
Product lists and then pressing
Create a product list. Note that if you already have several product lists, you can search by product name and ID to find specific lists with those products.
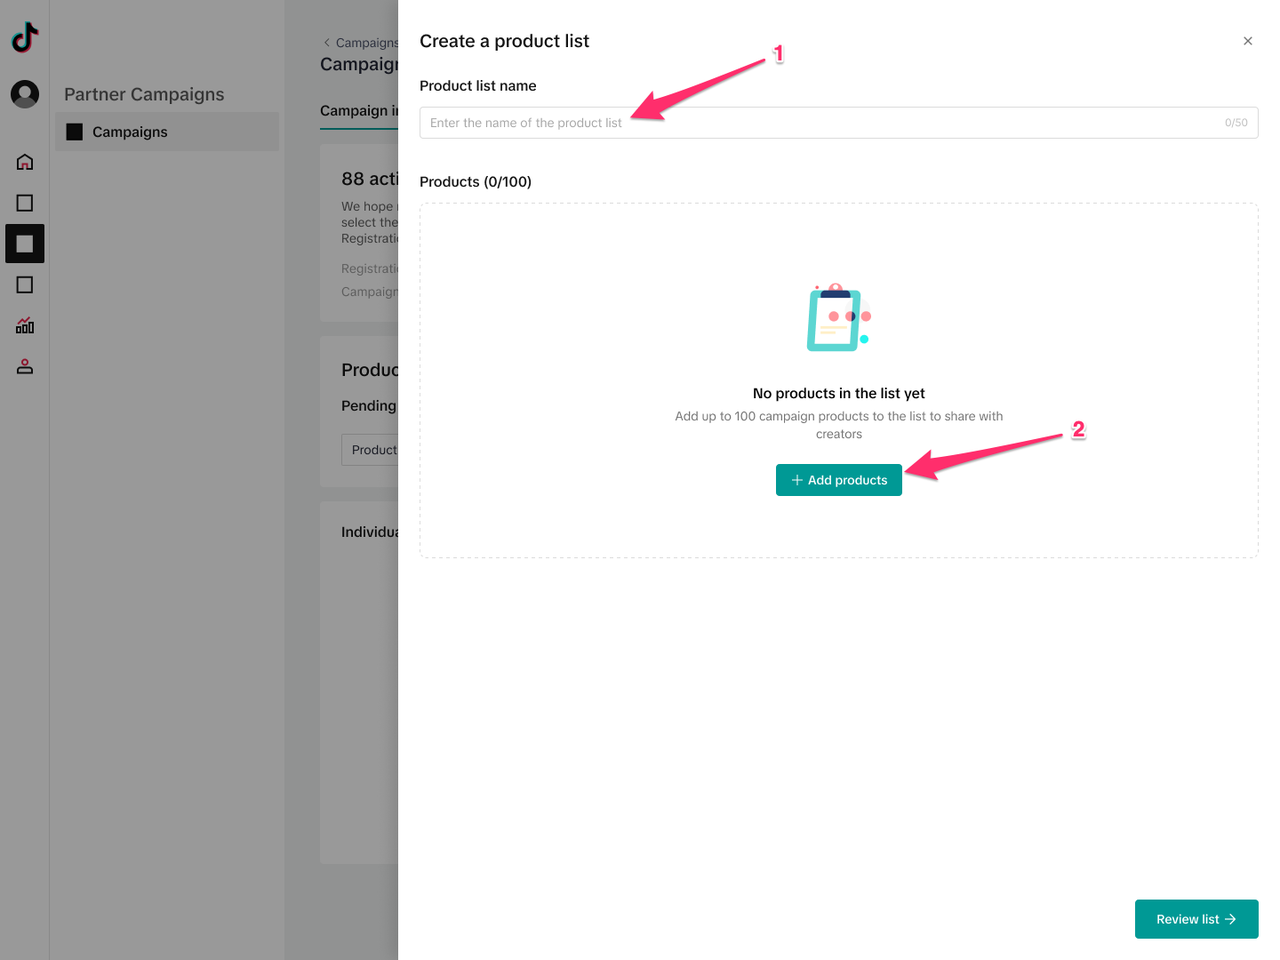
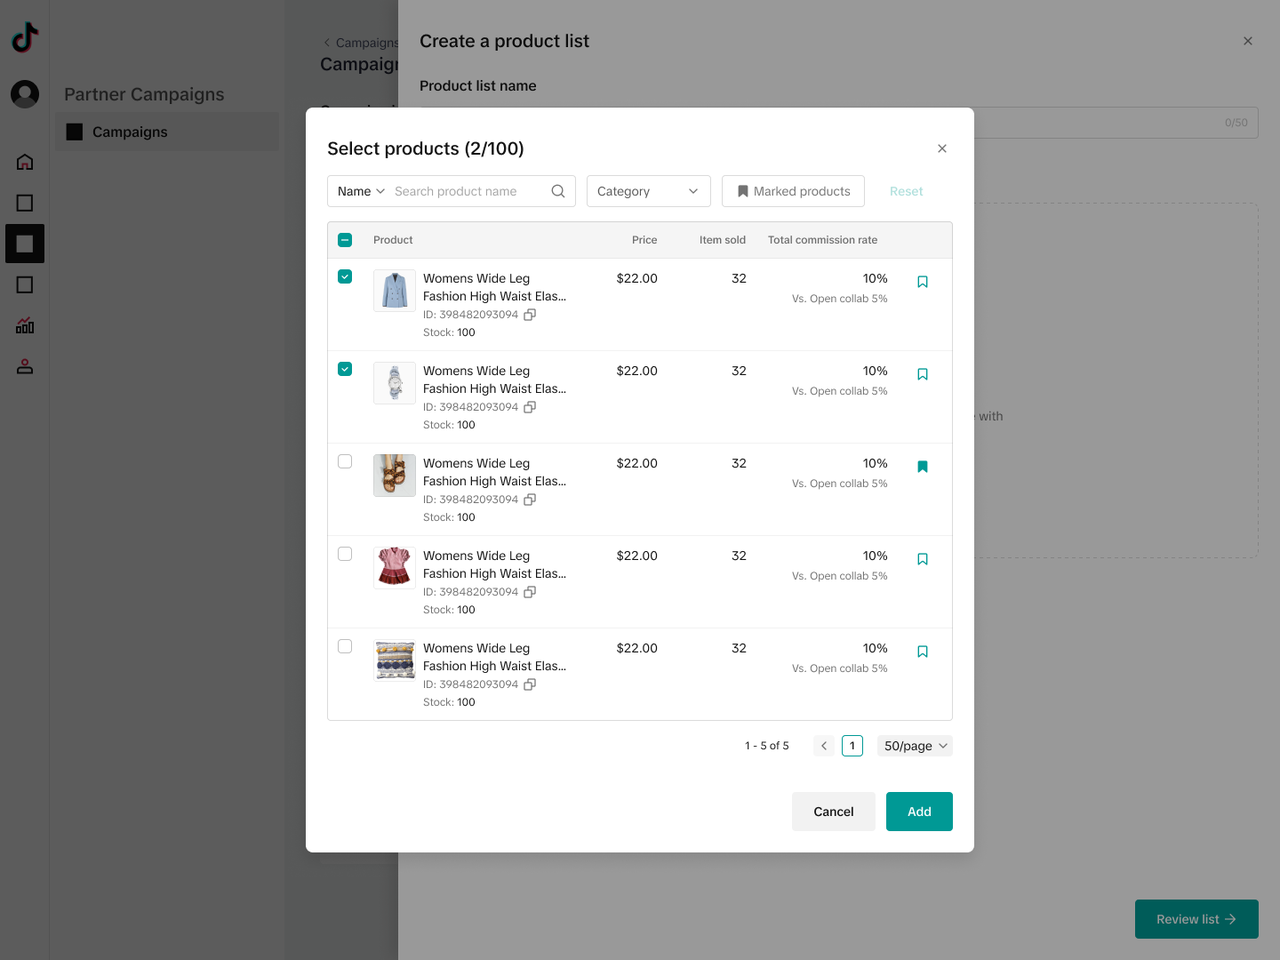
Step 5: First, give your product list a name, then press
Add products. Next, select the products you want to include in the list (up to 100). Here, you can search for products by name and category, as well as by marked products that you have bookmarked. Once ready, press
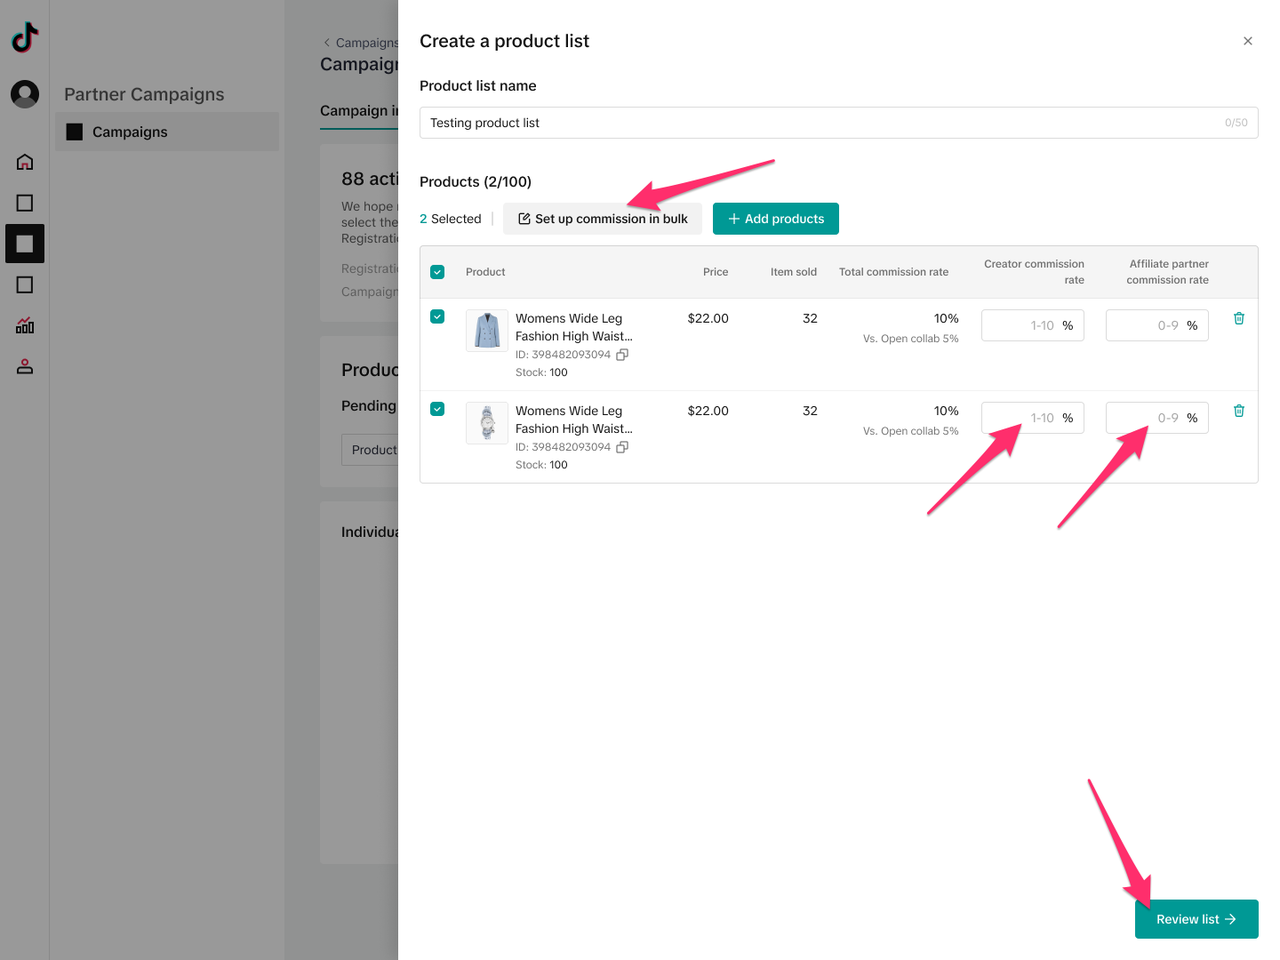
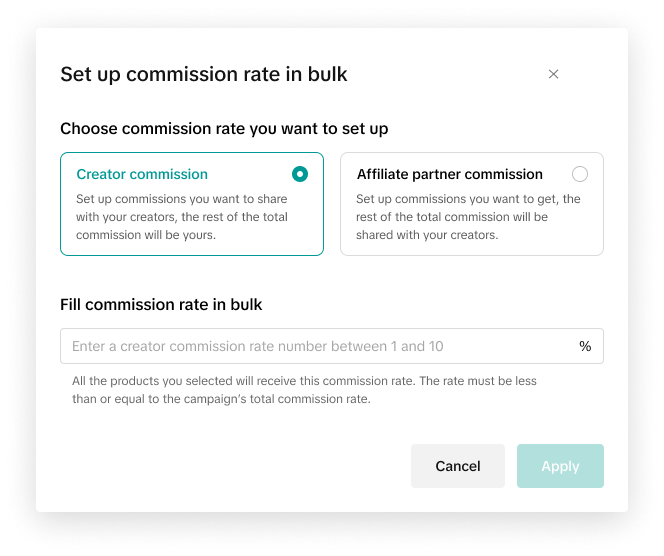
Add. Then, set the commission for each product separately, or in bulk by selecting multiple products and then clicking
Setup commission in bulk. Remember that you have to set the commission that the creator should receive, as well as the commission that you as the agency would like to receive. For example, if the total commission rate is 10%, then the Creator commission rate and the Affiliate partner commission rate must add up to 10%. Once you are finished setting the commission rates, press
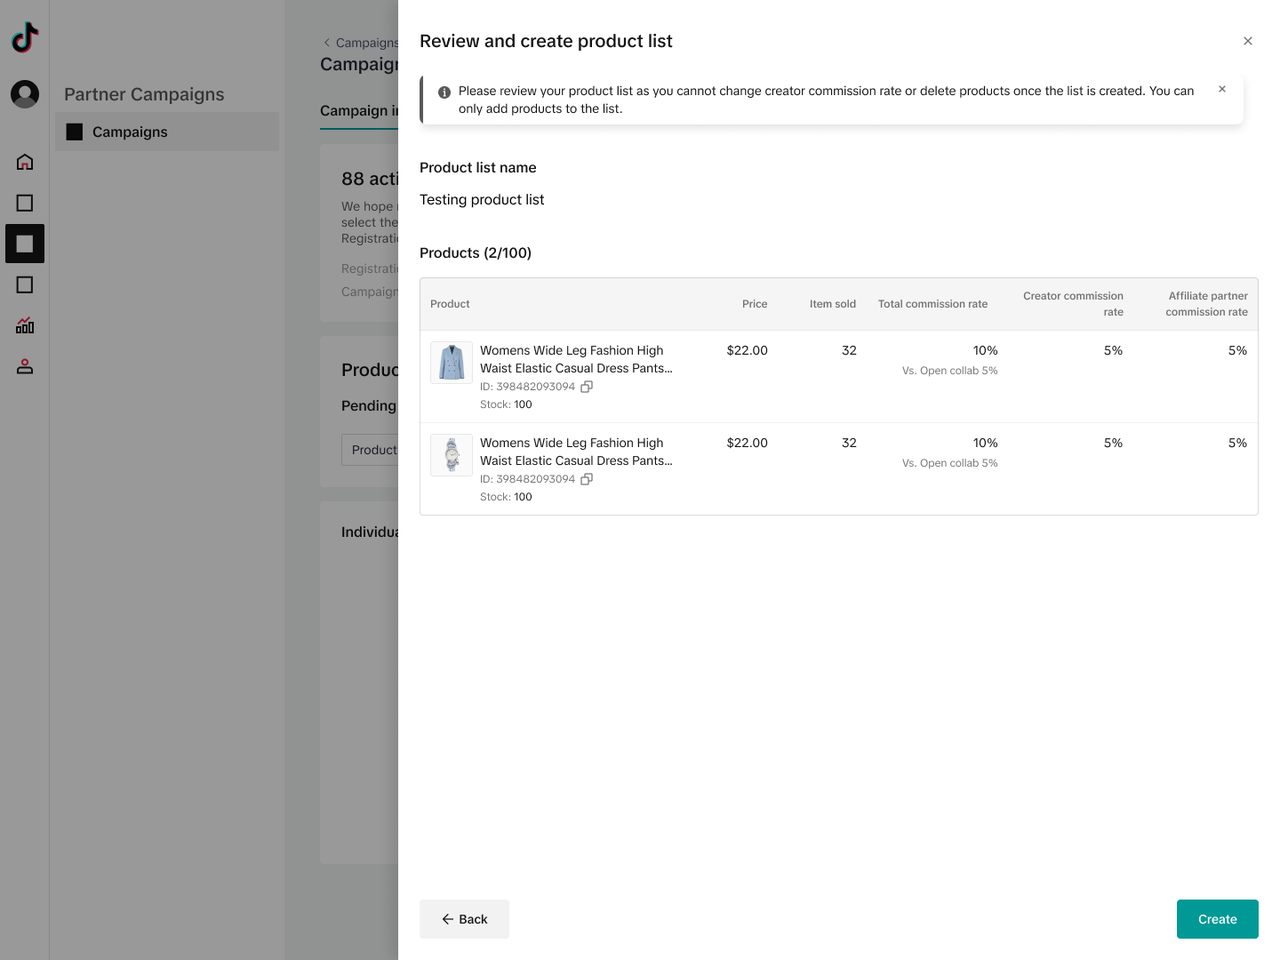
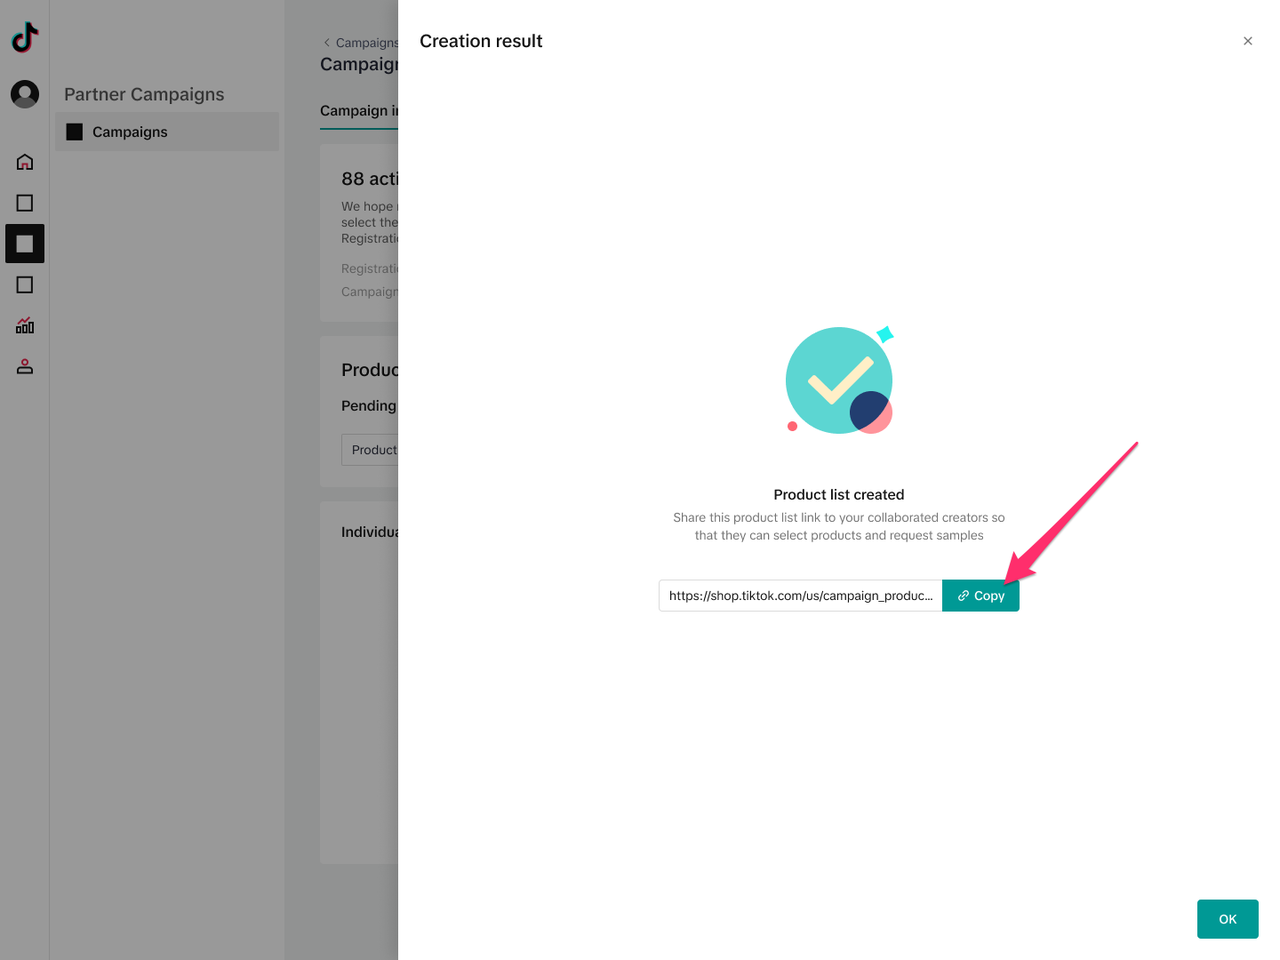
Review list.Step 6: After reviewing your list, press
Create. Now, you will be able to copy the list
link that you can share with creators you want to participate in the collaboration. Creators who receive this link will be able to add all of the products in the list to their Showcase.
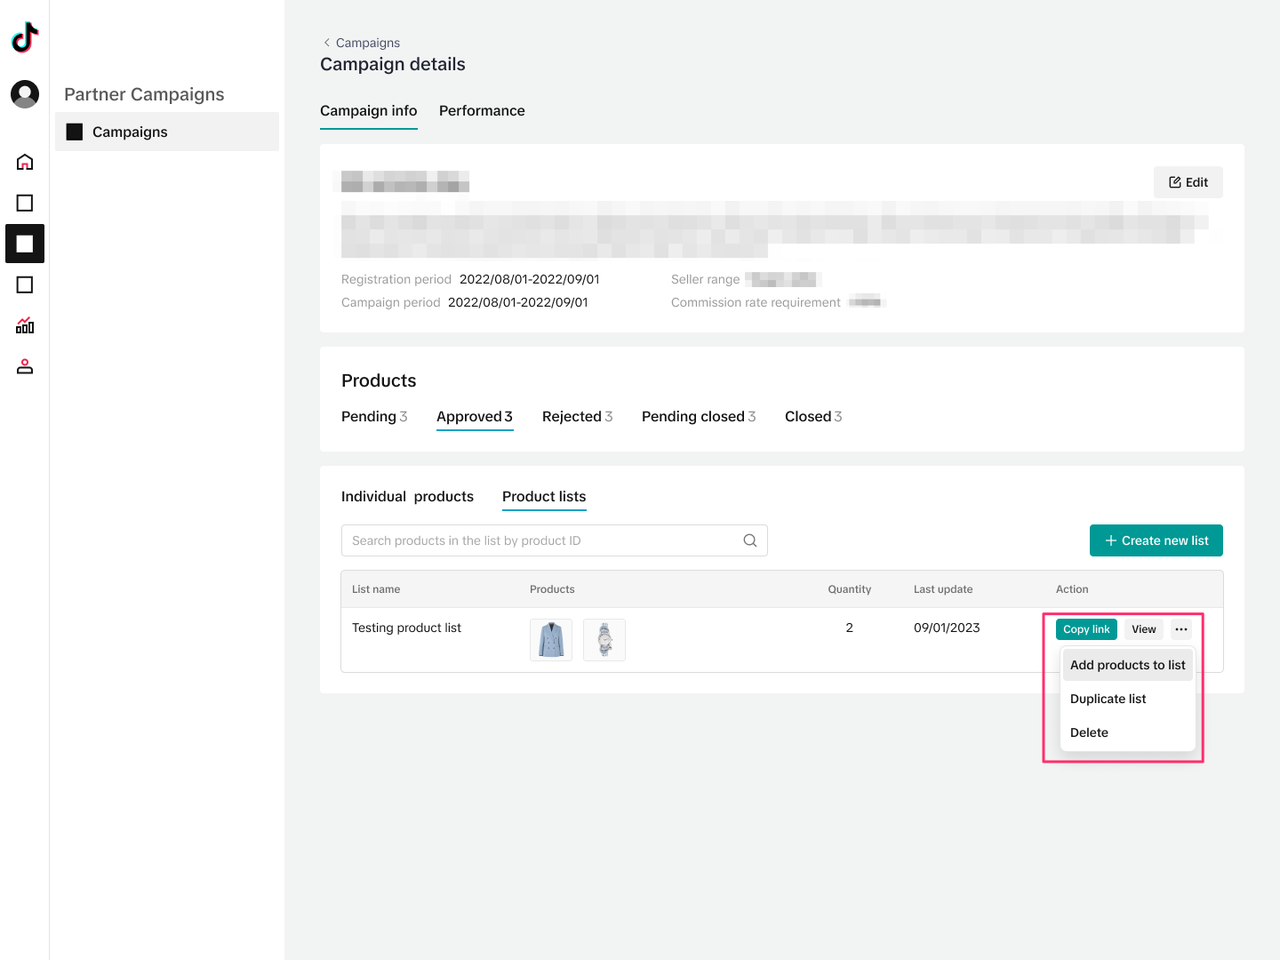
Step 7: After you've created a product list, you can view all the product lists in the
Campaign details page. Here you can
Copy the link,
View the list details,
Add products to the list,
Duplicate the list, and
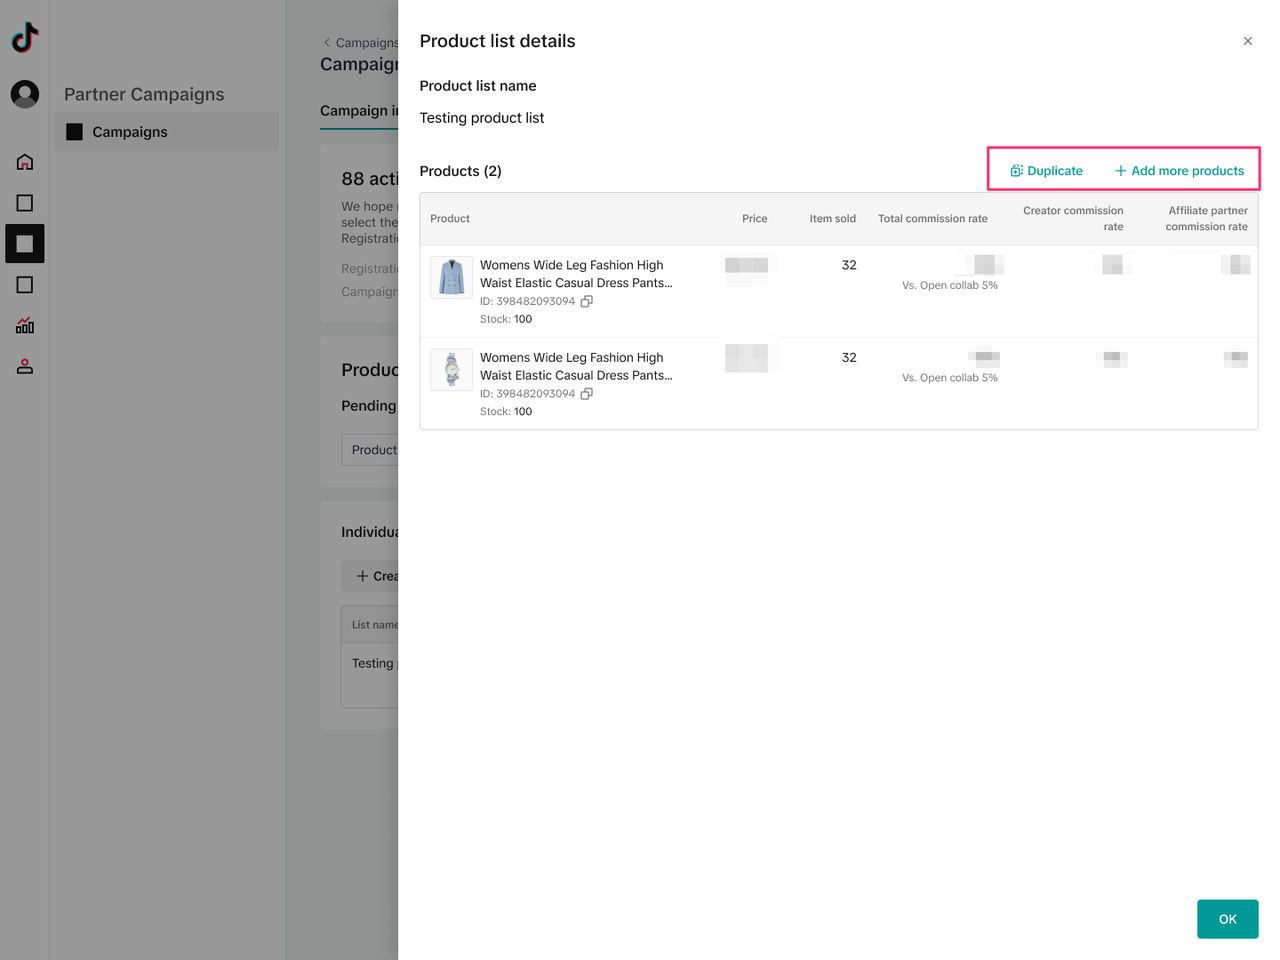
Delete the list. If you click on View list details, you will also be able to
Duplicate the list and
Add more products to the list from here. Note that you can only have up to 1000 lists, and each list can contain up to 100 products. If you reach the list limit, you must delete an existing list to add another one.
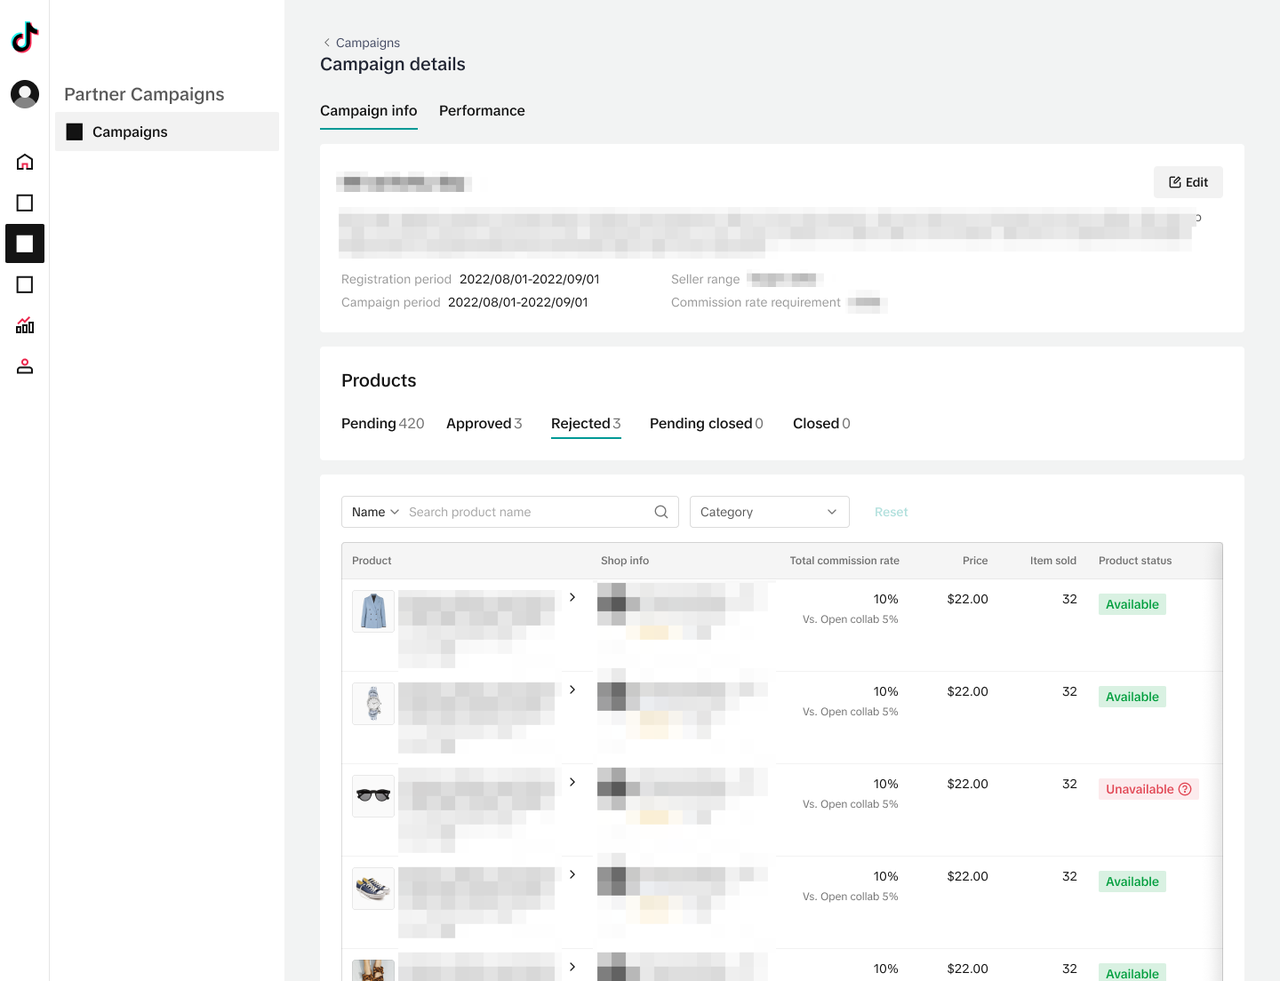
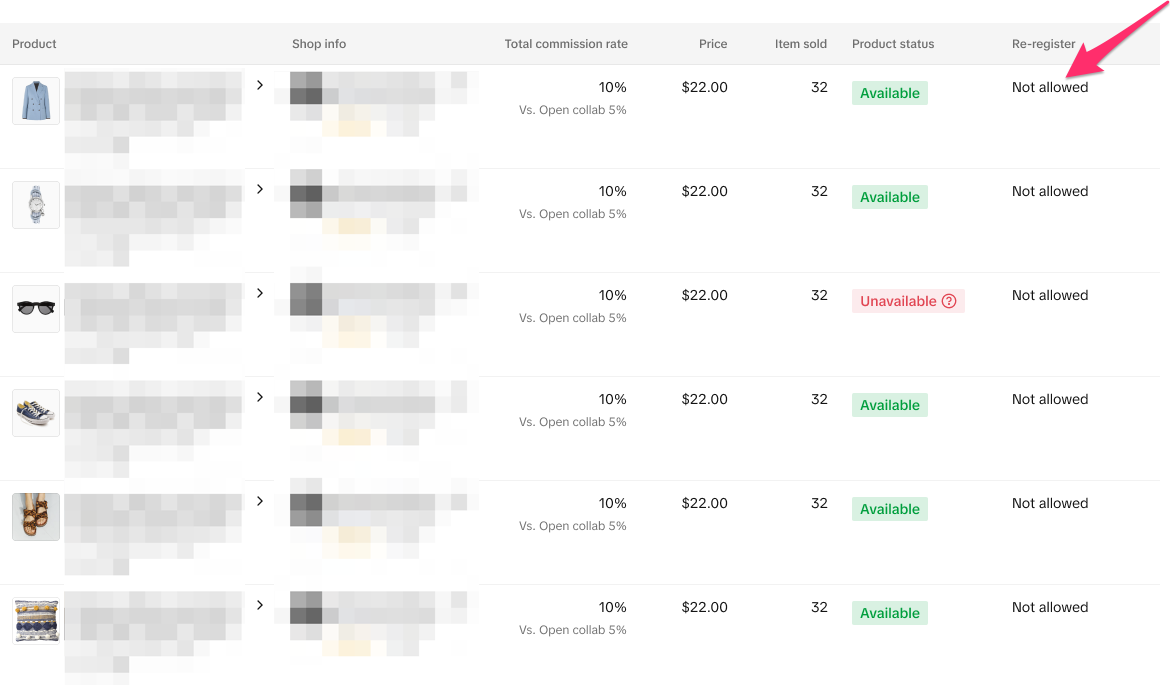
Step 8: Any Seller registrations you have rejected will appear in the
Rejected tab. Here you can see whether or not you allowed the Seller to re-register the product.
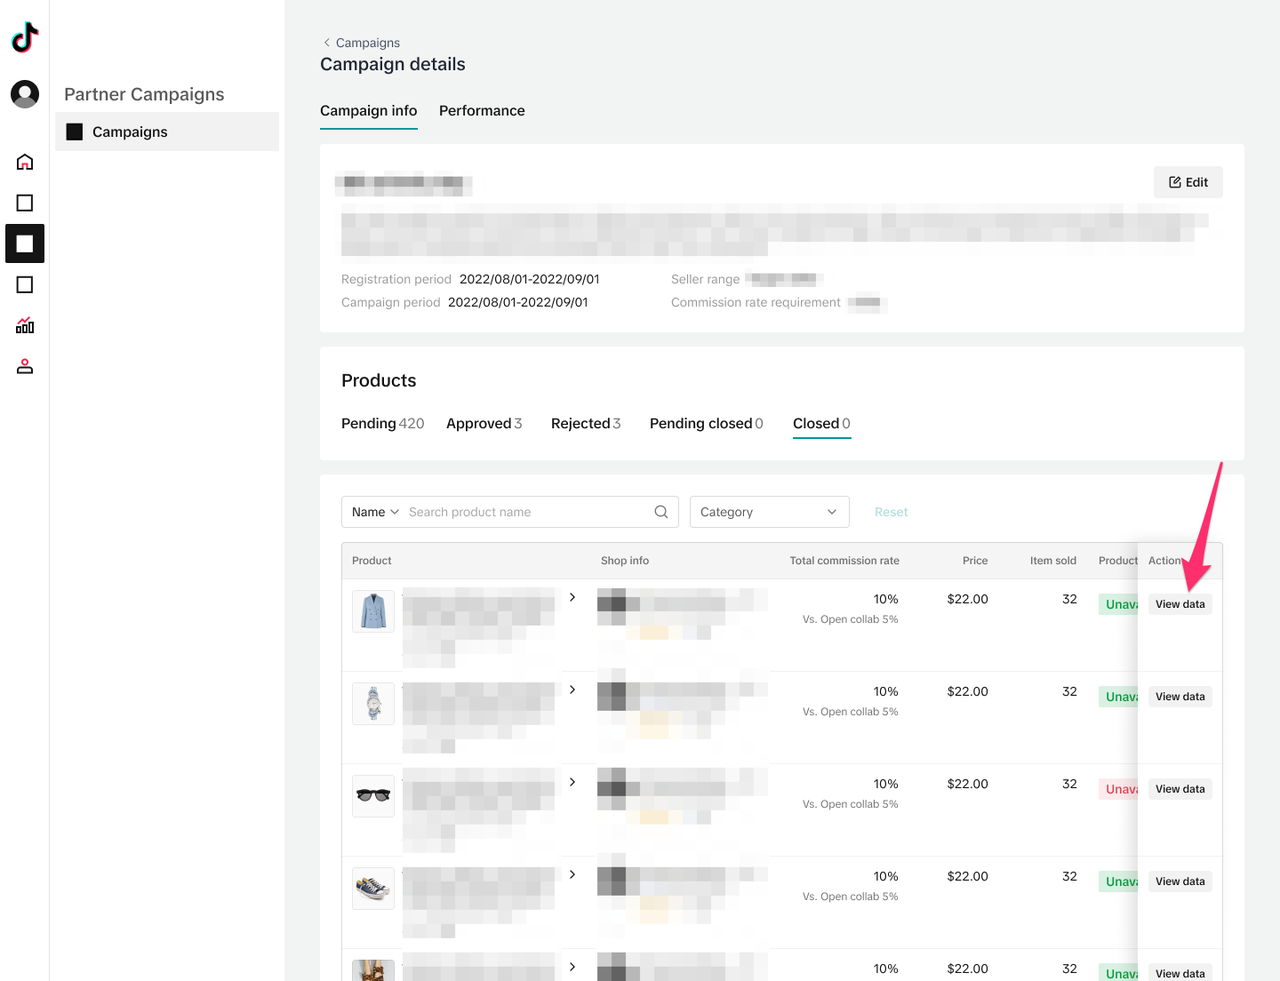
Step 9: In the
Pending closed tab you can see the Seller registrations that are about to close. Here you can
Approve or
Reject these registrations, as well as view the data and Creators for this registration. In the
Closed tab, you can see the product registrations and the associated data for the ones that have already closed.
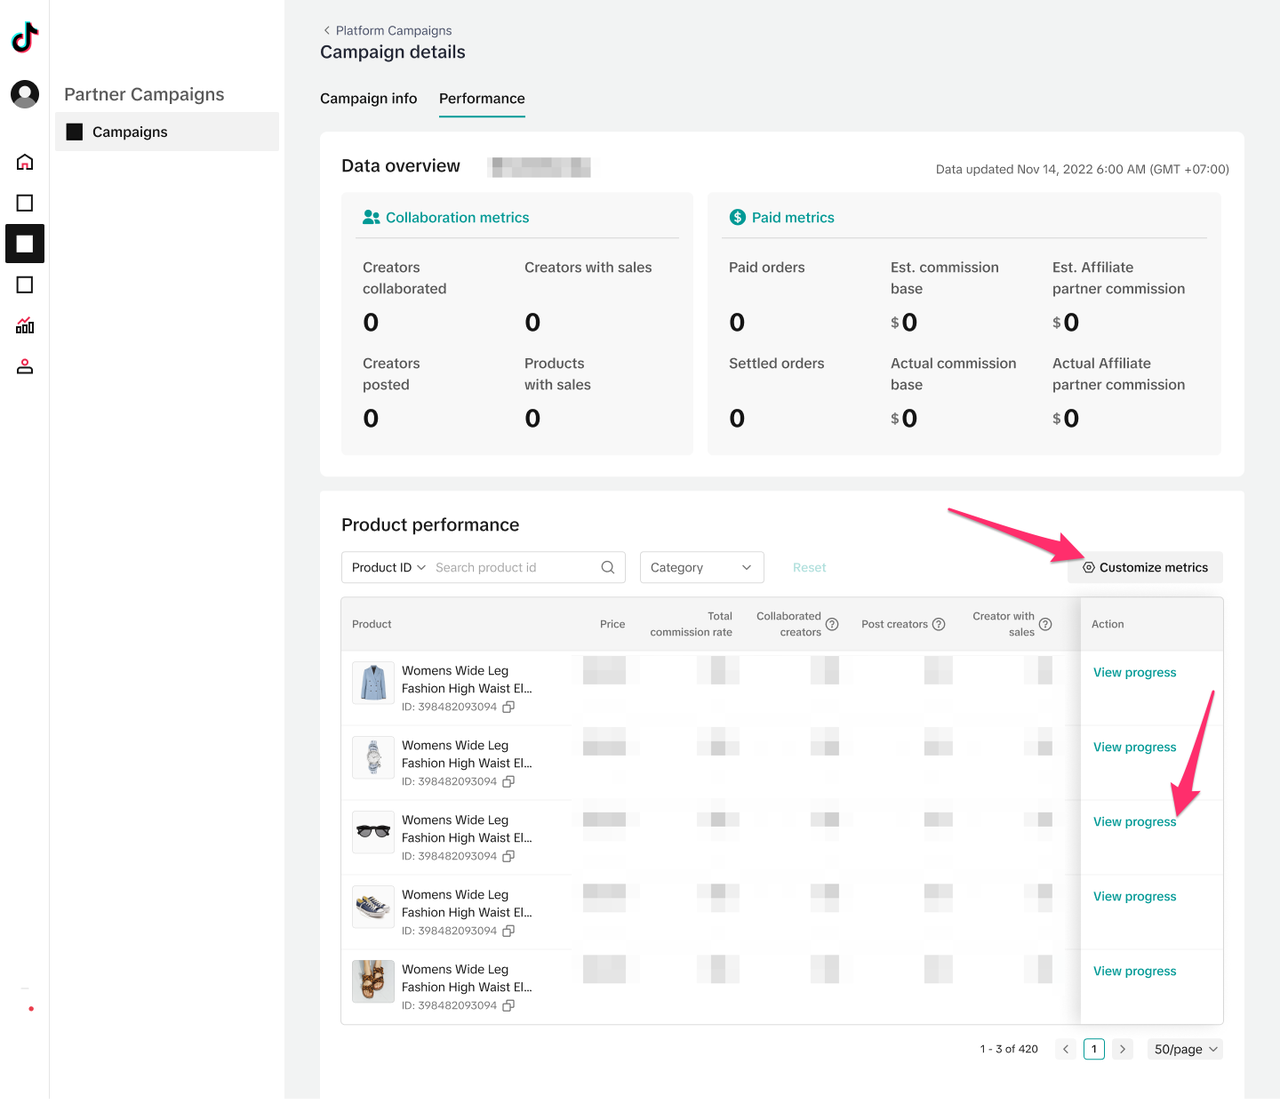
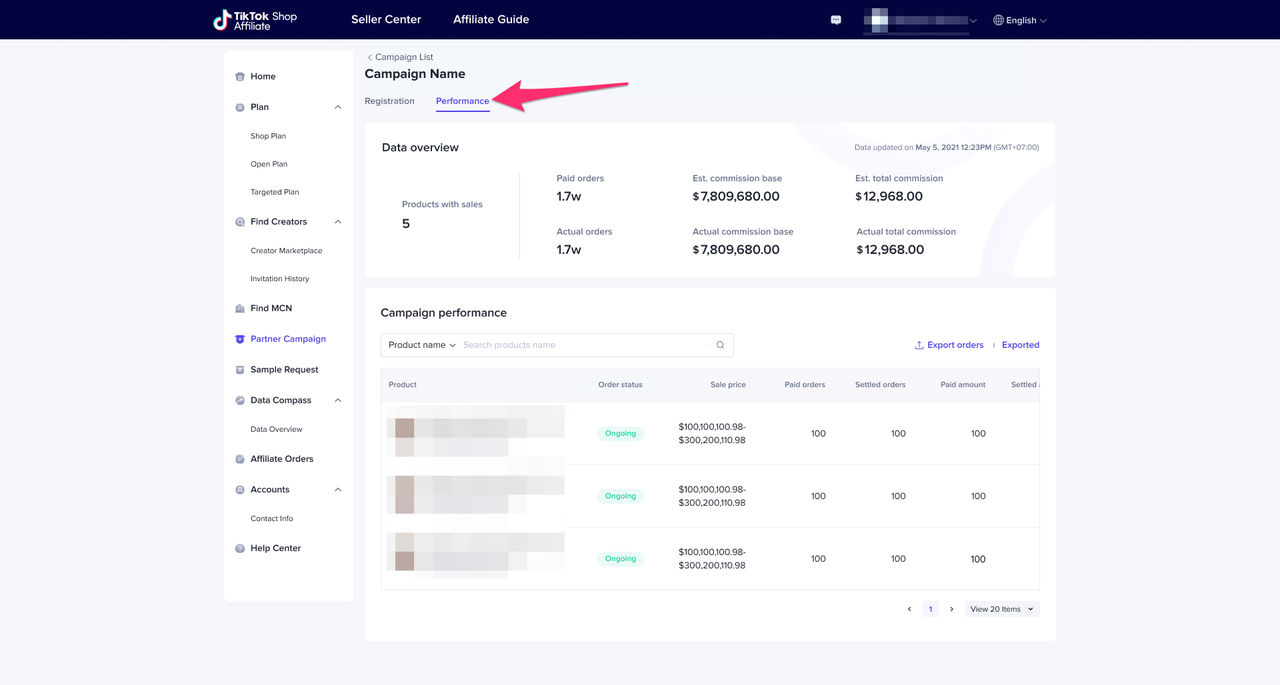
Step 1: In the
Campaign details page, press the
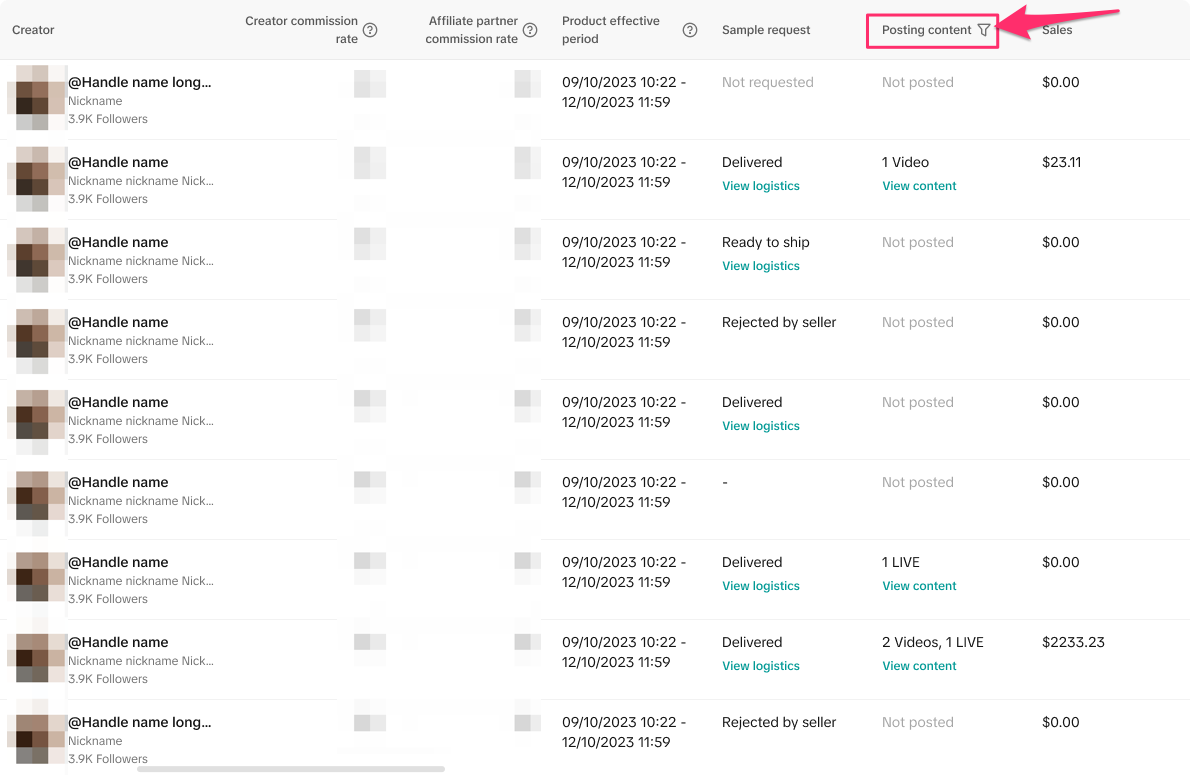
Performance tab to see details of the campaign performance. Here, you can see overall metrics, such as Collaboration and Paid metrics. You can also view product-specific metrics, including the price, commission rate, number of collaborated creators, creators who have posted content with the product, creators who have driven sales of the product, the number of paid orders, the number of settled orders, and the estimated commissions. Press the
Filter button in the Pending content column heading to filter products based on whether or not they have content posted. Press
Customize metrics to choose which metrics you want to see.
Press View progress to see more specific details about the collaboration.
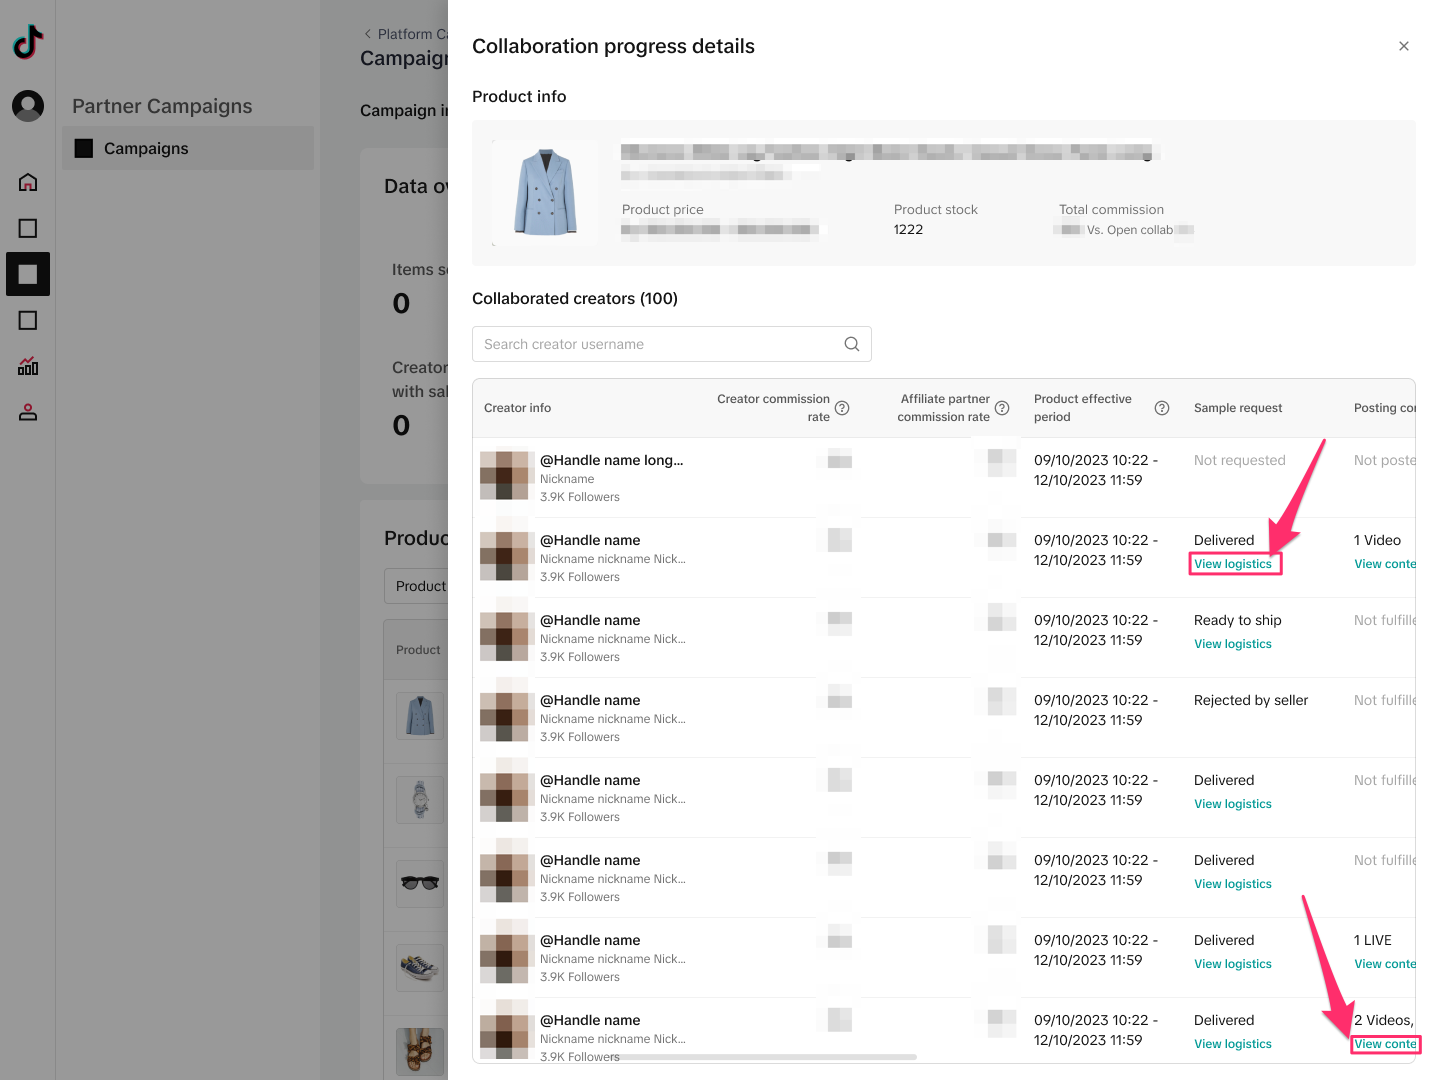
Step 2: In the
Collaboration progress details page, you can view the creators who are part of this collaboration and details of each collaboration. Press
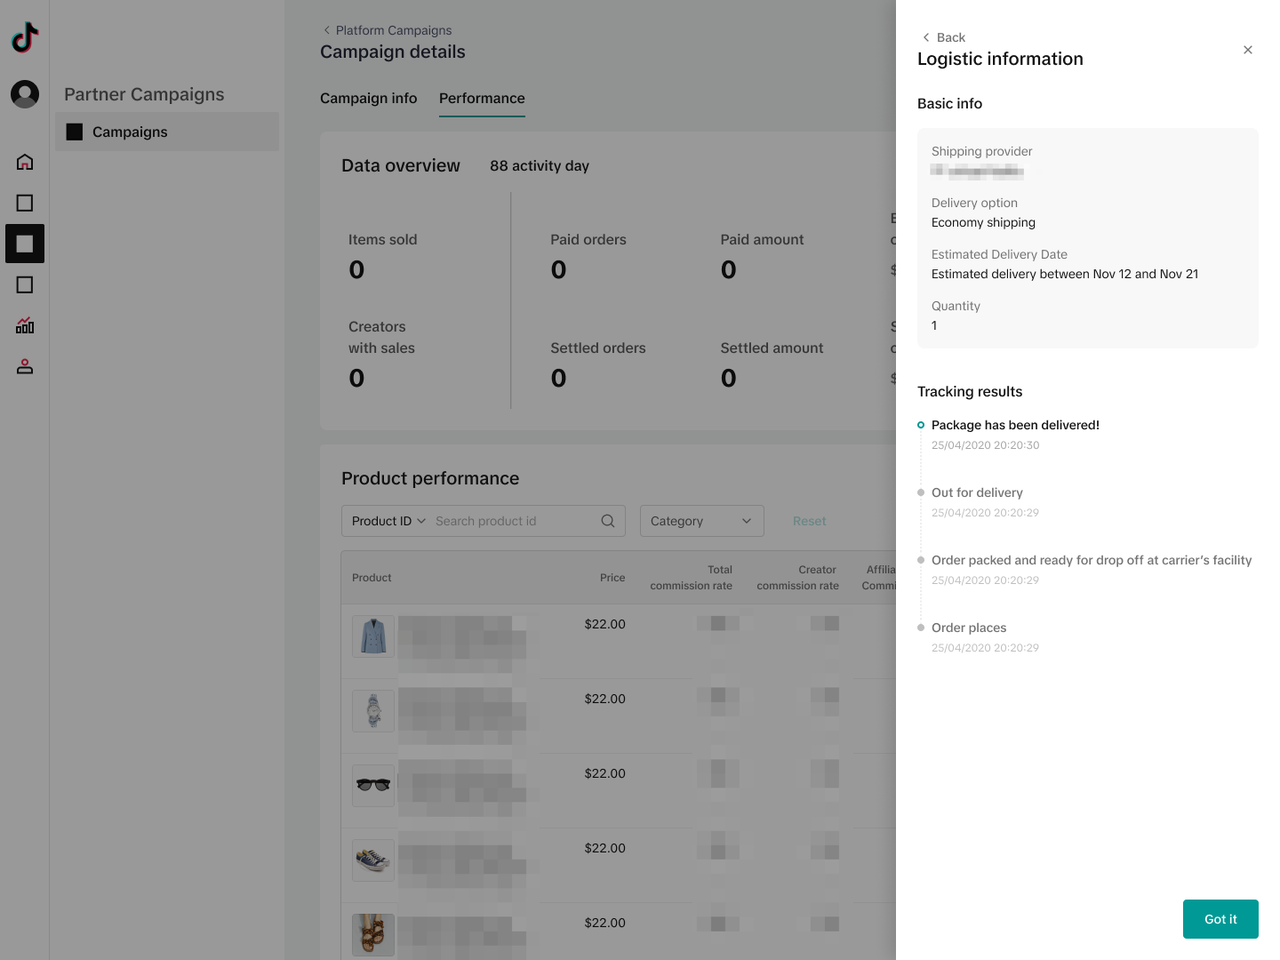
view logistics to see tracking details of the Creator's sample request. Press
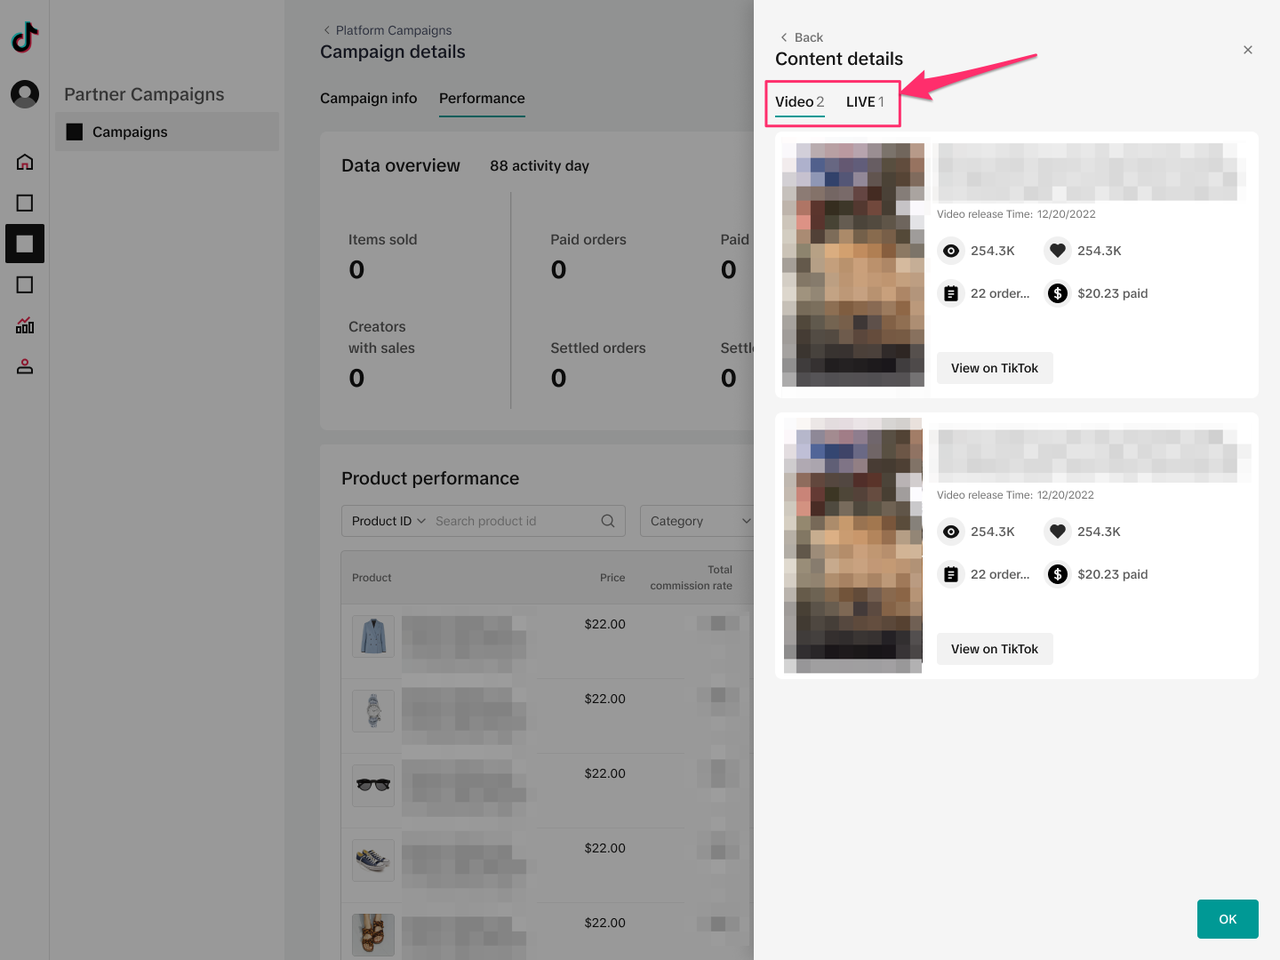
View content to see the Video and LIVE content created with this product.
Creator & Seller Experience
Seller Experience
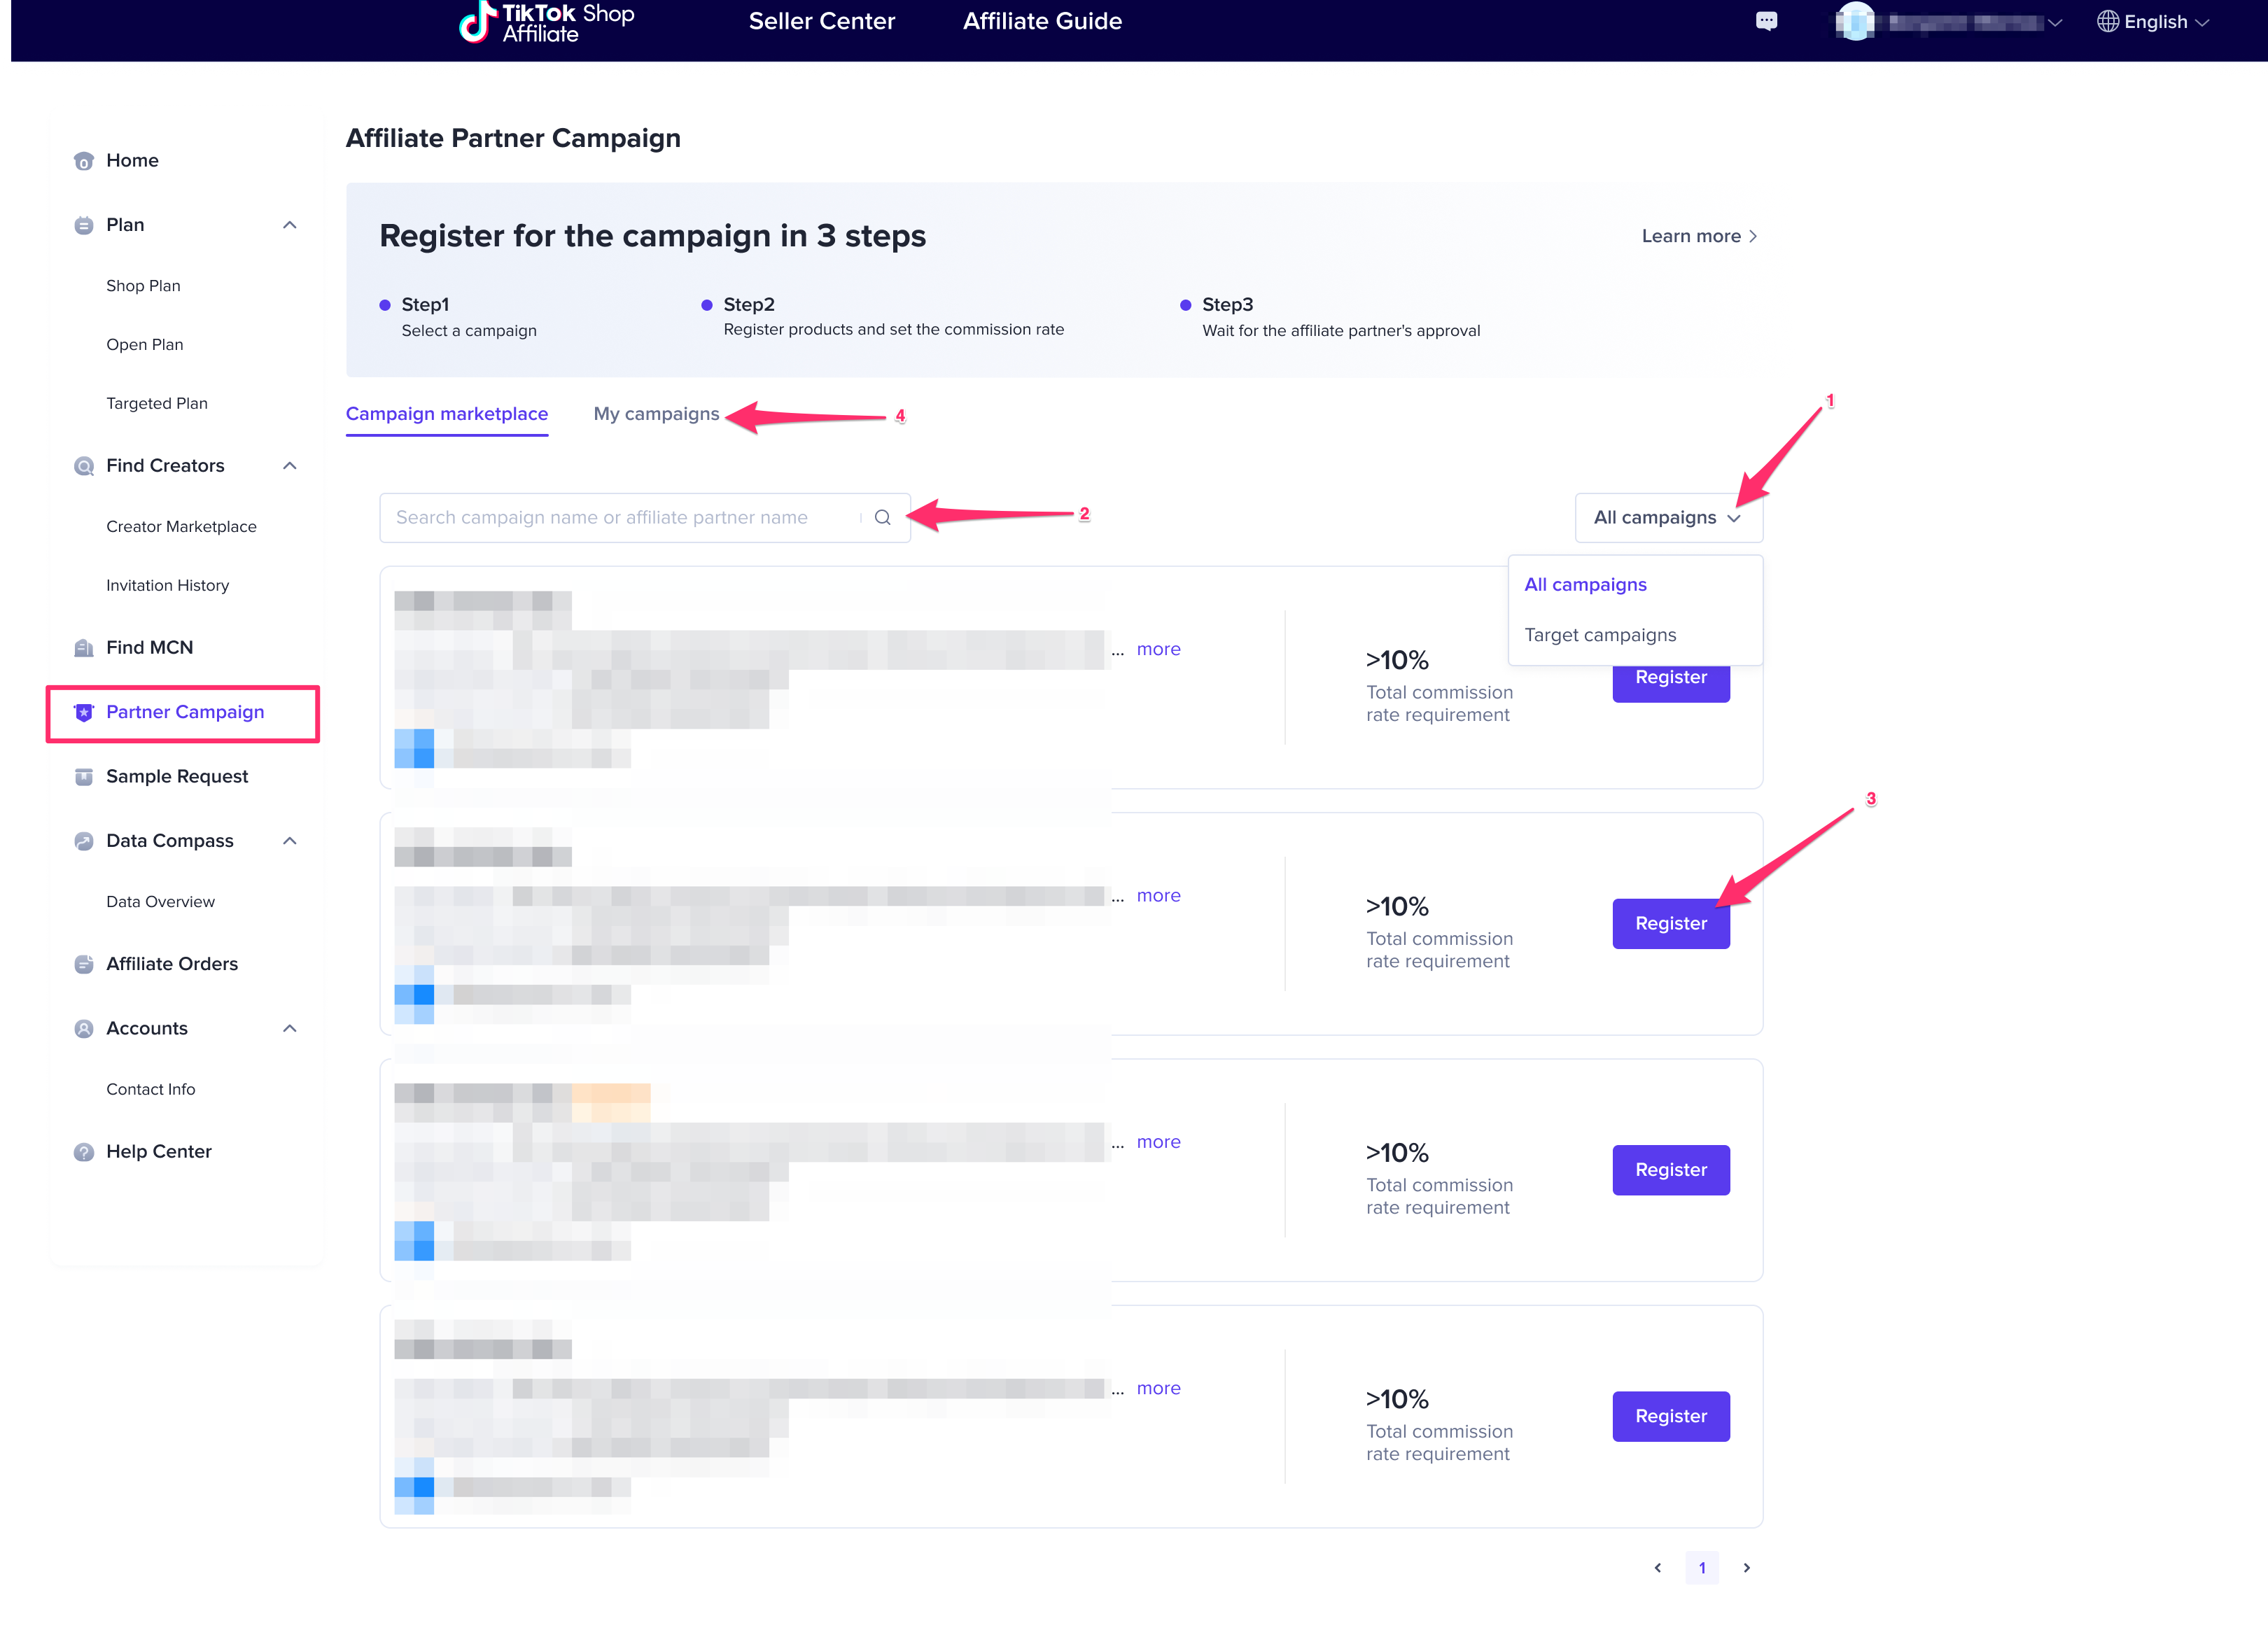
Step 1: Sellers can access agency campaigns by clicking on the
Partner Campaign tab. From here, they can see all of the campaigns that are published in the
Campaign marketplace. Sellers can (1) filter these campaigns by
All campaigns or
Target campaigns (i.e. campaigns that they were specifically invited to), (2)
Search for specific campaigns or partners, (3)
Register for a campaign, and (4) view their existing
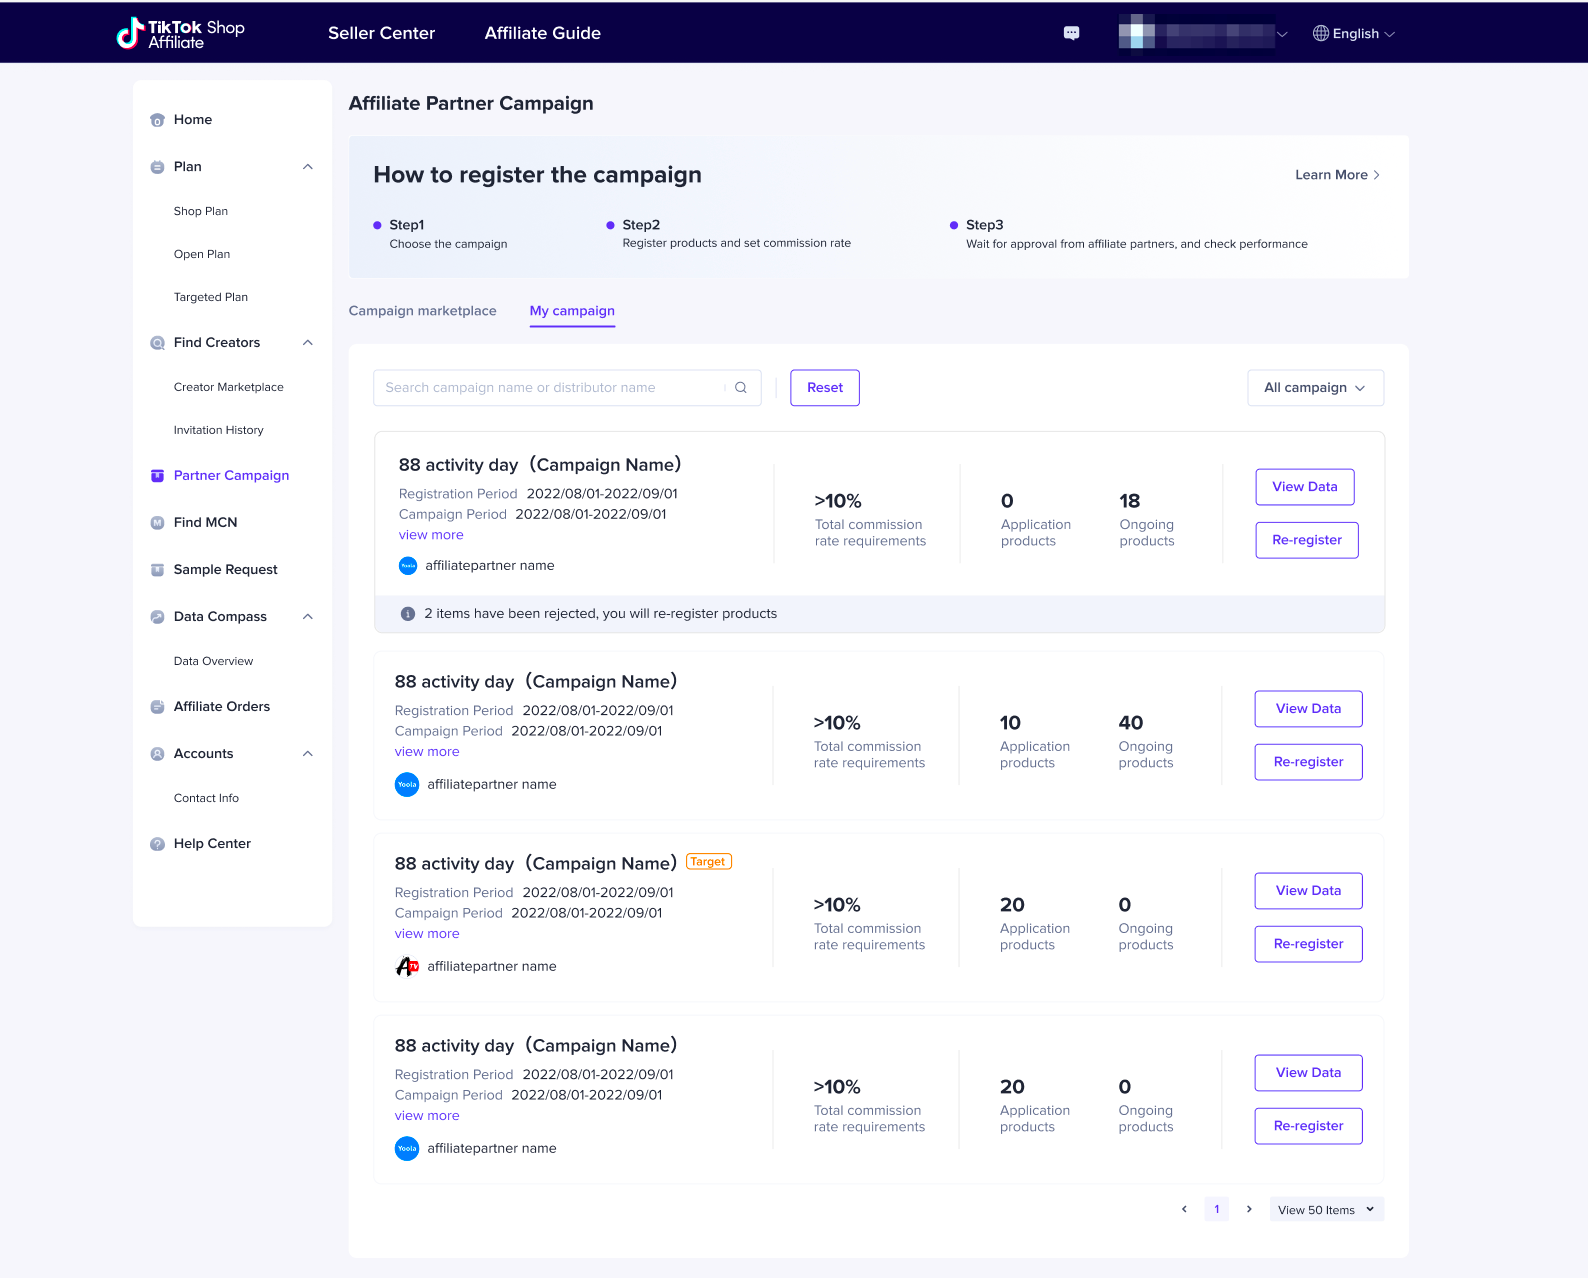
My campaigns.Step 2: In the
My campaigns tab, Sellers can click into a campaign to view more details, data, and re-register to a campaign.
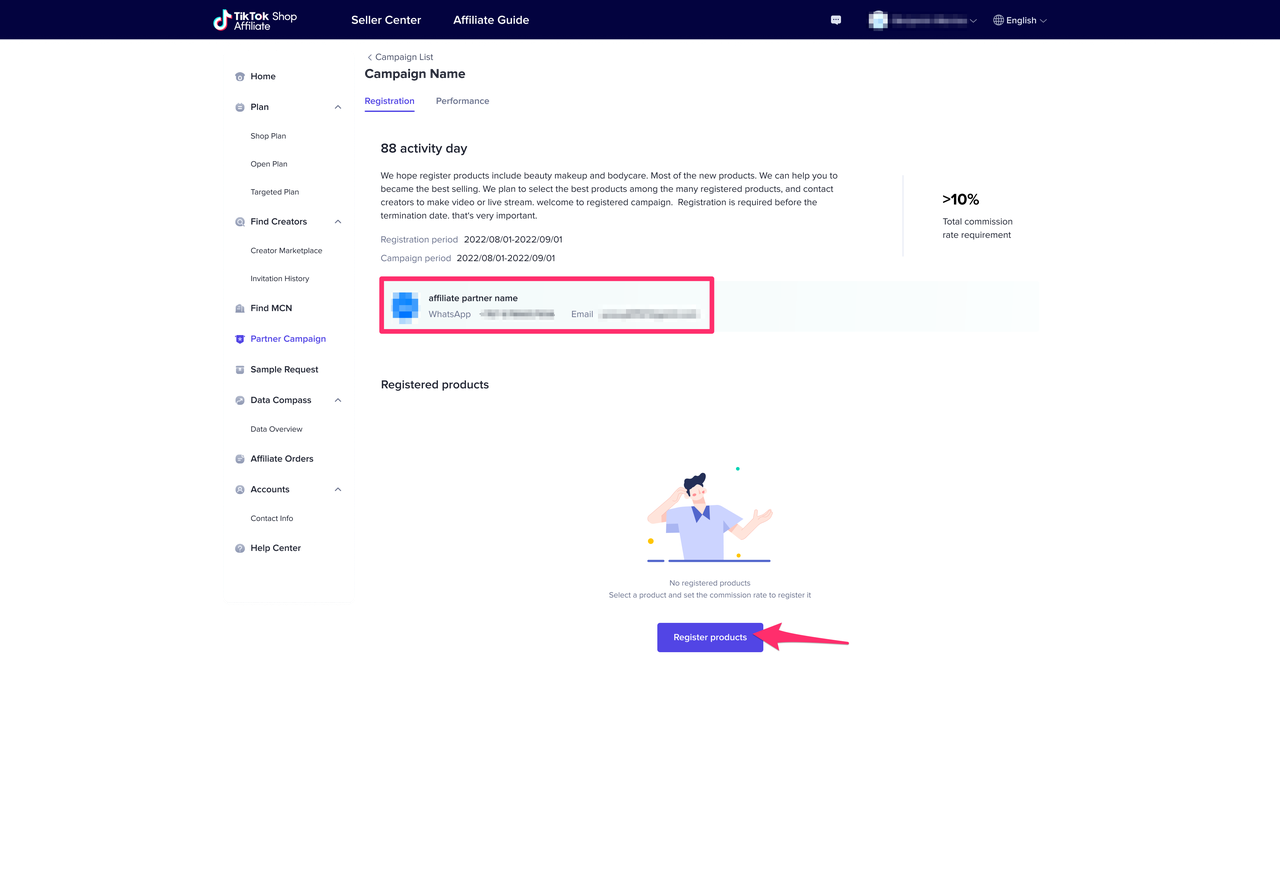
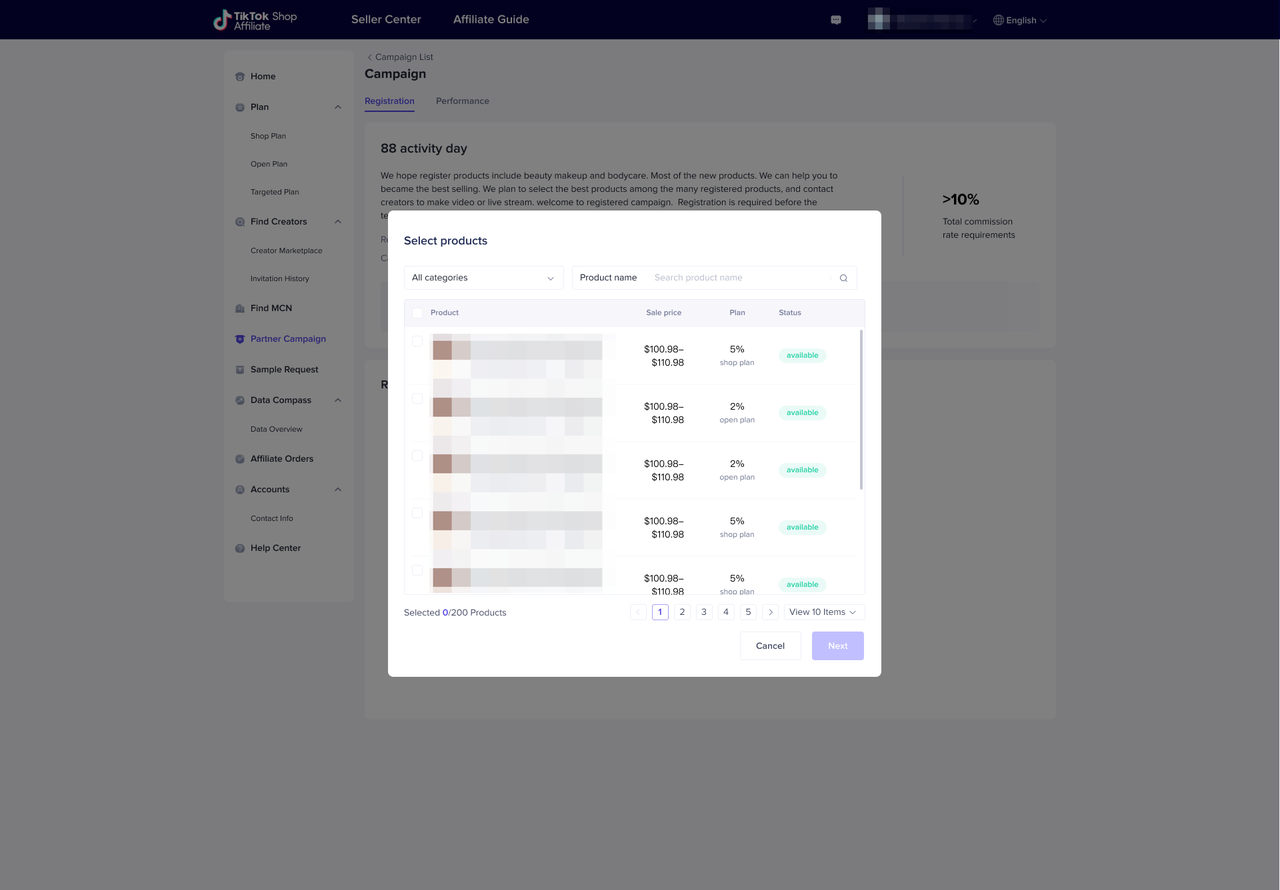
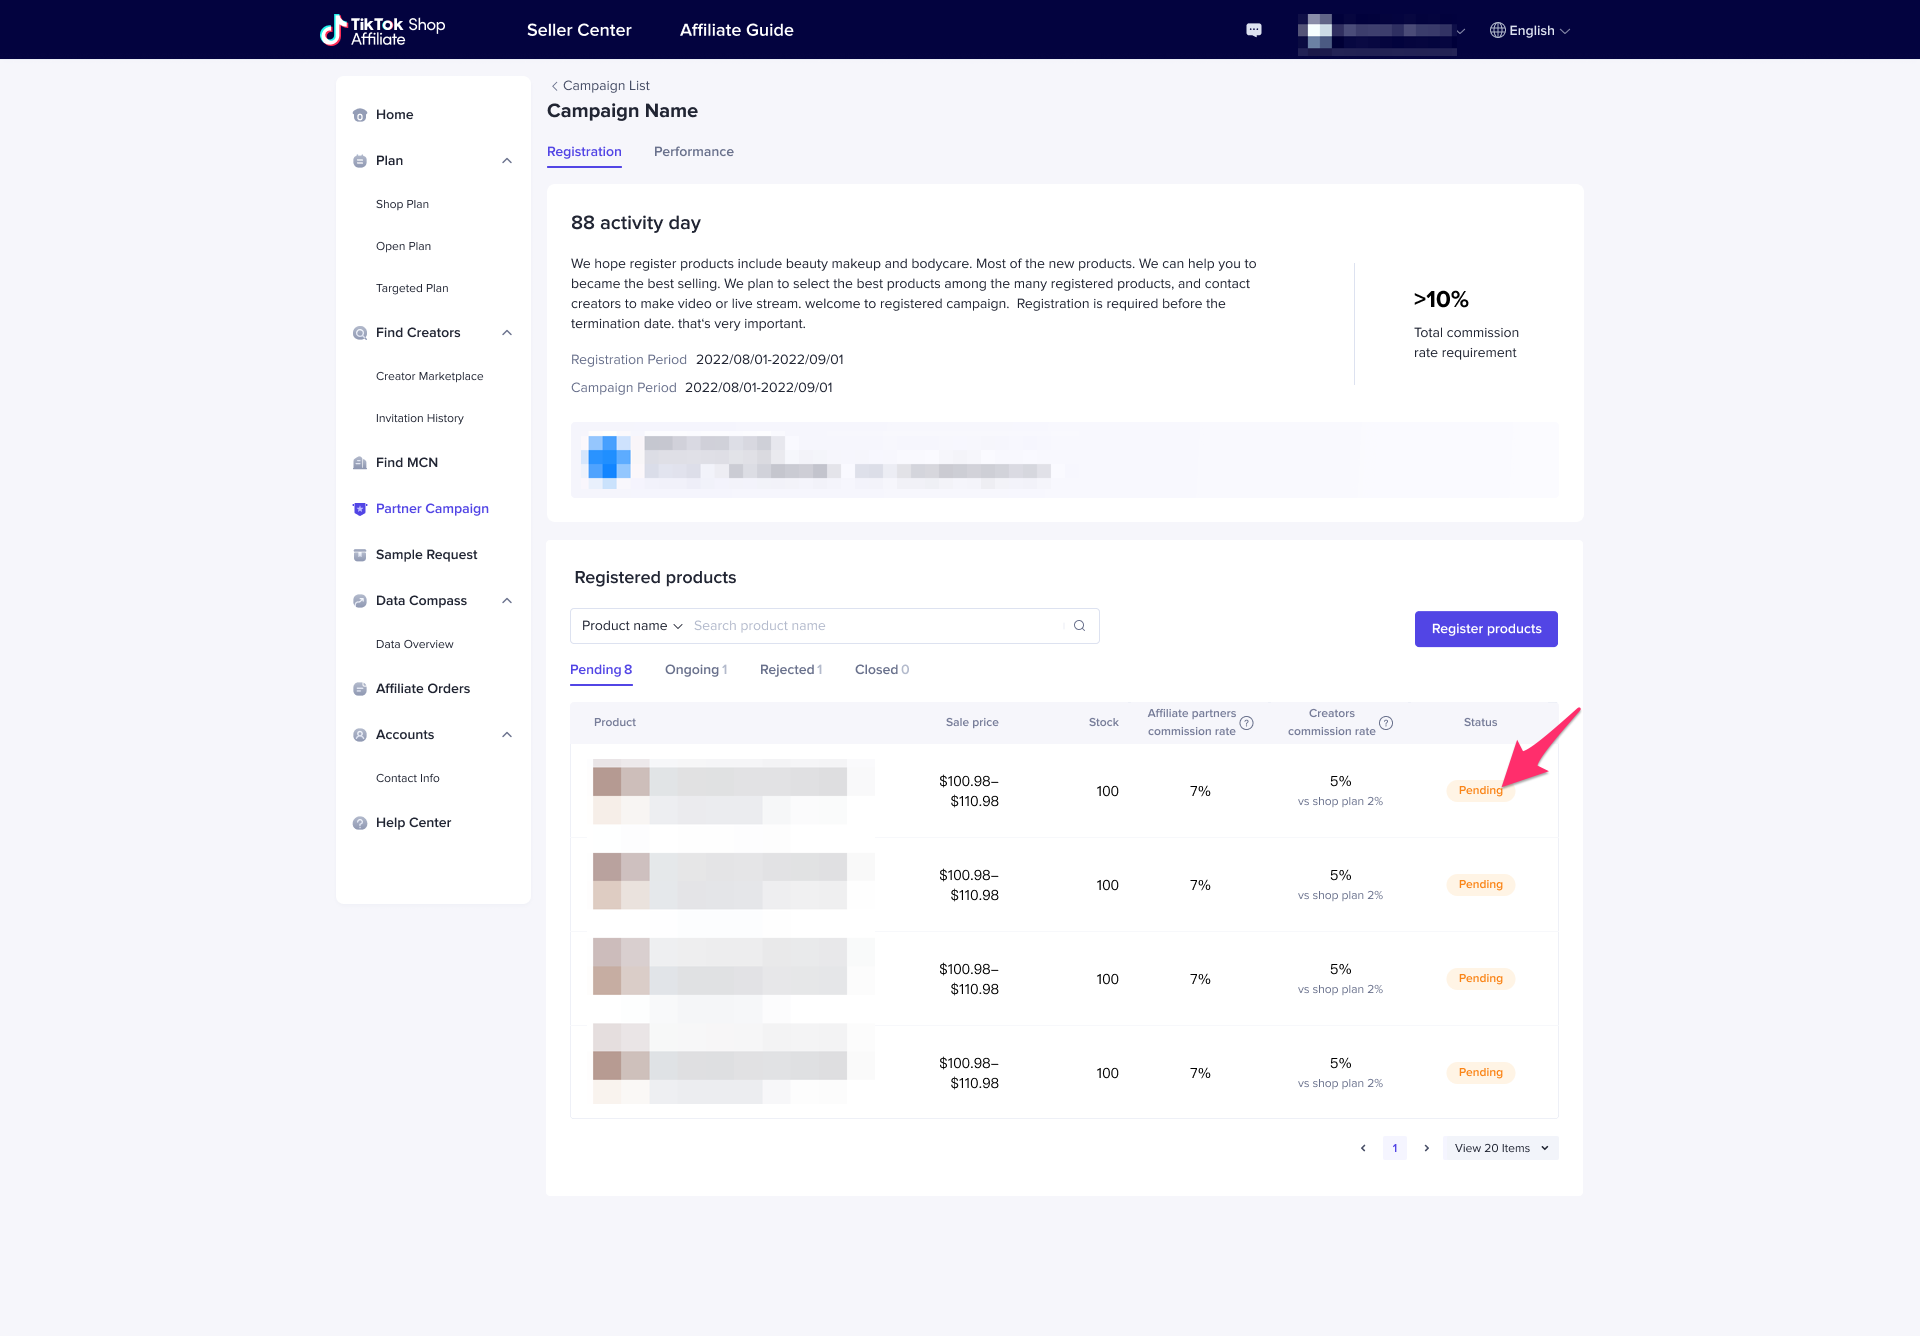
Step 3: After clicking into a specific campaign, a Seller can view more details about the campaign and the agency organizing it. Here, the Seller can also register their products by clicking
Register products and then adding them.
Step 4: Once a Seller has registered a product, it will be listed as pending on the campaign until the agency has approved it.
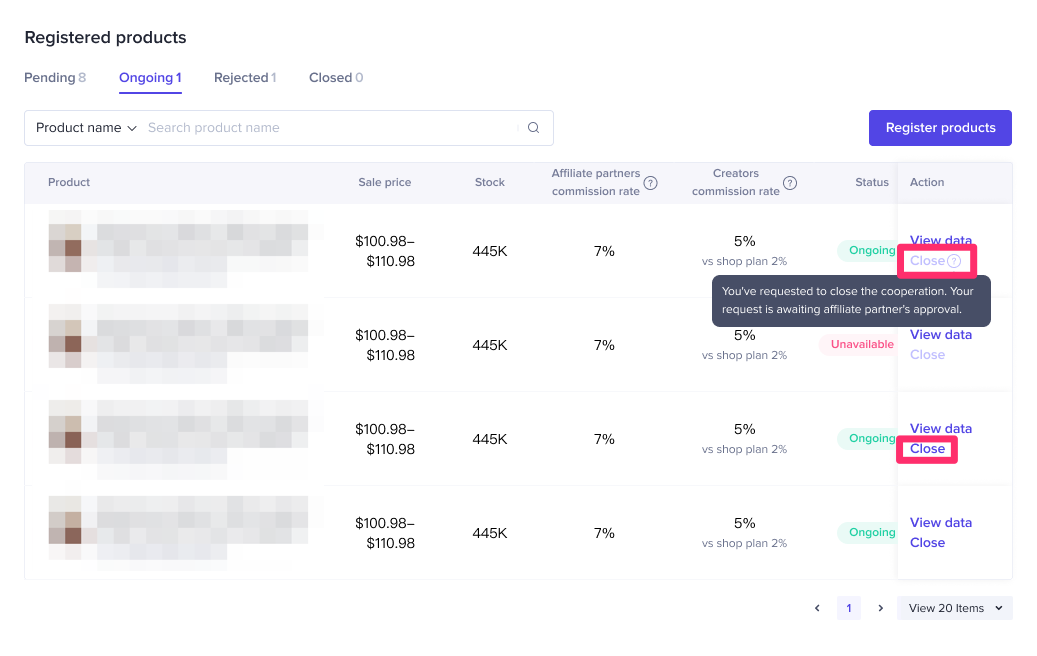
Step 5: After a product has been approved by the agency, it will appear in the Ongoing tab. Here, the Seller can choose to cancel a specific product collaboration by clicking
Close. The agency must then approve the cancellation request before it takes effect.
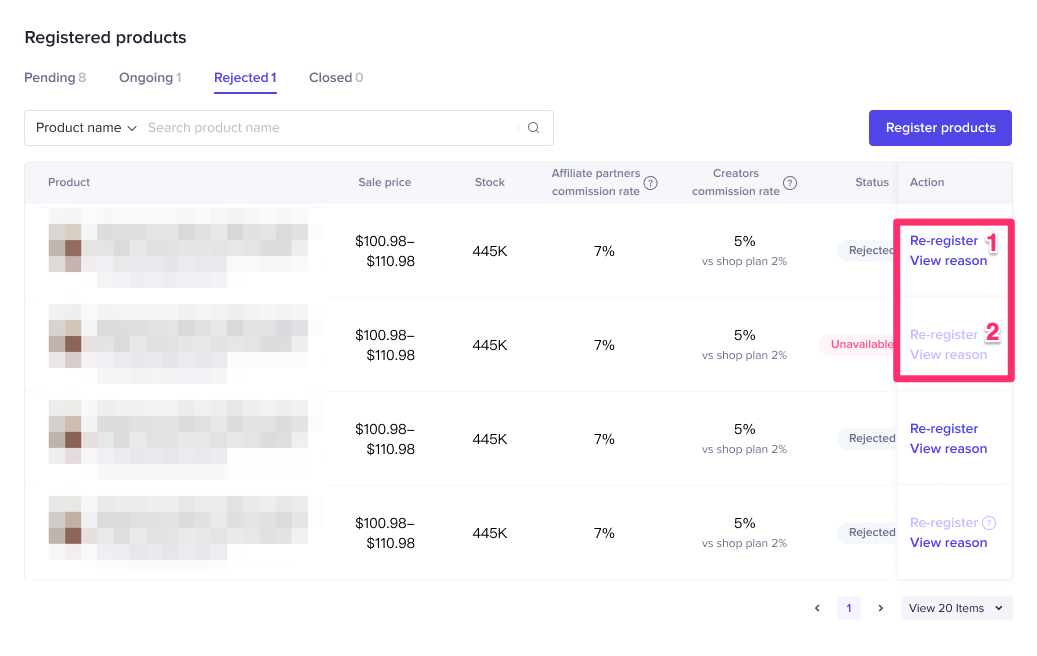
Step 6: In the
Rejected tab, a Seller can view all the collaborations that have not been approved by the agency. There are two possible scenarios here. In the first scenario (1), the agency has rejected the registration, but has provided a reason why and has given the Seller the opportunity to
Re-register. In the second scenario (2), the agency has rejected the Seller's product registration and blocked the Seller from registering the product again.
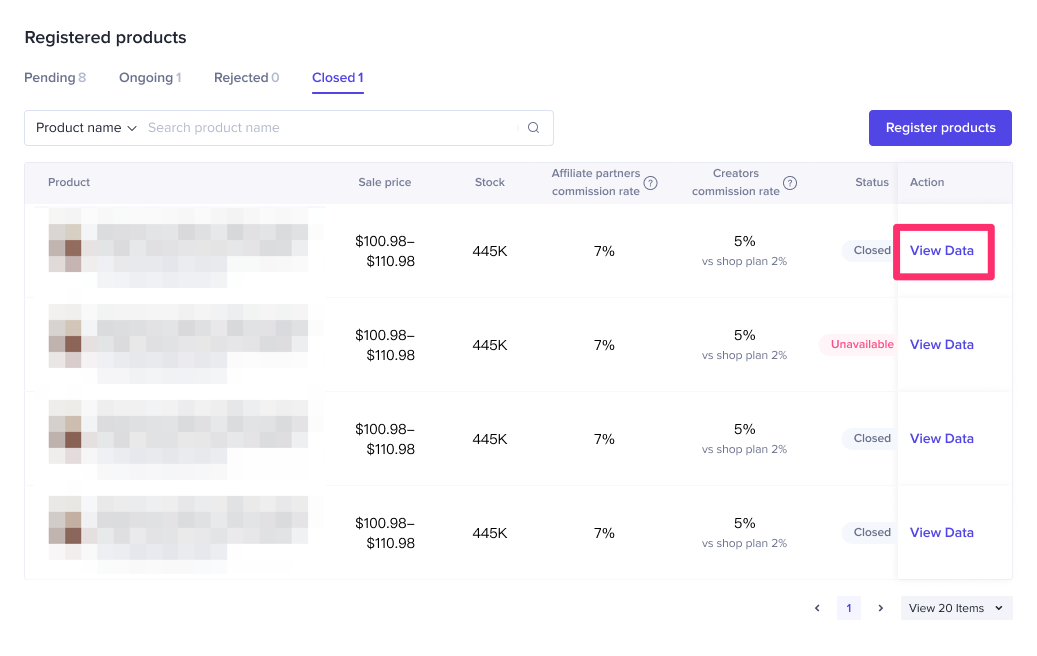
Step 7: In the
Closed tab, Sellers can
View Data for product campaigns that have already closed.
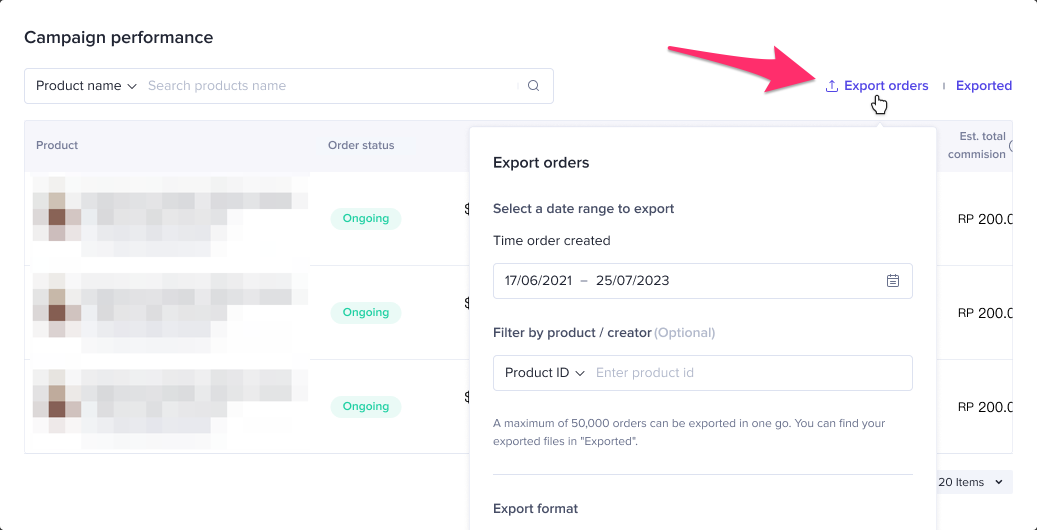
Step 8: In the
Performance tab, Sellers can view the data for this specific campaign, including the registered products, the number of orders, and the commission totals. From here, Sellers can also
Export the existing orders.
Creator Experience
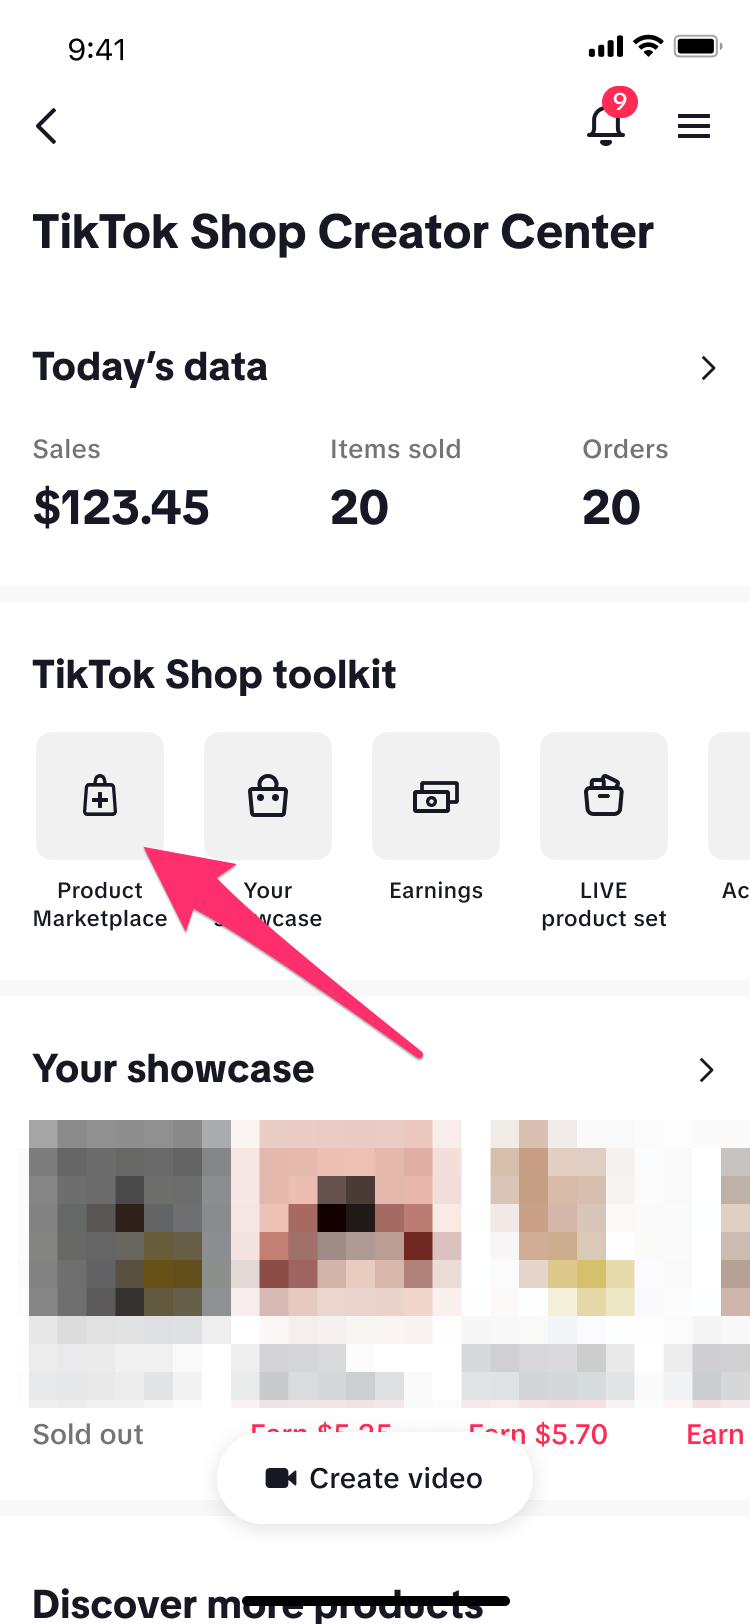
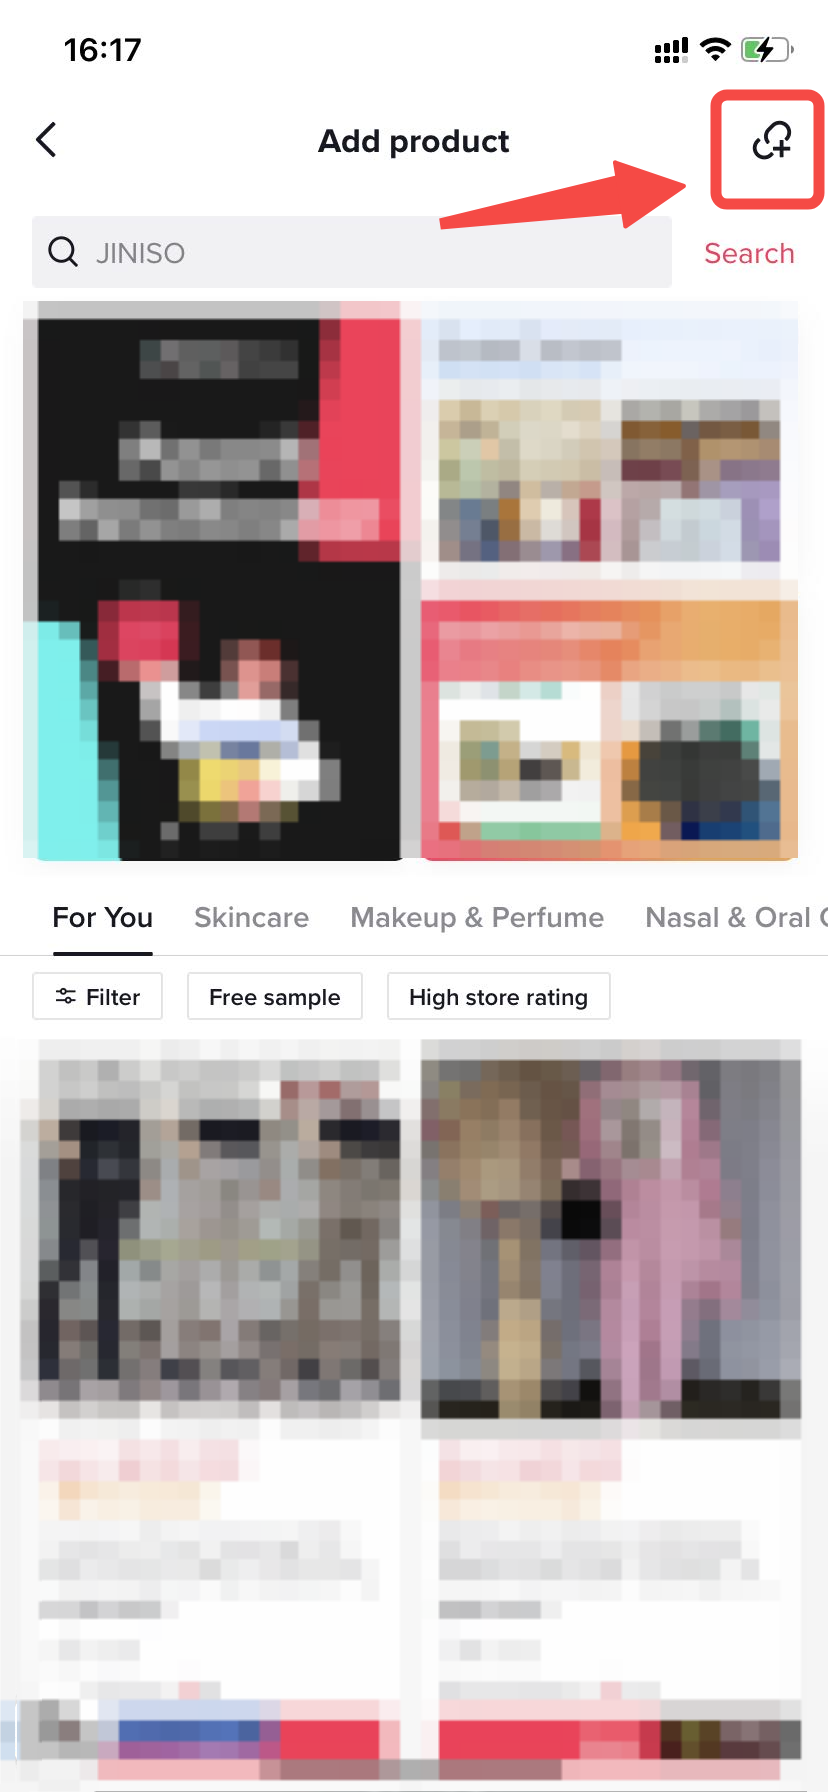
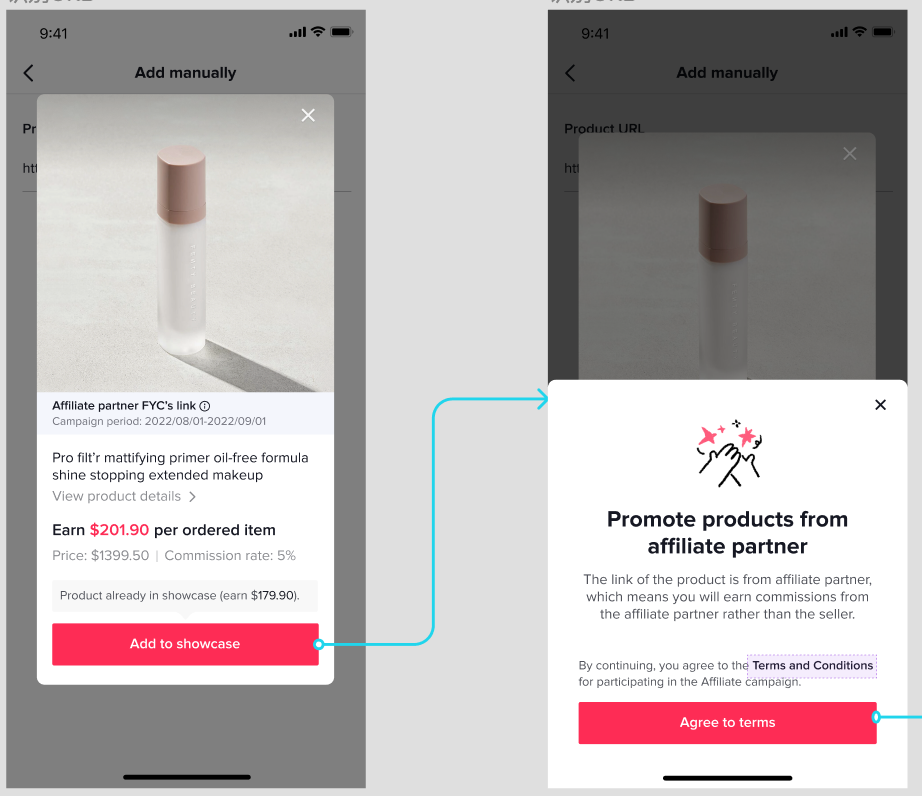
Step 1: Once the agency provides a link to the Creator, the Creator can paste that link by going to TikTok Shop, and clicking on
Add product, then the
link icon on the top right of the page, and pasting the link into
Product URL.
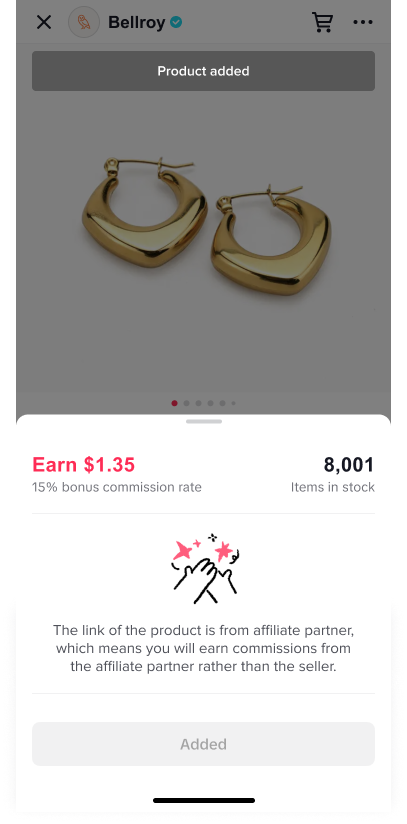
Step 2: Once the Creator has entered the product link, the Creator will be prompted to
Add to showcase and
Agree to the terms and conditions of participating in the affiliate campaign.
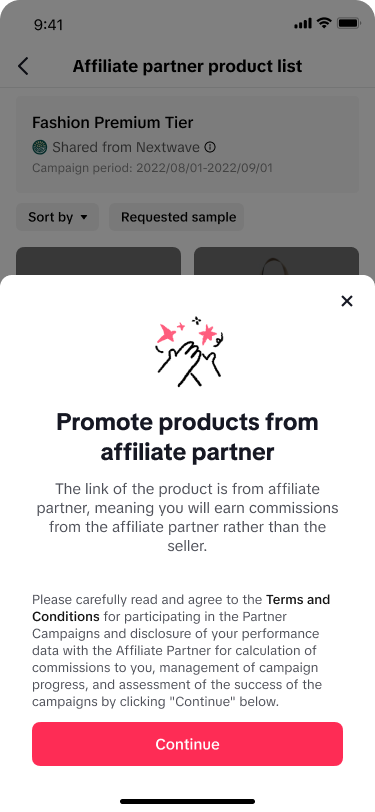
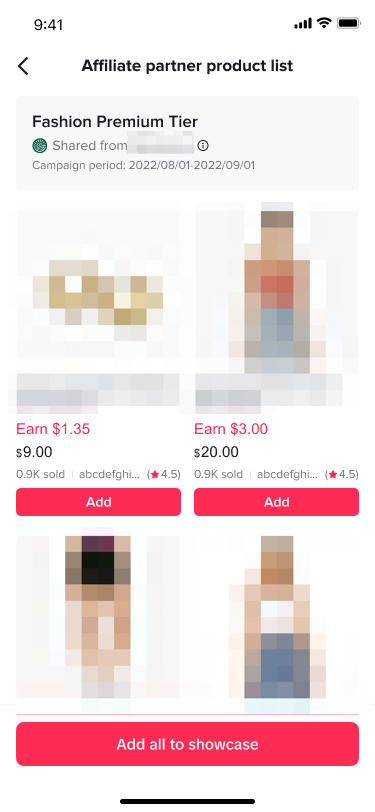
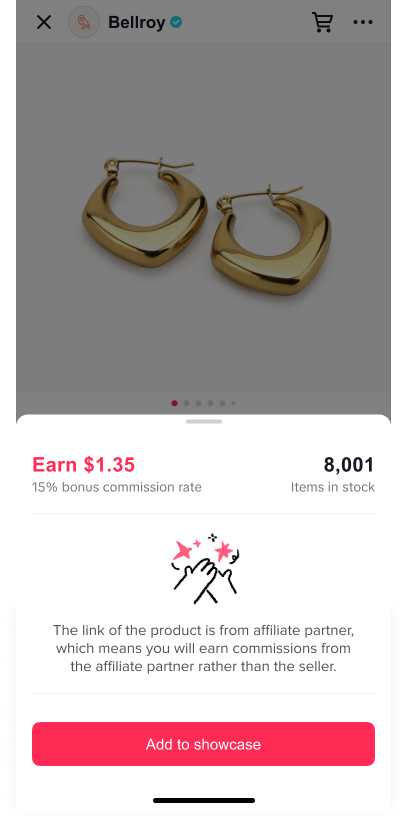
Step 3: If the Creator receives a list link, then they will be shown a list of products in the campaign after accepting the terms and conditions. The Creator can
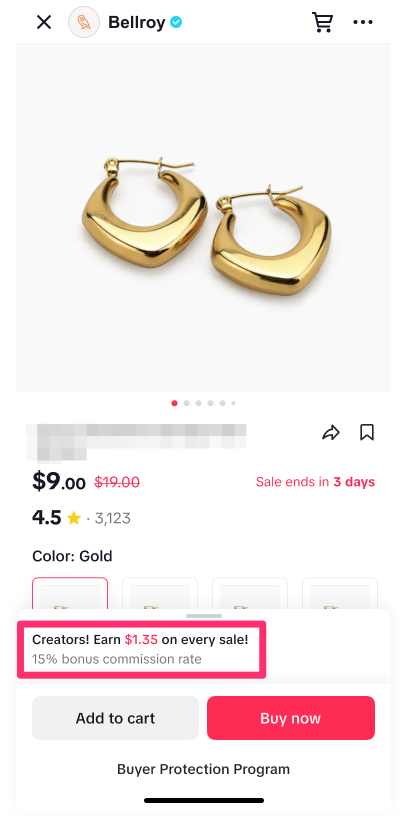
Add all to showcase or add them individually. When a Creator clicks into a product details page, they can see the commission rate and
Add to showcase. The commission rate that is shown to the Creator is the commission rate they are paid by the agency, not the Seller.
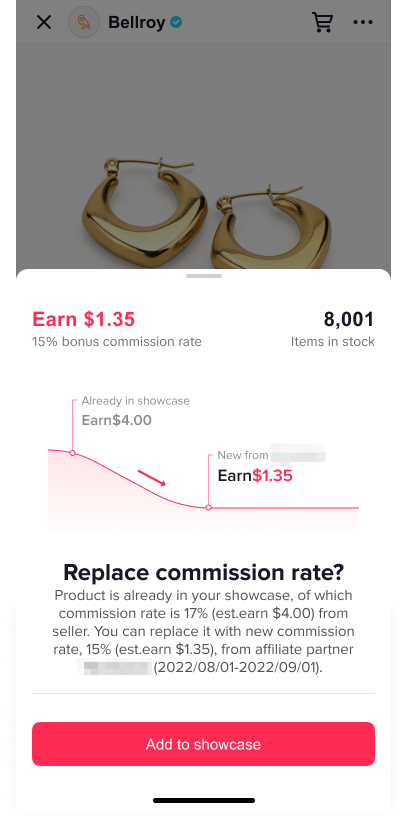
Step 4: In cases when the commission rate in this campaign is lower than the commission rate the Creator is already receiving for a product or list, the Creator will receive alerts that their commission will decrease if they add the products from this campaign.
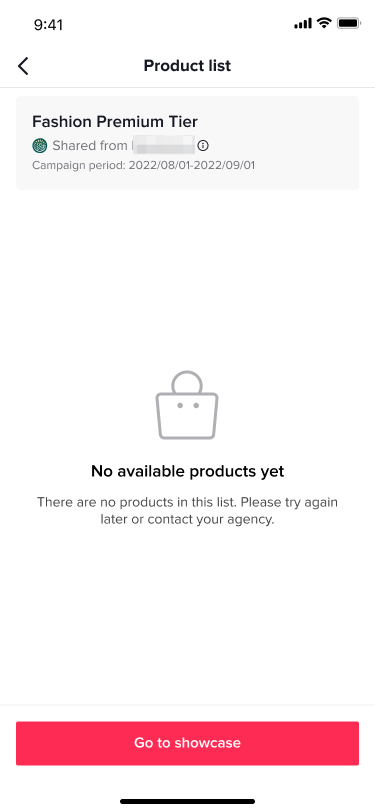
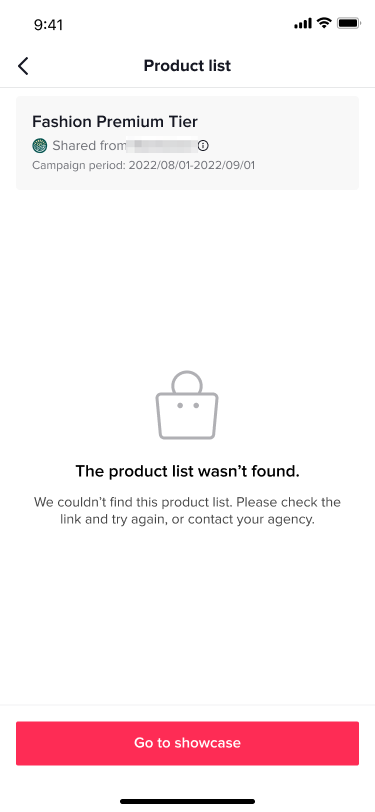
Step 5: If after entering a link, a Creator receives a
No available products yet or
The product list wasn't found message, it means that the campaign does not have any products in it yet or that the agency has deleted the product or list.
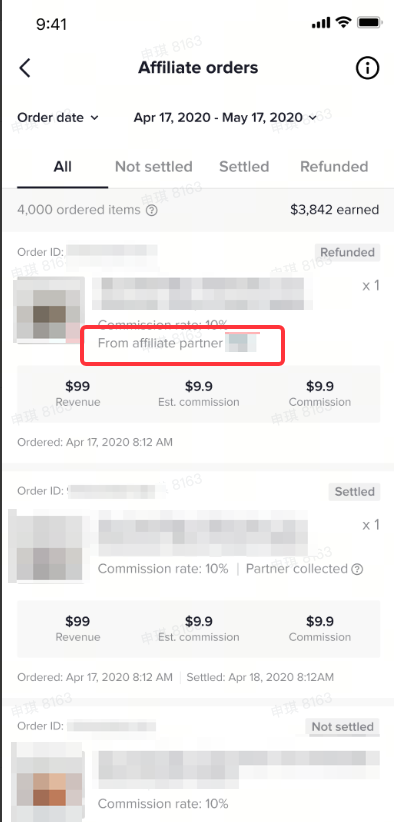
Step 6: In the
Affiliate orders page, Creators will be shown when a sale and commission is from an agency-led campaign.
FAQ
- What happens if the agency that created the Partner Campaign is also linked to one of the Creators participating in the campaign?
The agency can only collect commission from the Seller. The agency cannot collect commission from the Creator, as this would be considered "double dipping."
- What happens if the agency that created the Partner Campaign invites a Creator to the campaign who is managed by another agency?
The agency that created the campaign will still receive a commission from the Seller and can decide how much of that commission to give to the Creator. The remaining commission that goes to the Creator is then split between the Creator and the agency that manages the Creator, based on the existing agreement between both parties.
- Can sellers see creator-specific performance data?
No, sellers cannot see creator-specific performance data. Sellers are only able to view product-specific performance data. Partner Campaigns are therefore recommended for sellers who are eager to outsource their work to agencies, but do not require detailed insights into creator-specific sales performance.
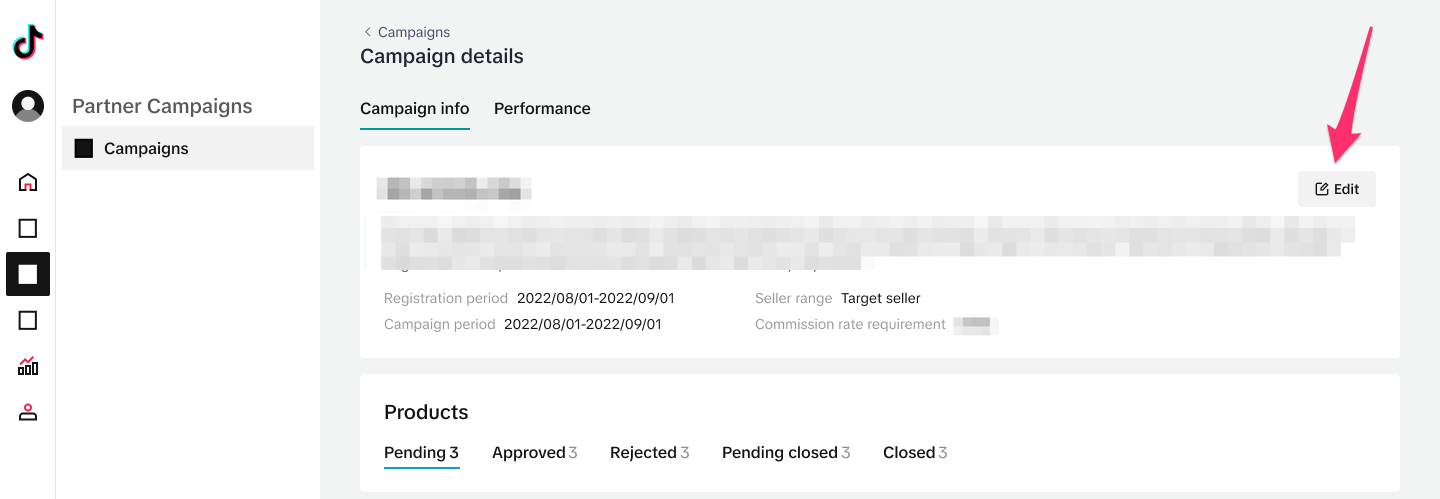
- How can I edit existing Partner Campaigns?
In the Campaign details page, press the
Edit button. Here, you can edit key details of the campaign, you can add more shop codes, and you can view the uploaded shop codes. Press
Update once you are done making changes. Once updated, your changes will take effect within 30 minutes and you cannot make edits during this period. Once it takes effect, you can continue to edit until the end of the campaign period.