

Customizing Your Return and Refund Features
Summary
What return and refund management features does TikTok Shop provide to sellers in the Seller Center?
- TikTok Shop offers automated return & refund approvals, refund without return, refund-only requests, product replacements, and adjustable return windows (14, 30, 45, or 90 days) to streamline customer service and reduce manual workload.
How can sellers automate returnless refunds, auto-approve refunds, and replacements on TikTok Shop?
- Sellers can create custom rules by selecting return/refund reasons, product categories, refund ranges, and effective timeframes in the Seller Center’s Return settings to auto-approve returnless refunds, refunds, or replacement requests, improving efficiency and customer satisfaction.
What steps must sellers follow to set up and customize their return window on TikTok Shop?
- In Seller Center’s Return settings, sellers add a new rule per product category, choose a return window duration (14, 30, 45, or 90 days), and save it; only one return window per category is allowed, with 14 days limited to select categories.
What are the key benefits for sellers using TikTok Shop’s automated return and refund tools?
- Automation reduces manual review time, speeds up response to customer requests, lowers workload, and enhances the overall customer experience by enabling faster resolutions and flexible return/refund options.
Where can sellers find support if they need help setting up return and refund automations on TikTok Shop?
- Sellers can contact their Account Manager or use the Seller Center’s Contact Us page for assistance with automating return and refund requests.
Overview
Returns and refunds occur when customers are dissatisfied with their orders. Understanding the tools available to manage the return and refund process effectively can help you better address customer requests, reduce manual workload, and enhance the overall customer experience.Features Available in Seller Center:
- Automated Return & Refund Approval
- Refund Without Return: Enable auto-approval for return and refund requests, allowing customers to keep the items without returning them.
- Refund Requests: Enable auto-approval for refund-only requests, such as scenarios where "Package received but missing items" or "Package wasn't received."
- Replacement: Offer product replacement as a service option, allowing customers to choose a replacement instead of a refund.
- Adjustable Return Window
- Set a custom return window by choosing from 14 days (for certain categories), 30 days, 45 days, or 90 days.
- If no selection is made, the default return window of 30 calendar days from the "Delivered" date will apply for customer return and refund requests.
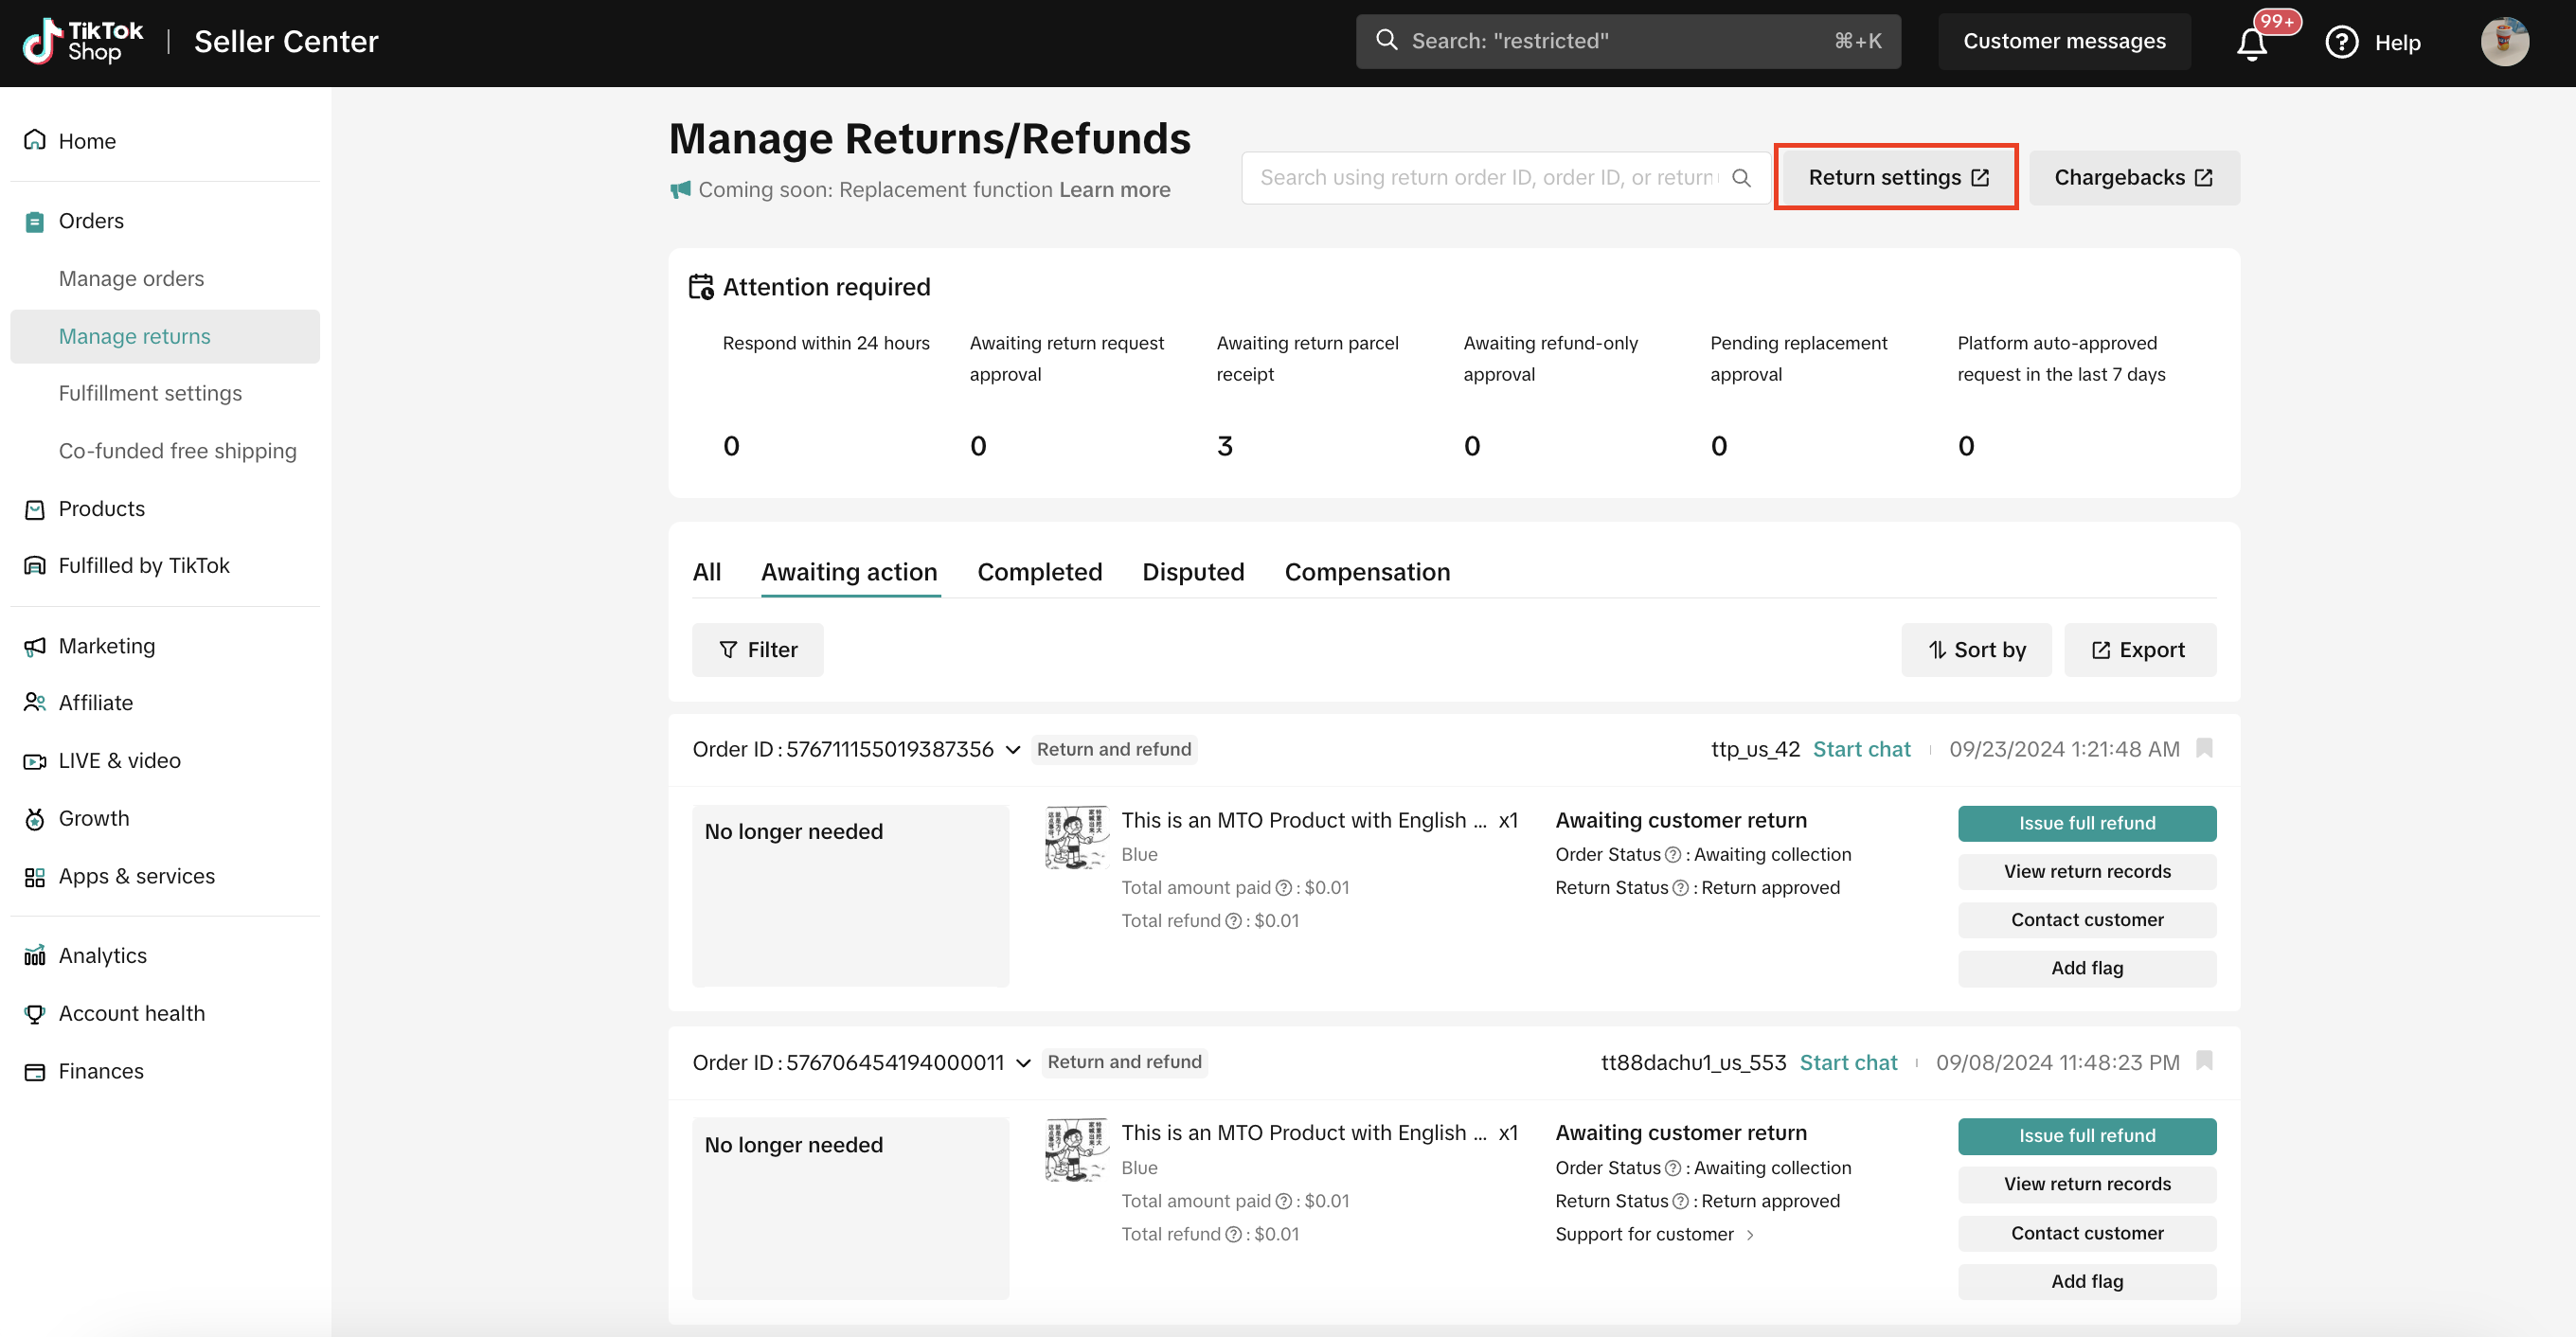
How to Locate the Return and Refund Features
You can manage your return, refund, and replacement settings for certain requests in the Seller Center.To find these settings:
- In the Seller Center, go to Orders and click the Manage Returns page.
- Select the Return settings tab.
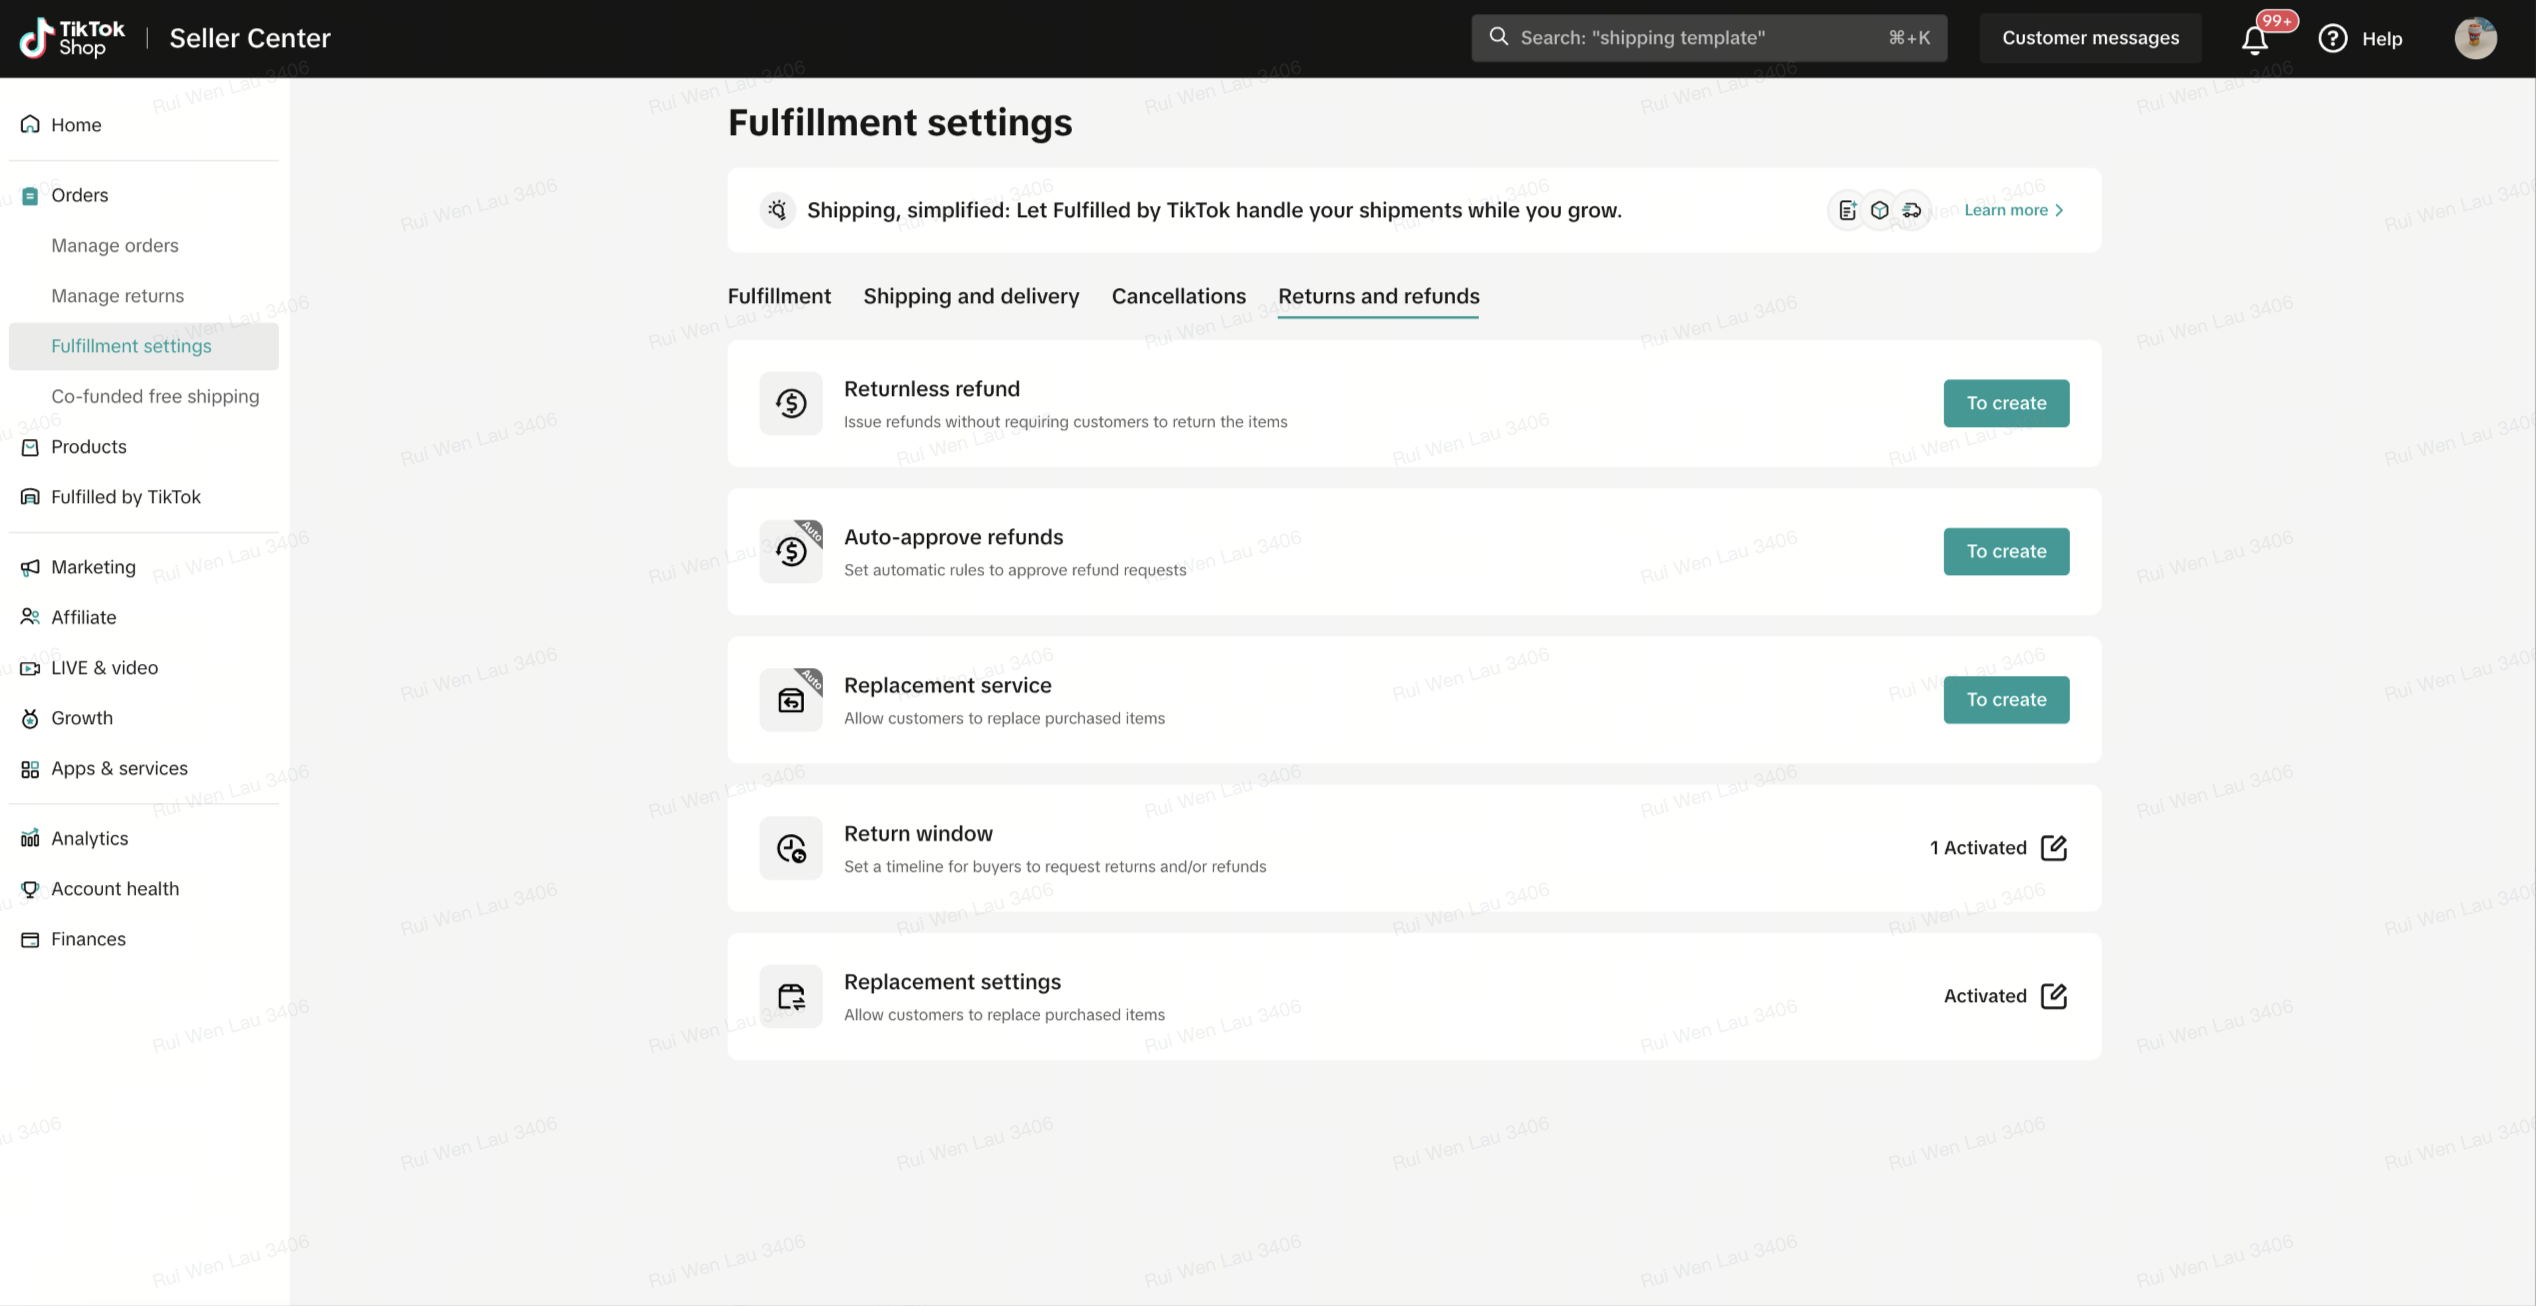
- In the Seller Center, go to Orders and click the Return settings page.
- Select the Returns and refunds tab.
How to Automate Return and Refund Requests
Automating the review process for return, refund, and product replacement requests can significantly increase efficiency and reduce your manual workload. By customizing the process, you can streamline these requests, minimize manual intervention, and speed up response times, ultimately benefiting your business and improving customer satisfaction.Follow the steps below to automate certain return and refund requests:
- How to Automate Return without Refund
- How to Automate Auto-Approval Refunds
- How to Automate Replacements
How to Automate Returnless Refunds
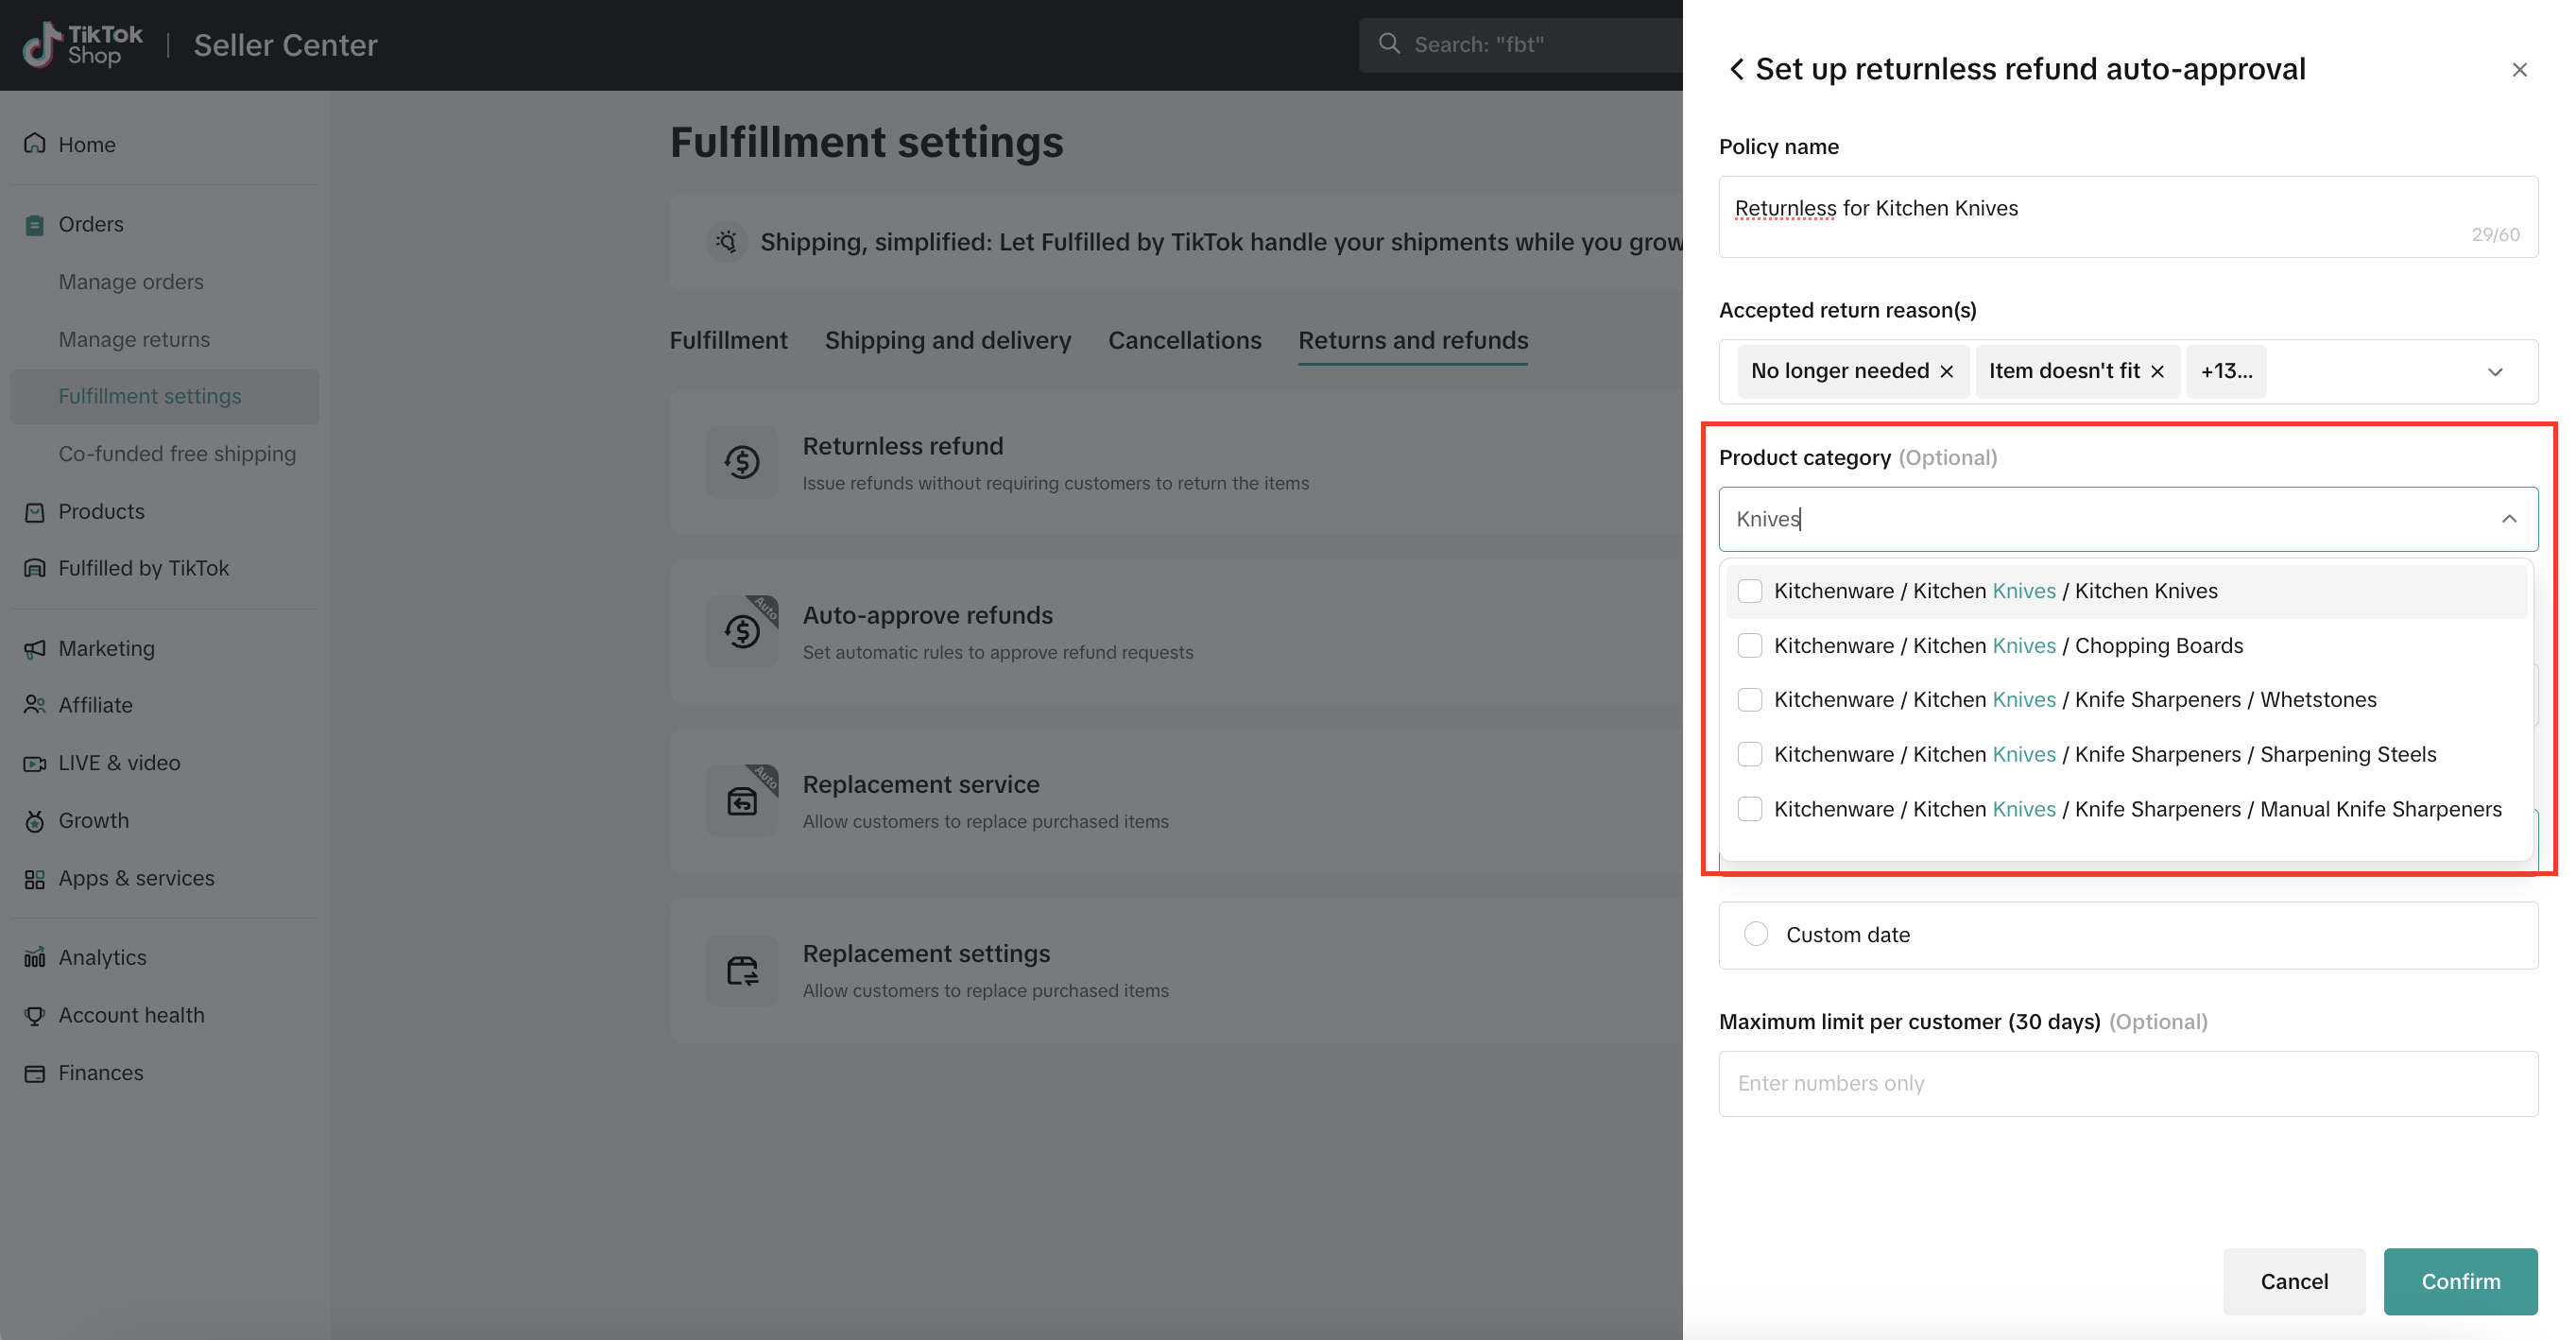
To set up a return without refund automation for select return reasons (item no longer needed, item doesn't match description, missing or broken parts, etc.), follow these steps:- In the Seller Center, go to Orders and click the Return settings page.
- Select the Returns and refunds tab.
- In the Returnless refund row, select "To create."

- Select "Add new rule."

- Enter the Policy name (e.g. "Returnless for Kitchen Knives")
- Select the Accept rule reason(s) from the drop-down list.

- Select the Product category from the drop-down list.
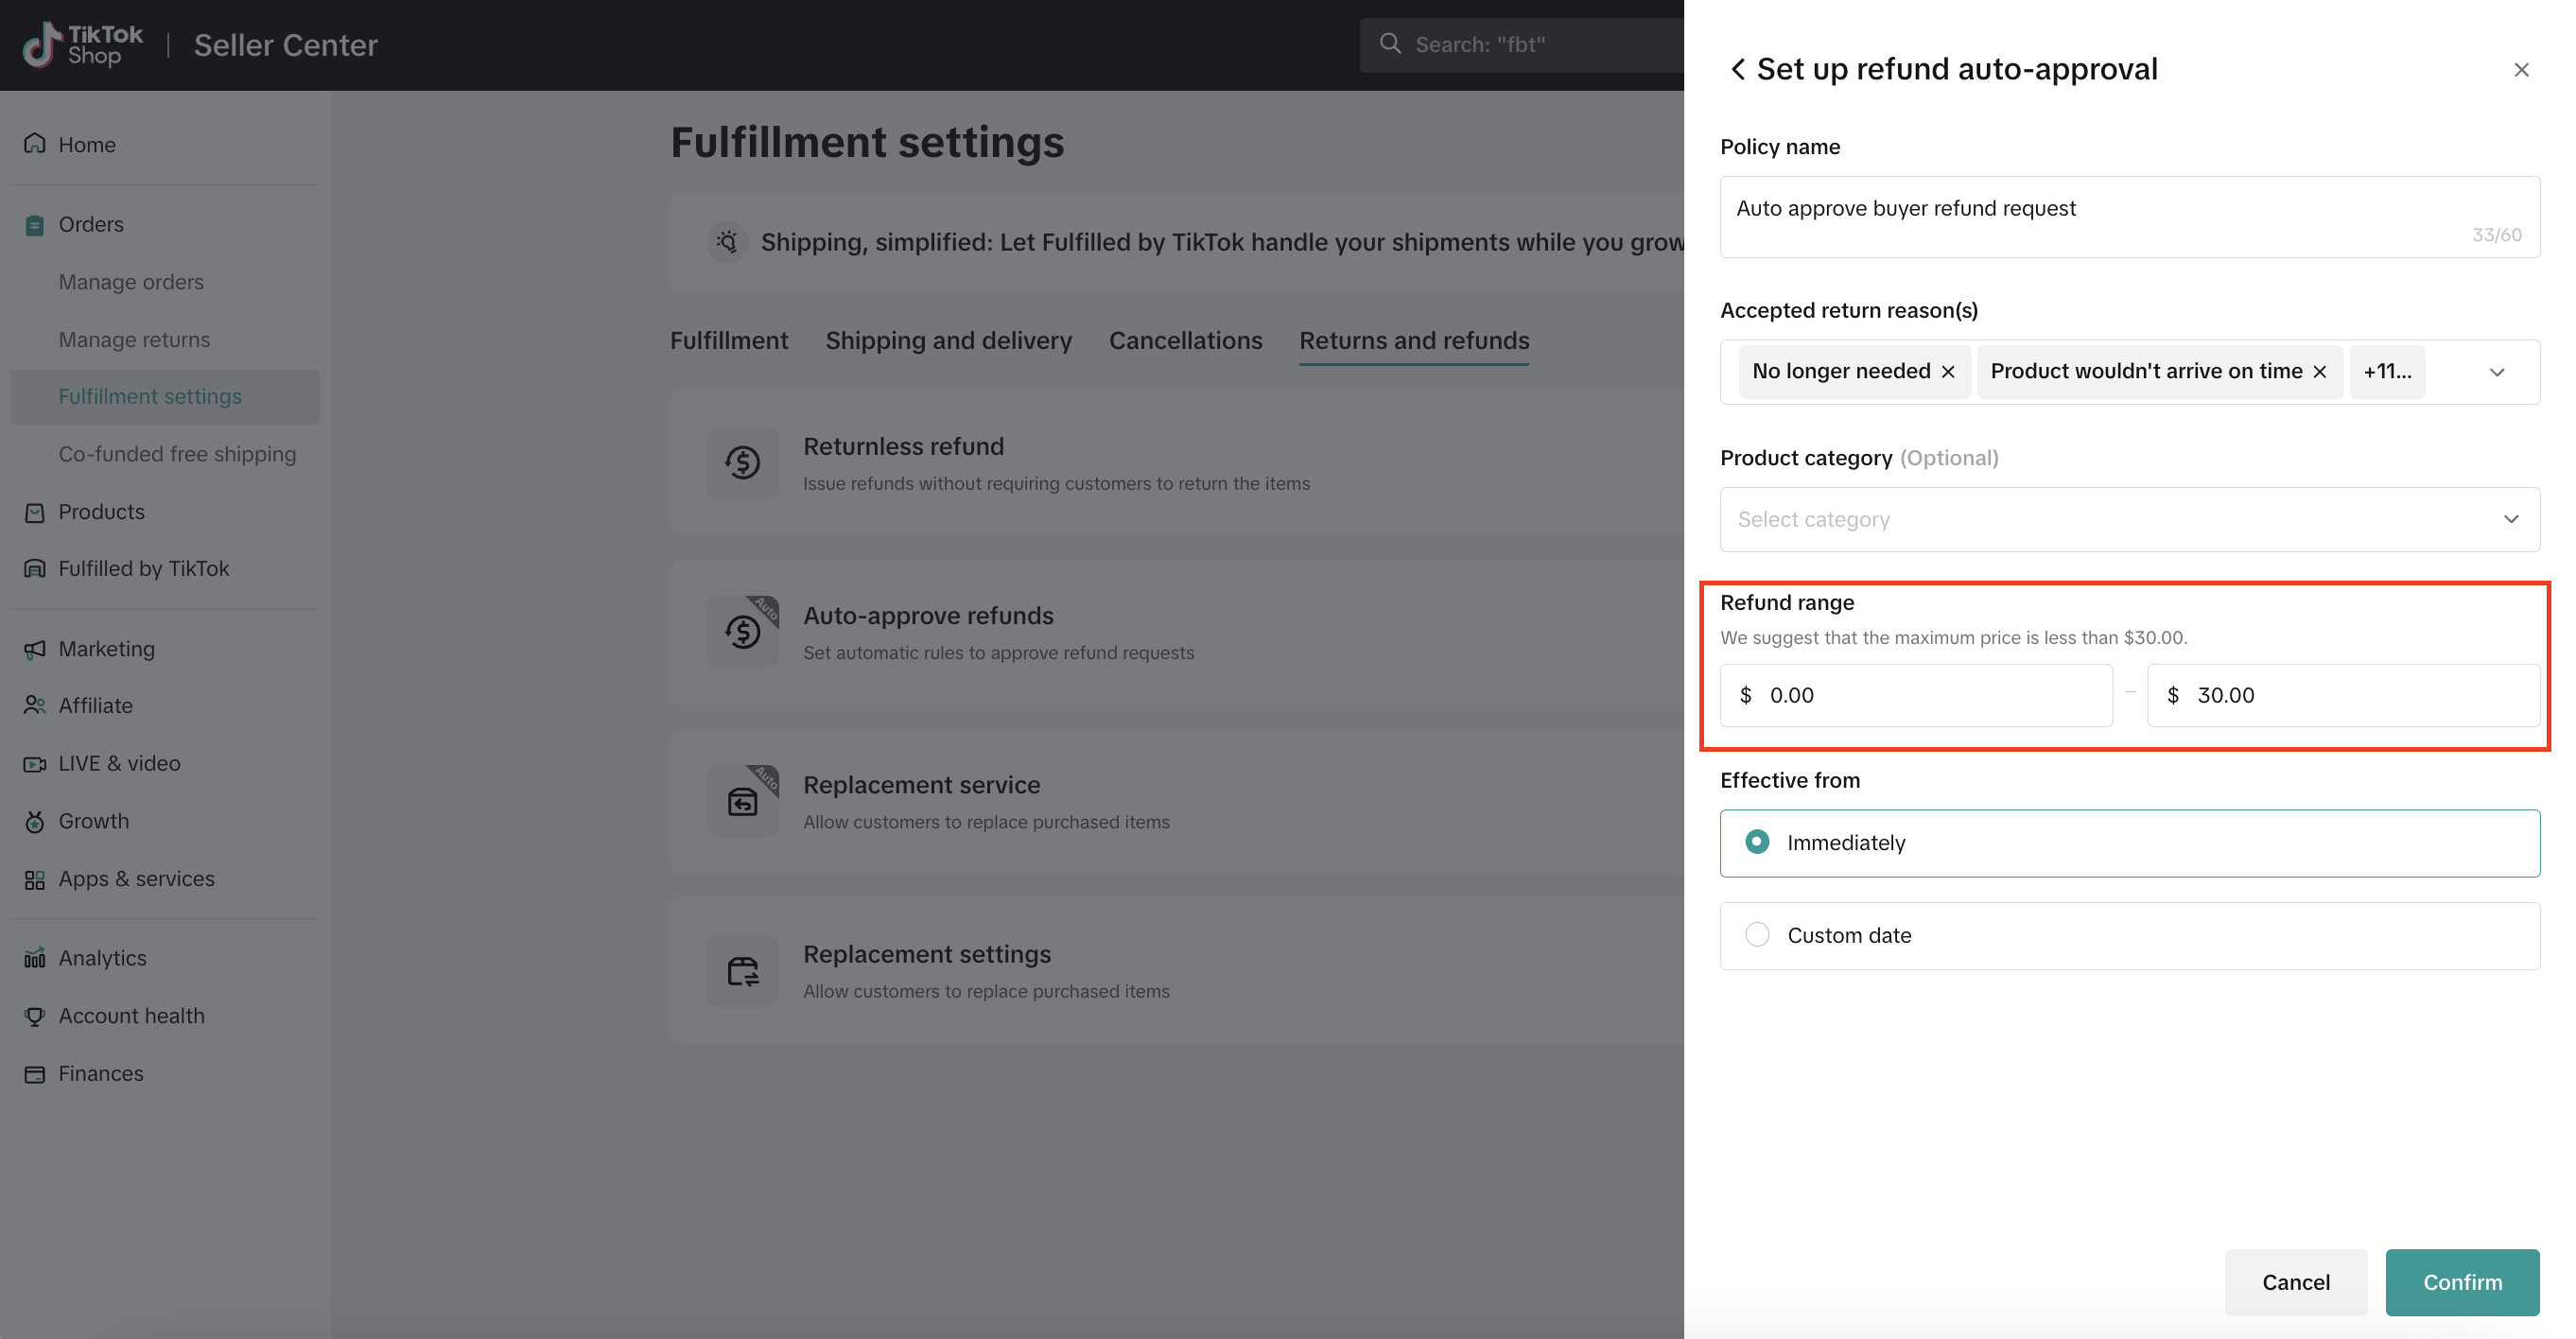
- Enter a Refund range.
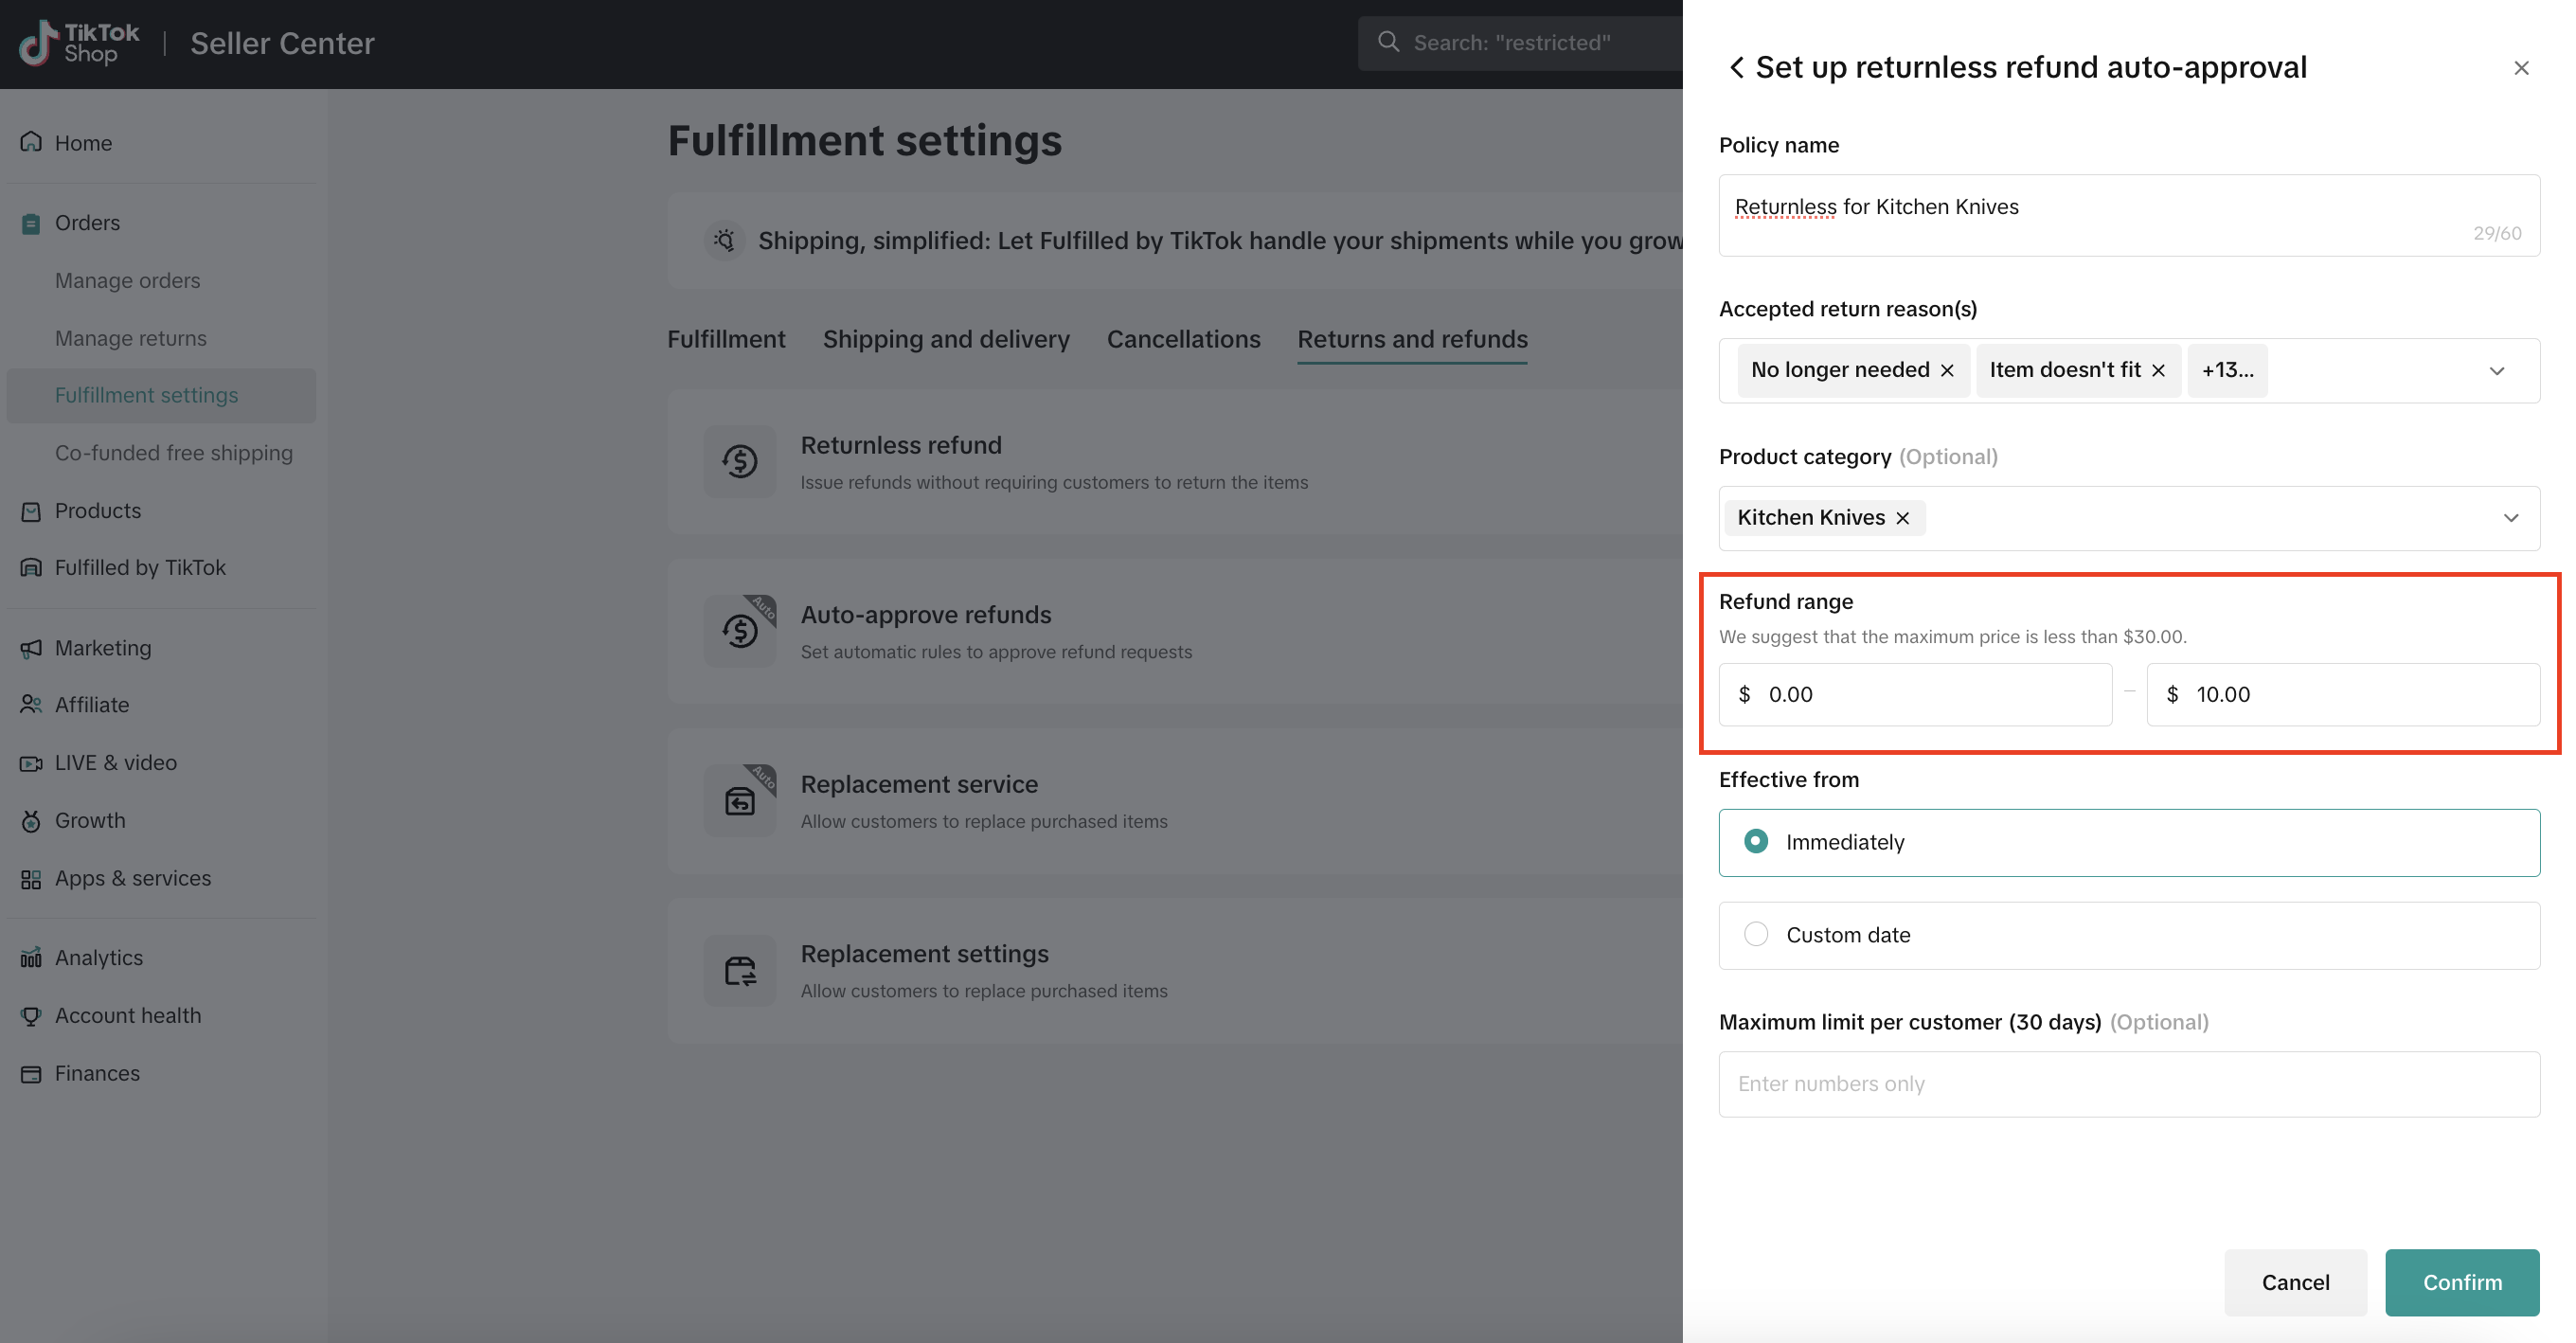
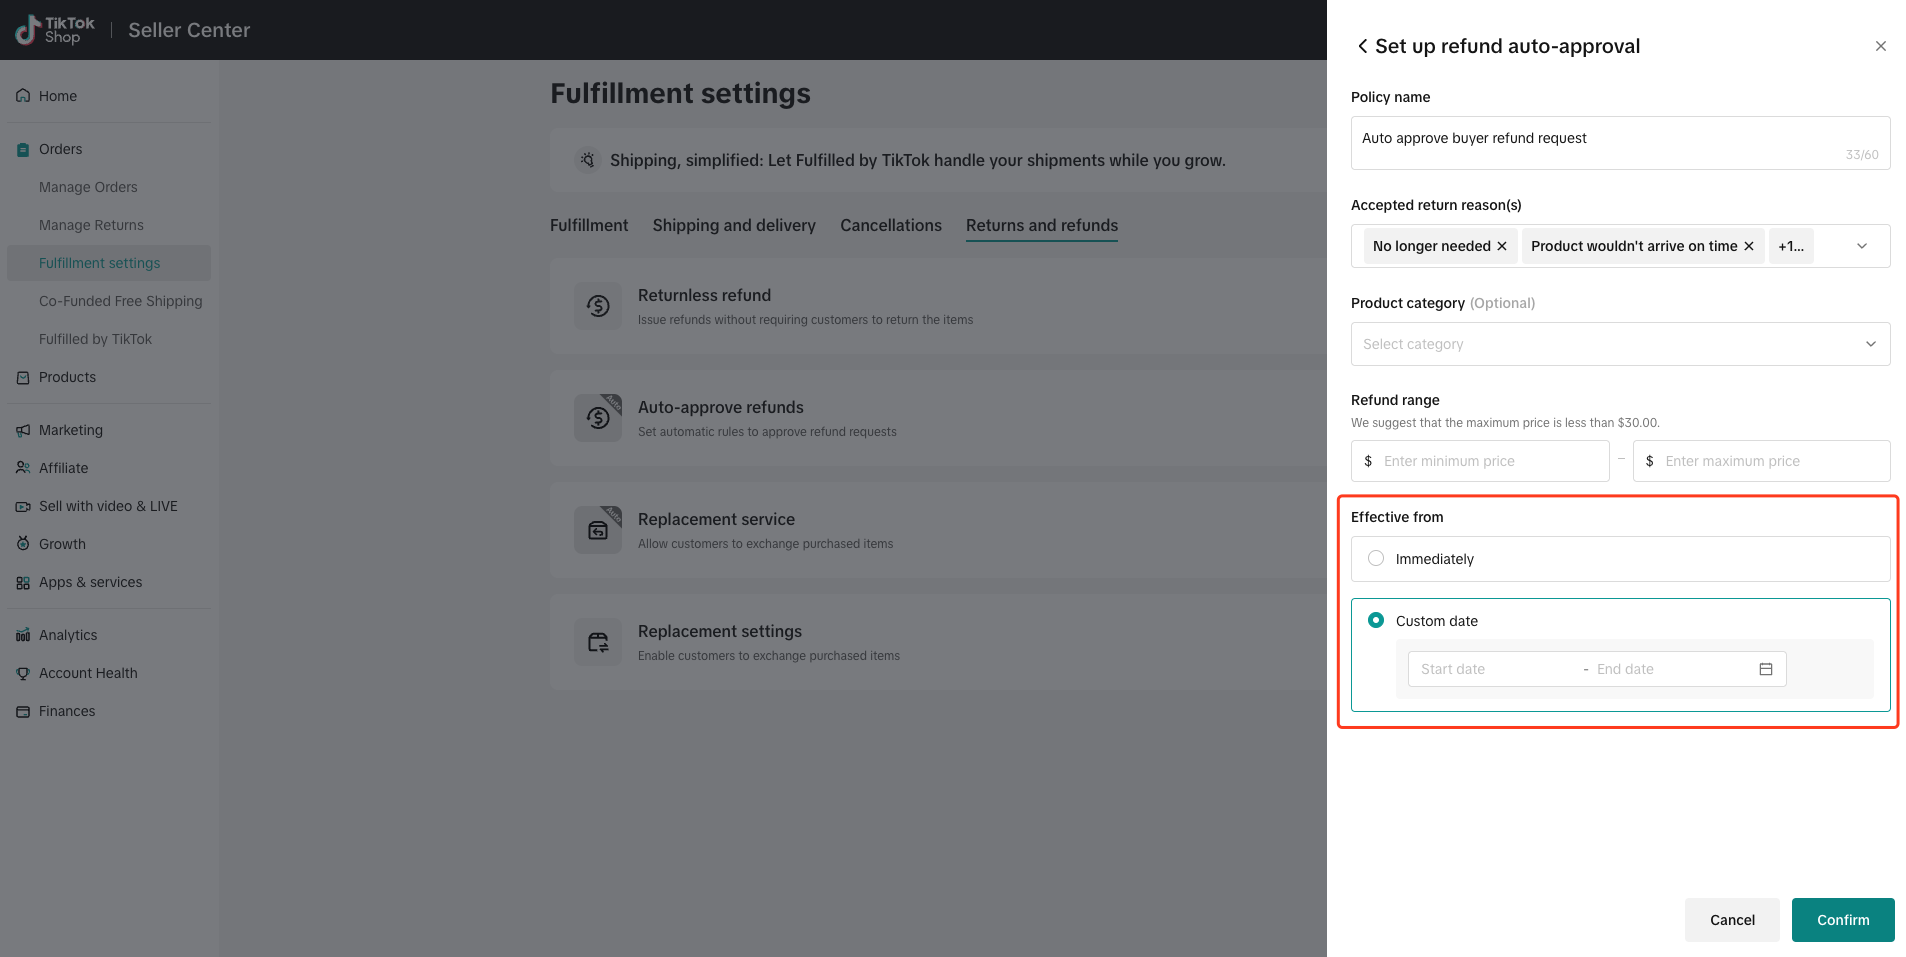
- Enter an Effective from time range for the rule.

- Set the Maximum limit per customer (30 days).
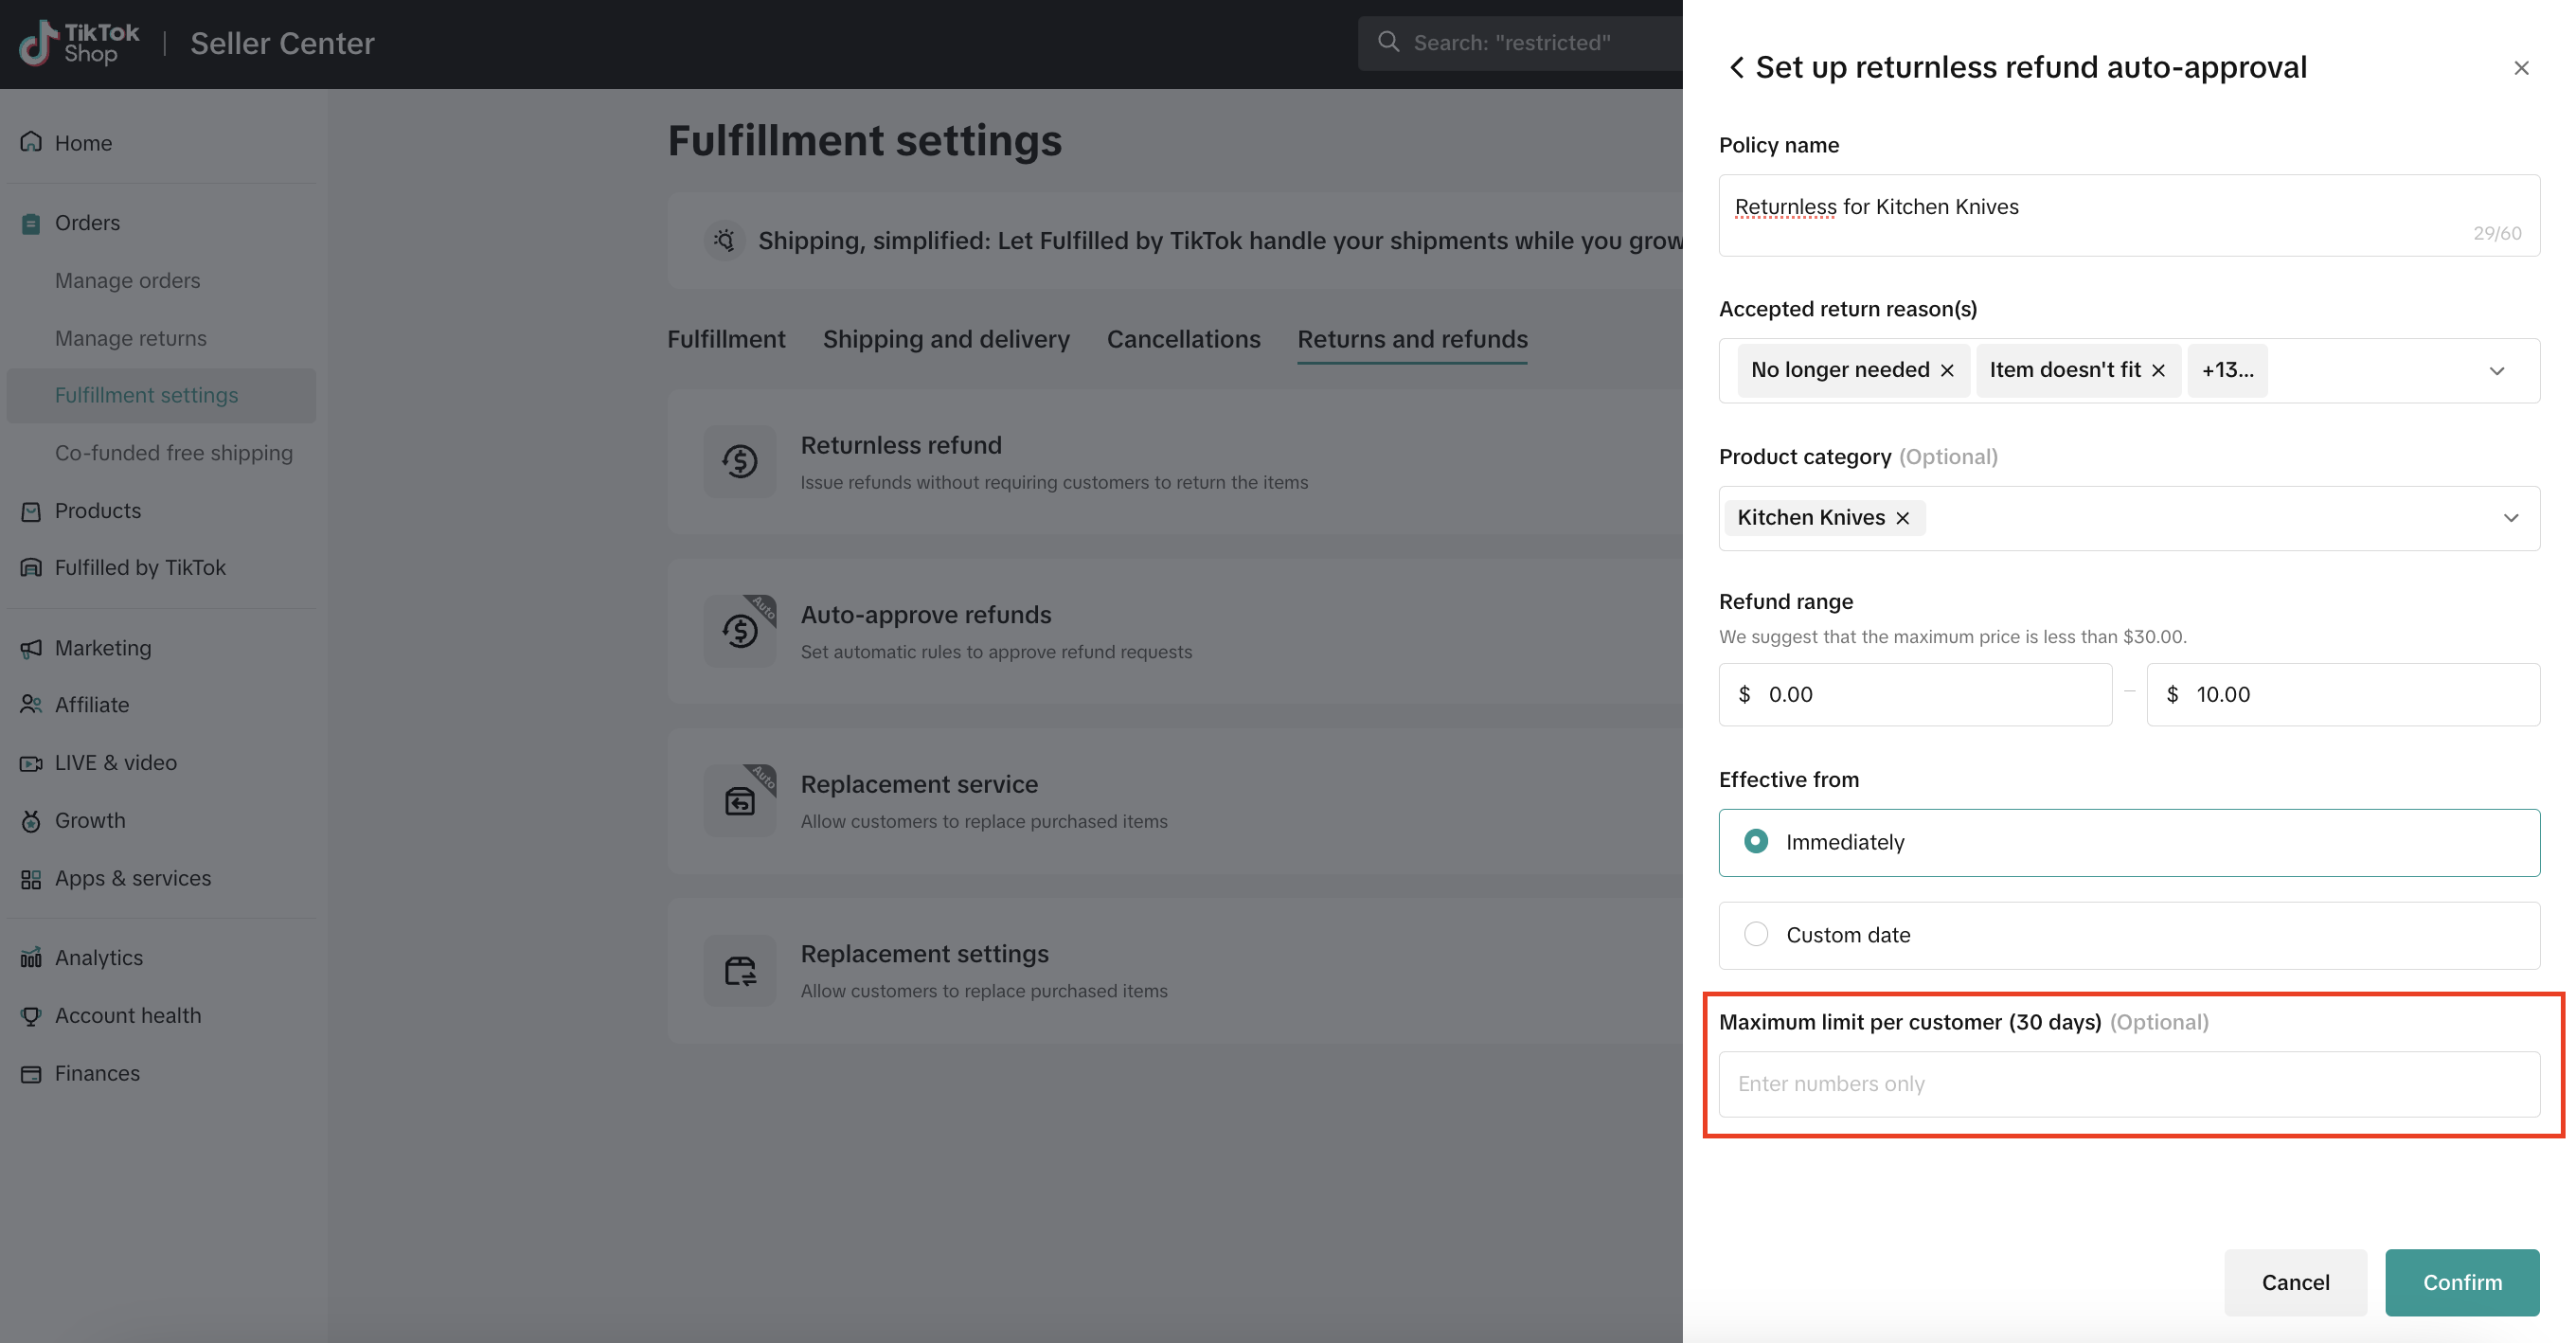
- Click Confirm to set up the Returnless refund auto-approval.
How to Automate Approve Refunds
To set up an automated refund approval for select refund reasons (did not receive order, wrong product delivered, etc), follow these steps:- In the Seller Center, go to Orders and click the Return settings page.
- Select the Returns and refunds tab.
- In the Auto-approve refunds row, select "To create."
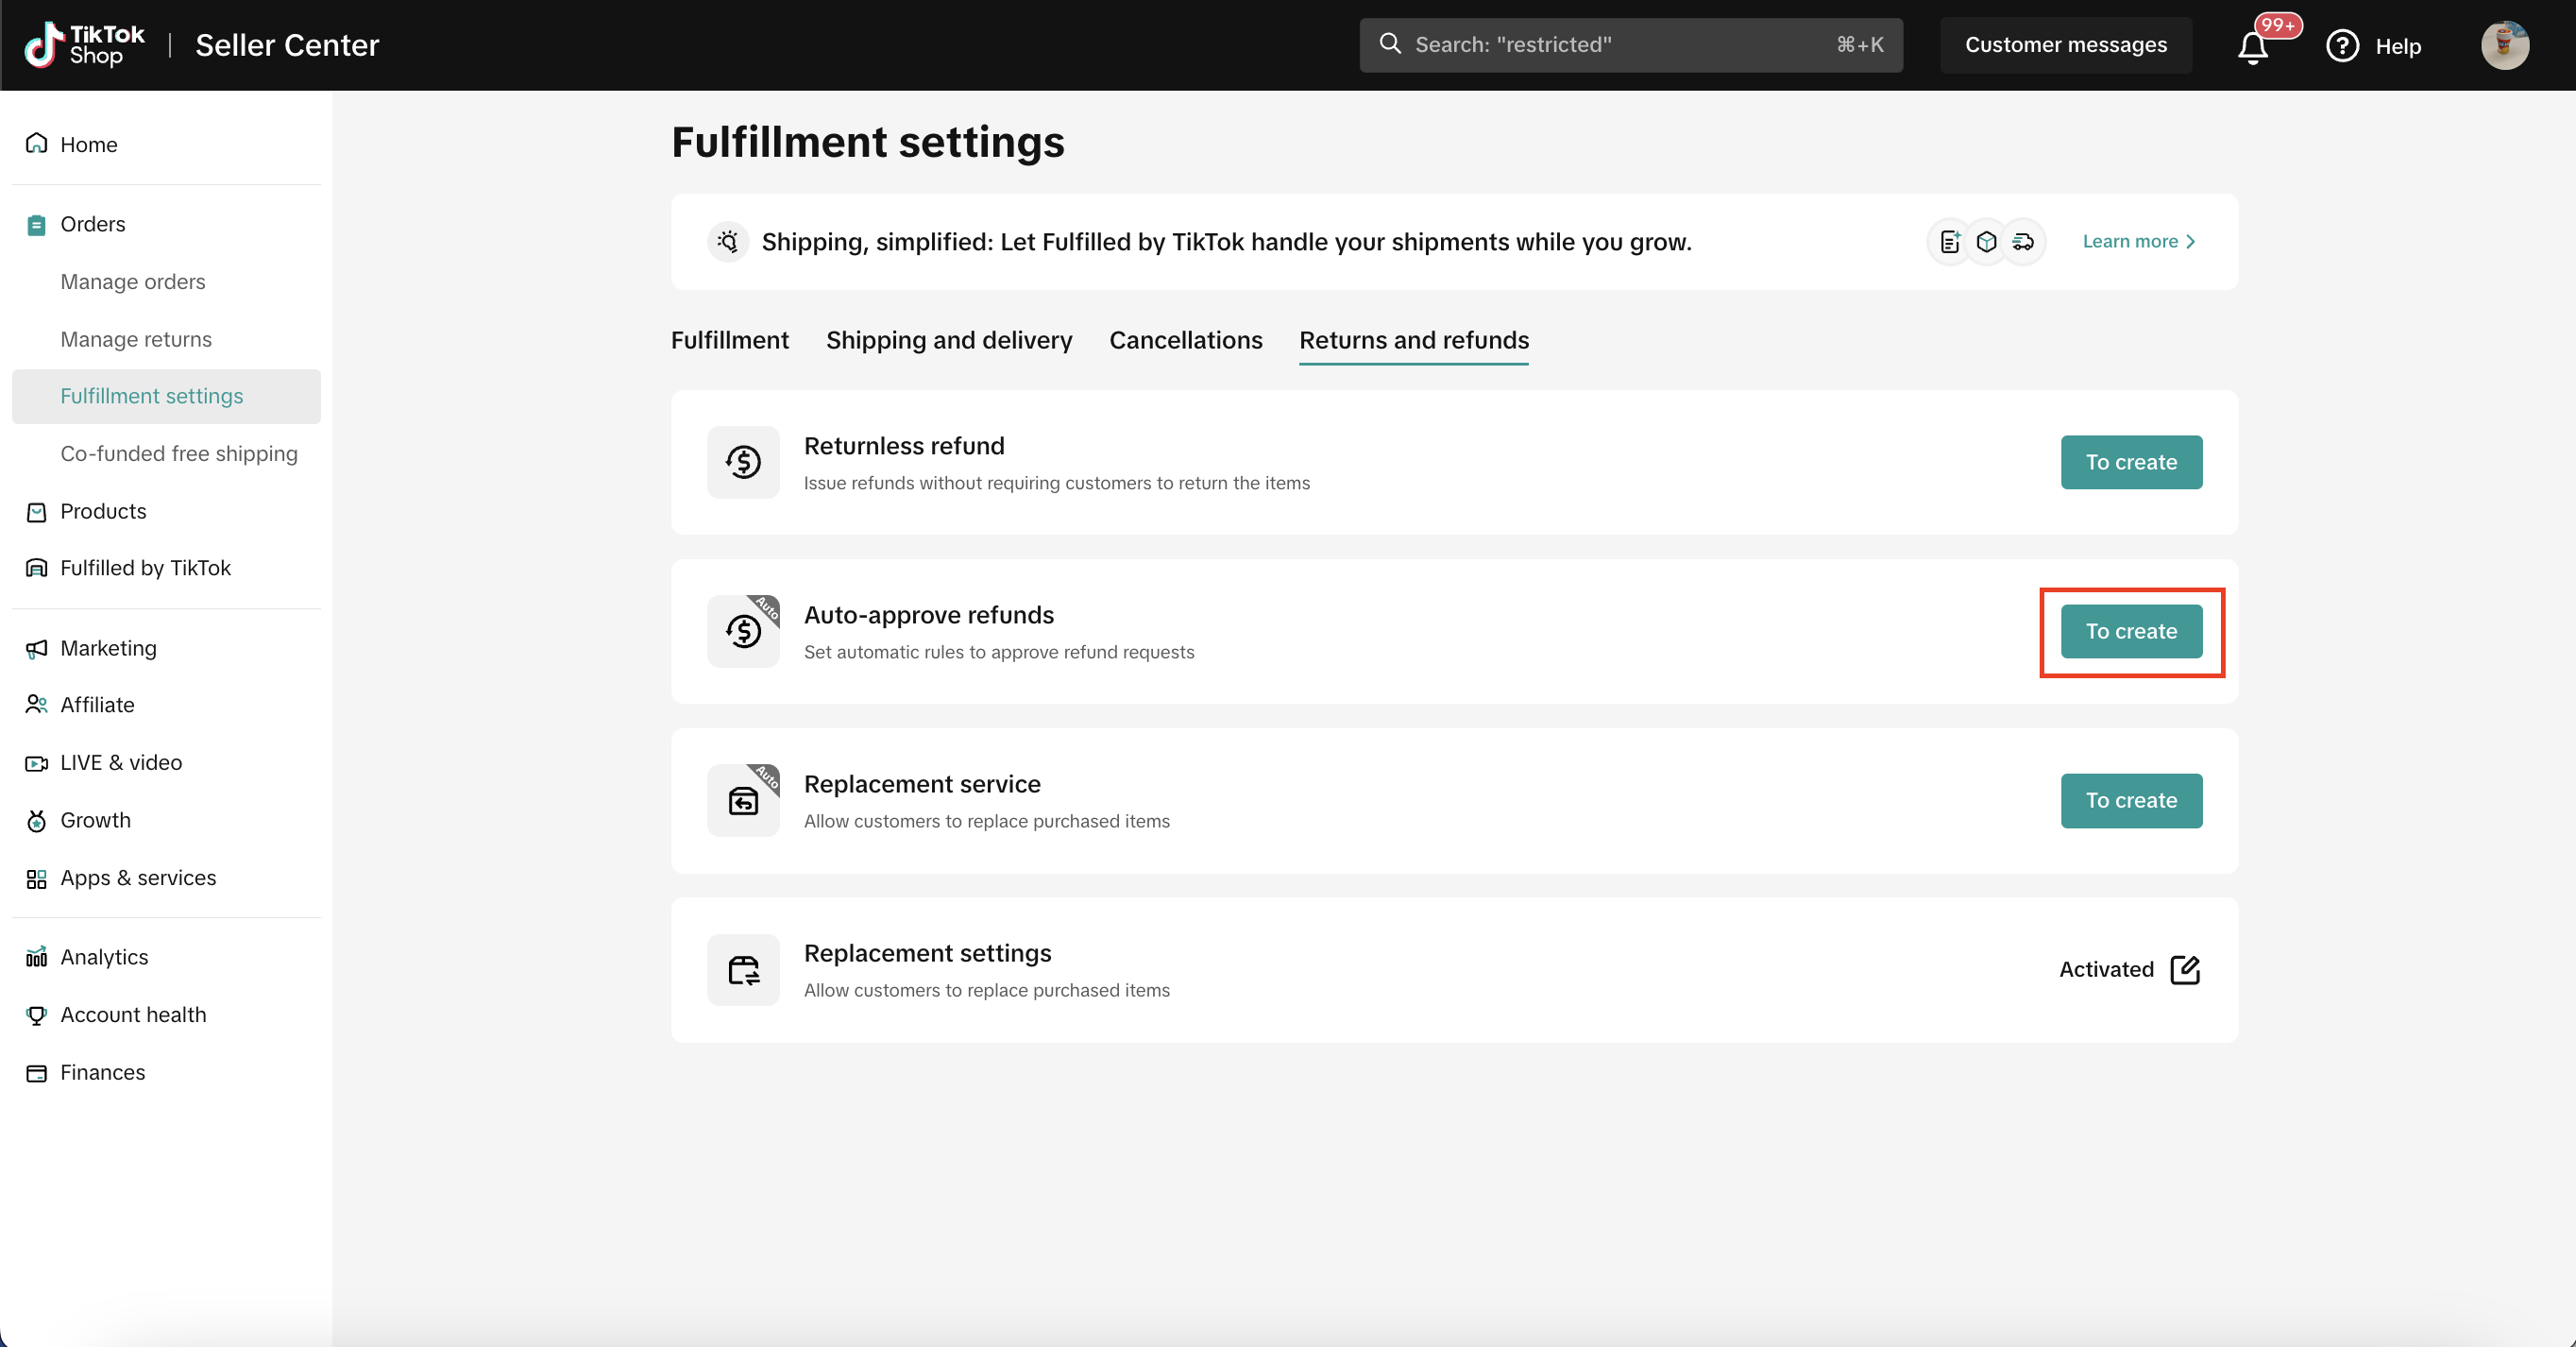
- Select "Add new rule."

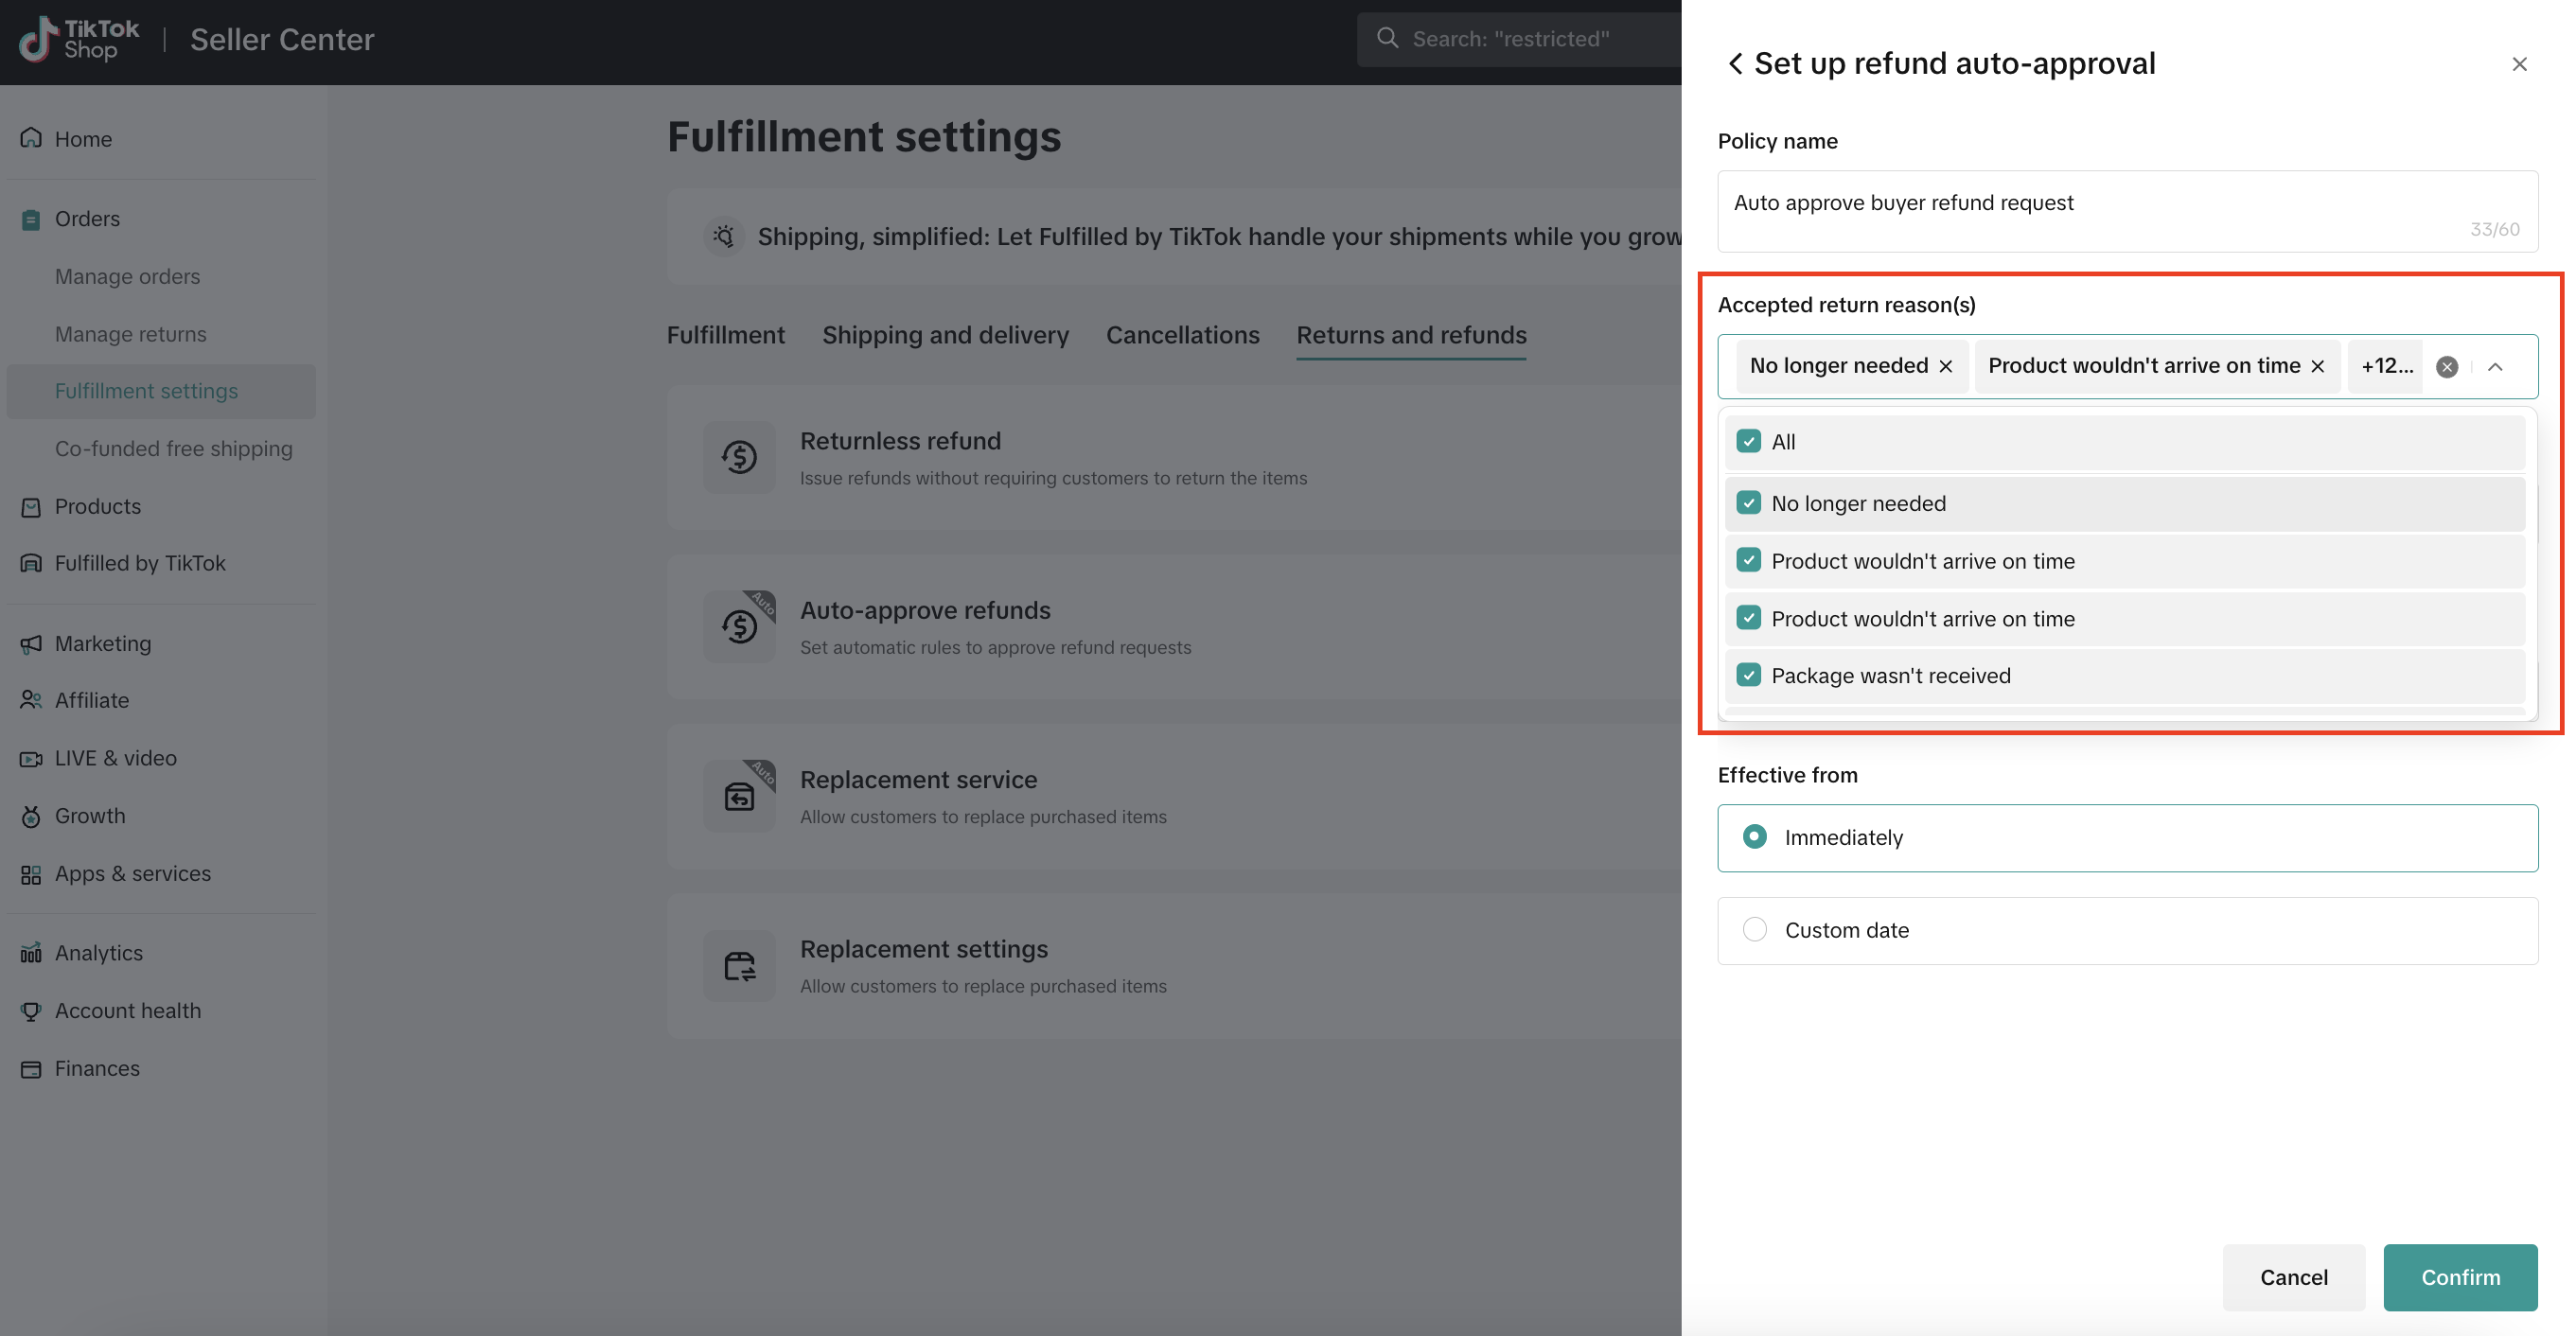
- Enter the Policy name (e.g. "Auto approve customer refund request").
- Select the Accepted refund reason(s) from the drop-down list.
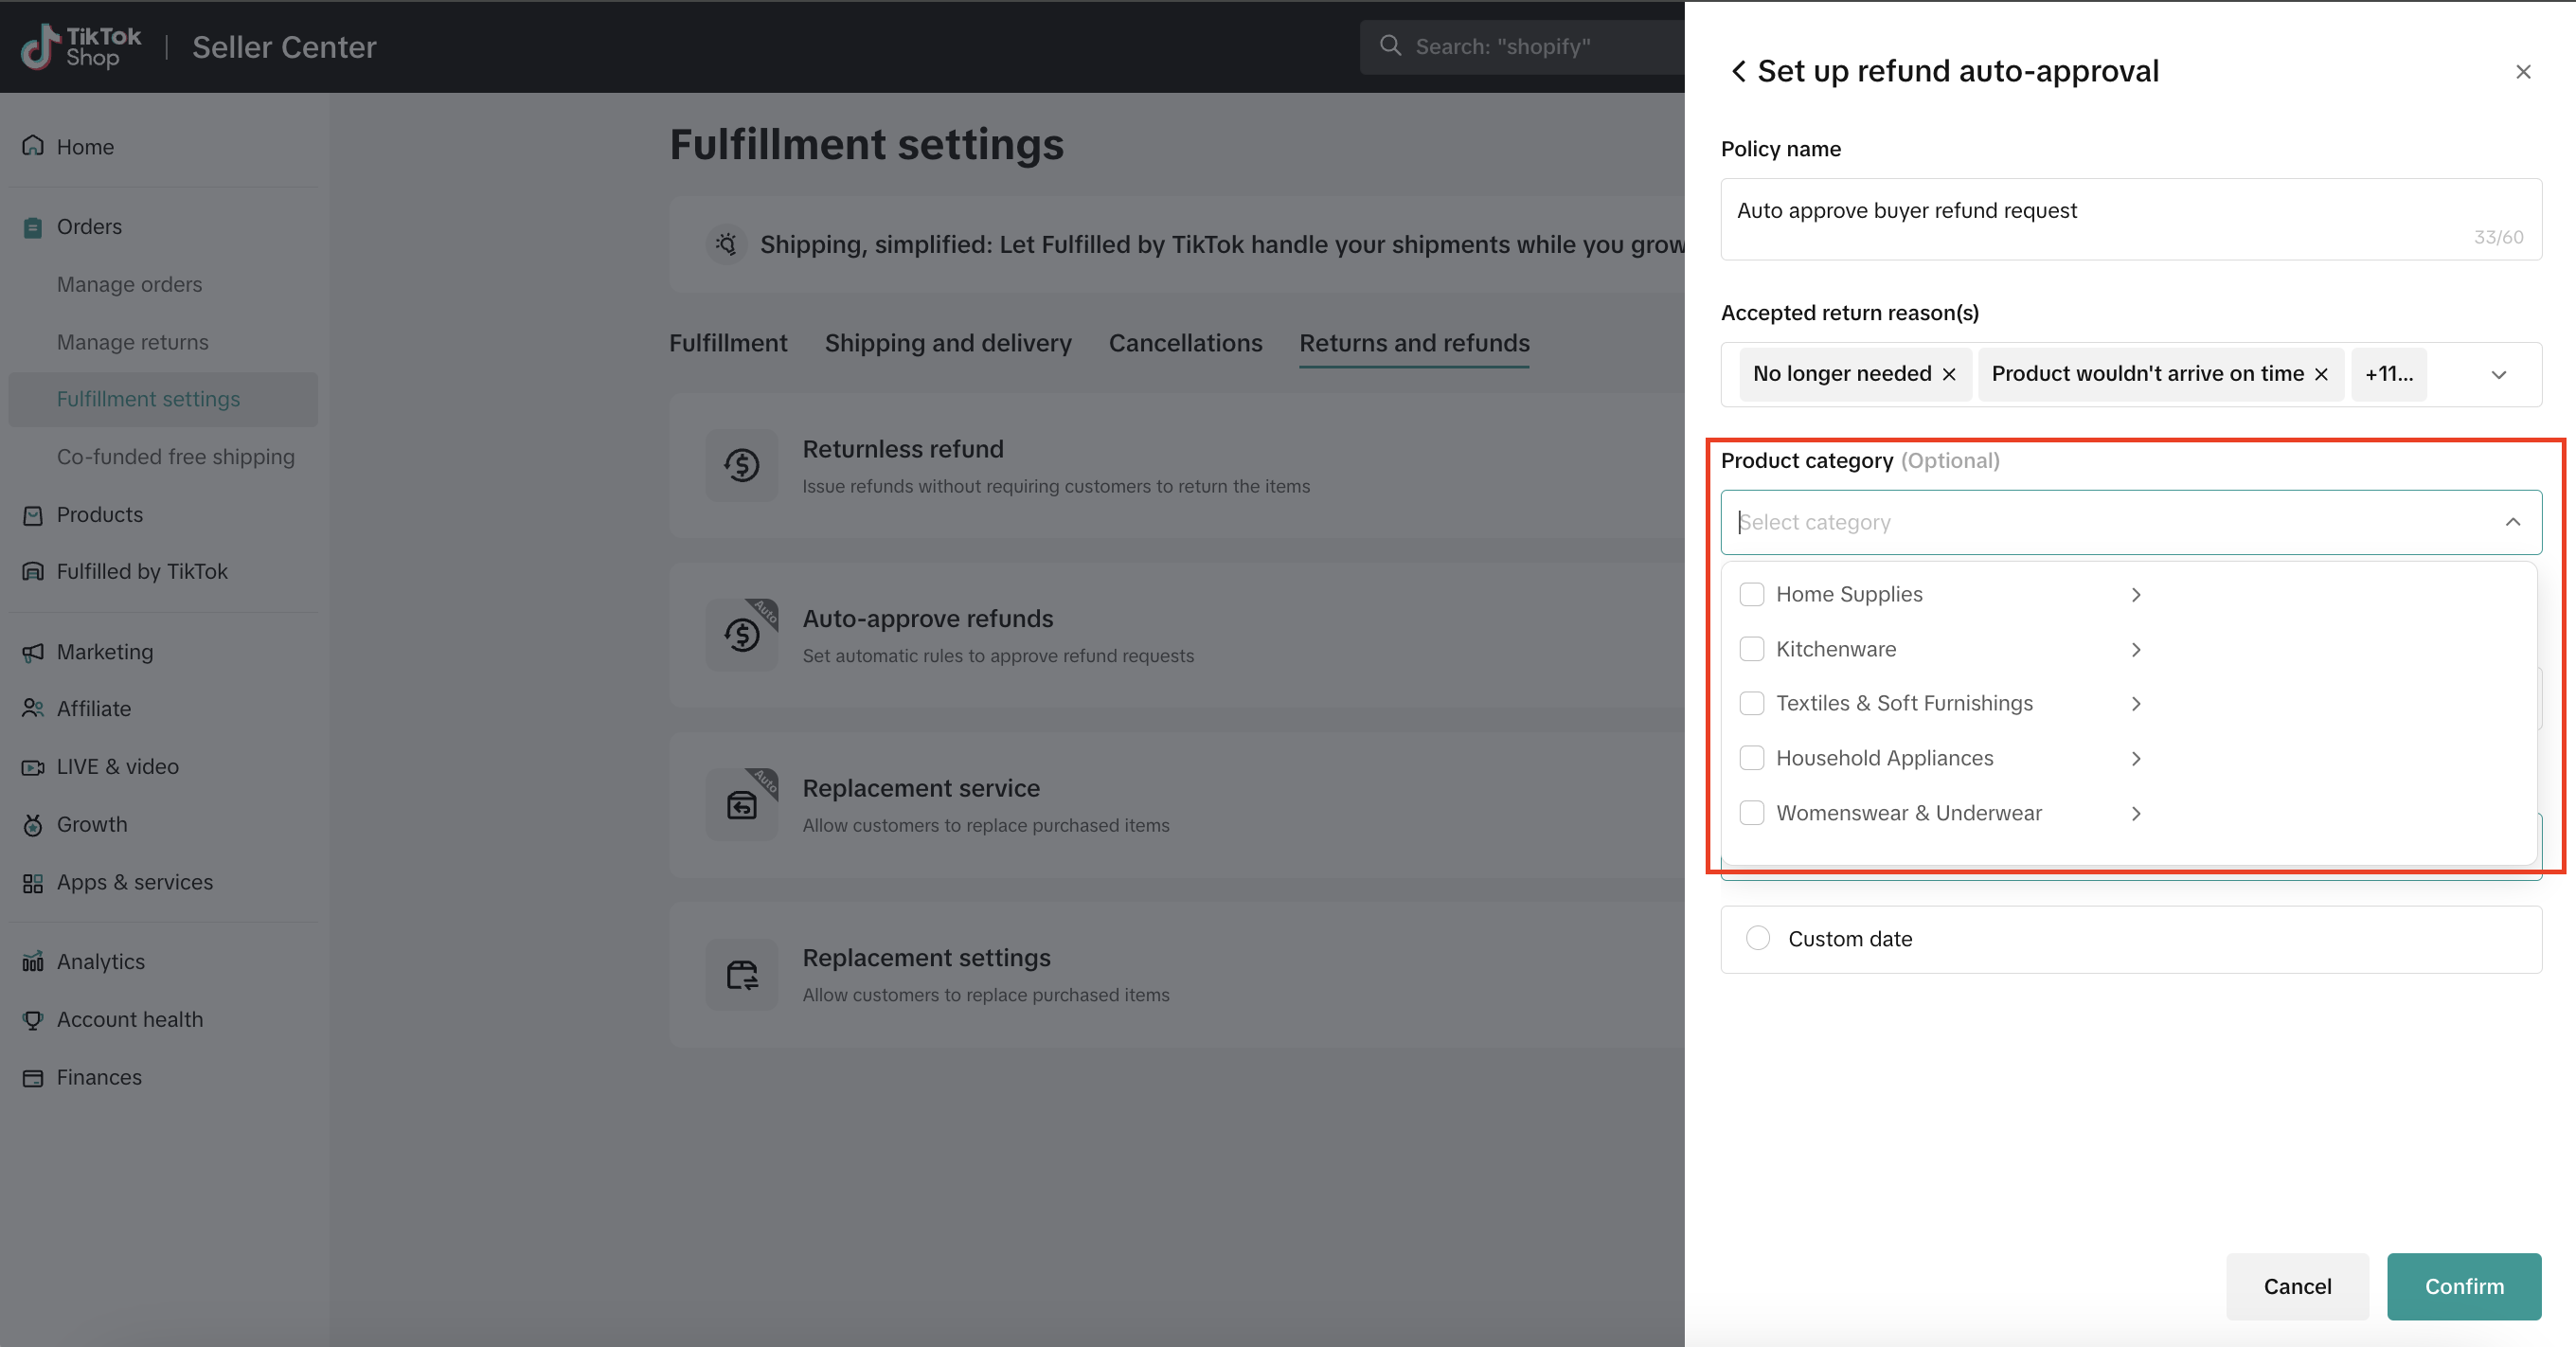
- Select the Product category from the drop-down list.
- Enter a Refund range.
- Enter an Effective from time range for the rule.
- Click Confirm to set up the refund auto-approval automation.
How to Automate Approve Returns
Navigating to Return Settings
- Log in to your Seller Center account on your desktop.
- Go to the Orders section, then navigate to your Return Settings page.
- Locate the Auto-approve returns module.
- If no rules are set, the status will show as "Deactivated".
- If rules are active, it will display the number of active rules (e.g. "1 activated").

Creating a New Rule
- Click the Edit button on the "Auto-approve returns" card. A sidebar drawer will open on the right side of your screen.
- If this is your first time, you will see a message: "Set up automatic approval for returns after shipping"
- Click the [+ Add new rule] button to configure a new automation strategy.

Configuring Rule Parameters
When creating or editing a rule, you need to define the following:
- Policy name
- Accepted return reason(s)
- Product category (Optional)
- Refund range: Enter the minimum and maximum price to enable auto-approval
- Effective from: Specify when you want the rule to start
- Starting point: Choose when auto-approval process starts
- After drop-off: Starts when the buyer hands the package to the logistics carrier.
- Delivered to the warehouse: Starts when the logistics carrier marks the package as delivered to your warehouse.
- Auto-approval time: Choose how long the system waits before automatically approving the return.
- Immediately: The return is approved the moment the package is dropped off or delivered to your warehouse (depending on the starting point configured).
- Custom Range: Set a specific delay between 1 to 24 hours.
- Maximum limit per customer (30 days) (Optional)
- Total Rules: Displays the count of all created rules, regardless of whether they are turned on or off.
- Rule Switches: Use the toggle next to each rule to easily enable or disable it.
- More Actions: Click the "..." icon to Edit or Delete an existing rule.

How to Automate Replacements
To allow customers to exchange purchased items, enable the customer replacement settings and set up the replacement automation:Step 1: Enable Customer Replacements
- In the Seller Center, go to Orders and select the Return Settings page.
- Select the Returns and refunds tab.
- In the Replacement settings row, select the Edit button.

- Toggle on to Allow replacements.
- Under maximum amount, choose whether to limit customer replacement request amount.
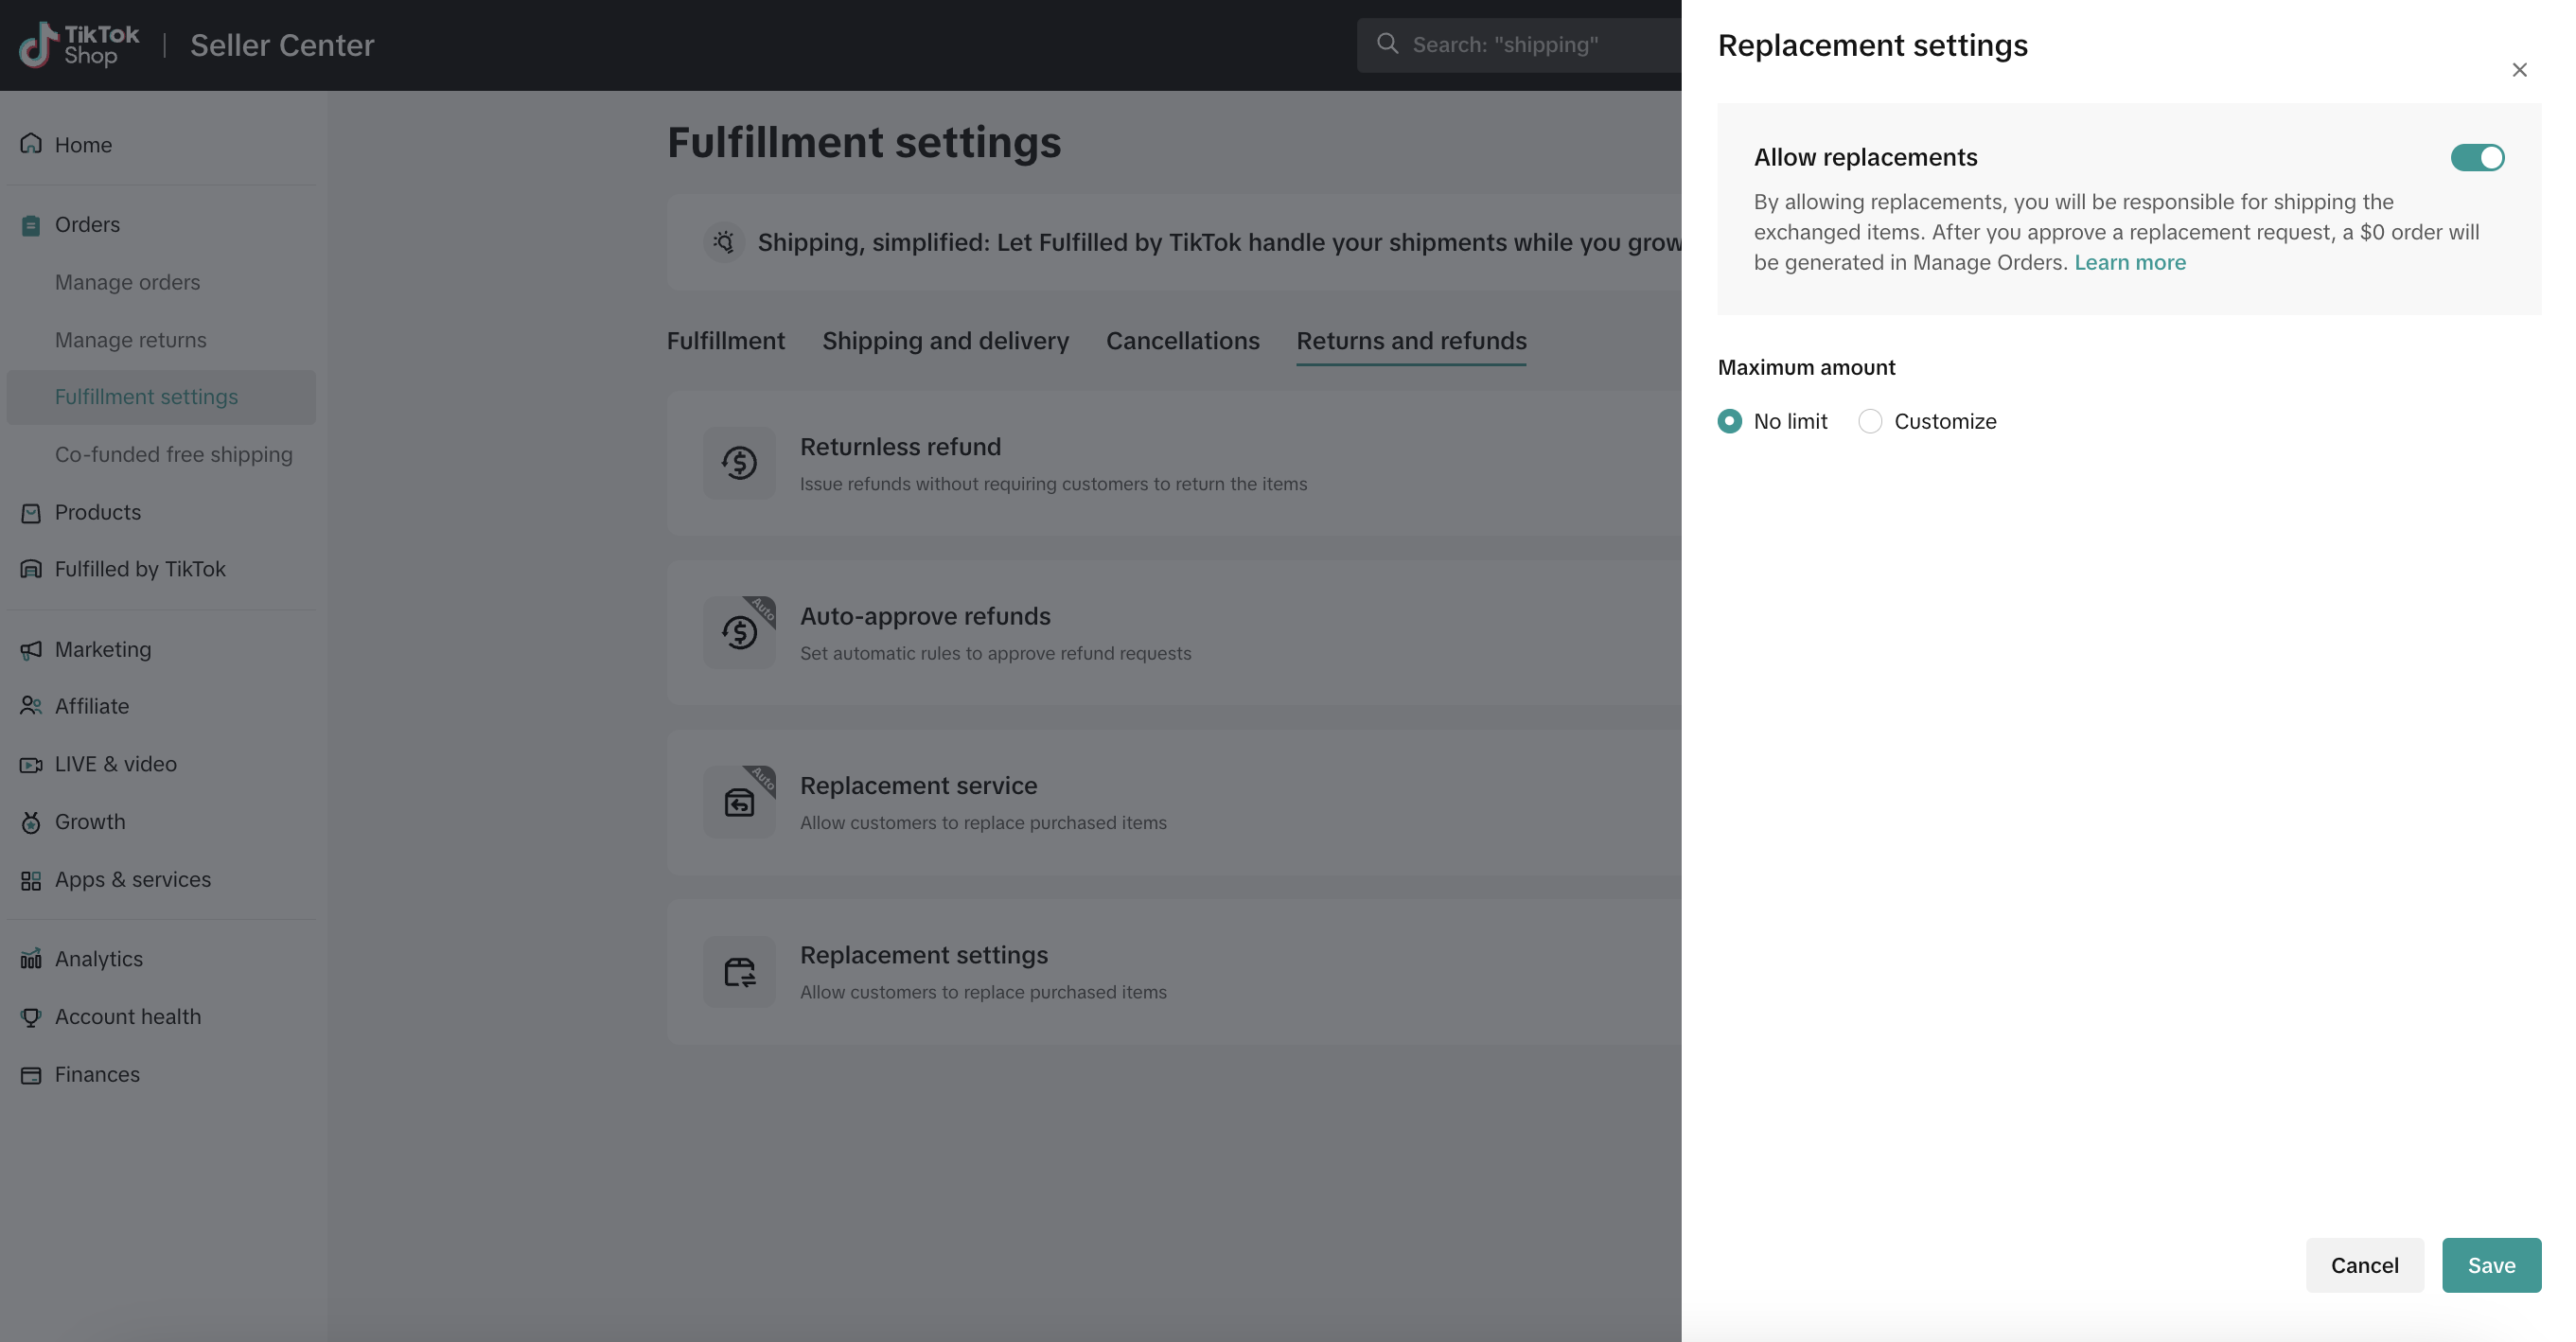
- If you want to limit the number of customer replacement requests, enter the desired amount.

- Click Save to set up the Replacement settings.
- In the Seller Center, go to Orders and select the Return settings page.
- Select the Returns and refunds tab.
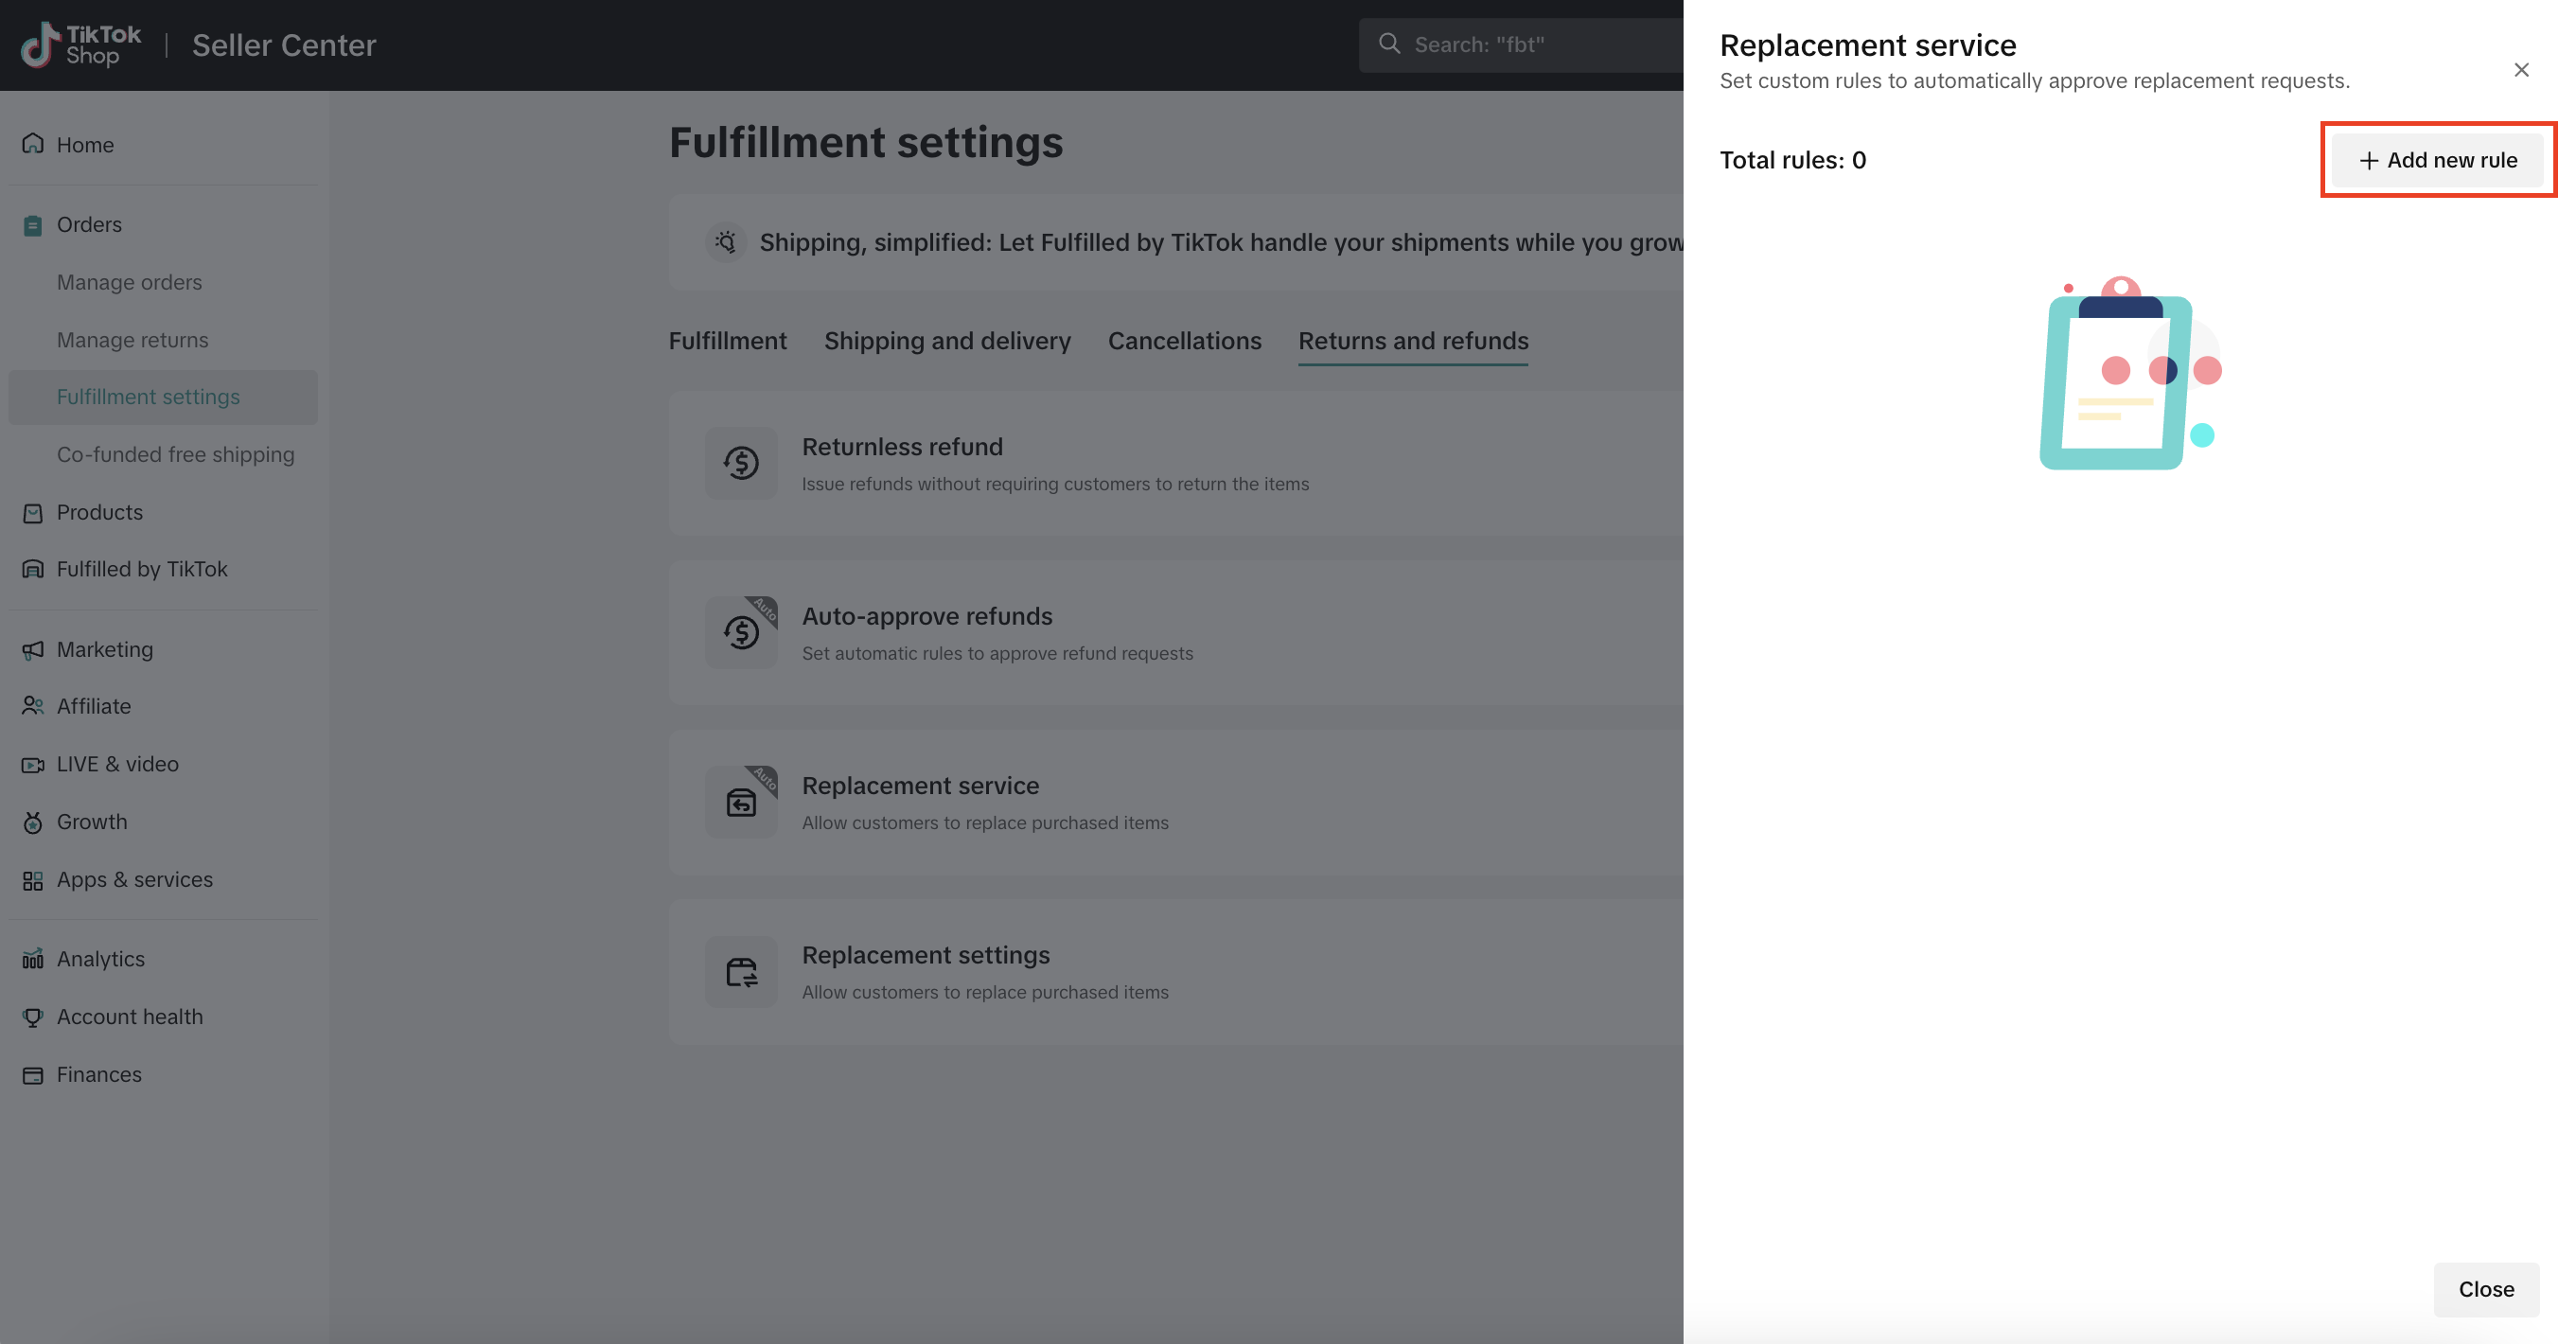
- In the Replacement service row, select the To create button.

- Select "Add new rule."
- Enter the Policy name (e.g. "Auto approve replacement request").
- Select the Accepted return reason(s) from the drop-down list.
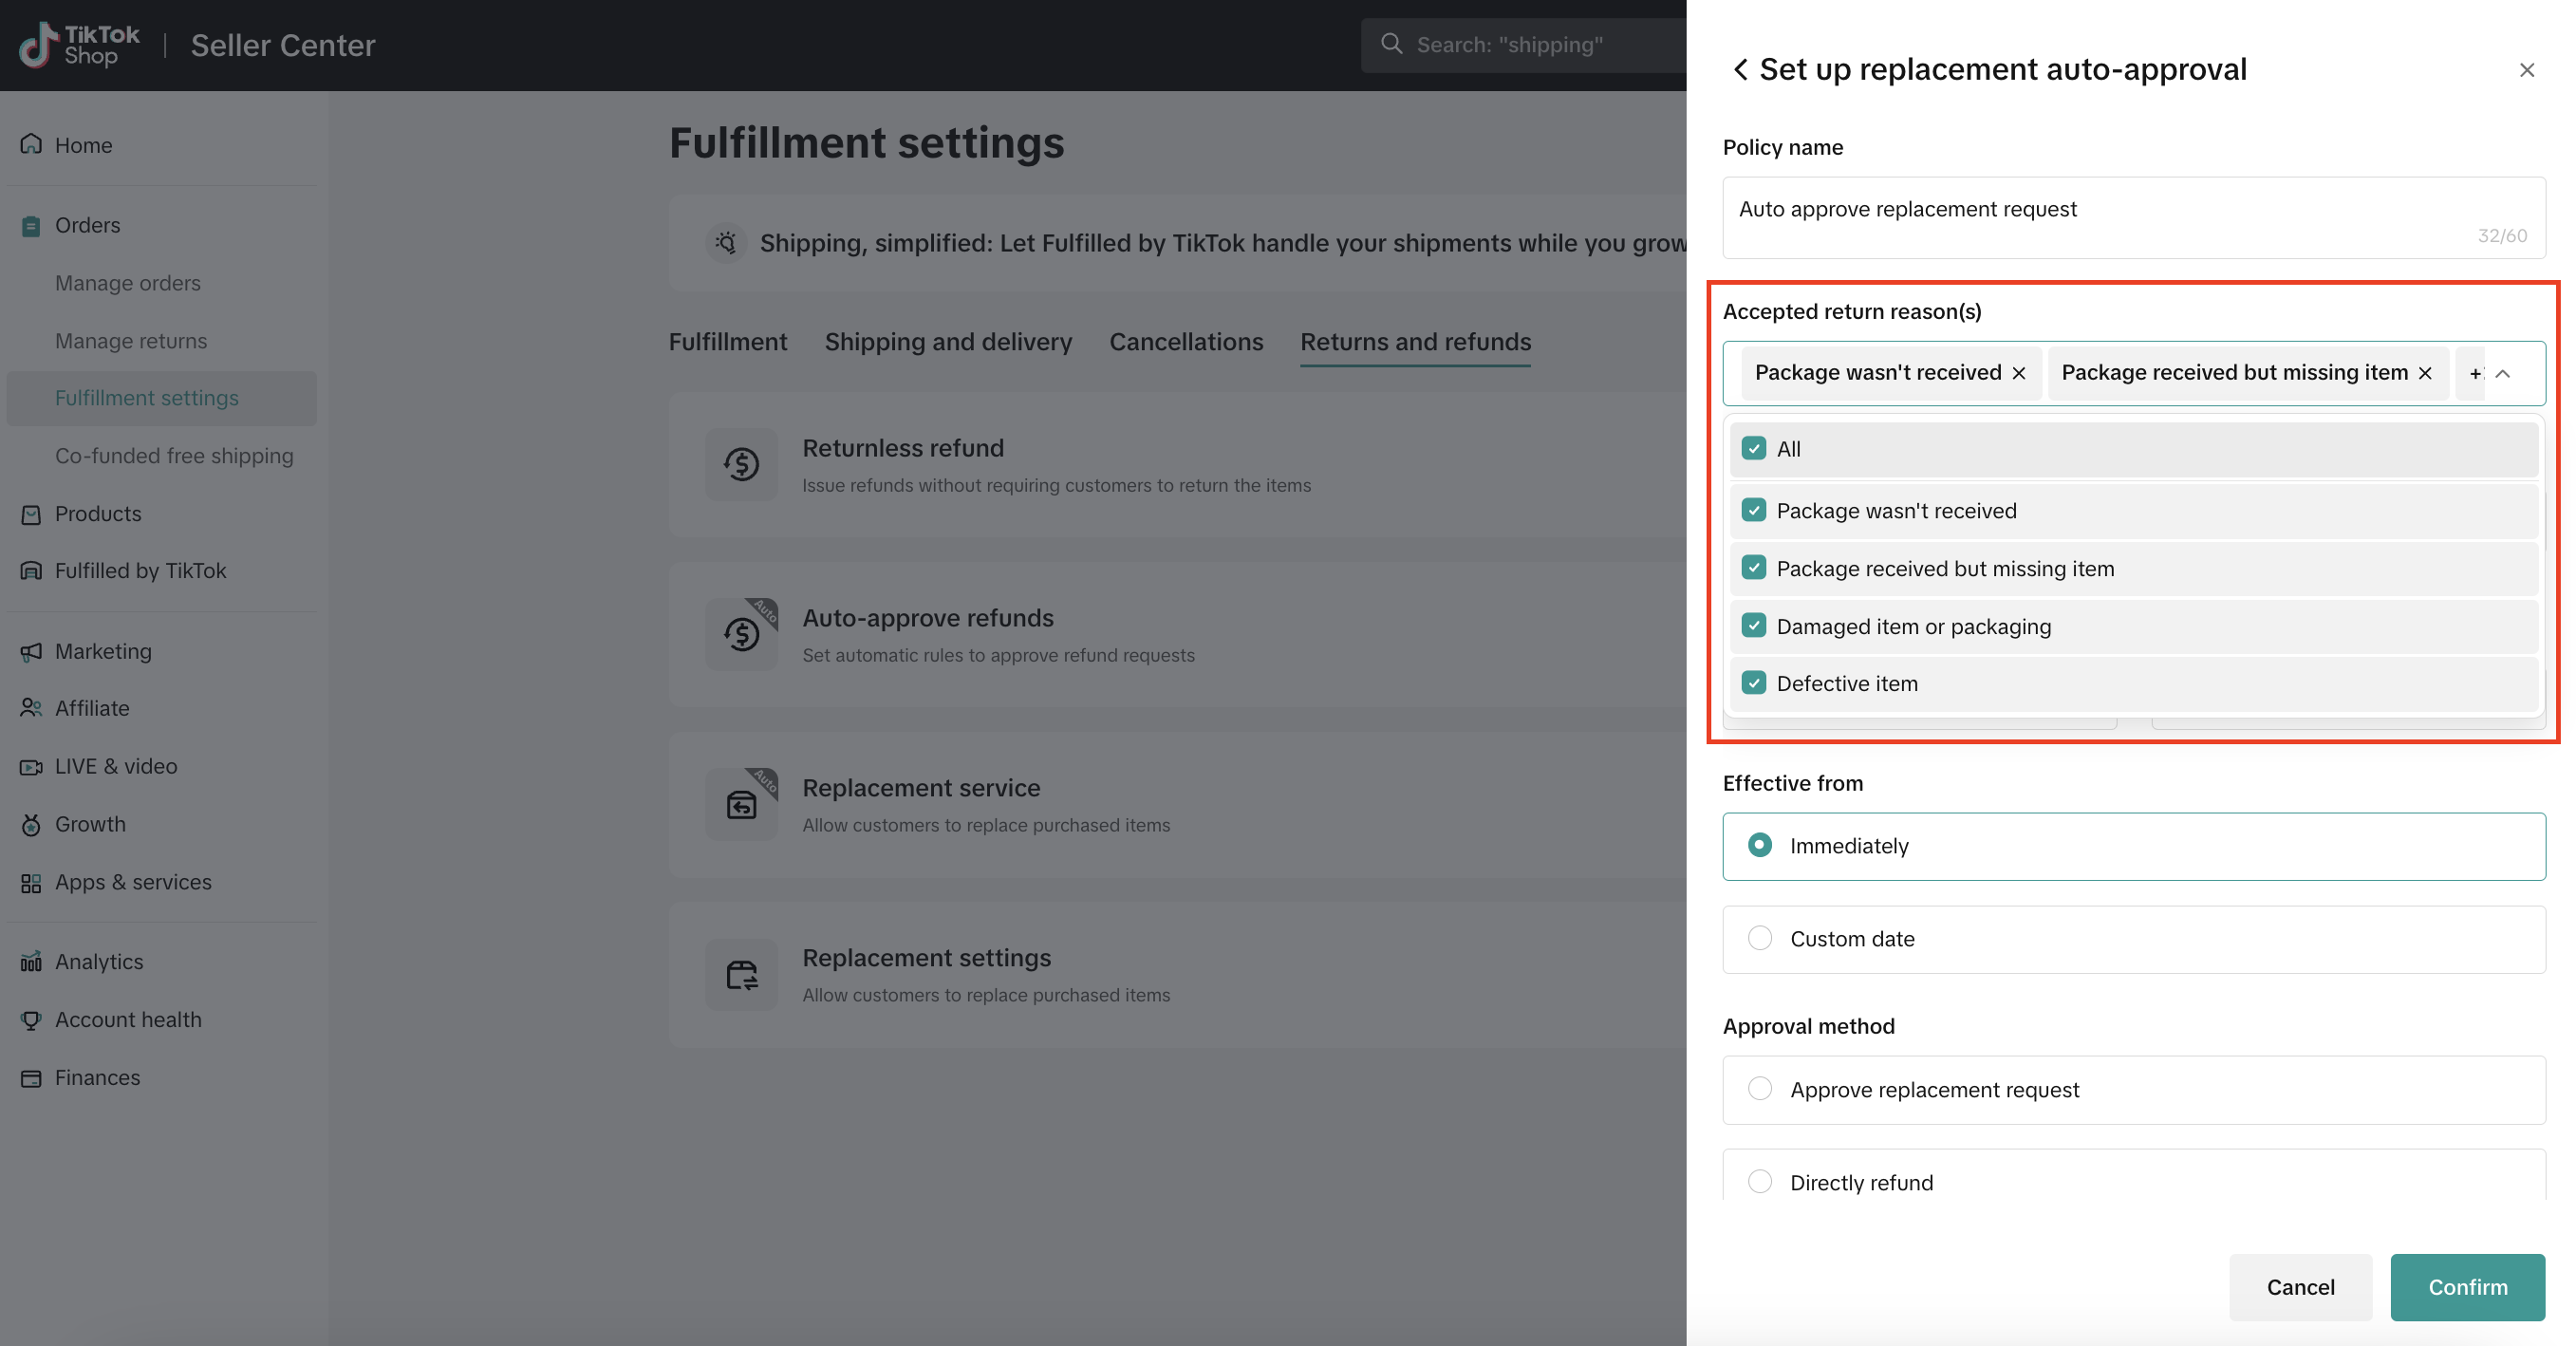
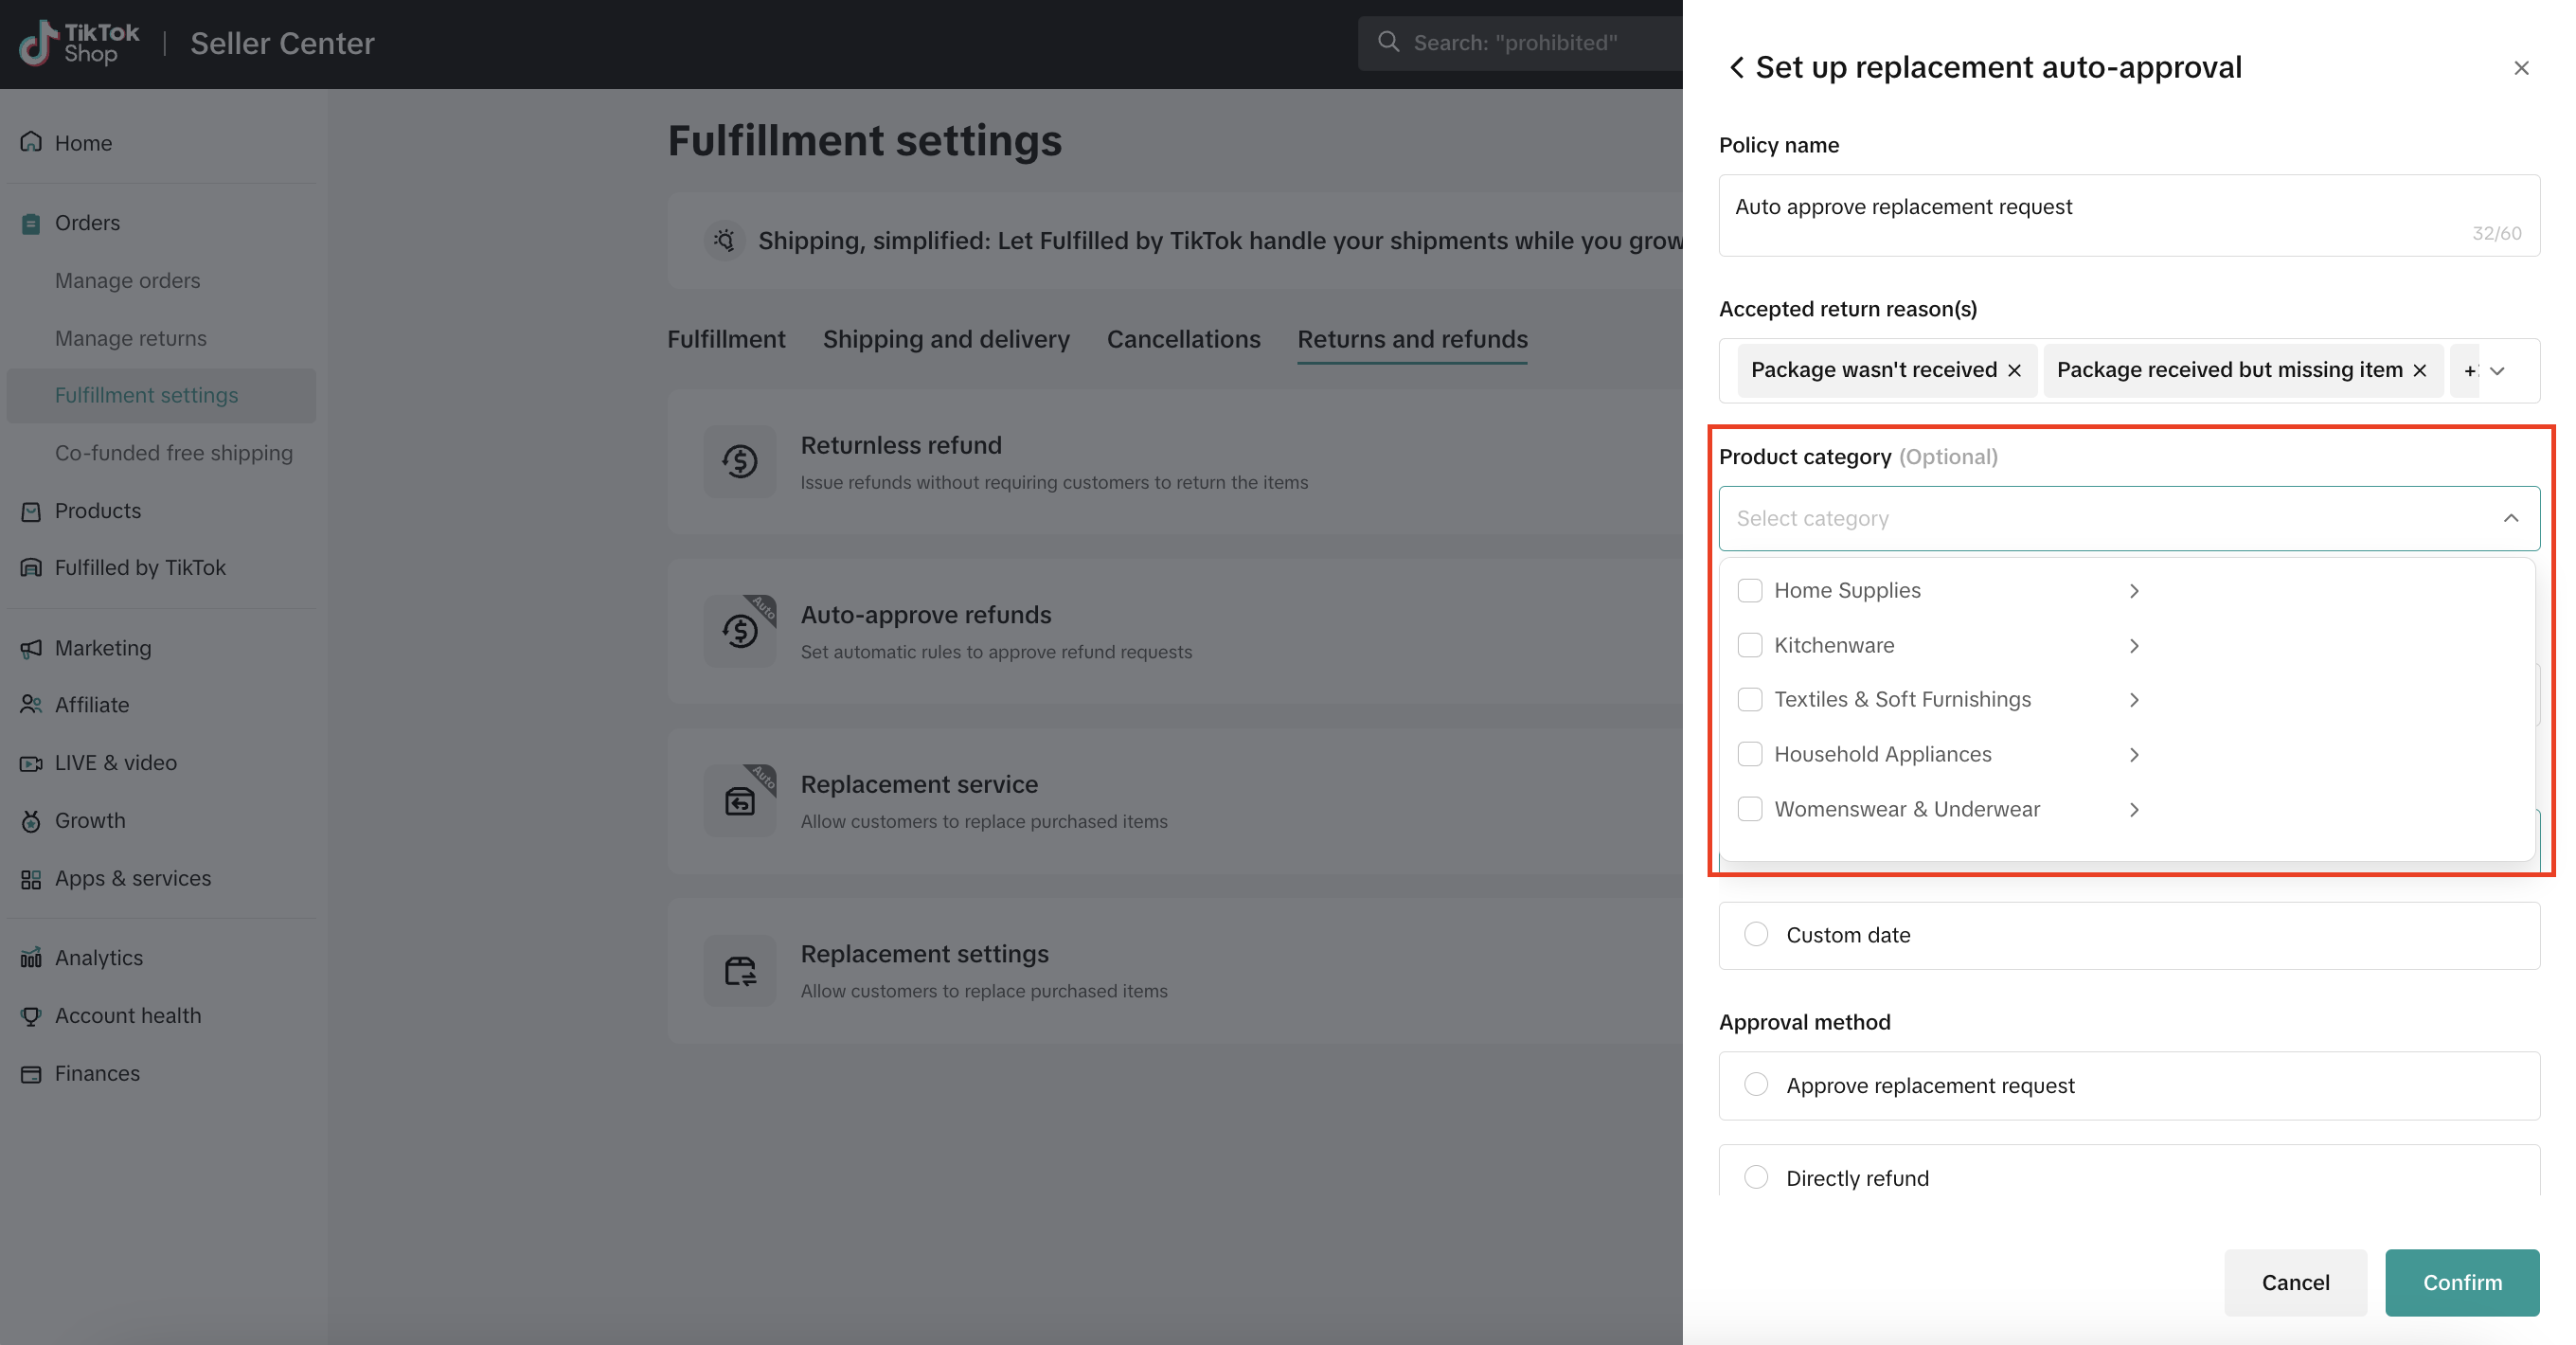
- Select the Product category from the drop-down list.
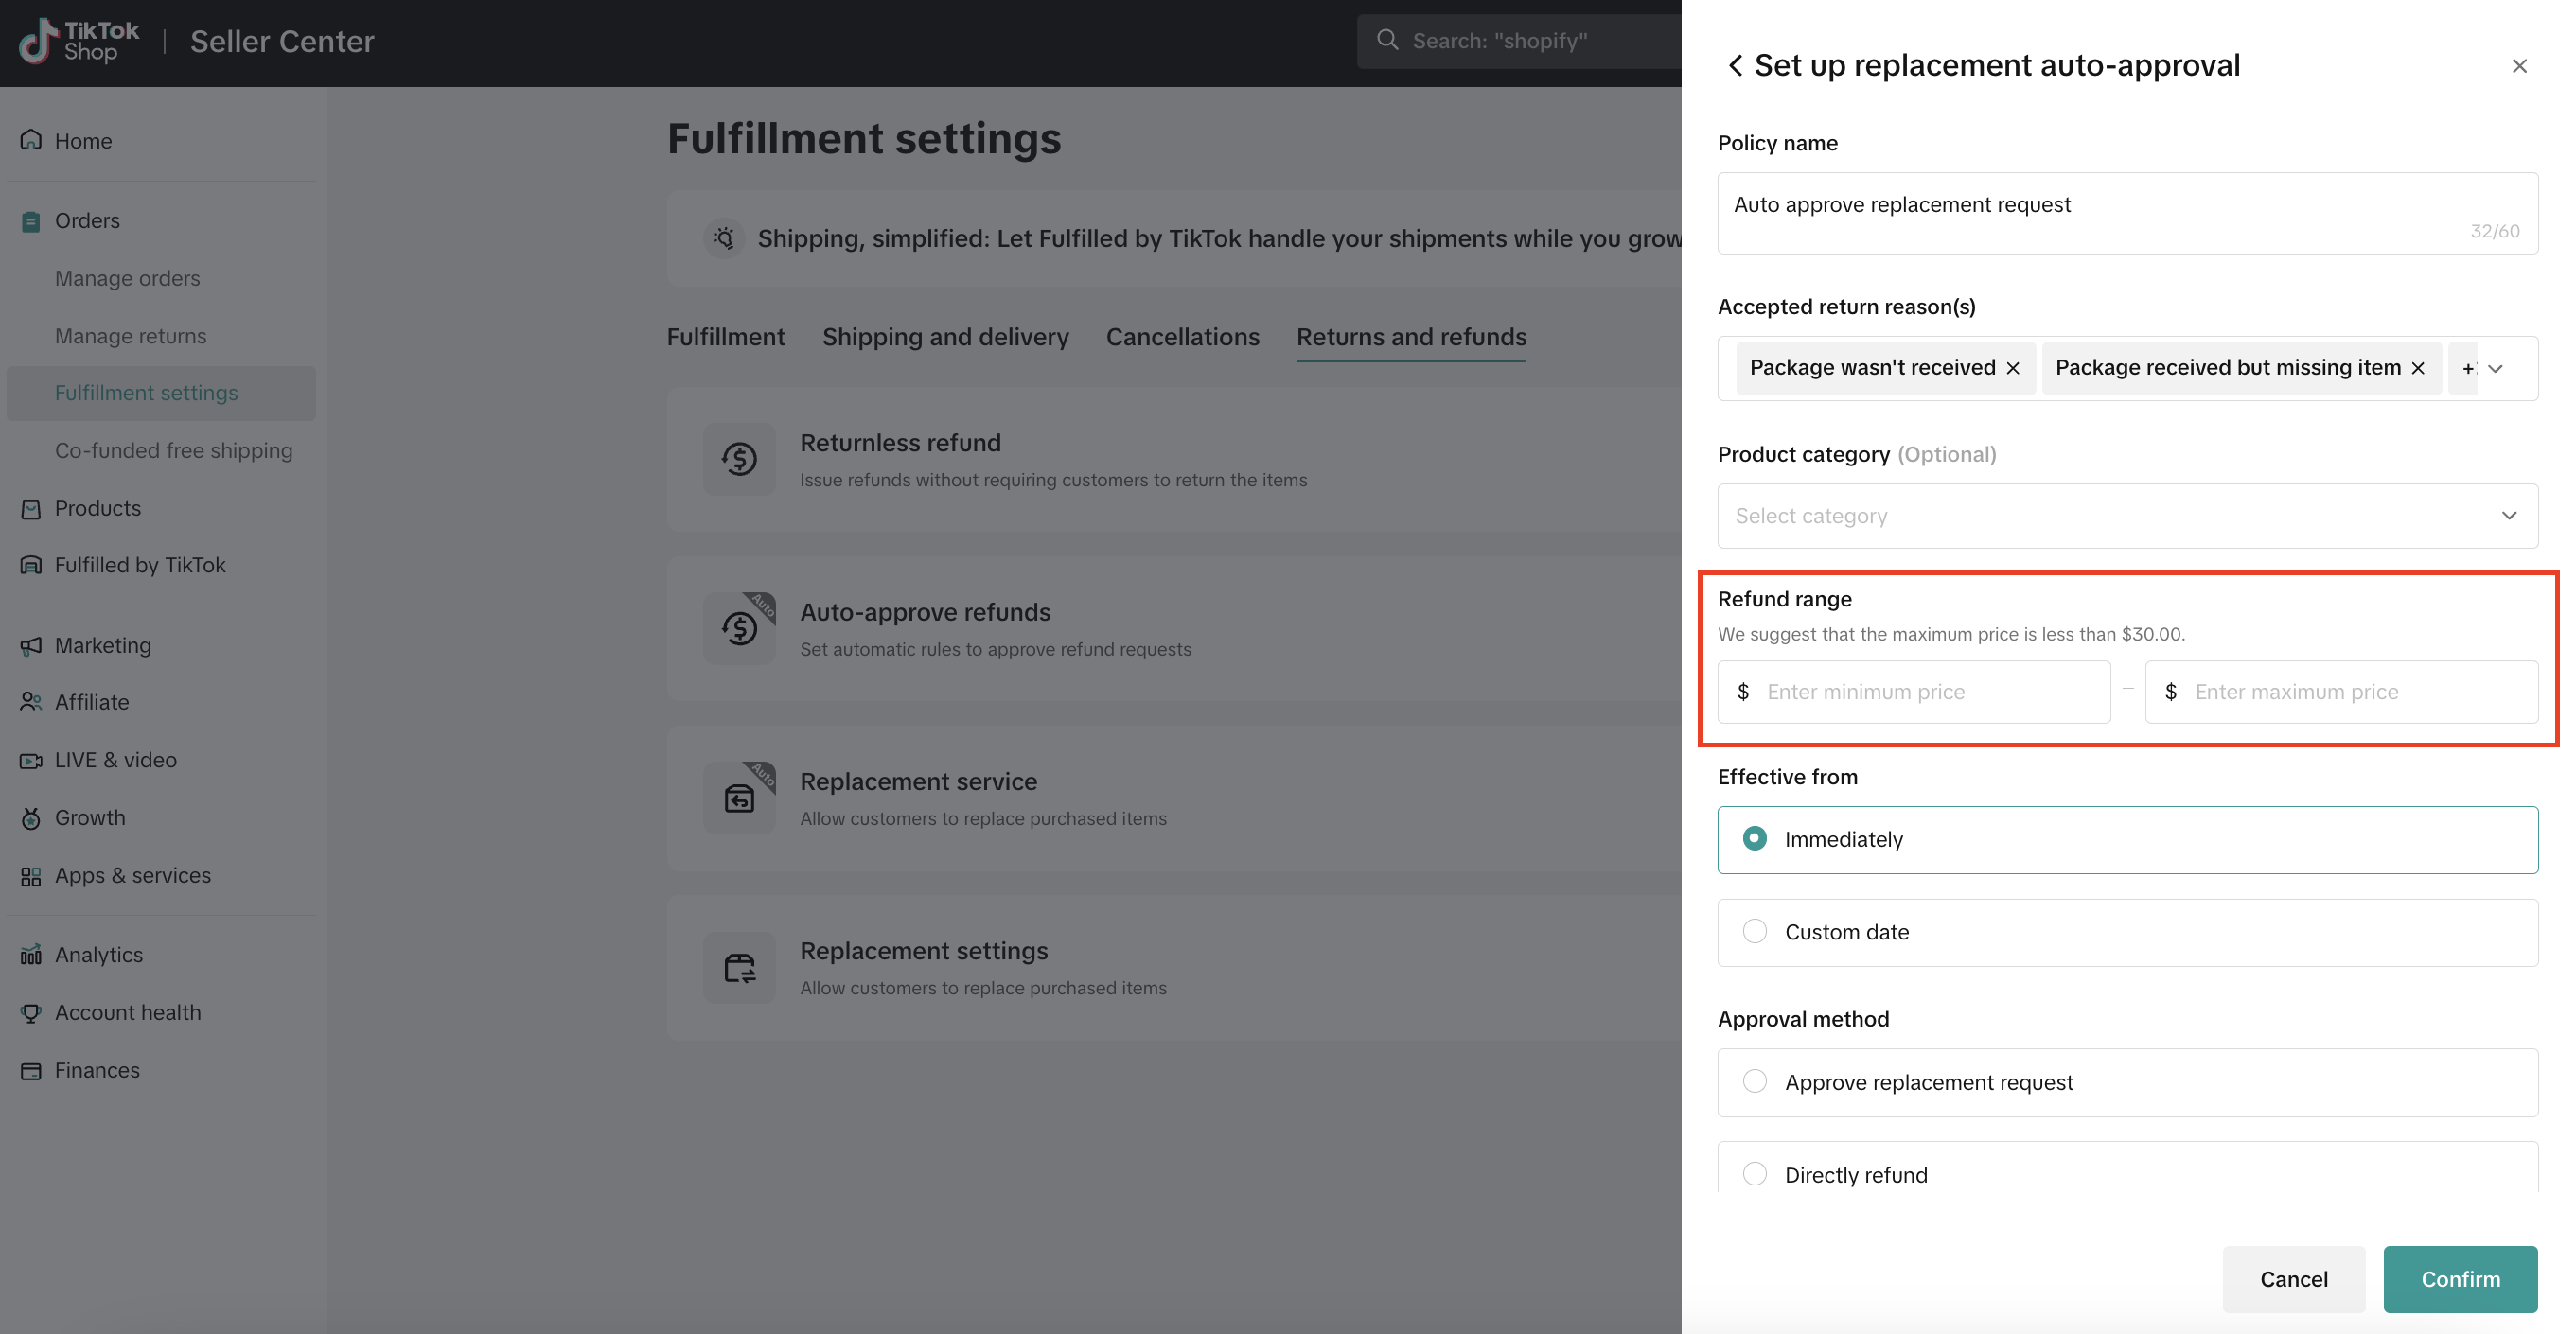
- Enter a Refund range.
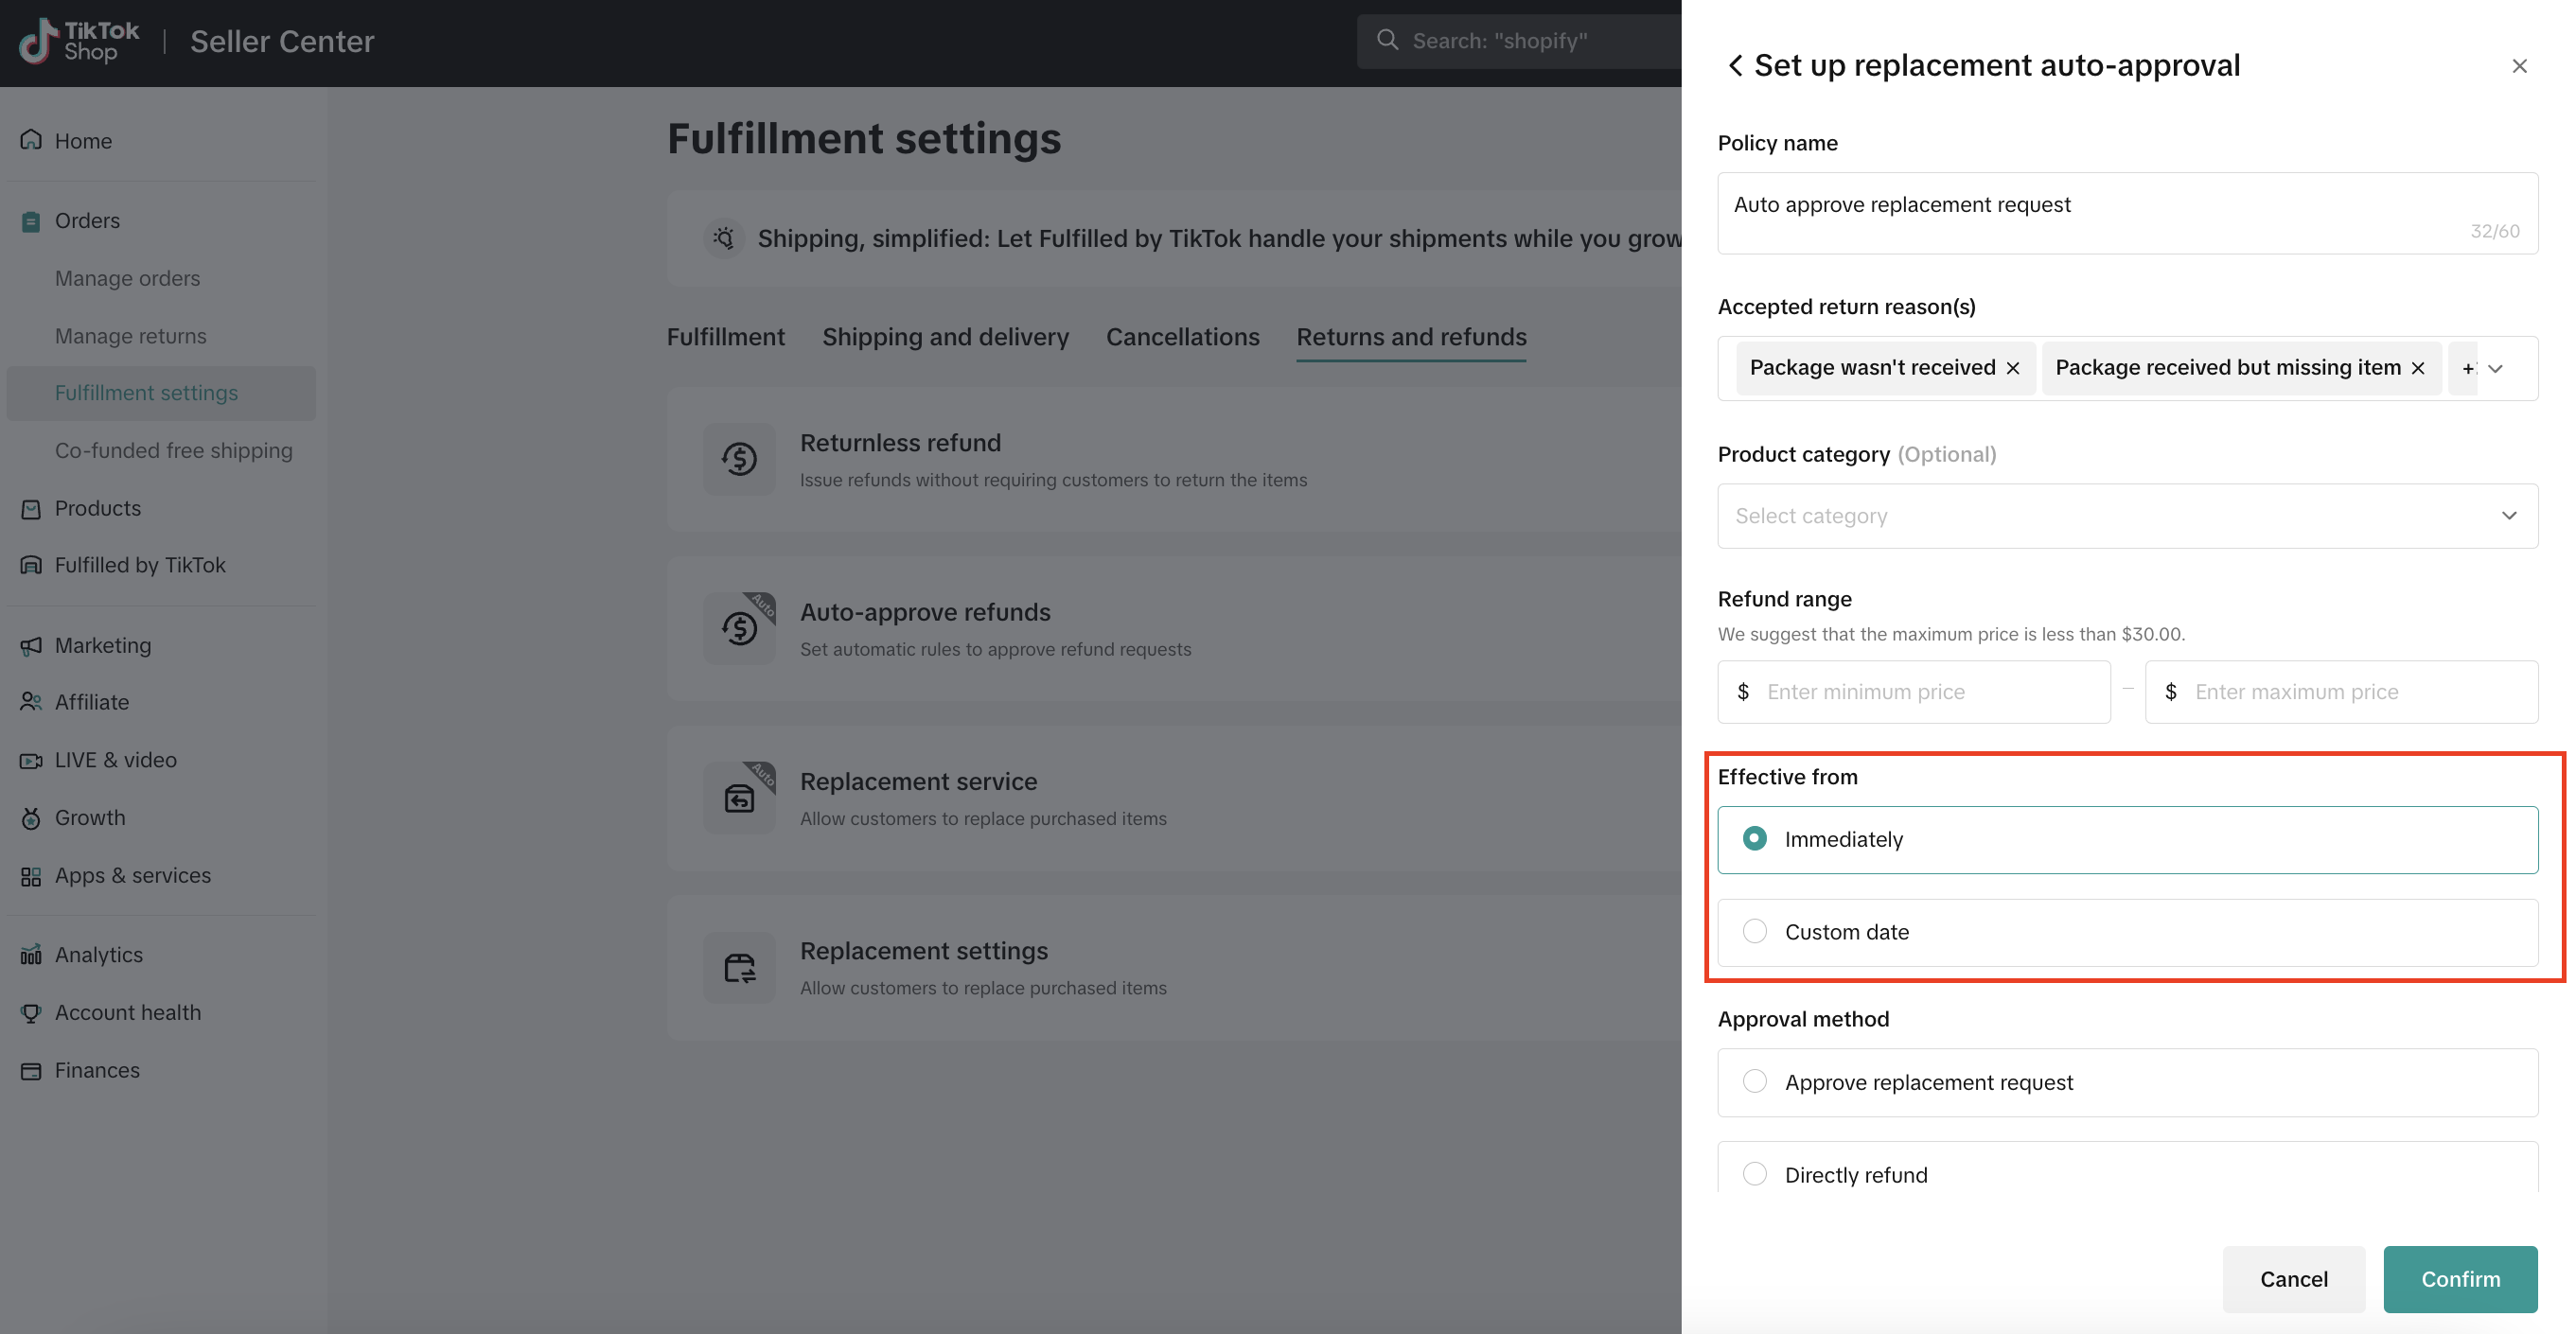
- Enter an Effective from time range for the rule.
- Set your auto-approval method.
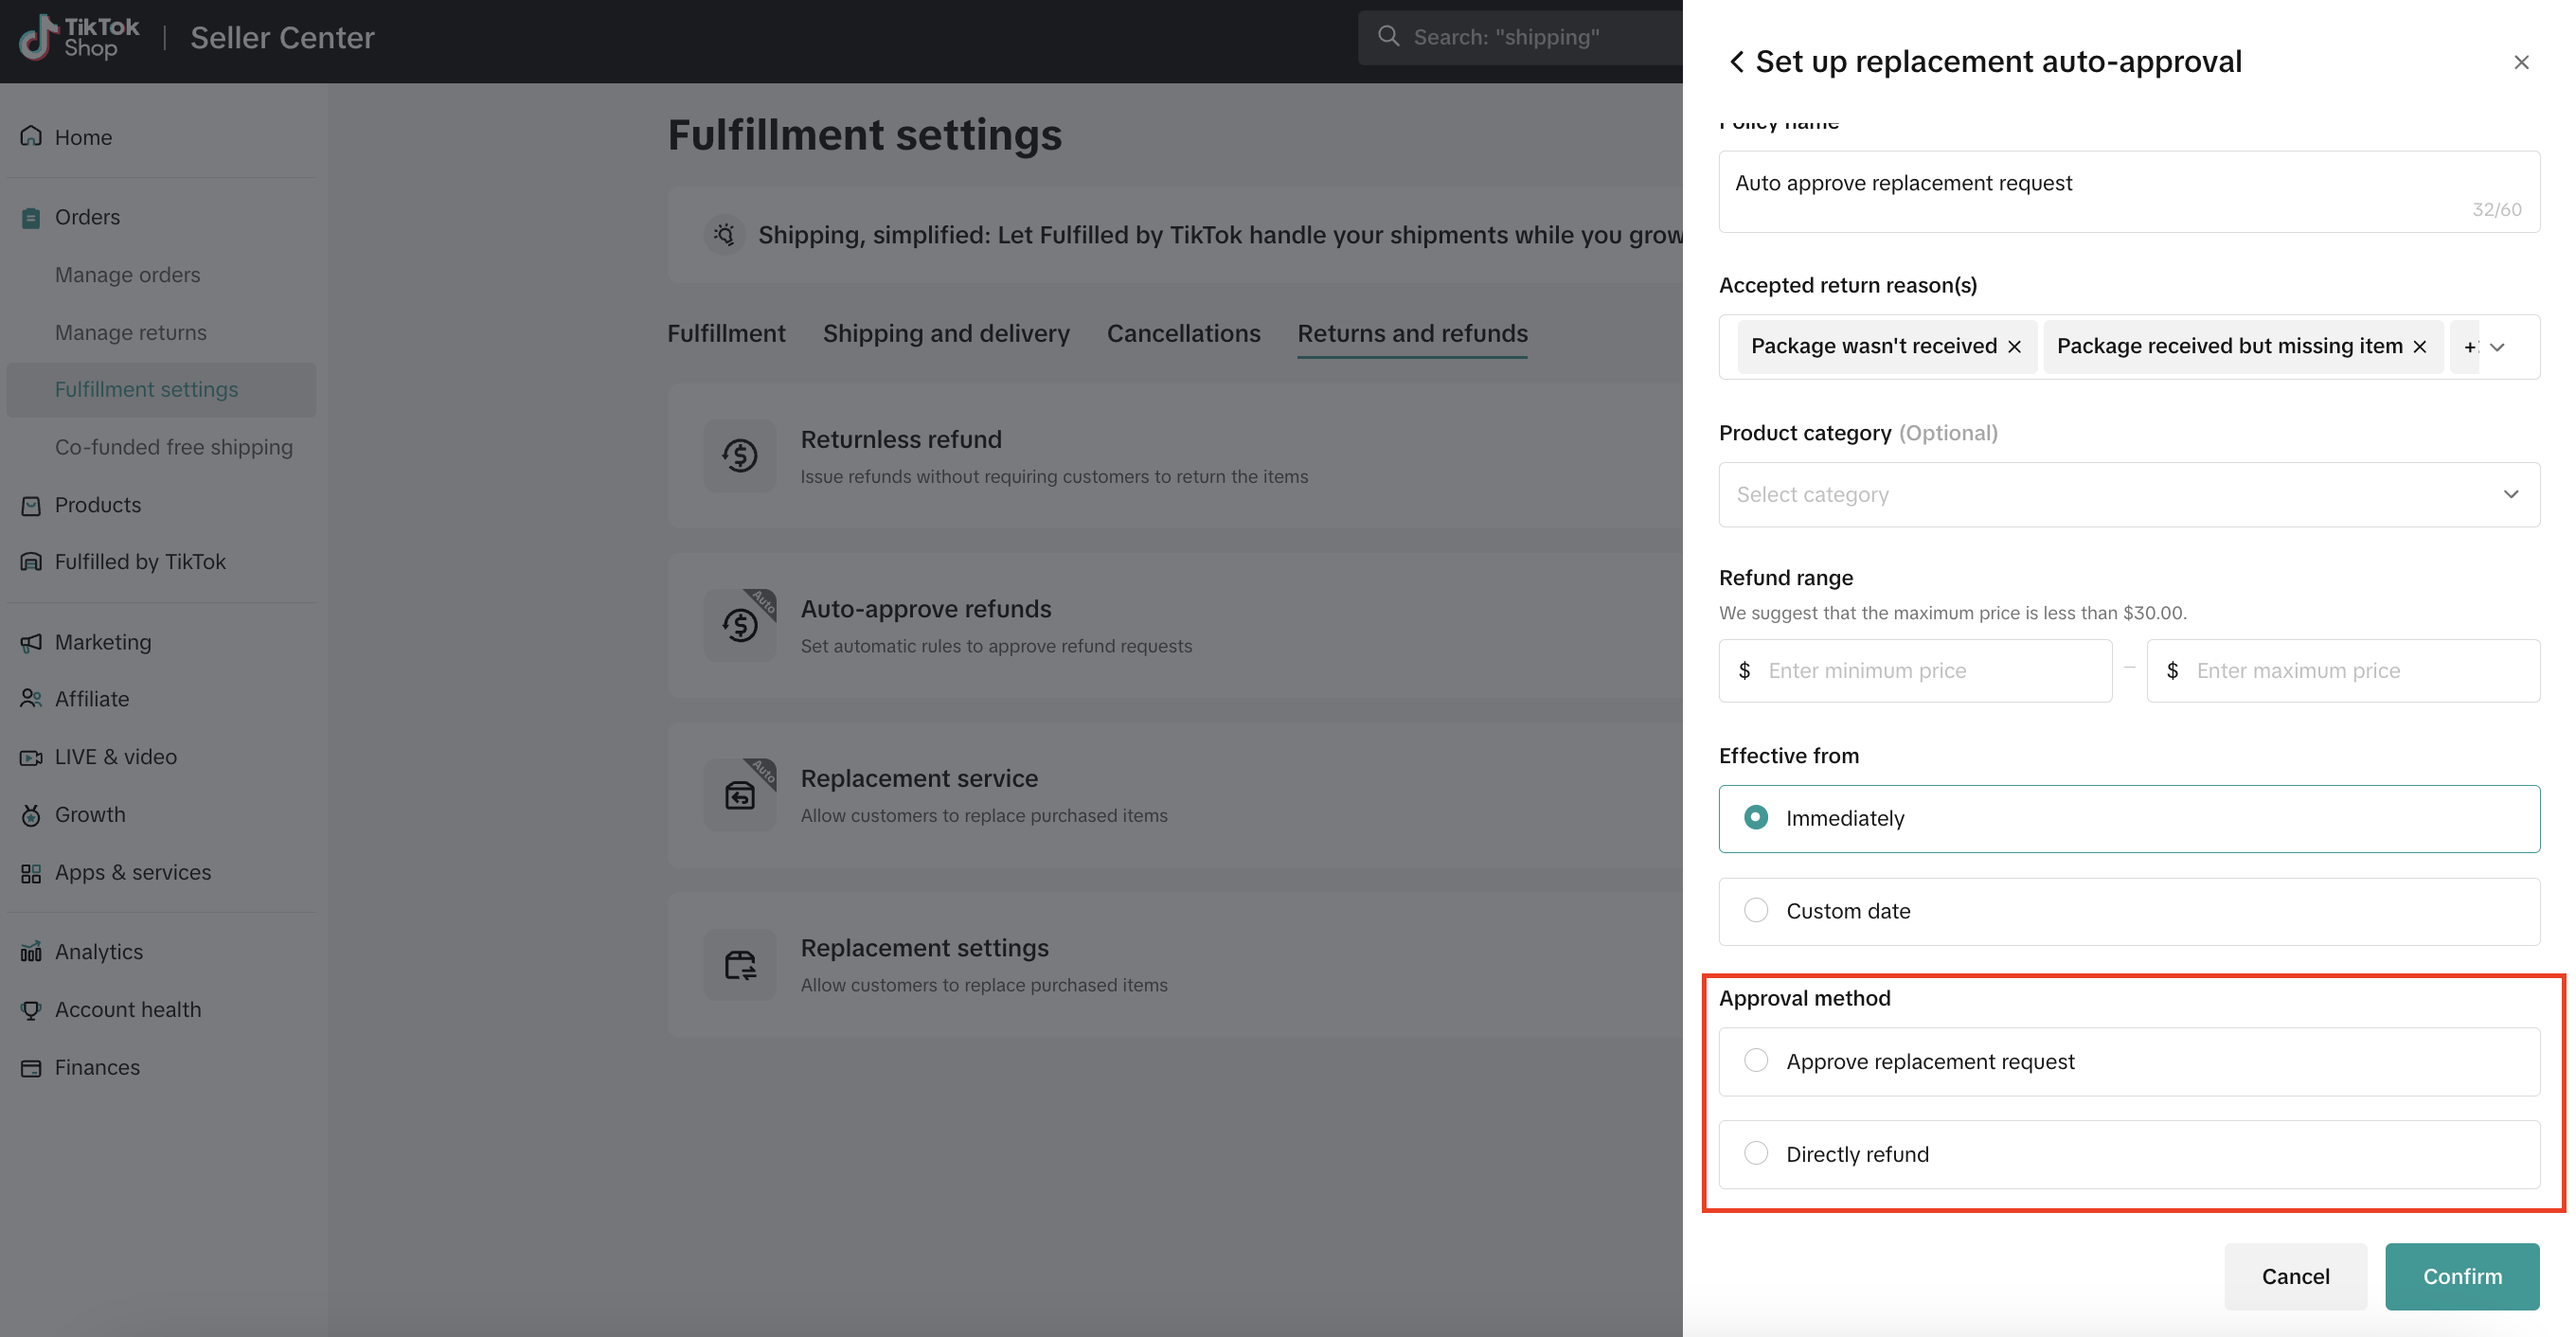
- Click Confirm to set up the replacement automation.
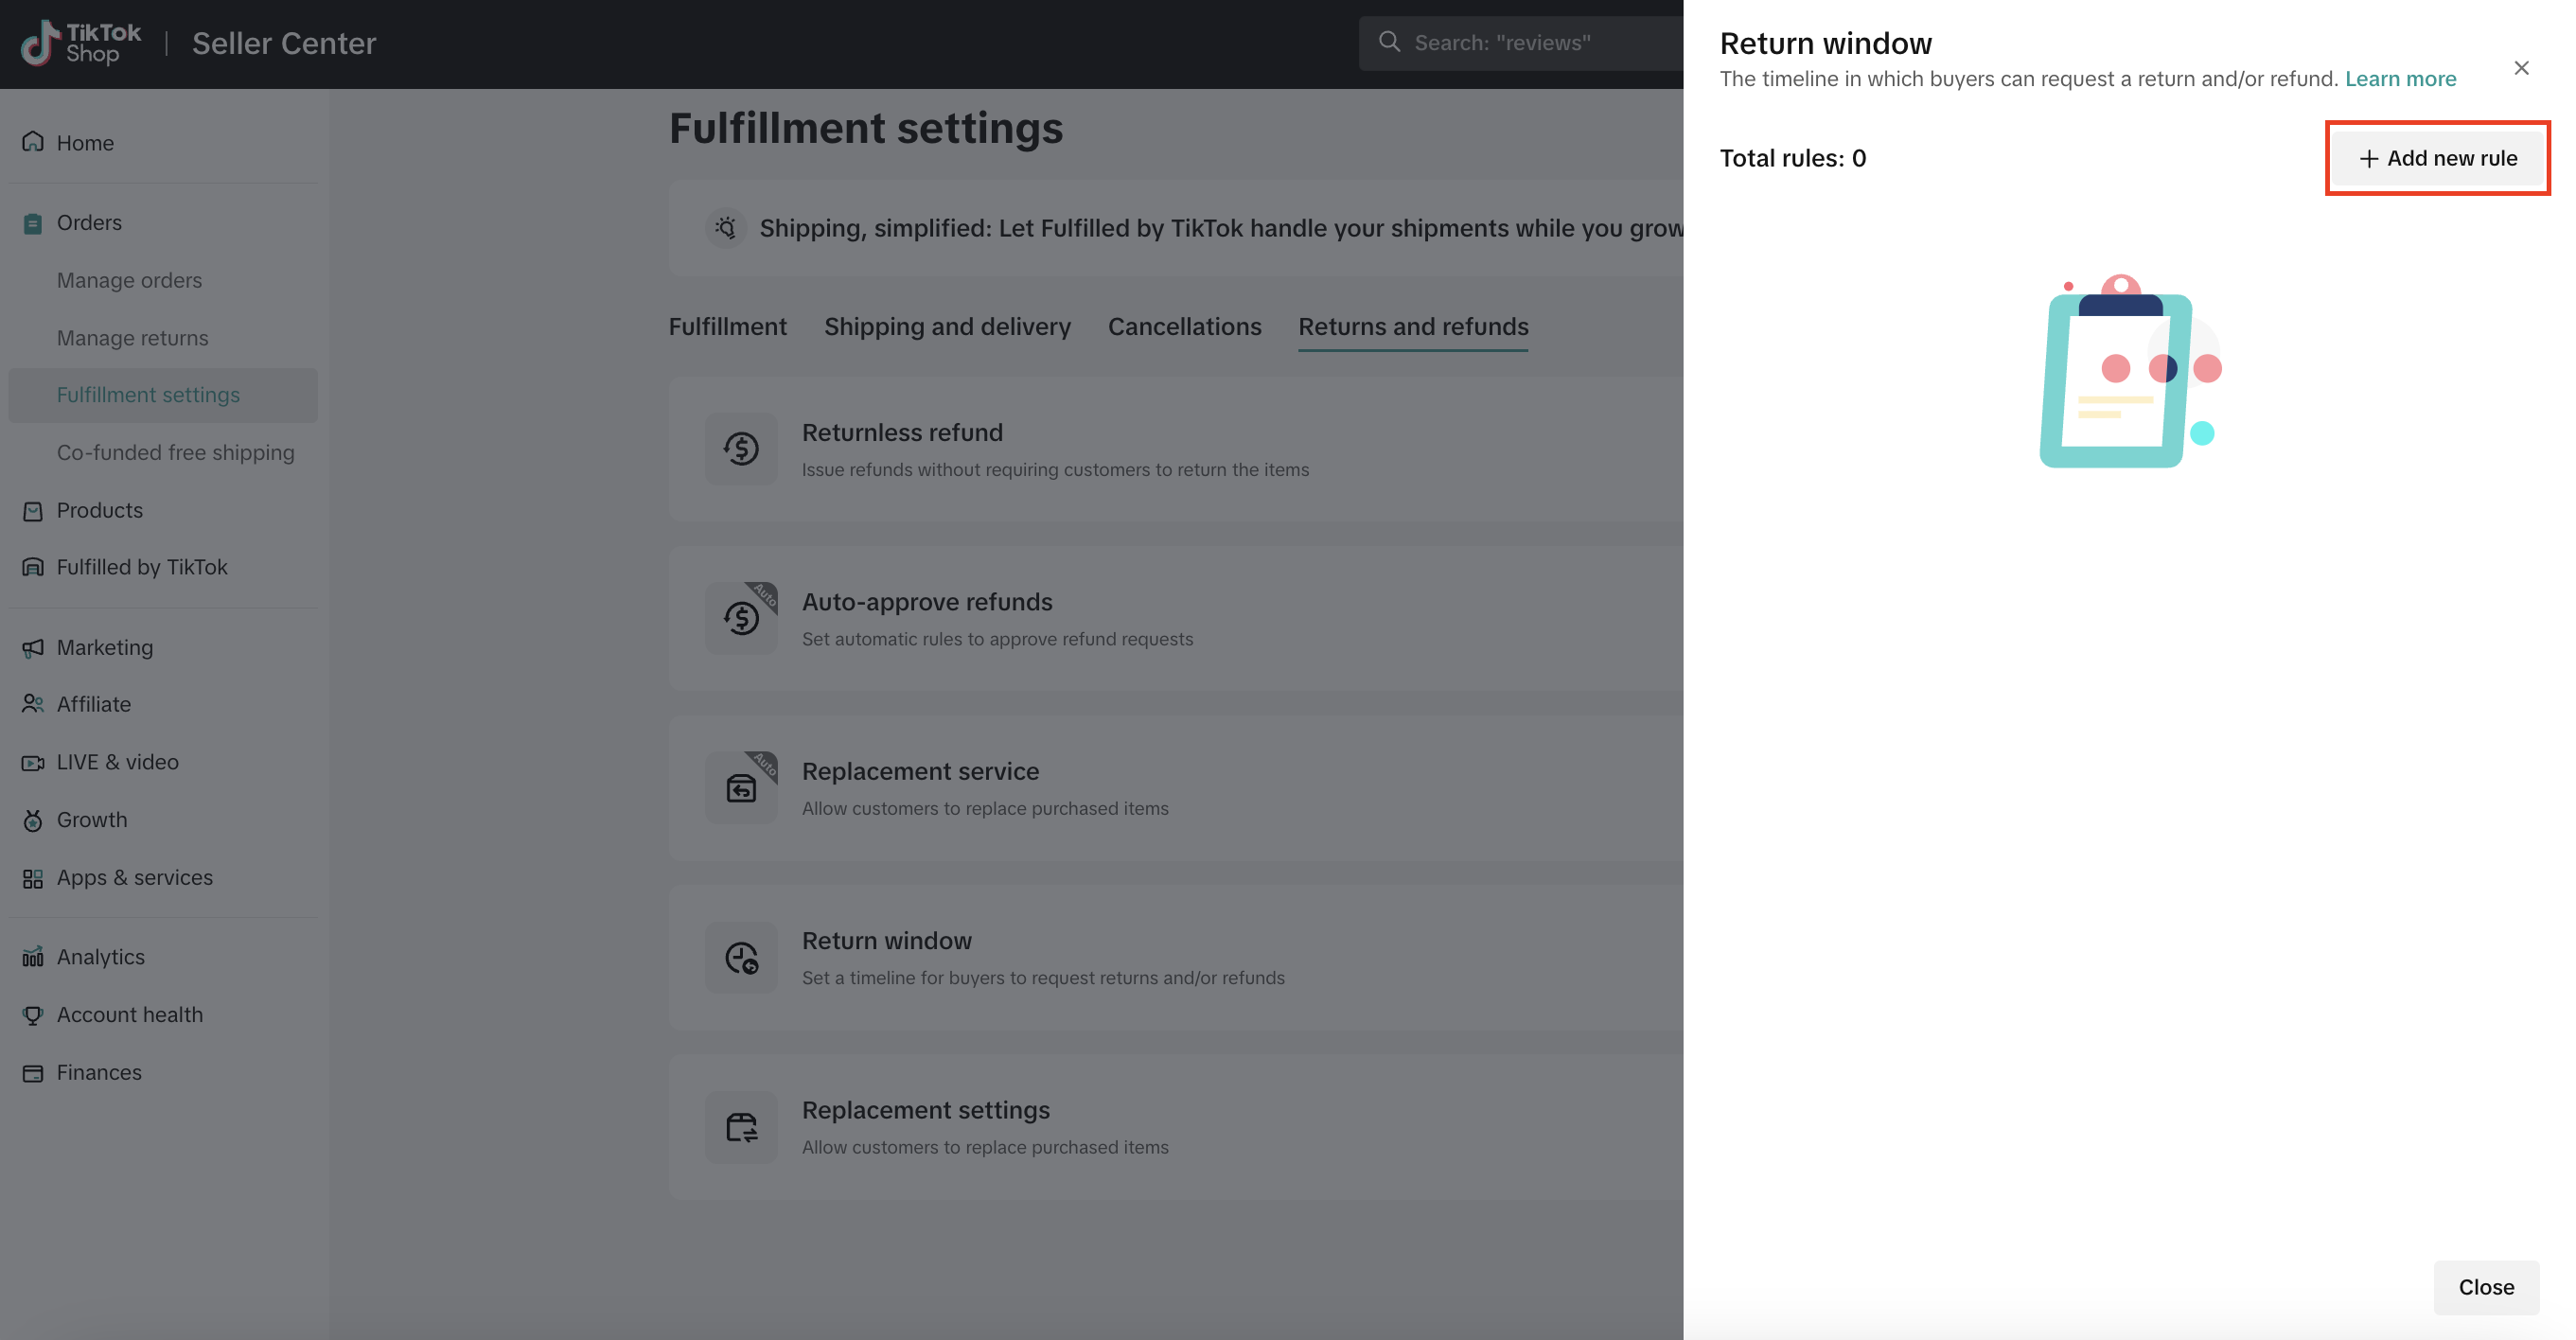
How to Adjust Your Return Window
To set up your adjustable Return Window (available to select sellers) for returns and refunds:- In the Seller Center, go to Orders and select the Return settings page.
- Select the Returns and refunds tab.
- In the Return window row, select the To create button.

- Select "Add new rule."
- Enter the Policy name (e.g. "Return Window for Electronics").
- Select the Product category from the drop-down list.
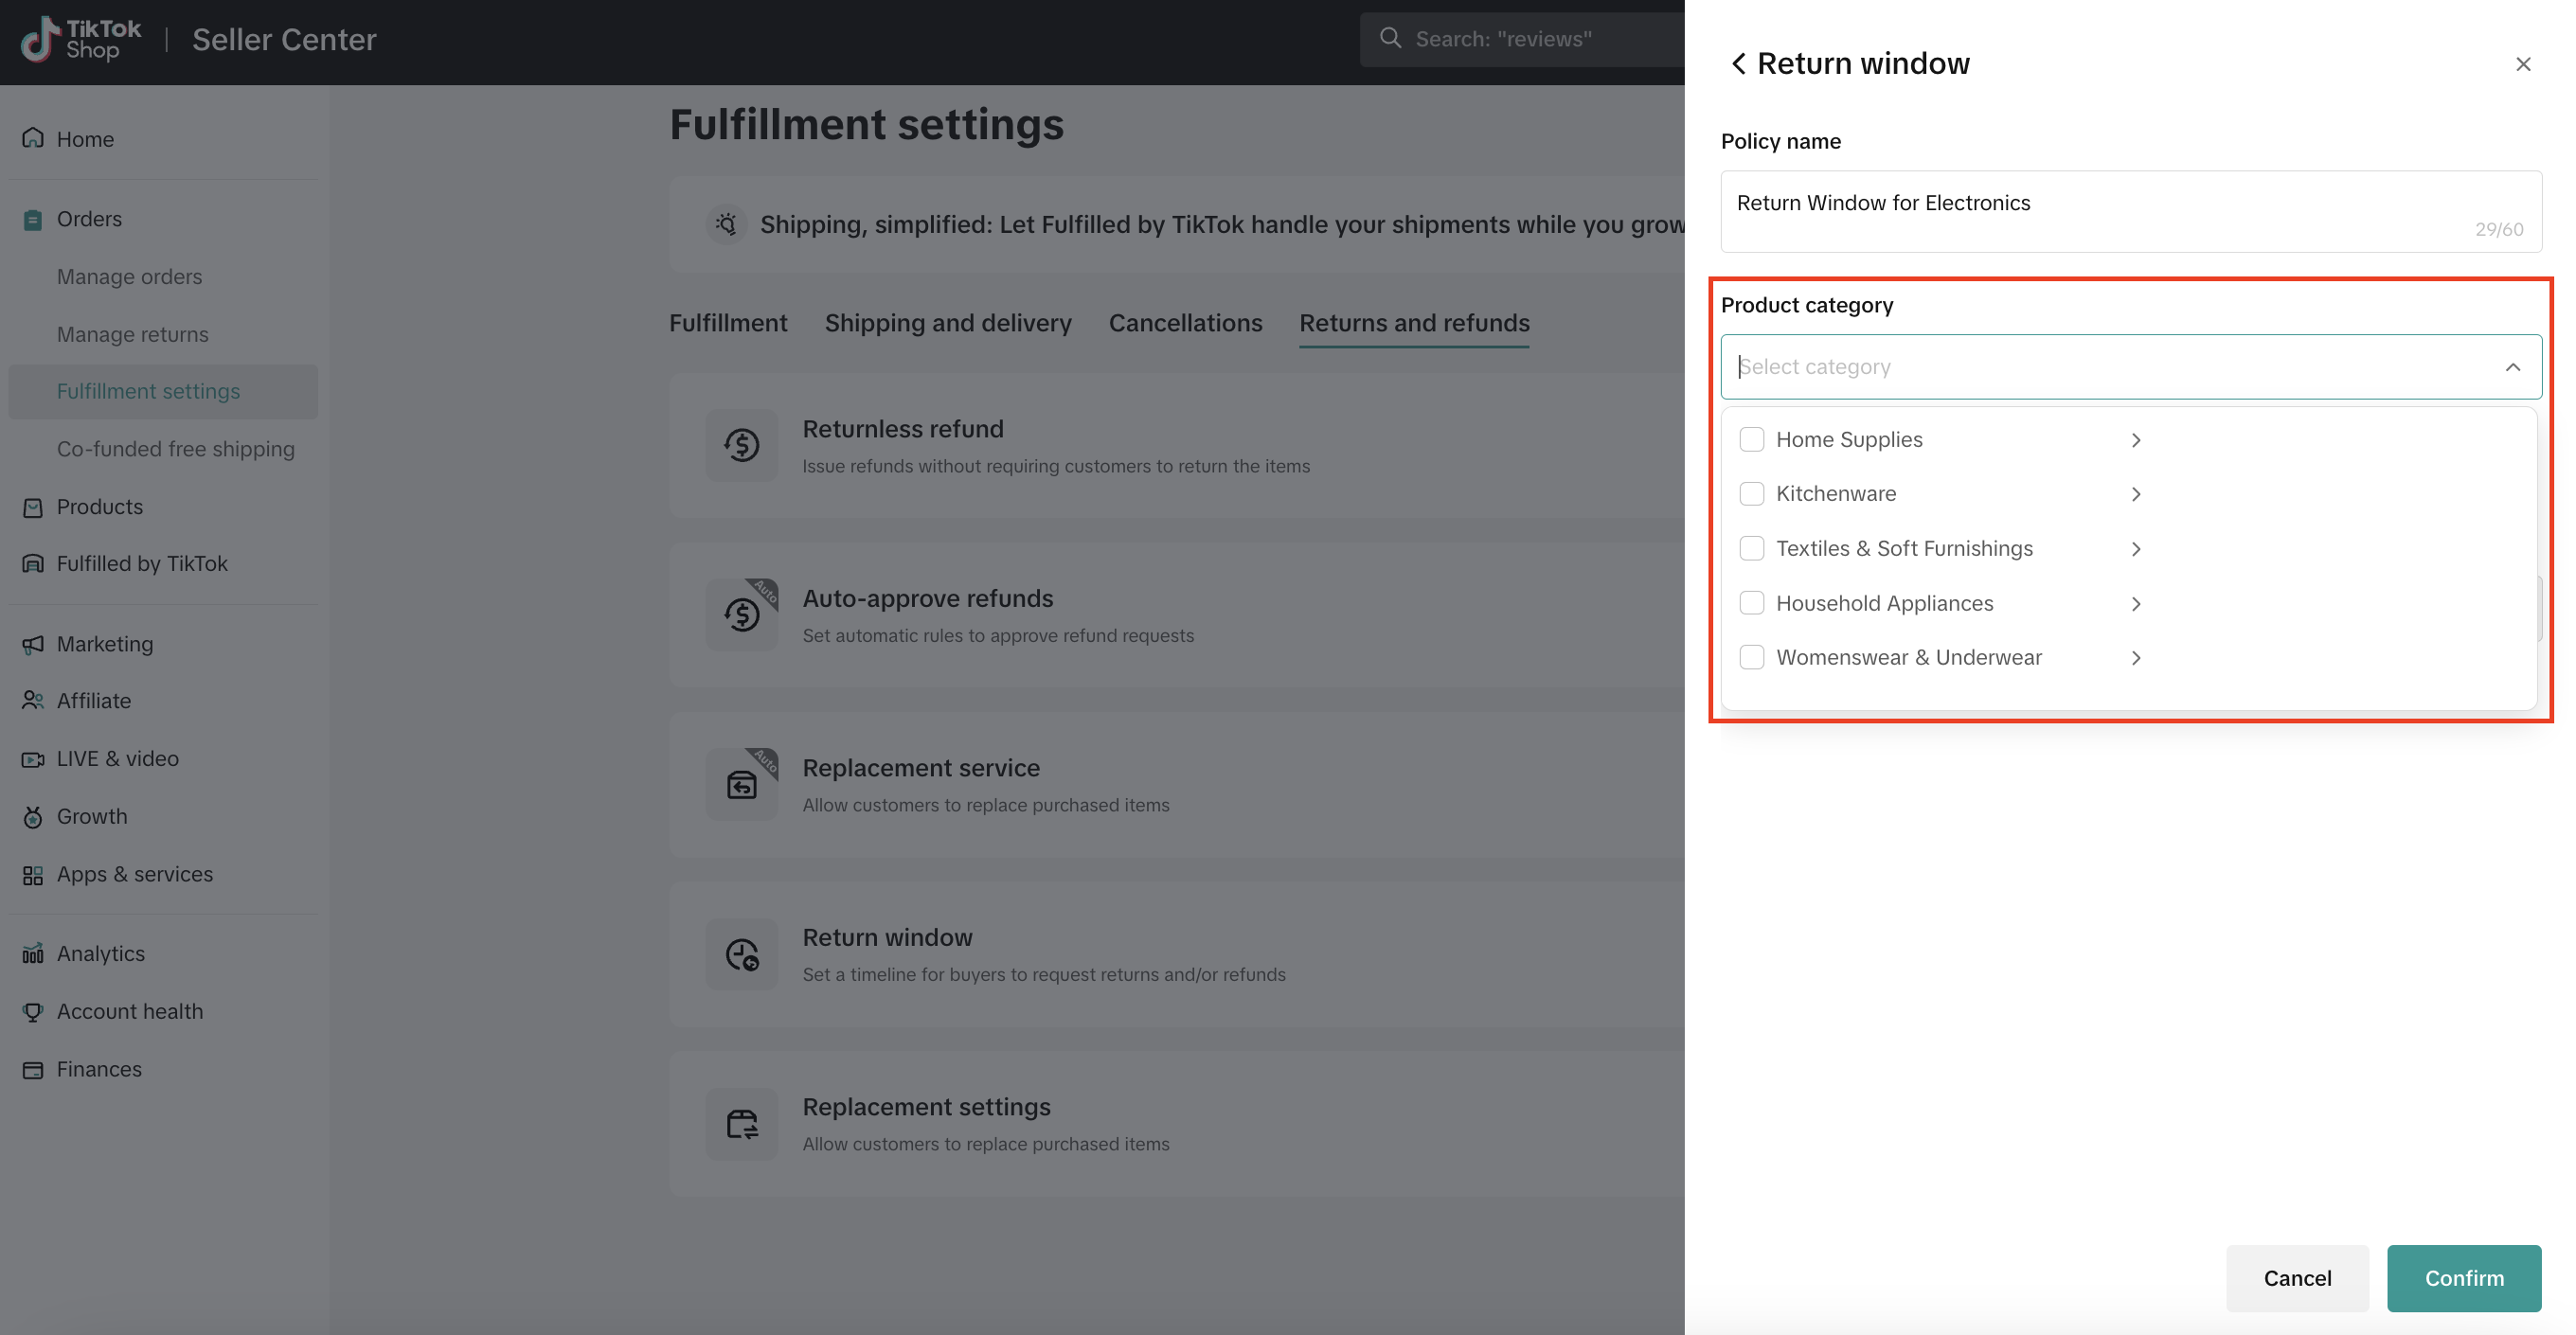
- Choose the desired time period from the list of options.
- 14 days option is limited to selected categories
- Only 1 return window is allowed per category
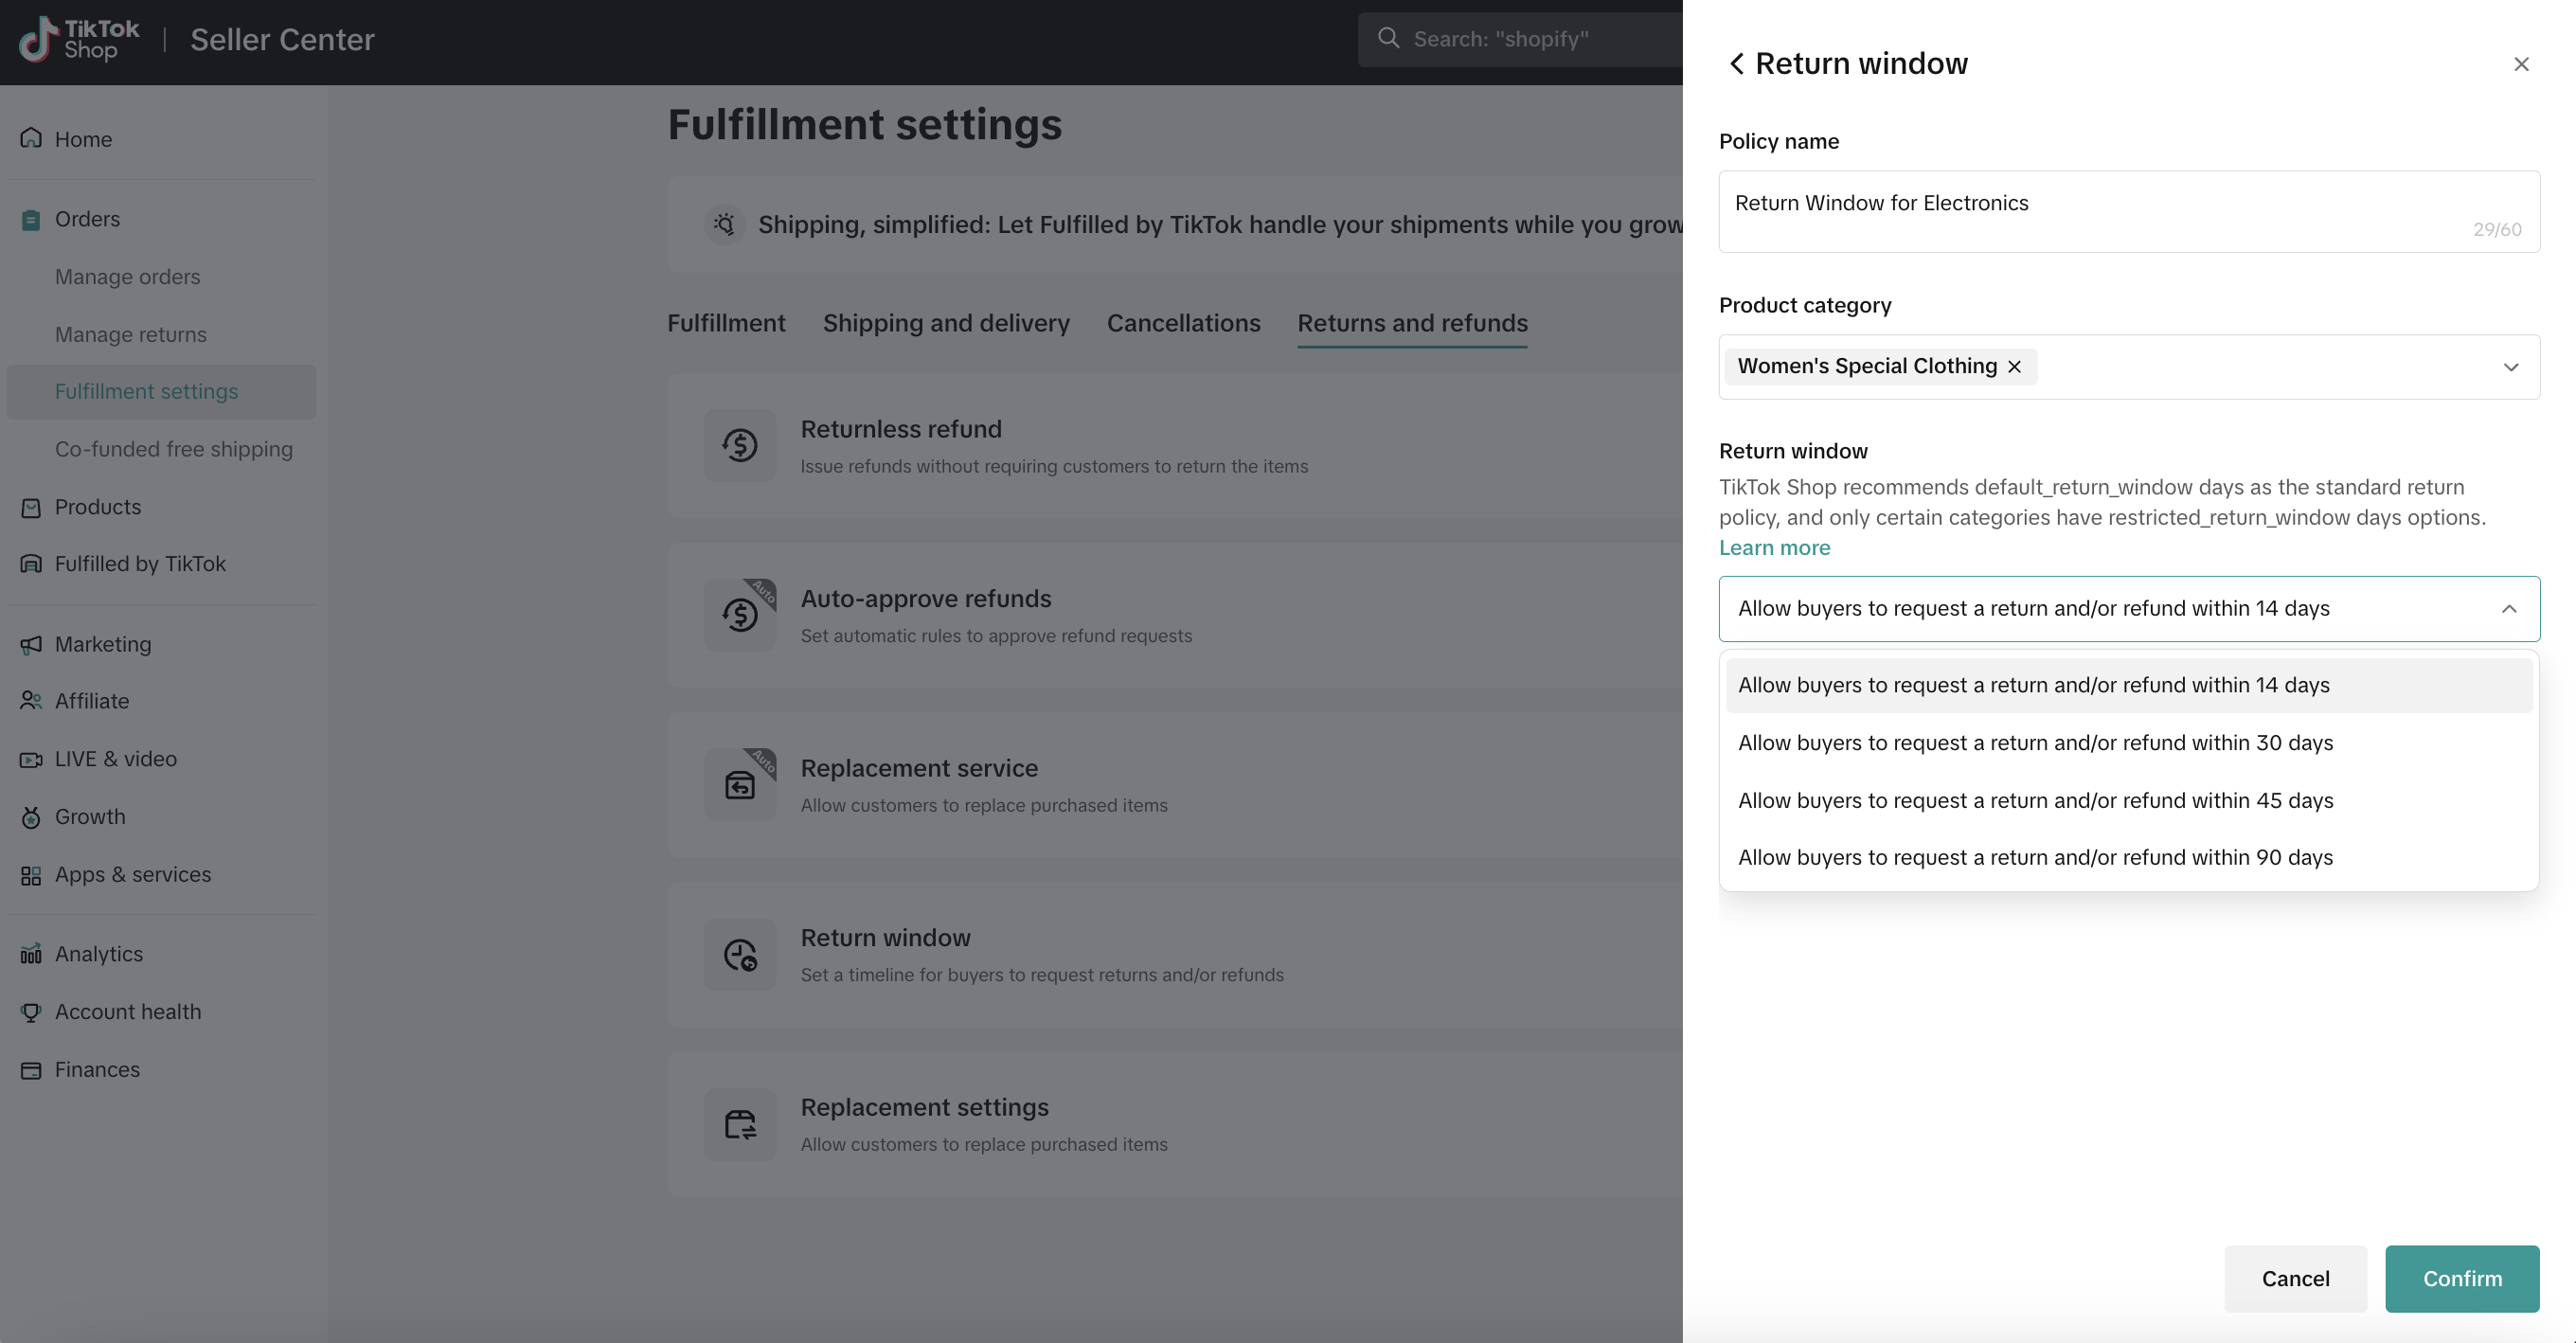
- Click Confirm to save your new return window.