

TikTok for Shopify: Migrating to Shopify from Third Party
02/09/2026
Summary
What are the key steps for sellers to migrate smoothly from third-party apps to TikTok Shop for Shopify?
- Sellers should first enable Holiday Mode on their warehouse to pause operations temporarily, revoke third-party app authorizations, connect their store to TikTok Shop for Shopify, synchronize product listings, then reactivate their store and disable Holiday Mode.
- Detailed instructions for each step are available in the TikTok Shop Seller Center and TikTok for Shopify onboarding guides to ensure a seamless transition.
How does enabling Holiday Mode facilitate the migration process, and what should sellers know about its use?
- Holiday Mode temporarily sets warehouse inventory to zero, pausing sales to prevent order or inventory conflicts during migration; sellers can set the duration as far ahead as needed.
- While recommended for a smooth transition, using Holiday Mode is optional if sellers prefer to keep their shop active during migration.
What actions must sellers take regarding third-party app authorizations during the migration?
- Sellers need to revoke access for any third-party services by navigating to the 'Growth' tab, selecting 'Apps and Services,' and canceling authorizations to avoid conflicts with the new TikTok Shop for Shopify integration.
What should sellers do after completing the migration steps to resume normal store operations?
- After syncing product listings and connecting to TikTok Shop for Shopify, sellers must reactivate their store and turn off Holiday Mode to make their products visible and start selling again.
- Additional help is available through TikTok’s Help Center or customer service for any migration-related questions.
Step 1: Enabling Holiday Mode for Your Warehouse
To prevent any operational hiccups during the migration, it's crucial to set your store to 'Holiday Mode.' This temporary pause allows for a smooth transition.How to Activate Holiday Mode:
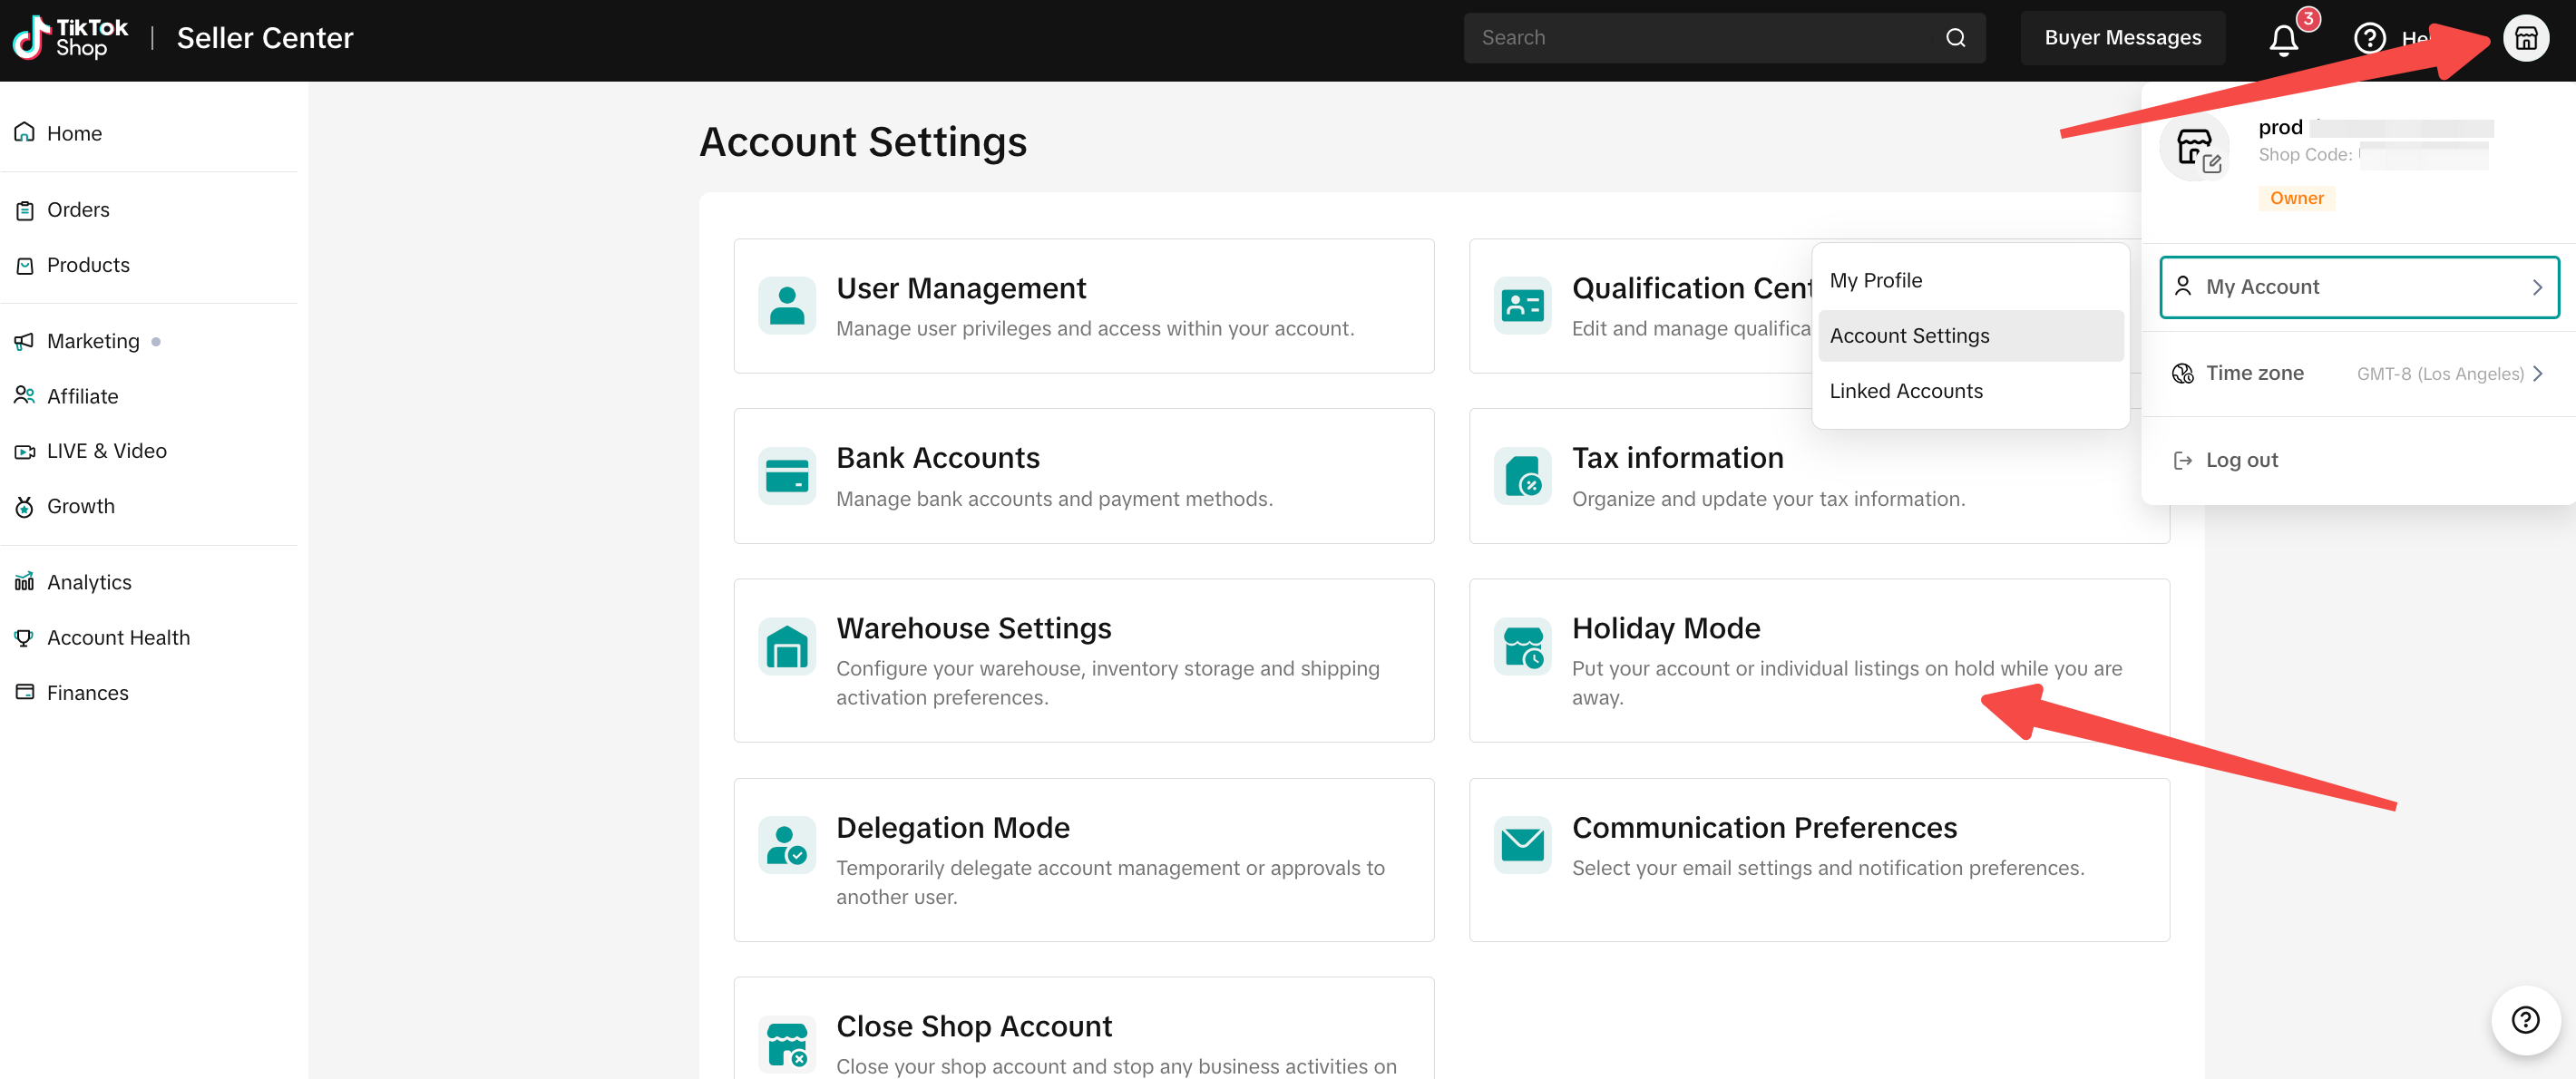
- Navigate to the TikTok Shop Seller Center.
- In the top right corner, click on your profile icon.
- Go to 'My Account' and select 'Account Settings.'
- Click on 'Holiday Mode.'
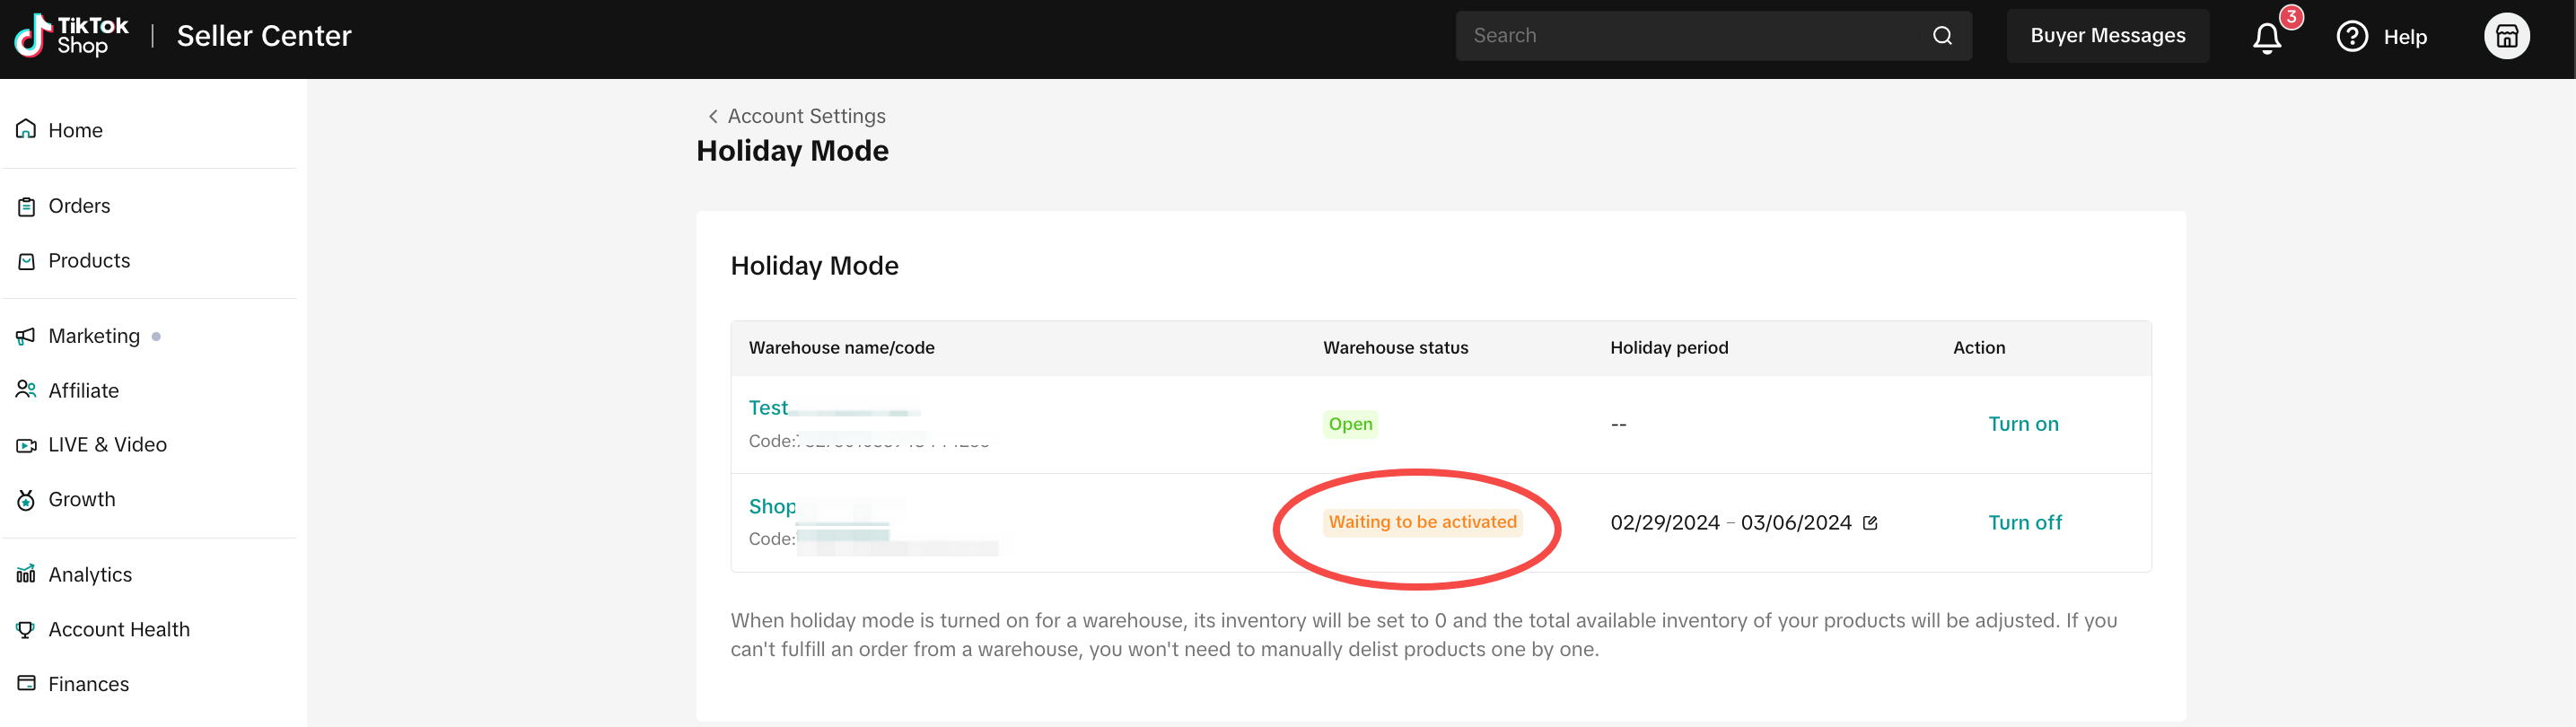
- Choose the specific warehouse you wish to set to Holiday Mode.
- Click on 'Turn on.'
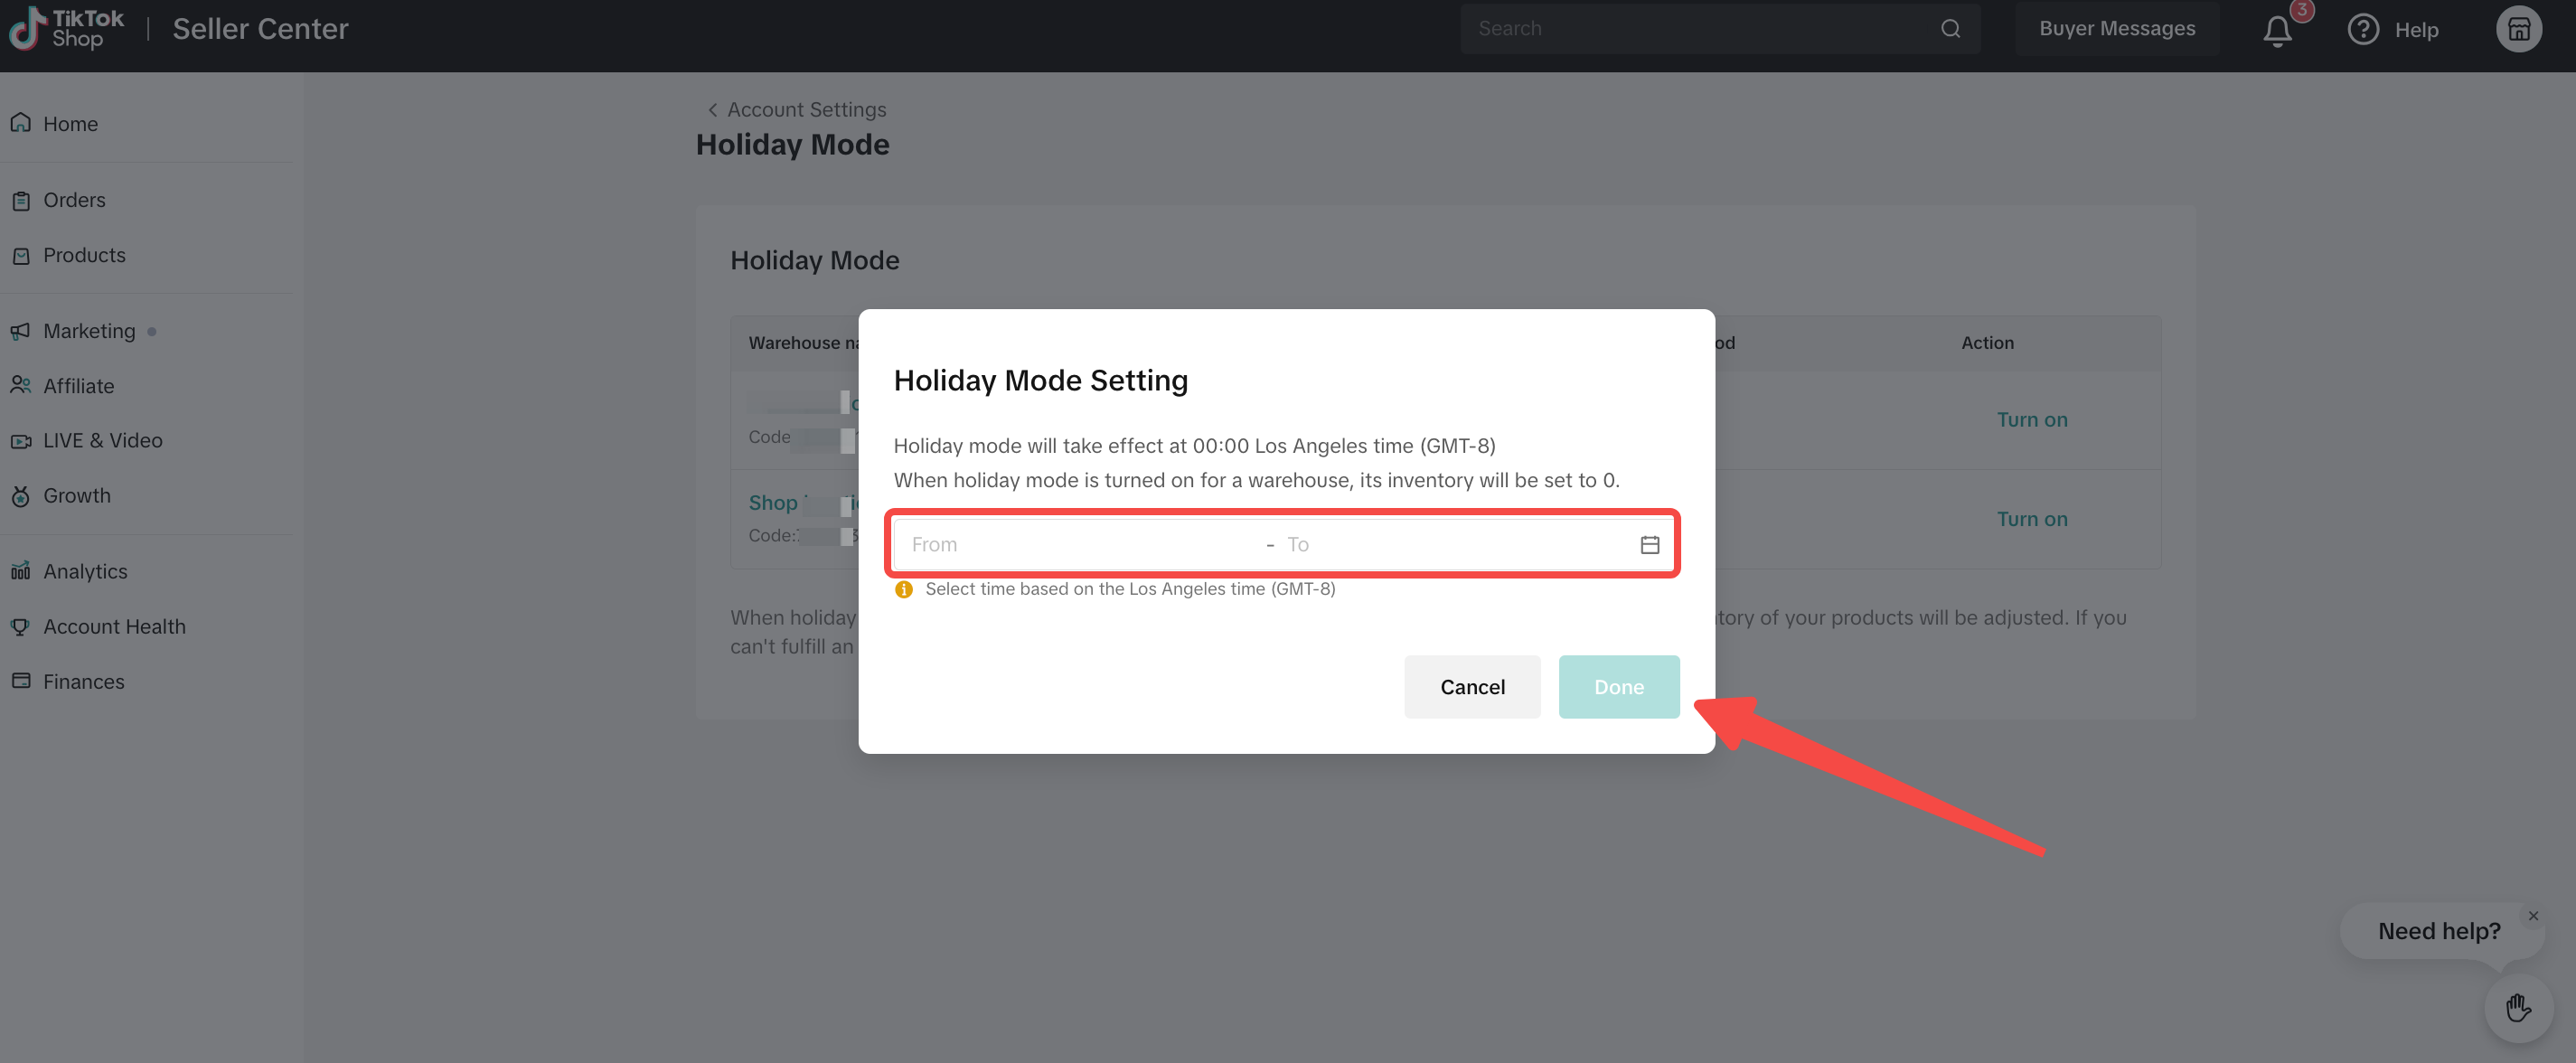
- Select the duration for Holiday Mode (we recommend setting this as far in the future as possible).
- Confirm by clicking 'Done.'
Note: It's advised to use holiday mode for a seamless transition, though not mandatory if the seller needs their shop to stay open.
Step 2: Revoking Authorization from Third-Party Services
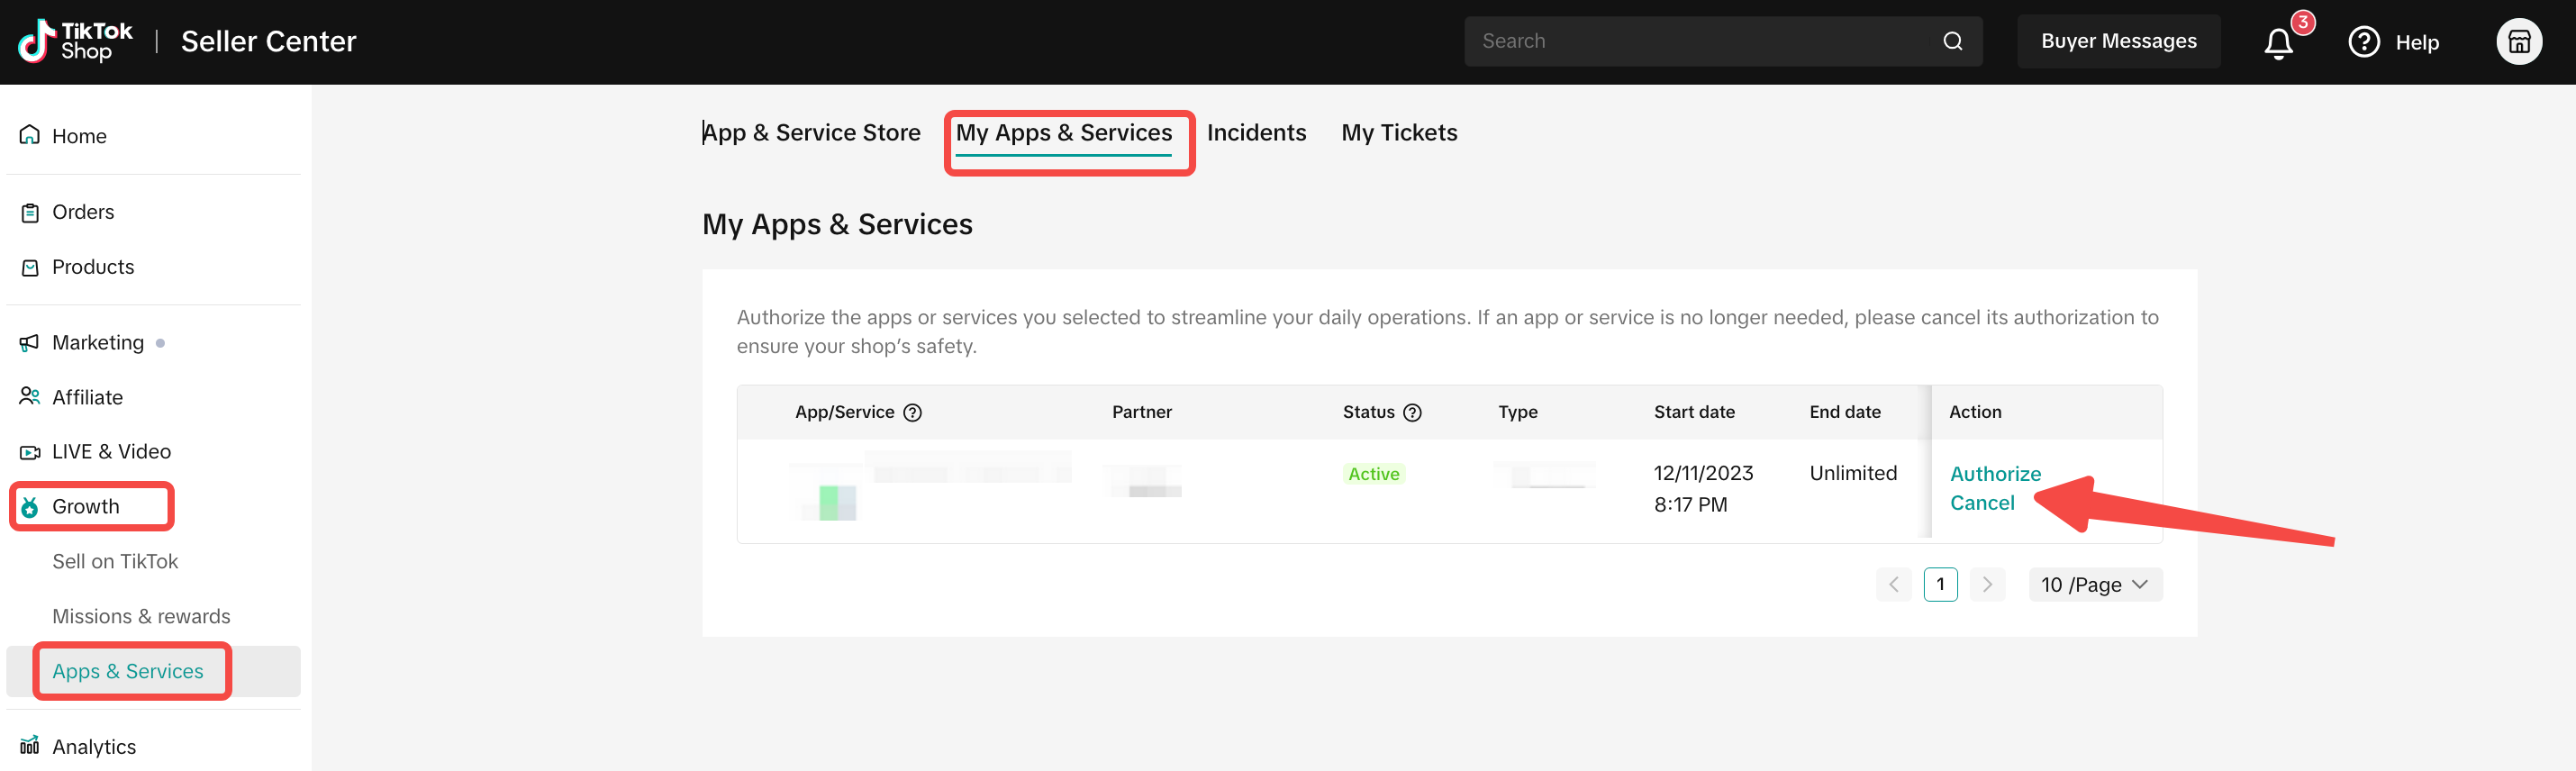
To disconnect from any third-party services:- Go to the 'Growth' tab in the TikTok Shop Seller Center.
- Navigate to 'Apps and Services.'
- Click on 'Authorize/Cancel' next to the third-party service.
- Confirm your action to revoke access.
Step 3: Granting Access to TikTok Shop for Shopify
To connect your store with TikTok Shop for Shopify, follow these steps on our TikTok for Shopify - Onboarding Guide page.Step 4: Synchronizing Product Listings
Ensure your product listings are updated and synchronized with the new platform. For detailed guidance, refer to the "Onboarding for Existing TikTok Shop Seller Center Users" section.Step 5: Reactivating Your Store
Once you've completed the above steps, you're ready to go live with TikTok Shop for Shopify. Reactivate your store and resume your sales on this dynamic new platform. For more information, please refer to our TikTok for Shopify - How to Uninstall/Disconnect TikTok Shop for Shopify App help page.Final Step: Deactivate Holiday Mode
After completing the migration, sellers should turn off holiday mode to make their showcase active again. For instructions on how to toggle holiday mode, please see Step 1 in this guide.Need More Help?For additional support or questions, please visit our Help Center or contact our customer service team.
You may also be interested in

TikTok for Shopify: Strikethrough Pricing Integration
TikTok for Shopify - Strikethrough Pricing Integration for Shopify Overview: Strike-through pricing…

TikTok for Rithum: Connection Establishment
Before you begin Make sure you have a posting account created for the market you are selling on TikT…

TikTok for Shopify: Webinars
How Shopify Sellers are Crushing it in TikTok Shop Watch this "How Shopify Sellers are Crushing it i…

TikTok for Rithum: Returns & Refunds
Overview In this section, we'll guide you through returns and refunds. To manage returns, visit TikT…
TikTok for Rithum: Order Management
Order Management This guide outlines how to manage orders using TikTok Shop, your Order Management S…

TikTok for Rithum: Brand Authorization
Brand Certification At TikTok Shop, we commit to the highest quality and safety standards for our cu…

TikTok for Shopify: All Guides and Resources
Overview of TikTok for Shopify Integration The TikTok for Shopify app lets you sell your Shopify pro…

TikTok for Shopify - Onboarding guide
TikTok for Shopify App Guide The TikTok for Shopify channel app enables sellers to expand their reac…
TikTok for Shopify: Enable Third Party Cookies
In this resource, we'll cover essential steps to ensure your browser settings are optimized for smoo…
TikTok for Shopify: How to Disconnect TikTok Shop
Overview This guide provides step-by-step instructions for sellers on how to disconnect their TikTok…